‘Tutorial Tuesday': How to create a sugarpaste lamb!

Tutorial Tuesday: How to create a sugarpaste lamb for St. David's Day!

Tutorial Tuesday: How to create a sugarpaste / fondant lamb!

As the winter months transcend into spring why not follow this tutorial and create your very own sugarpaste lamb! With Easter and St. David’s Day just around the corner these little lamb cupcakes are perfect for your spring themed celebrations. As one half of Juniper Cakery is Welsh we’ll certainly be creating this lamb on the 1st of March!
Tutorial Tuesday: How to create a sugarpaste lamb for St. David's Day!

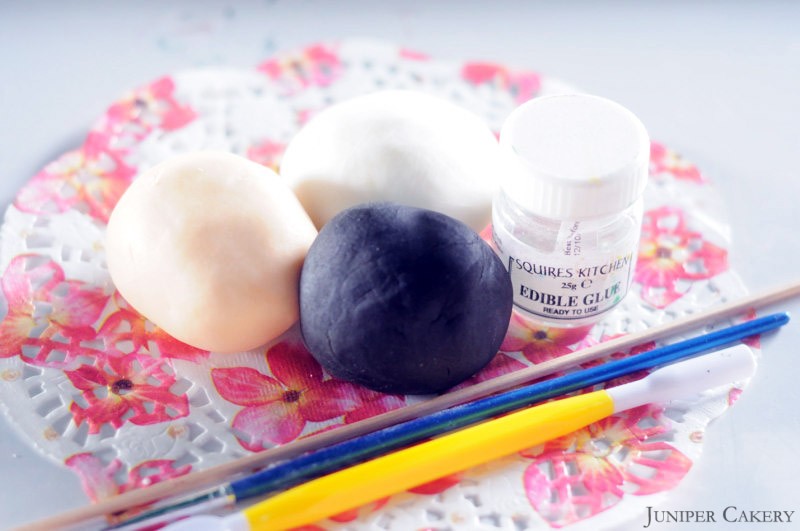
What you will need:

White sugarpaste or white flowerpaste for ‘wool’
Peach sugarpaste or flowerpaste for the sheep (We used white flowerpaste coloured with peach gel paste colour by Sugarflair)
Black sugarpaste for the eyes and eyebrows
Edible glue
Blade tool
Paint brush
Tutorial Tuesday: How to create a sugarpaste lamb for St. David's Day!

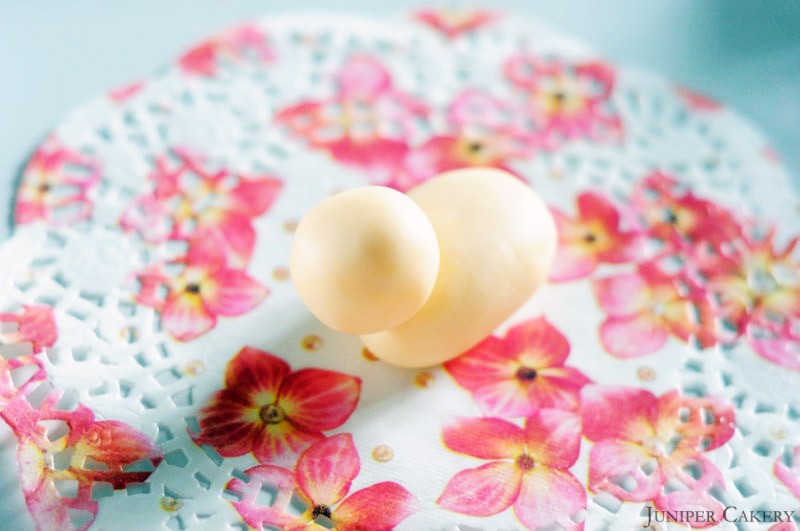
Step one: Split the peach sugarpaste in to three, sitting one piece aside for now, and roll out a ‘sausage’ and a ball with the other two pieces. Place the ball atop of one end of the ‘sausage’ using  edible glue to secure it in to place. If you feel extra support is needed place a cocktail stick between both pieces.

DSC_0019

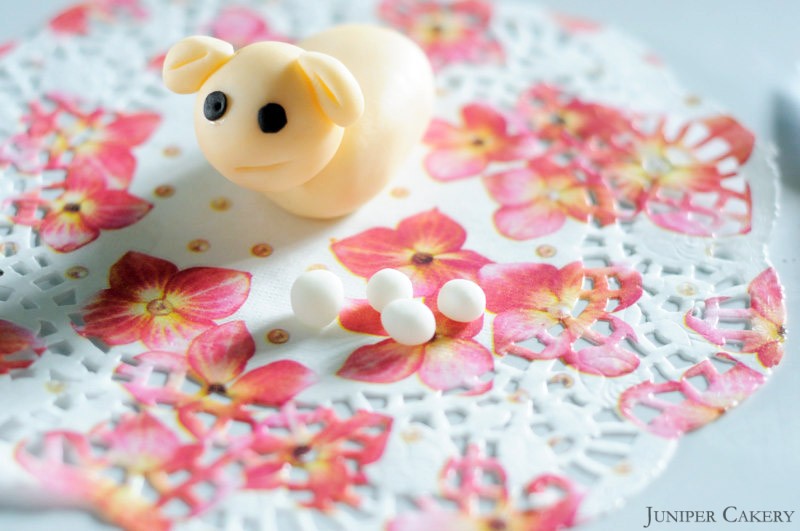
Step two: Now you have the body of your lamb it is time to add some facial features. As you can see below we’ve given ours has a sheep-ish look perfect for adding a blade of ‘grass’ at a later stage as though eating. You could play around at this stage but if you would like to create a similar characteristic for your lamb use the blade tool to make a small incision at either side of your lamb’s face to create the mouth. Using a small amount of the black sugarpaste create two circles and stick them into place using edible glue; now your lamb has eyes!

Step three: For the ears simply take the remainder of the peach sugarpaste, roll them into small ovals, ensuring they taper at one end, and slice down the middle using the blade tool until they resemble coffee beans. Glue them into place with edible glue and now your lamb has ears!
Tutorial Tuesday: How to create a sugarpaste lamb for St. David's Day!

Step four: As we have done above begin rolling balls of white sugarpaste in multiple sizes; their actual size depends on how big, or small, you’ve decided to make you lamb. Build up your lamb’s ‘wool’ with one or two lawyers to ensure that all of the body is covered as seen below.

Step five: If you would like to add a piece of ‘grass’ for your lamb to chew simply pipe your cupcake using a 133 grass tip. Using a cocktail or kebab stick select a blade and place it in the corner of your lamb’s mouth. Alternatively you could roll a thin piece of green sugarpaste out between your fingers and attach it in the same way.

Step six: To add eyebrows simply paint them on usuing a black gel paste.
Tutorial Tuesday: How to create a sugarpaste lamb for St. David's Day!

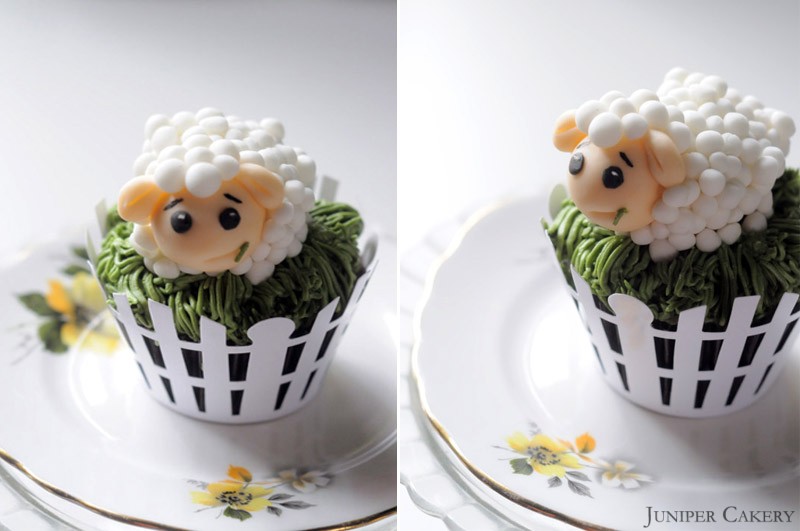
If you have followed this tutorial you will now have your very own little lamb! If you’re planning on celebrating spring, Easter or St David’s day this is a perfect way to do so. Why not change the white ‘wool’ to black ‘wool’ for variation or even place a flock of sheep atop a larger cake.


‘Tutorial Tuesday': How to create a simple sugarpaste flower!

'Tutorial Tuesday': How to create a simple sugarpaste flower!

How to make a simple sugarpaste flower!

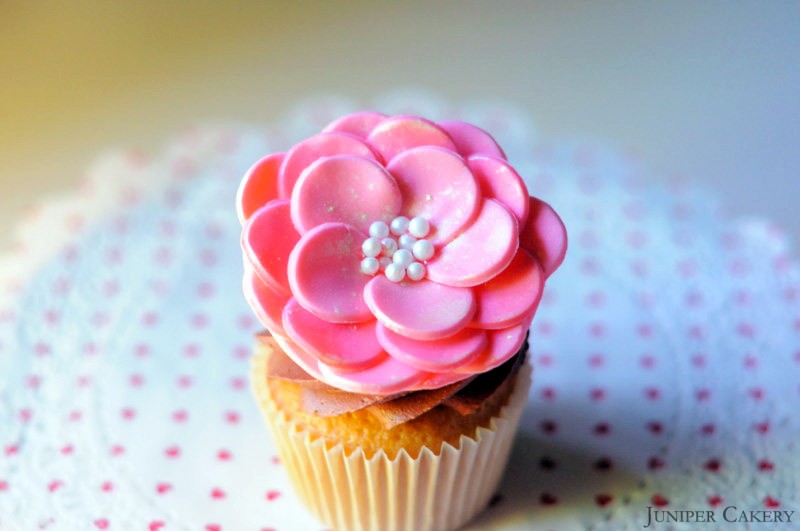
In this week’s tutorial we show you how to create a simple sugarpaste flower out of a series of circles! The end result will be a lovely camelia-like blossom ready to make your cakes and cupcakes look utterly irresistible. Why not try this tutorial to whip up beautiful Mother’s Day, Easter, and Springtime inspired treats? Remember, you can experiment and use different colours to fit specific palettes or play with springs, diamonds, edible pearls and piping tips to customise the centre of your flower.

'Tutorial Tuesday': How to make a simple sugarpaste flower

What you need…

Circle cutter (approximately 2 inches in diameter)
Edible glue
Paintbrush
6 inch fondant roller
Coloured flowerpaste (We coloured ours with Squires Kitchen’s Rose)
Ateco 858 tip (use it’s base to punch out the smaller circles/petals)
Decorating gel (optional)
Lustre dust (optional)
A small tea saucer or plate the curves slightly
Icing sugar
Kitchen towels or bubble wrap

'Tutorial Tuesday': How to make a simple sugarpaste flower

Step one: Roll out your flowerpaste.

Step two: Cut out one 2 inch circle and a series (approximately 19-21) of smaller circles (using the base of your large piping tip).

Step three: Place the large circle in the saucer after dusting it with icing sugar to stop the flowerpaste sticking the the saucer.

Step four: Begin arranging and gluing your petals around the outside of the large circle. You will need around 7 ‘petals’ for this.

'Tutorial Tuesday': How to make a simple sugarpaste flower

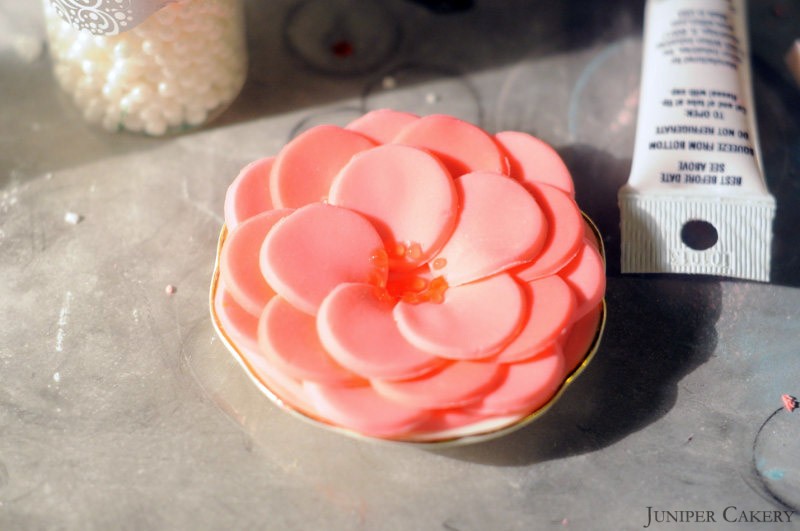
Step five: Now begin arranging and gluing your second layer of ‘petals’. You may need around 6-7 for this stage.

'Tutorial Tuesday': How to make a simple sugarpaste flower

Step six: Now begin arranging and gluing your final layer of ‘petals’ top your second layer. You may need around 5 for this step.

'Tutorial Tuesday': How to make a simple sugarpaste flower

Step seven: Using edible glue or decorating gel affix your chosen sugar pearls or sprinkles to the centre of your flower.

'Tutorial Tuesday': How to make a simple sugarpaste flower

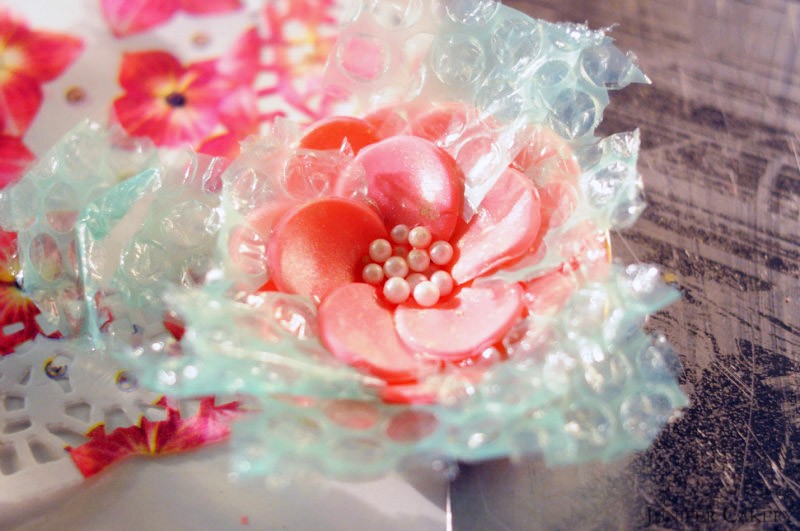
Step eight: To add volume and depth to your sugarpaste flower carefully lift each petal slightly upwards and slide some kitchen roll or bubble wrap underneath before the ‘petals’ dry.

'Tutorial Tuesday': How to create a simple sugarpaste flower!

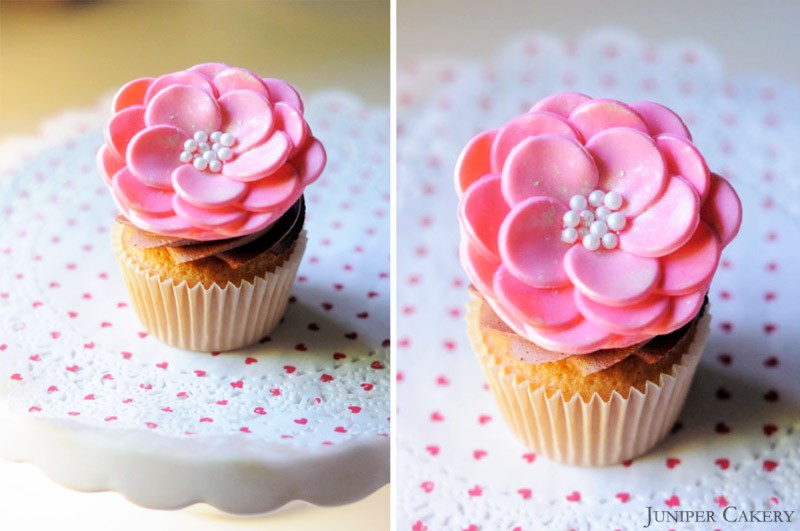
Hurrah! Once your blossom dries and hardens you should be left with a beautiful large flower to add drama to your delicious cakes and cupcakes! We added some lustre dust to ours to add a bit of sparkle!


The Happy Egg Co. Cake - Cookies and Crème de Menthe

Welcome to our second design and development blog post in partnership with The Happy Egg Co.! As we mentioned in last month’s design entry our development posts will help take our readers through the cake design, recipe testing and trend forecasting process. We’ll show you what is involved in designing a cake and it’s recipe, how to gather inspiration, creating colour palettes and what fads in the cake world to look out for!

Cookies and Crème de menthe?

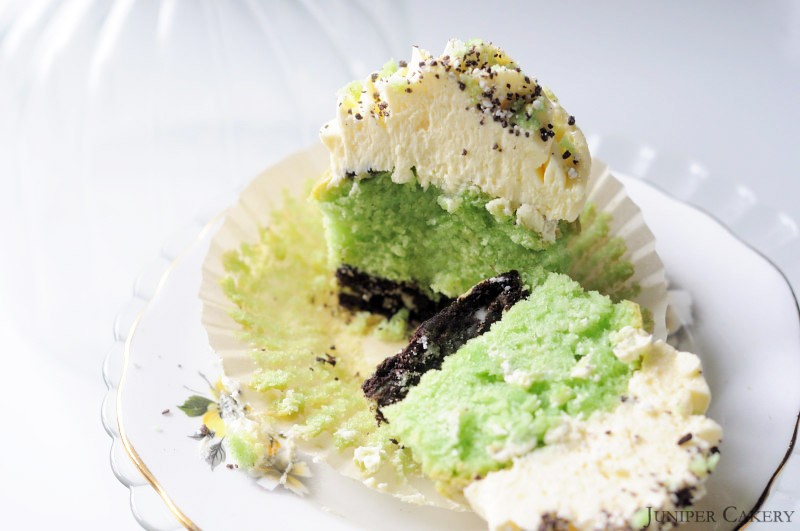
Crème de Menthe cupcake

For our second cake using only Happy Eggs we wanted to create a fun yet sophisticated dessert that could be adapted to suit any crowd. We looked at combining different ingredients and flavours together and played with various puns (we do love puns here at Juniper Cakery) before we settled upon a more grown up version of the classic ‘cookies and cream’ (our most popular cupcake flavour).

The creamy yet tingly combination of rich vanilla, cookie crumble and crème de menthe is traditionally an American dessert called ‘Grasshopper Pie'; a delicious and light minty pie with hints of vanilla perched upon a chocolate sandwich cookie crust. The name of the pie comes from the ‘Grasshopper’ cocktail which consists of crème de menthe and crème de cacao.

Creme de menthe cupcake

The wonderful thing about creating a crème de menthe based cake is it’s freshness! The soft yet vibrant green combined with the tingling taste is perfect for the approaching spring season. Also, because wedding season is fast approaching it is important (for us as bakers and cake decorators especially) to consider what trends are circulating the world of wedding cakes. 2013 is seeing a succession of soft mint and ivory tiered cakes flavoured with traditional vanilla and peppermint. Subtle lace detailing paired with shimmer, birds, focal point floral motifs and ‘rustic’ homemade look cakes are also finding their way into cake shops.

Design Boards and Sketches

Creme de menthe

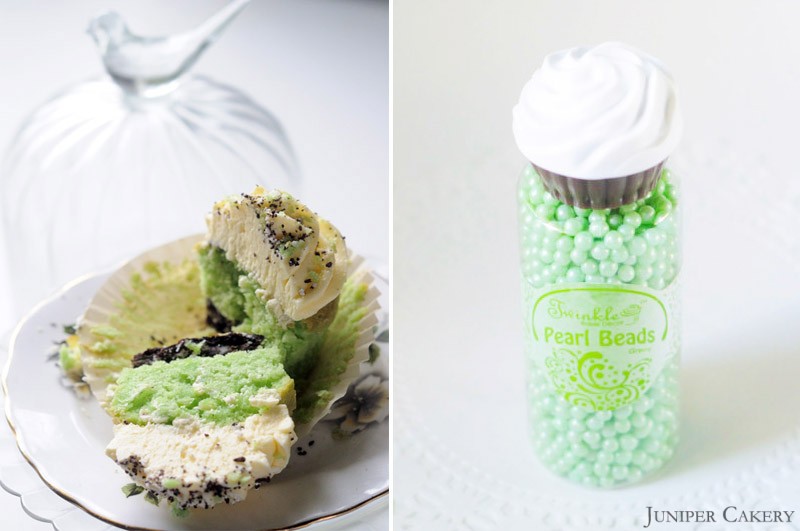
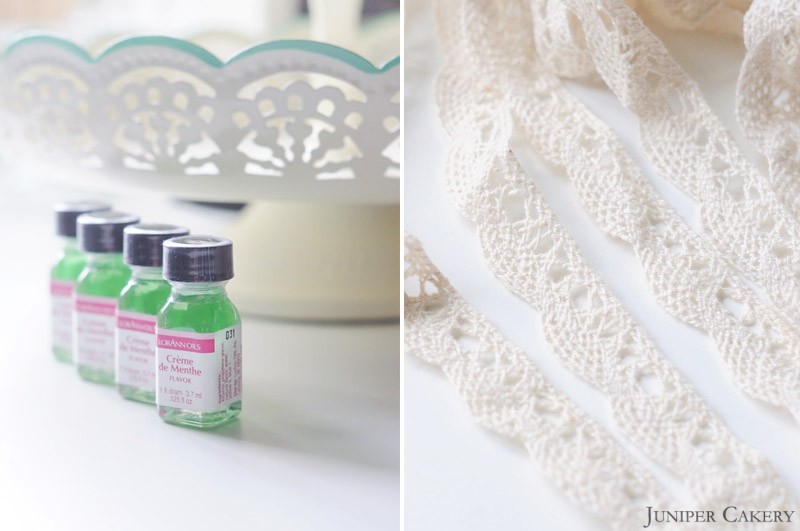
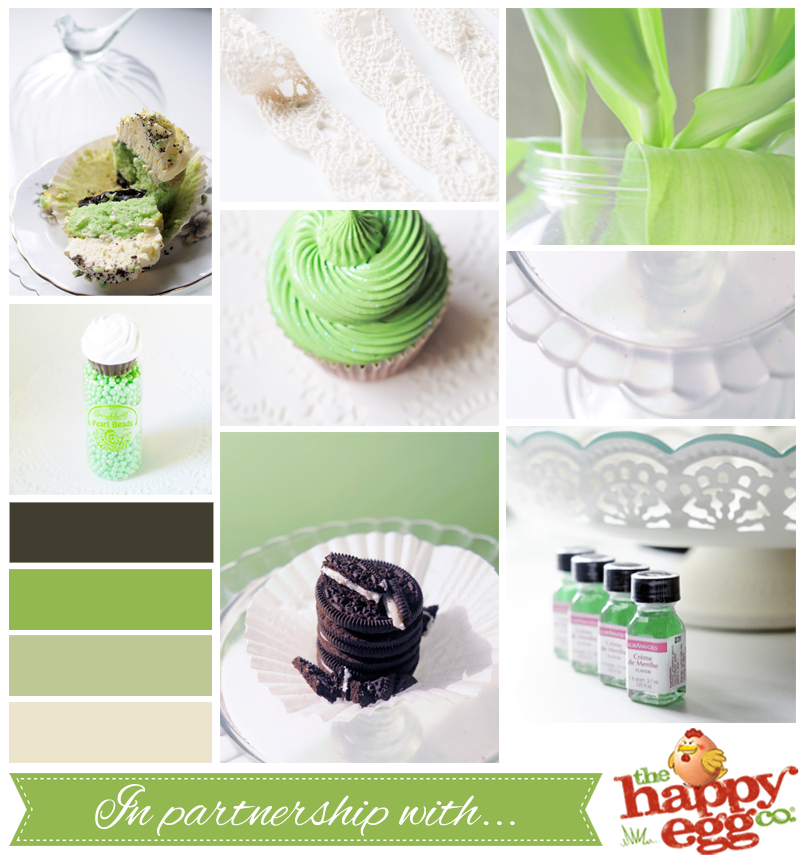
For all of our cakes in partnership with The Happy Egg Co. we consider a variety of things that will inspire our end design and create a design board in order to fully develop our ideas. From the fresh green and ‘Grasshopper’ history we looked at plants, simple white florals and leaves. From the mint flavour and traditional creamy vanilla we considered ice creams and sugar beads. Both aspects evolved into looking at simple lace features and pearl embellishment ideas and how could we translate these.

Cookies and Creme de Menthe cake for The Happy Egg Co.


‘Tutorial Tuesday': How to make a sugarpaste pom pom!

'Tutorial Tuesday': How to make a sugarpaste pom pom

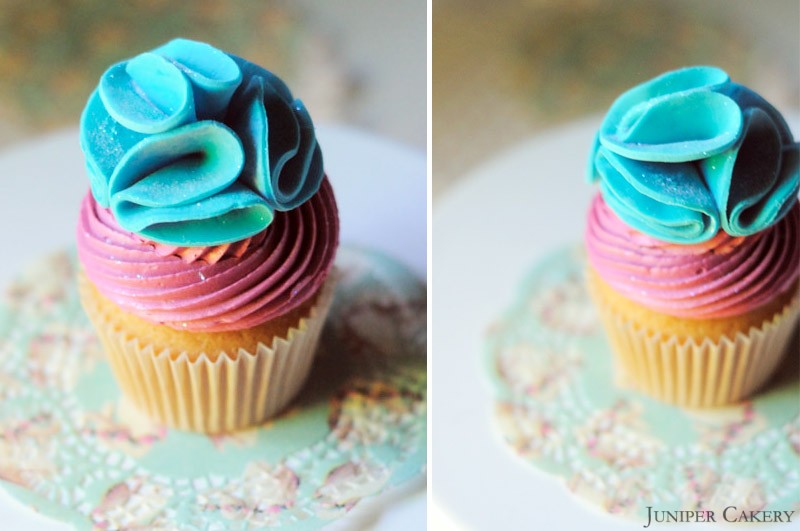
In this week’s tutorial we are going to show you how to create a fun sugarpaste pom pom that would be perfect for adorning themed cakes and cupcakes! Make then soft colours and perhaps scallop the edges by experimenting with edged cutters to create more floral looking pieces or use a vibrant palette mixed candy for clown or circus themed cakes!

'Tutorial Tuesday': How to make a sugarpaste pom pom

‘Tutorial Tuesday': How to make a sugarpaste / fondant pom pom!

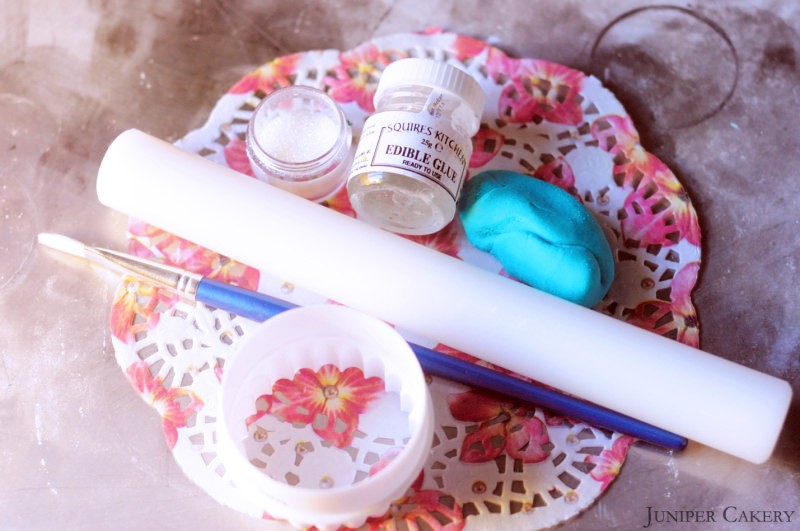
What you need…

Circle cookie / pastry cutter (approx. 2 inches)
Paintbrush
Edible Glue
Flower / modelling paste (We coloured ours with ‘Bluegrass’ by Squires Kitchen)
Fondant rolling pin
Edible lustre dust or non-edible decorator’s glitter (optional)

'Tutorial Tuesday': How to make a sugarpaste pom pom

Step one: Roll out your coloured sugarpaste on a lightly icing sugared surface.

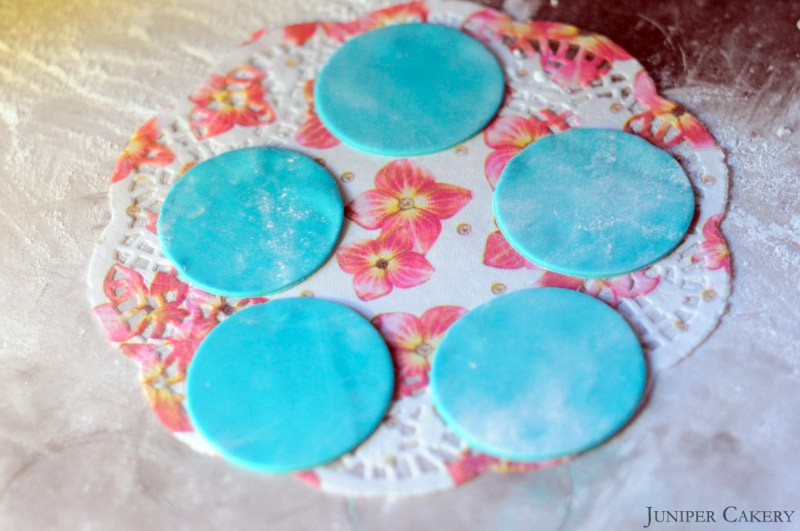
Step two: Using a cutter (approx. 2 inches in diameter) cut out five circles.

'Tutorial Tuesday': How to make a sugarpaste pom pom

Step three: Fold your circles twice over to make the sections of your pom pom.

'Tutorial Tuesday': How to make a sugarpaste pom pom

Step four: To help your pom poms keep shape use folded scraps of bubble wrap or kitchen towel.

Step five: To attach you can either apply edible glue to the sides of four folded sections then arrange and hold together… OR you can cut out a smaller circle of sugarpaste, paint with edible glue and place four of your folded sections atop.

'Tutorial Tuesday': How to make a sugarpaste pom pom

Step six: The top of your pom pom is made with your fifth folded section. Sit it atop and carefully fan it out and glue in place. Use bubblewrap or kitchen towel to pad out and hold the shape in place. Leave to harden and dry

'Tutorial Tuesday': How to make a sugarpaste pom pom

If you’ve followed this tutorial well you should be left with a lovely ruffled pom pom that will add a dramatic and fun look to your cakes and cupcakes!


Juniper Cakery on National Cupcake Week Website

National Cupcake Week

Juniper Cakery and The Happy Egg Co. partnership on National Cupcake Week website

Today we have been featured on National Cupcake Week”s website! Our partnership with The Happy Egg Co. has been acknowledged in their latest news alongside a photograph of our Earl Grey, Lemon and Bergamot cake. To read the article about our partnership with The Happy Egg Co. visit the National Cupcake Week’s blog and website.
 

‘Tutorial Tuesday': How to make a sugarpaste ruffled flower corsage!

'Tutorial Tuesday': How to make a sugarpaste ruffle flower corsage

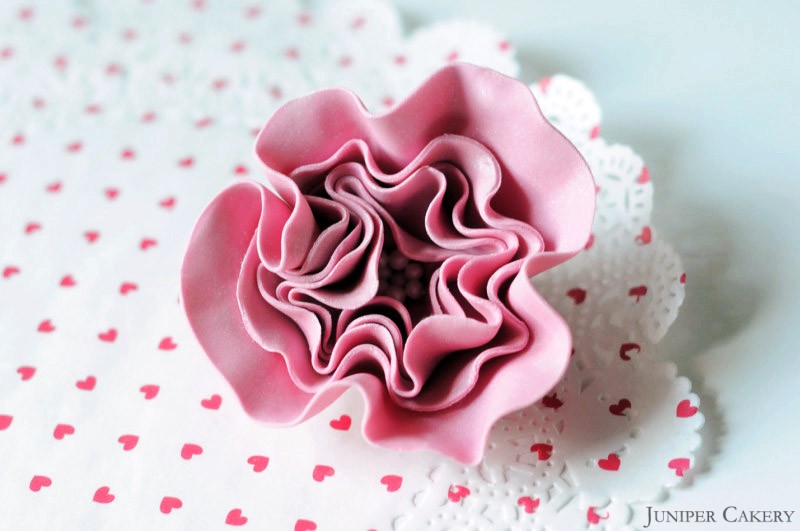
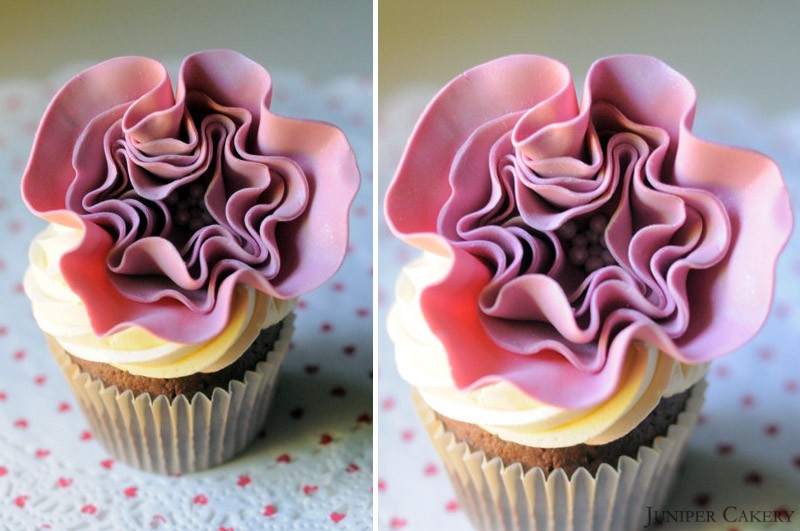
In this week’s ‘Tutorial Tuesday’ we show you how to make a very simple yet dramatic ruffled flower to adorn atop your cupcakes and cakes. You can adapt this flower to any cake design by experimenting with colour, shape, textures etc. Why not add edible diamonds in the centre of your flower for a more fashion styled design, cut your circles using a scalloped cutter for extra shape and ruffles.

'Tutorial Tuesday': How to make a sugarpaste ruffle flower corsage

‘Tutorial Tuesday: How to make a sugarpaste ruffle flower corsage!

What you need…

Flower / modelling paste by Renshaw (We coloured ours with ‘Dusky Pink’ by Sugarflair)
PME Ball Tool
Twinkle Baker Decor’s Sugar Pearls
Squires Kitchen edible glue
Paintbrush
Tala pastry cutter set
Toothpicks
Teacup

'Tutorial Tuesday': How to make a sugarpaste ruffle flower corsage

Step one: Roll out your sugarpaste until it is wafer thin; this will make it much easier for you to create your ruffles later.

Step two: Now your sugarpaste is ready cut out four circles, descending in size, using your pastry cutter set by Tala.

'Tutorial Tuesday': How to make a sugarpaste ruffle flower corsage

Step three: On a foam pad use your ball tool to slightly ruffle the outer of each circle.

'Tutorial Tuesday': How to make a sugarpaste ruffle flower corsage

Step four: Use a paintbrush end to increase the ruffled texture on each circle.

'Tutorial Tuesday': How to make a sugarpaste ruffle flower corsage

Step five: Place the largest ruffled circle into a teacup.

Step six: Dabbing edible glue on each layer place all ruffled circles atop each other in the tea cup. Add further ruffled circles in appropriate size to create a more dramatic shape.

'Tutorial Tuesday': How to make a sugarpaste ruffle flower corsage

Step seven: Spread a small amount of glue inside the smallest ruffled circle and dot inside some sugar pearls for detail.

'Tutorial Tuesday': How to make a sugarpaste ruffle flower corsage

If you have followed this tutorial you will now have your very own ruffled flower corsage!


Earl Grey cake in Partnership with The Happy Egg Co.

Earl Grey cake in partnership with The Happy Egg Co.

Earl Grey cake in partnership with The Happy Egg Co.

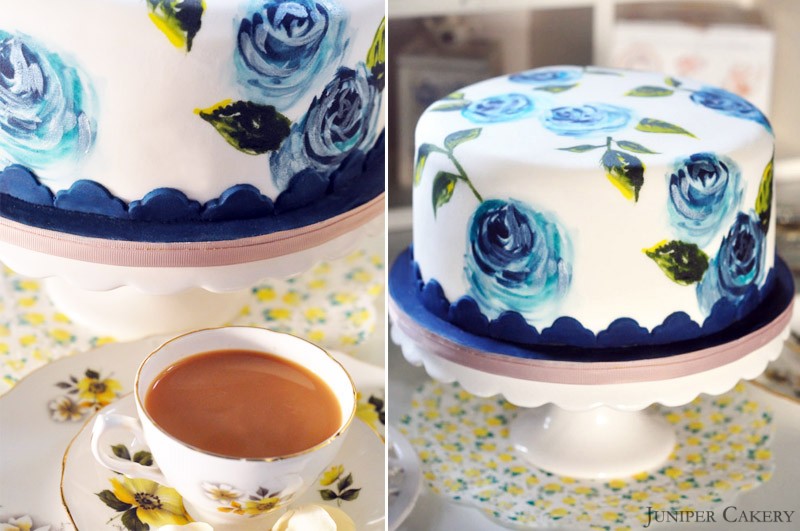
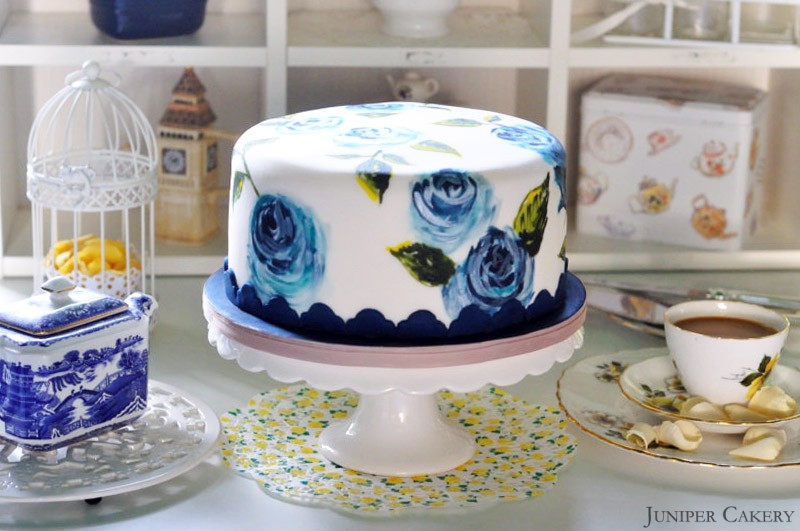
Here it is! This is our début cake, recipe and tutorial in partnership with The Happy Egg Co. In our design and development post we blogged about creating a delicious tea infused cake. We settled upon the delicate taste of Earl Grey tea paired with fragrant scent of lemon and bergamot. After the following images of the finished cake you’ll find the recipe and a tutorial on how to hand paint a rose onto an iced cake. Why not create this cake, or elements of it, yourself?
Earl Grey cake in partnership with The Happy Egg Co.

Earl Grey cake in partnership with The Happy Egg Co.

Recipe

To create this cake (a 9 inch circle) you will need the following…

7-8 free range eggs by The Happy Egg Co. depending on egg size
453g self raising flour
453g caster sugar
543g butter
3-4 Earl Grey teabags
4-6 drops of Bergamot extract

For the buttercream you will need…

453g butter (don’t use margarine as the water content is higher and not suitable for buttercream)
Bergamot extract (flavour to your own taste)
Lemon extract (flavour to your own taste)
453g - 553g icing sugar (choose your own consistency and taste)

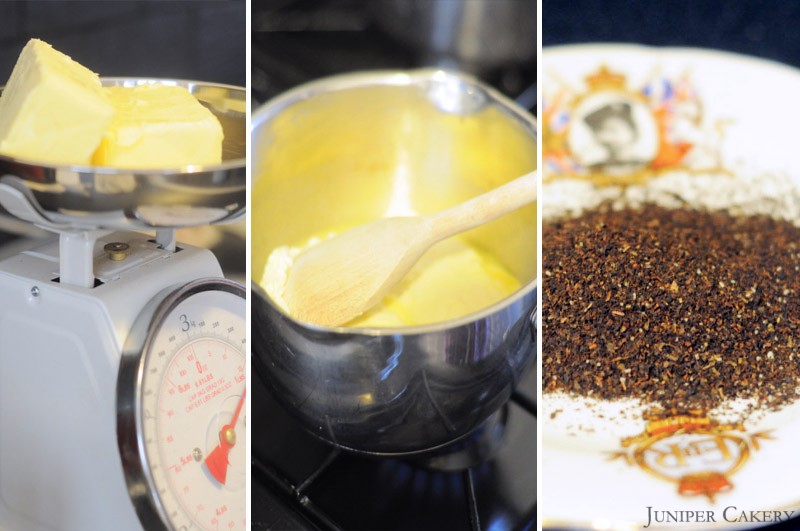
The very first step you need to do is to create a pat of Earl Grey tea infused butter. This ensures the tea will become more prominent in flavour once baked. Simply adding Earl Grey leaves to the batter only gives a very faint scent and taste.

‘Brewing’ your tea

Earl Grey cake in partnership with The Happy Egg Co.

To create your Earl Grey butter you need to ‘brew’ the tea leaves and butter together in a saucepan. Once mixed together pour the melted Earl Grey butter into a suitable container and allow to chill and reset in the fridge. Once chilled you can simply add the Earl Grey butter to your recipe as normal.

To create the cake cream your butter in a stand up mixer and then add the caster sugar. Add the flour along with half of happy eggs for approximately one minute. Once half the happy eggs are combined add the remaining and mix for around 5 minutes. Once the batter is fully mixed add a few drops of bergamot to enhance the Earl Grey flavour further.

Pour into greased cake pans (we use Wilton’s Bake Easy Non-Stick Spray to prepare our cake pans) and place on the top shelf of a pre-heated oven at Gas Mark 3/325F/170C. Bake for approximately 30 minutes. Baking time may differ slightly depending on your oven.

Leave to cool and in the meantime prepare your buttercream.

For the buttercream add entire pat of butter diced into cubes to be creamed in a stand up mixer. Then gradually add icing sugar and small cubes of the remaining pat of butter. Once the buttercream is of a smooth consistency add your flavourings and mix well.

How to hand paint a rose onto your cake

Earl Grey cake in partnership with The Happy Egg Co.

We decided to decorate our Earl Grey cake with hand painted roses in order to evoke a lovely traditional, British look. Painting onto an iced cake can be scary, but if you follow our tips and practice on a small rolled out section of icing you should be able to create a beautiful and dramatic design.

What you need…

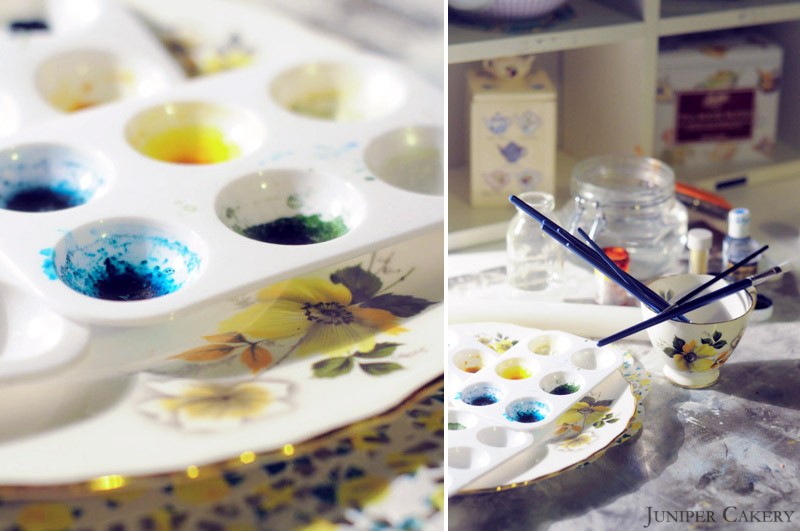
Good paintbrushes in various sizes (use different sizes for each colour)
Gel and paste colours (don’t use liquid colours as these will be faint)
Lustre dusts (these are wonderful for adding shimmer, texture and a lighter colour)
Vodka (this is used as a ‘thinner’… it evaporates quickly and leaves no alcohol behind so it is safe to use on kids’ cakes)

Earl Grey cake in partnership with The Happy Egg Co.

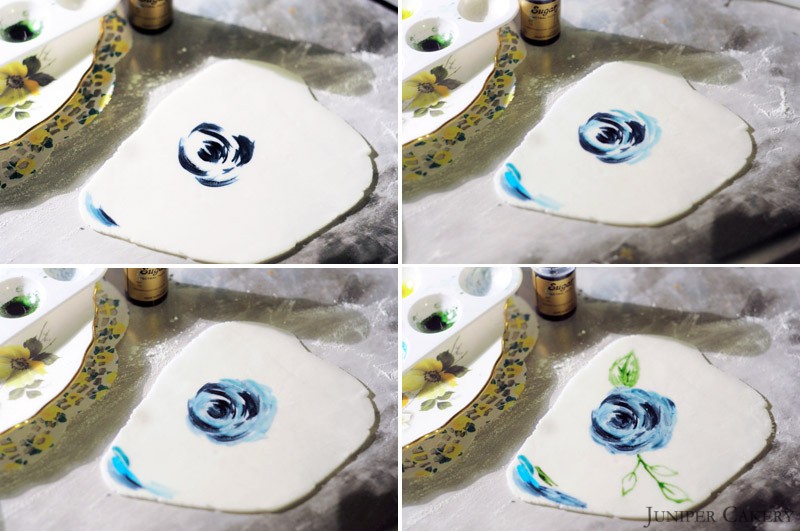
Step one: Using a brush around 1cm in width and your darkest colour paint a rough circle as the centre of your rose and brush some ‘petals’ around the outside. Make sure you don’t pick up too much liquid on your brush or you’ll find your painting very blotchy. Keep a towel or tissue close by to dry your brush.

Step two: At this stage you need to decide the direction your rose will face. In the images above our rose faces top left. To add direction brush in some tonal colour around the rose concentrating on the lower part of the flower.

Step three: Keep adding colour into your rose with a smaller brush. A tip is to use around four colours in total… the dark for the centre and defined petals combined with a brighter colour to add interest, a pale colour and finally a white or pearlised cream to tone down some sections.

Step four: To add leaves think of how they would flow. Either imagine a simple curved line through your rose or an S shape. Add the leaves and then use tones of green and yellow to add colour.


×