Zesty Lemon Cupcake Recipe!

This fabulous lemon cupcake recipe is always a definite hit for us when in need of a little afternoon pick-me-up. We love the sweet yet tangy dimensions of taste found in these little gems and adore how they work so well against the soft and creamy textures of the cake and buttercream. They’re wonderful additions to get-togethers, parties or a quick treat during the warm summer months so why not follow our lemon cupcake recipe below for a crowd-pleasing batch treats!

Lemon cupcake recipe by Juniper Cakery

Zesty Lemon Cupcakes Recipe (Makes approx. 12 cupcakes)

  • 226g self raising flour
  • 226 butter
  • 226g caster sugar
  • 4 eggs
  • Lemon extract
  • Finely grated peel/zest of 1/2 a lemon

Step 1: Pre-heat your oven to Gas Mark 3 / 160C / 325F and line a cupcake pan with cupcake cases.

Step 2: Cream your butter and sugar first and when ready add your eggs, lemon zest and lemon extract (test your batter to make sure it’s as lemon-y as you’ve like it).

Step 3: Once combined add the flour, mix well and pour your batter into your cases.

Step 4: Bake for around 20-30 minutes or until a cake tester comes out clean when tested.

If you’re throwing a grown-up party why not fancy this recipe up with a splash of King’s Ginger (one of our favourite liqueurs) in the buttercream, fill with a vodka and lemon curd preserve, or add a touch of class with reduced champagne in the buttercream and topple with curled lemon zest and fresh raspberries!

Lemon buttercream

  • 500g softened butter
  • 400g-500g icing sugar
  • Lemon oil or extract

Step 1: Cream your softened butter in a stand up mixer.

Step 2: Sift your icing sugar and this add to your butter. Cream together.

Step 3: Add in your lemon oil or extract to flavour your frosting. We add in around 2 teaspoons, but you should add in whatever amount tastes best for you!

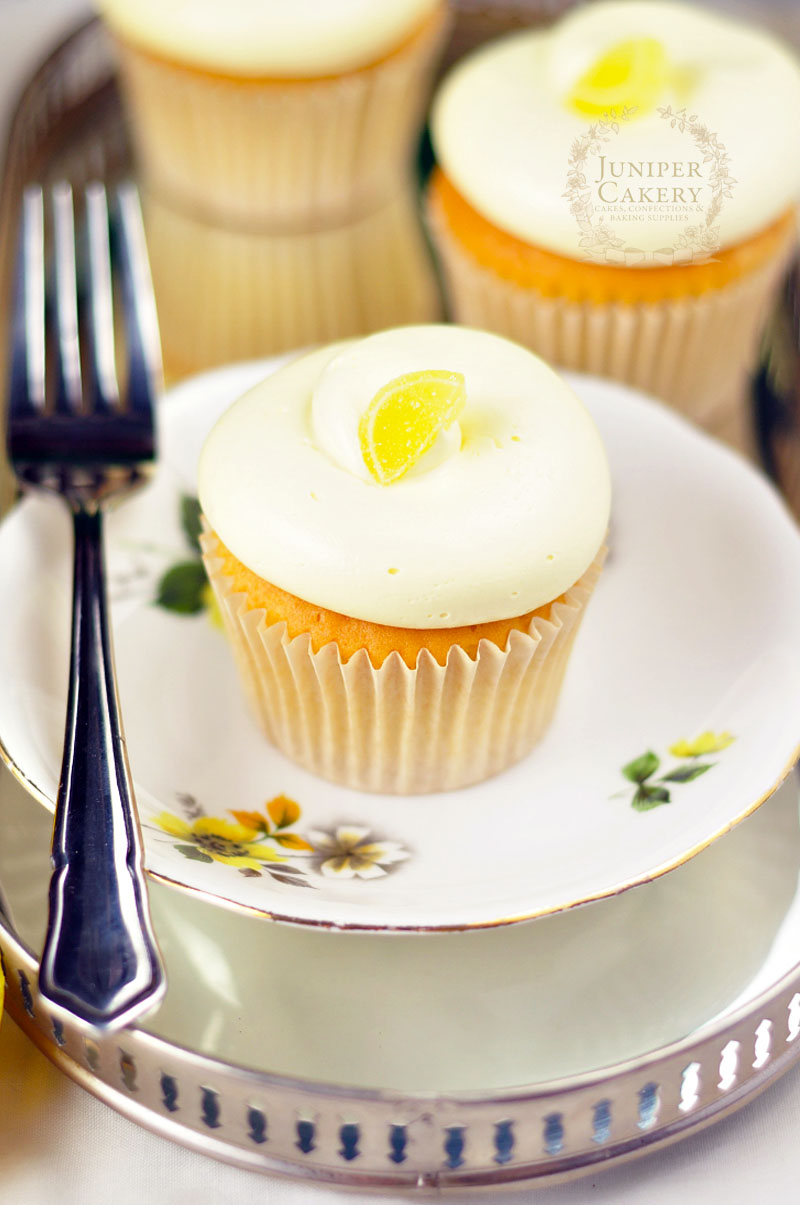
Lovely recipe for lemon cupcakes by Juniper Cakery

Lemon cupcake recipe by Juniper Cakery

Our top tip when it comes to baking gorgeous cupcakes is to fill your cases carefully. It doesn’t matter how busy we are and how insane our workload gets we make sure to never spill or drip batter onto the cases. Not only does this look rather unsightly and adds burnt cake to the outer edges of your cupcake cases, but it can even hinder your cakes baking evenly! A really handy method for filling your cases is to use a disposable piping bag and pipe batter into each cases.
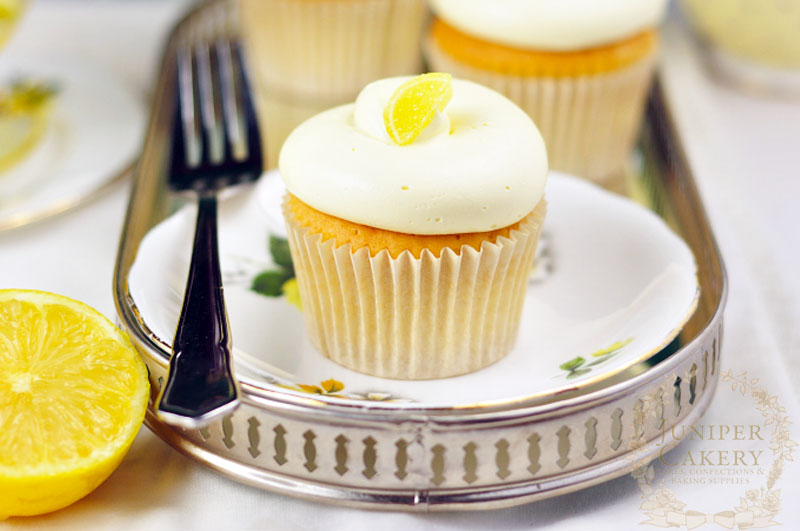
Recipe for some tangy lemon cupcakes by Juniper Cakery

We fully advocate baking and making buttercream completely from scratch so we’re perfectionists when it comes to getting super silky buttercream. Our advice is to experiment, modify and test like a mad scientist! Our baked creations, buttercreams and fillings are the result of stressful late nights in the kitchen timing how long butter was whipped for, which butter performs/looks/tastes/holds better, etc. When we found a recipe that didn’t work we took it apart and adjusted it, tried again and repeated until it was perfect for us!
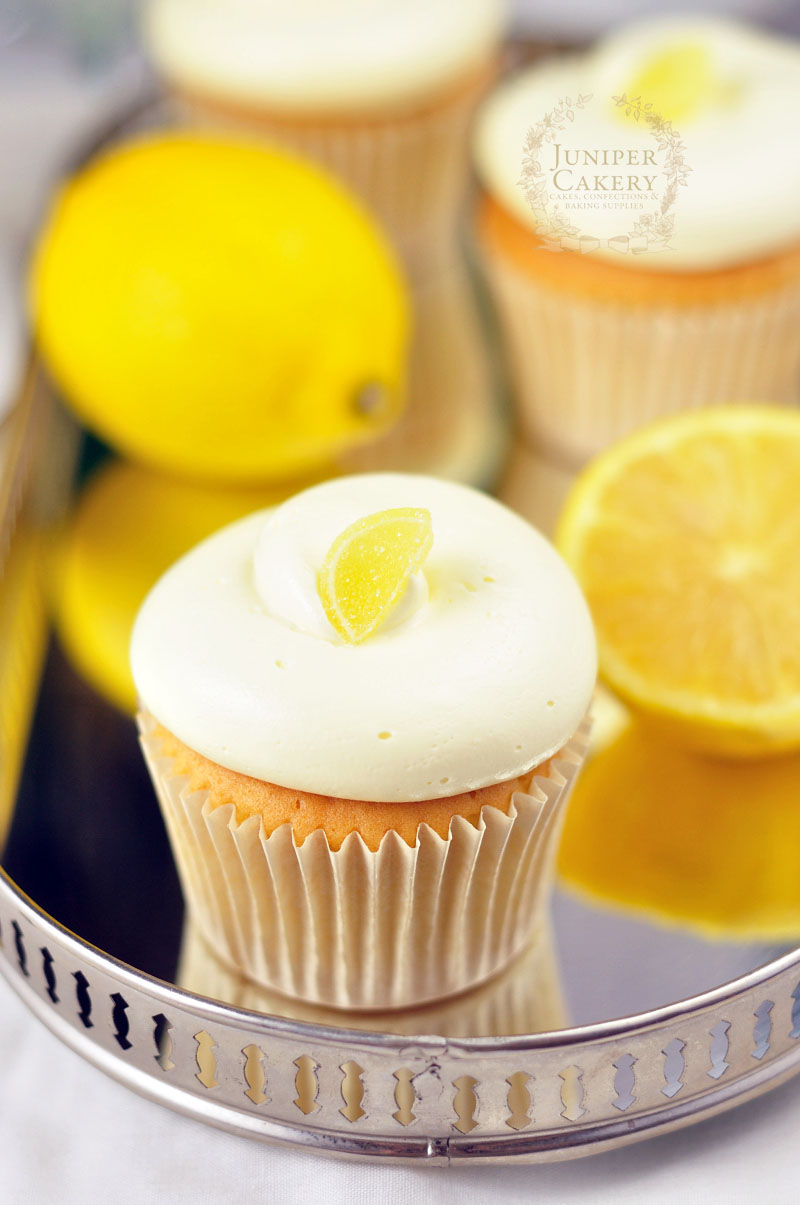
Gorgeous lemon cupcake by Juniper Cakery

Make sure to pipe each cupcake with a generous swirl of buttercream and decorate however you wish. Some fantastic decor ideas include sprinkling fun popping candy on top or a dash of lemon sherbet crystals, using sugar pearls for a more subtle look, jellied fruit inspired candies or some grated lemon peel.

If you’ve followed our lemon cupcake recipe you should be left with a deliciously sweet and zesty batch of lemon treats; perfect for relaxing with in the garden. We’d highly recommend pairing these tasty cakes with tangy lemonade or a soothing cup of fruit tea for a well-deserved rest!
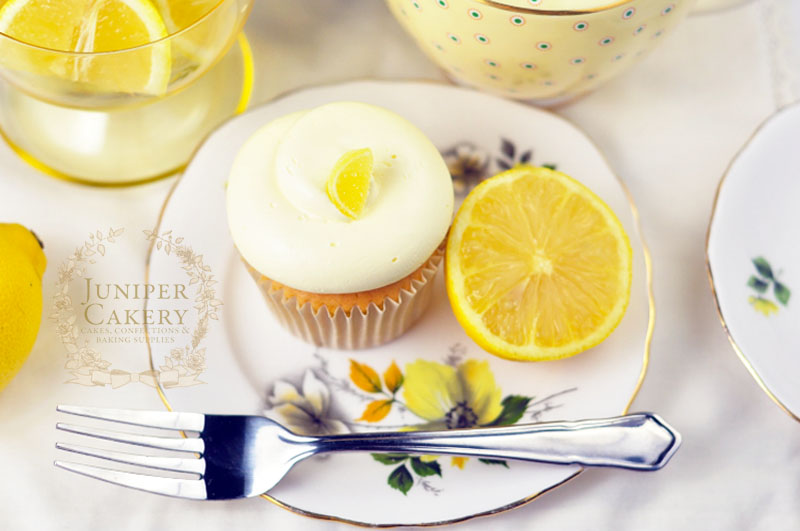
Lemon cupcake recipe perfect for summer by Juniper Cakery


Tutorial: Intro to Royal Icing…Stencil Designs!

We’re now onto week three of our ‘Intro to Royal Icing’ tutorial series which we hope you find easy to follow and pretty darn useful. Working with royal icing seems daunting, but with a straightforward recipe and some patience and practice it needn’t be! For our first tutorial of the collection we showed you how to pipe delicate pearl borders and we shared our go-to recipe for royal icing, then last week we featured a how to on making a parchment paper cornet/cone and how to pipe polka dots, this week we’re going to show you how to use stencils and royal icing to apply some fabulous designs onto your cakes and cupcakes!

How to stencil with royal icing by Juniper Cakery

Stenciling cakes tutorial by Juniper Cakery

How to use stencils with royal icing

You’ll need…

  • A flat and clean stencil
  • Cake, cookie or flat fondant disc to top a cupcake (fondant/sugarpaste covered is best)
  • Royal icing (find our recipe here) the consistency of toothpaste
  • Spatula
  • Trex or Crisco (optional)

Step 1: One of the first steps (if obvious) is to make sure that your stencil is the appropriate size for the surface you wish to decorate! Also, it’s best if your stencil is flat so look after them to avoid kinks, bends or folds. If you’re a fresh faced beginner it’s best to steer clear of over-complicated stencil designs until you’re more proficient!
Royal icing stencil tutorial by Juniper Cakery

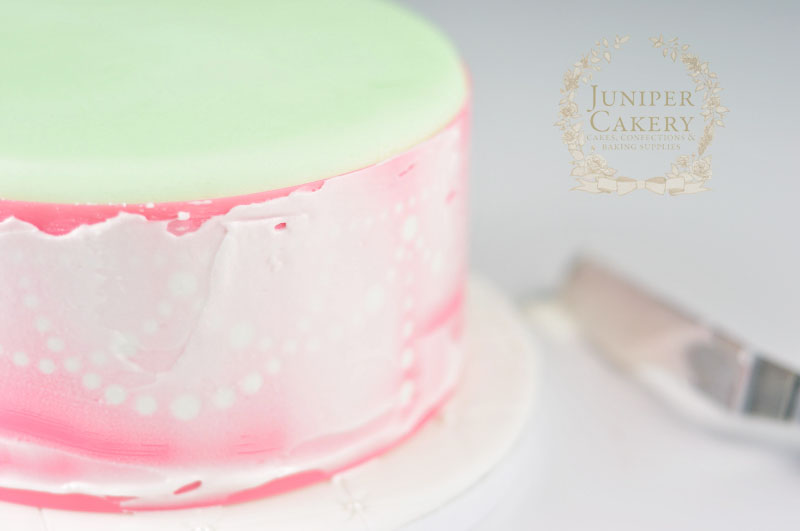
Step 2: Apply the stencil to the surface (some people paint Trex or Crisco onto the side of the stencil that will touch the cake to help stick it on, some utilise pins instead, and some have someone generous enough to lend their steady hands for a few moments), hold down steadily yet lightly before you apply your royal icing. 

Tutorial on how to stencil with royal icing by Juniper Cakery

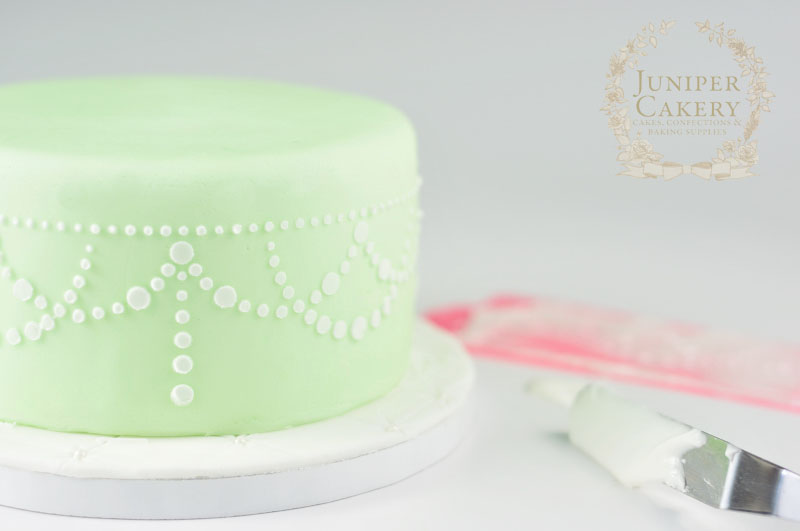
Step 3: With a good spatula (we recommend a cranked or angled spatula for good control). Whilst holding the stencil steady apply some royal icing and use the spatula to smooth over the stencil. Scrape excess royal icing away with the spatula and when ready slowly peel the stencil away. Remember to always work pragmatically… clean and wipe your stencil between each cookie or side of a cake to avoid blurred or indecipherable designs. Impatience will lead to mess! 
How to stencil onto cakes with Juniper Cakery

Tutorial on how to stencil cakes by Juniper Cakery

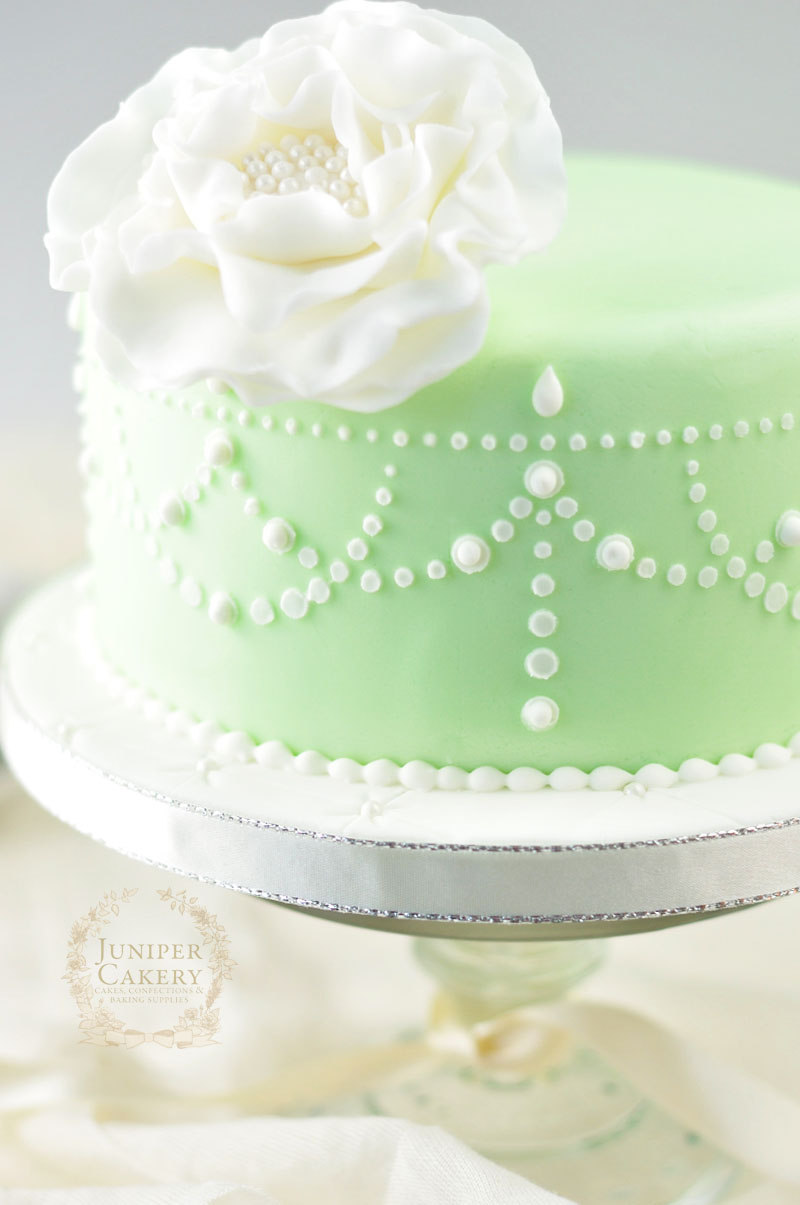
Once you become more confident with this technique adding stencil designs to your cakes and cookies with royal icing will be a fantastic and fast way to add detail! Now that our ‘Into to Royal Icing’ series is over why not keep test your new-found skills on a batch of cookies or cupcakes? Stop by next week to find out what our next collection of tutorials will be!


Pink Raspberry Cupcakes Recipe!

Fruity raspberry cupcakes are always popular especially when the cold winter months become warmer and brighter. They’re the perfect addition to any fun picnic, garden tea party or after work treat! We love adding little twists to this recipe by adding in mango, passion fruit, peach; baking champagne or lemon into the cake or by the playful addition of popping candy or sherbet into the silky smooth buttercream (always great for those who enjoy a tangy taste). Why not follow our pink raspberry cupcakes recipe below for your next event!

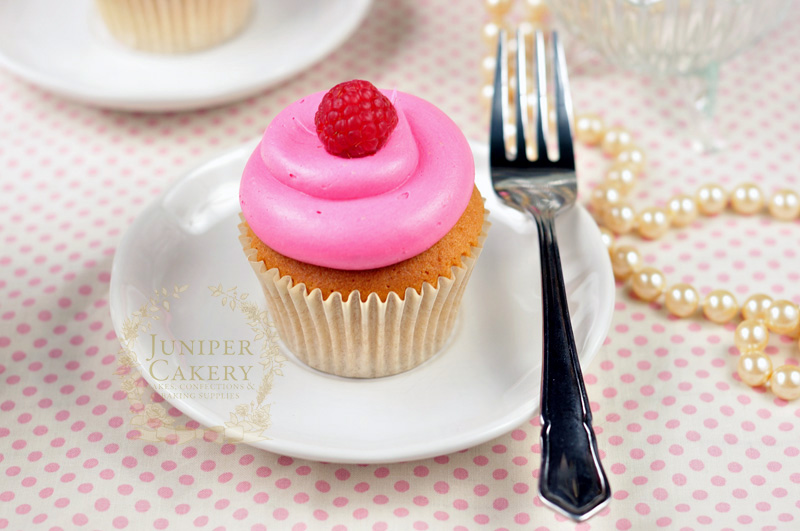
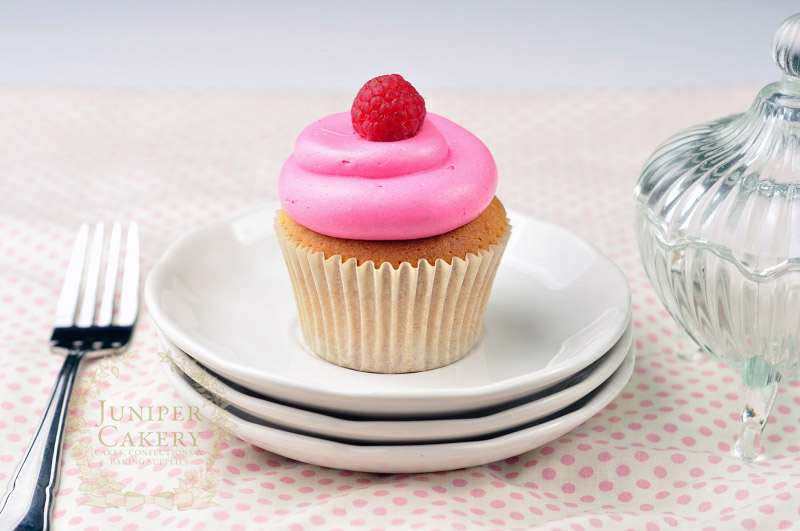
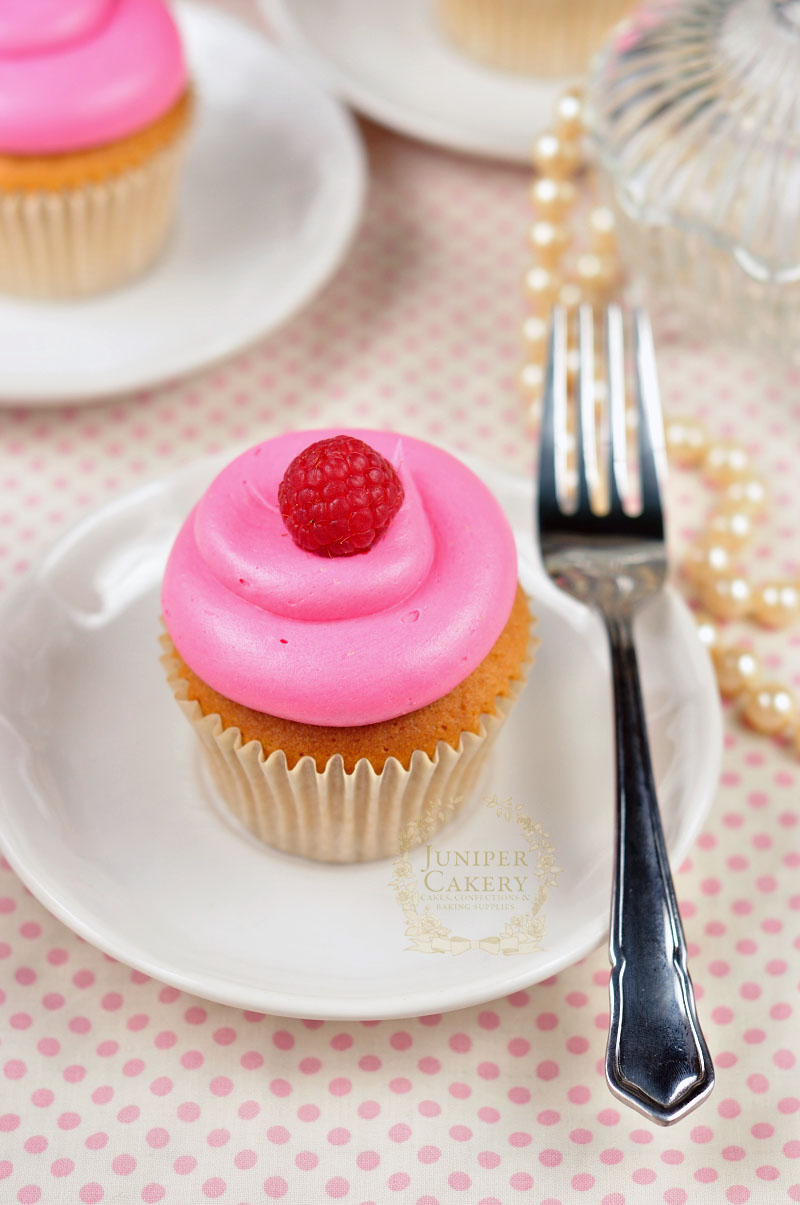
Pink raspberry cupcakes by Juniper Cakery

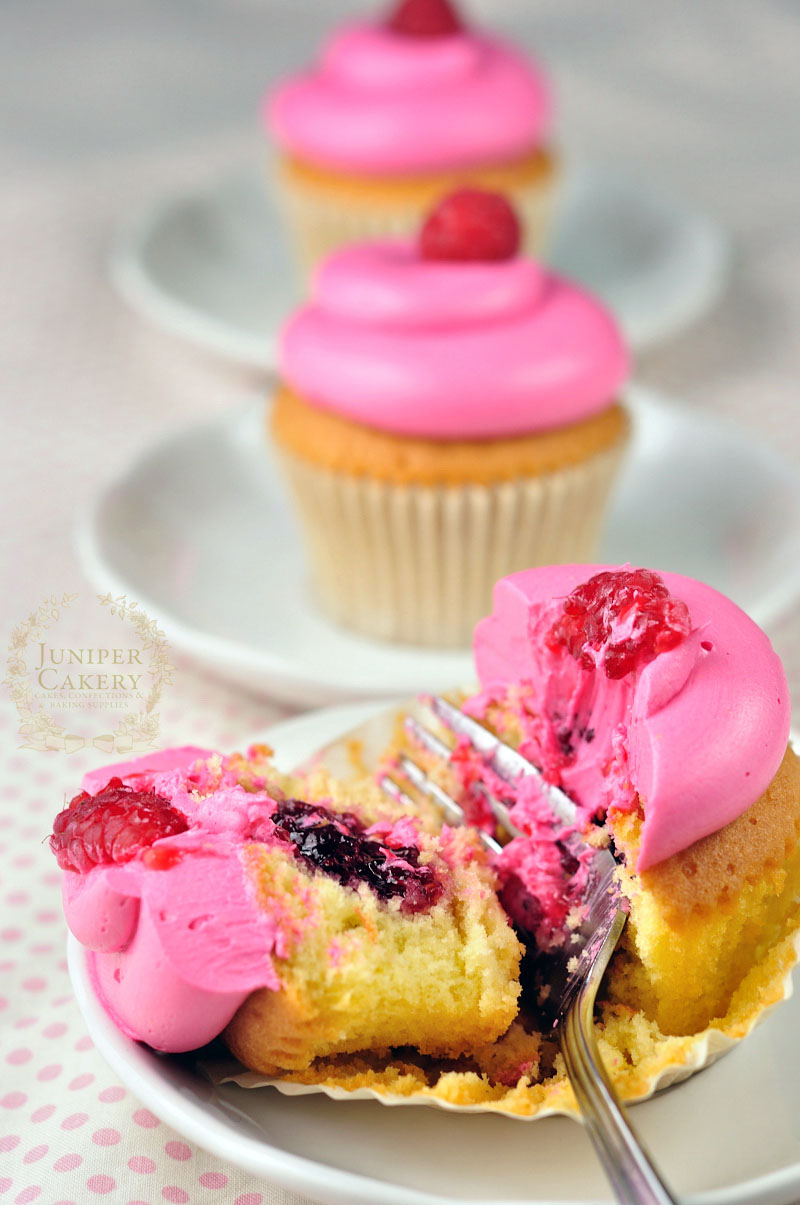
Raspberry jam filled cupcake by Juniper Cakery

These simple cupcakes are wonderfully perfect for summer get-togethers, fun parties or as a sweet thank you gift for someone special. Personalise each one with thoughtful messages or hand-made fondant toppers for an extra customised feel.

Personally, we love piping our raspberry cupcakes in a simple yet generous swirl of frosting or in a pretty buttercream rose finished with a fondant rose leaf. Other rather fabulous ways to decorate these little gems is to adorn the tops with fresh sugar-coated raspberries, raspberry coulis, sprinkles, white chocolate curls, sugar pearls, sugar flowers or gorgeous edible petals!

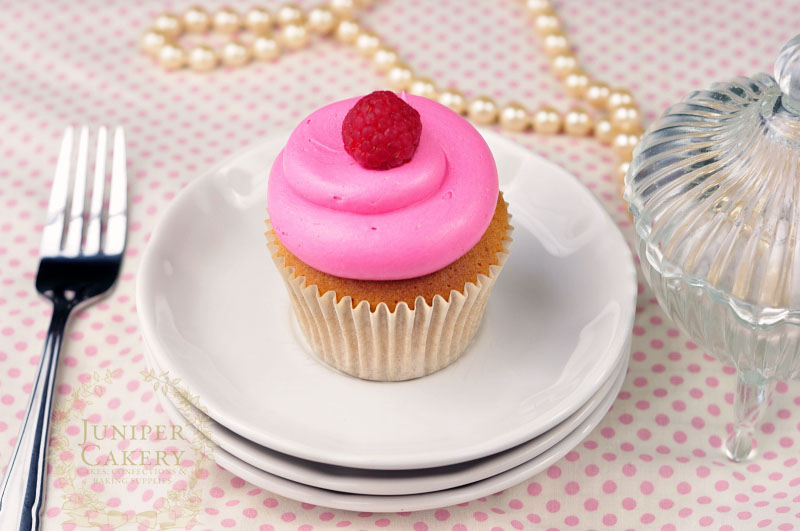
Raspberry cupcakes in a row by Juniper Cakery

Vanilla Cupcakes Recipe (Makes approx. 12 cupcakes)

  • 226g self raising flour
  • 226 butter
  • 226g caster sugar
  • 4 eggs
  • 1 teaspoon vanilla extract or bean paste

Step 1: Pre-heat your oven to Gas Mark 3 / 160C / 325F and line a cupcake pan with cupcake cases.

Step 2: Cream your butter and sugar first and when ready add your eggs and vanilla.

Step 3: Once combined add the flour, mix well and pour your batter into your cases.

Step 4: Bake for around 20-30 minutes or until a cake tester comes out clean when tested. 

Gorgeous pink raspberry cupcake by Juniper Cakery

Pink Raspberry Buttercream

  • 500g softened butter
  • 400g-500g icing sugar
  • raspberry extract
  • Pink gel food colour

Step 1: Cream your softened butter in a stand up mixer.

Step 2: Sift your icing sugar and this add to your butter. Cream together.

Step 3: Add in your raspberry extract to flavour your frosting. We add in around 2 teaspoons, but you should add in whatever amount tastes best for you!

Note: You can add in lots of crushed or blitzed raspberries if you wish, however, this will add lots of extra moisture into your buttercream making it sloppy in texture. Our tip for adding in raspberries would be to add equal measures of raspberries and caster sugar to a pan and reduce down into a sticky syrup before adding to your buttercream. 

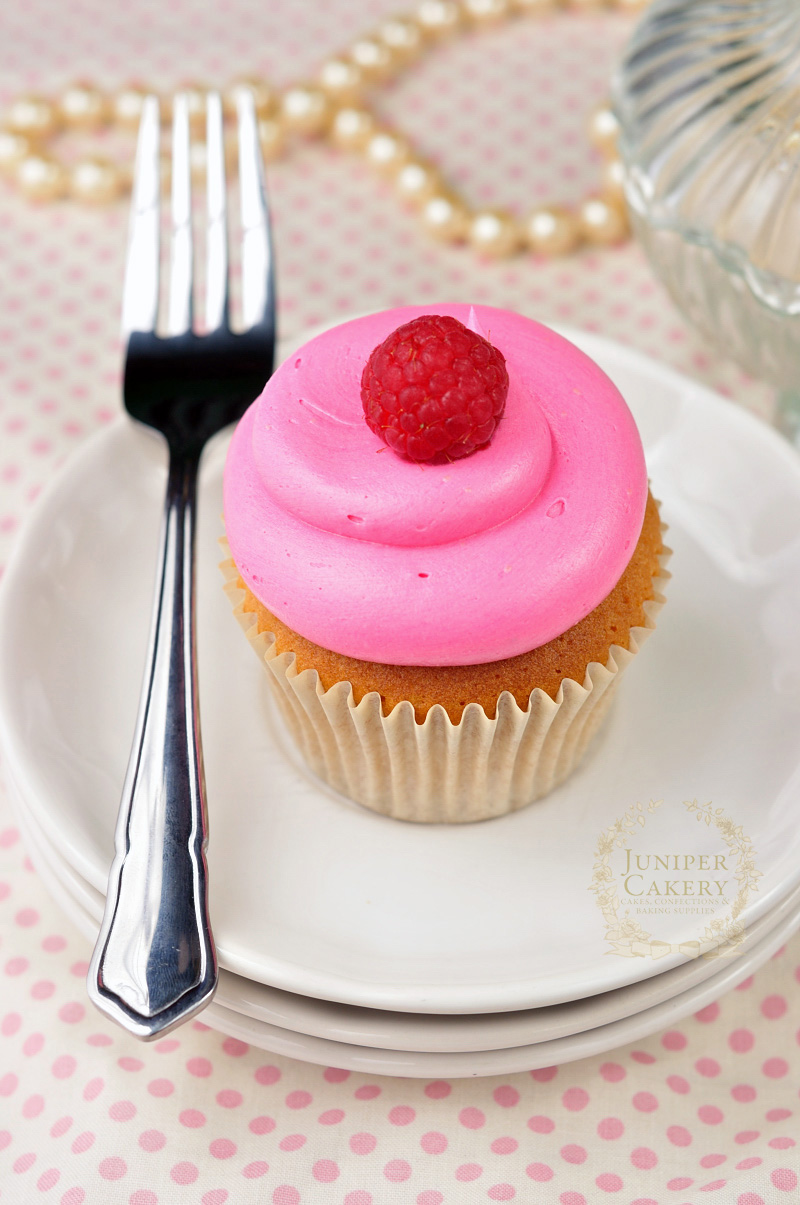
Pink raspberry cupcake by Juniper Cakery

Raspberry Preserve Recipe

  • 1oog fresh raspberries
  • 100g caster sugar
  • 1 tablespoon lemon juice

Step 1: To a saucepan on high heat add all of your ingredients.

Step 2: Bring to the boil and then turn the heat down to medium heat.

Step 3: Leave to simmer until thick and jam-like in consistency.

Step 4: Pour into clean jars and leave to cool.

Must try this raspberry cupcake by Juniper Cakery

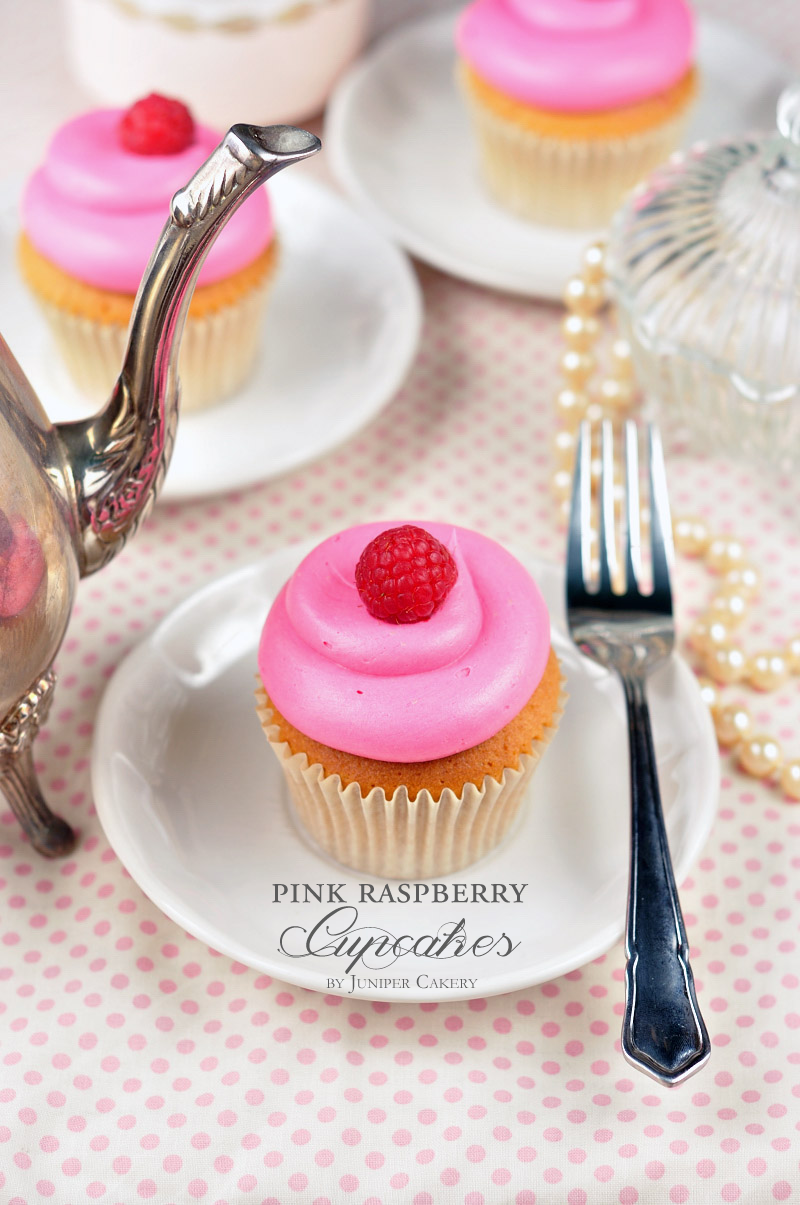
To assemble your cupcakes core using a good cupcake corer and spoon your cooled down raspberry preserve into the cored centre of the cupcake. Add your fruity pink buttercream to a piping bag fitted with any piping tip you desire (we used a large plain round nozzle) and pipe generous swirls on top of your cakes! 

Raspberry Cupcake by Juniper Cakery

Why not add some extra indulgence just for the grown-ups to your batch of pink raspberry cupcakes with a splash of King’s Ginger, Taittinger champagne or Raspberry Chambord in your preserve and buttercream for a fabulously boozy treat! We love the idea of a sherbet lemon cupcake that’s been infused with some zesty King’s ginger liqueur, filled with Charmbord and fresh raspberry confiture and swirled with fruity raspberry buttercream! 

Top 101 Summer Recipes by Amara Living

Wow! This recipe was selected as one of Amara Living’s Top 101 Summer Recipes! Check out their blog post here for 100 other fabulously mouth-watering recipes!


Tutorial: Intro to Royal Icing… Piping Polka Dots!

Last week we kick started our ‘Intro to Royal Icing’ tutorials with our go-to royal icing recipe and a tutorial on how to pipe a lovely and delicate pearl border! Now it’s time for us to show you how to pipe polka dots (or random dots if you like) onto cakes, cookies and cupcakes. This technique is wonderful and perfect for adding texture to decorated treats; piping royal icing dots into a polka dot formation also adds a very subtle vintage feel to a finished cake!

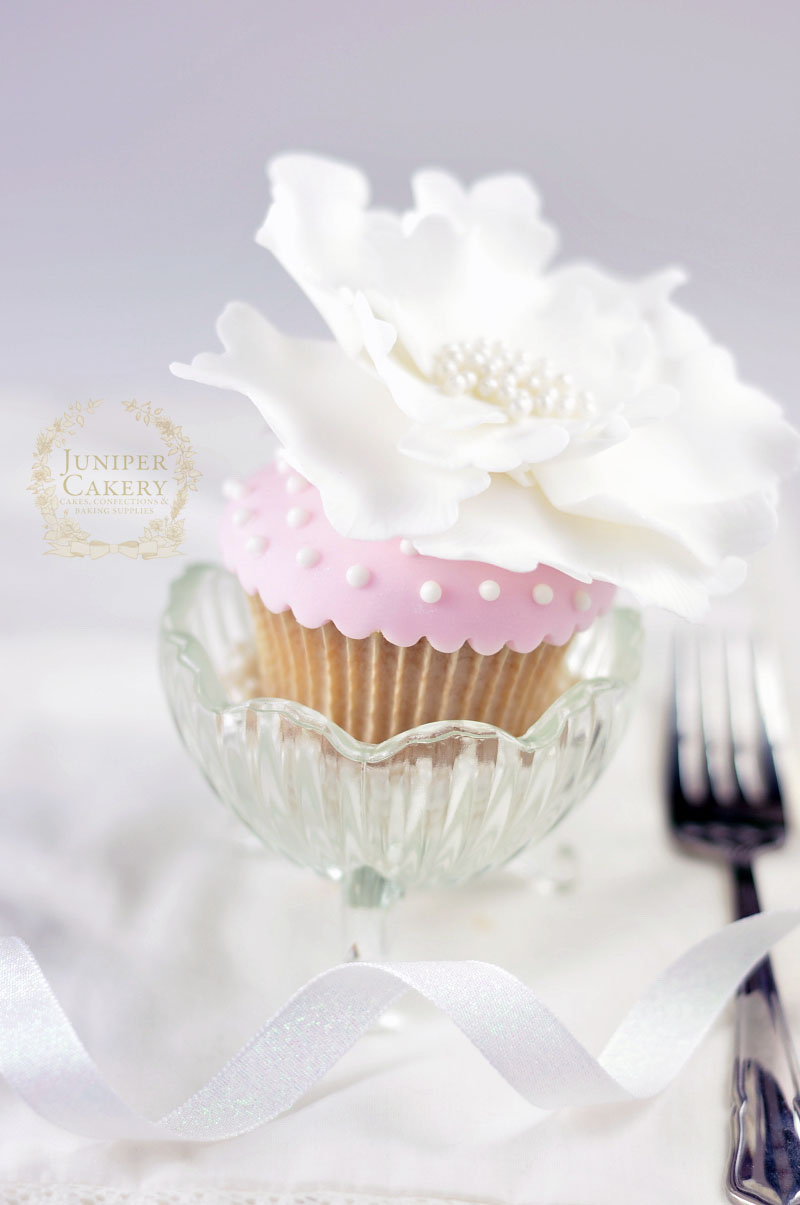
Polka dot icing tutorial by Juniper Cakery

This week we’re also going to show you how to create a parchment cornet /cone used for piping royal icing designs. We use a combination of both parchment cornets and disposable piping bags and personally haven’t noticed too much of a different between the two. One notable thing is that the smaller parchment cornet is better if piping smaller or more ‘fiddly’ detail due to the way you end up holding it and also due to the size. Using a parchment cornet is generally great for writing, string-work or lace.

How to make a parchment cornet / cone

You’ll need…

  • Parchment paper
  • Scissors
  • Piping tip
  • Small round piping tip (we used a 2.5 writer tip by PME
  • Royal icing (find our recipe here) the consistency of toothpaste


Step 1: Take a roll of parchment paper and cut a square portion from this.

Step 2: Fold corner to corner to form a triangle and cut down the fold.

how to make a parchment cone for royal icing by Juniper Cakery

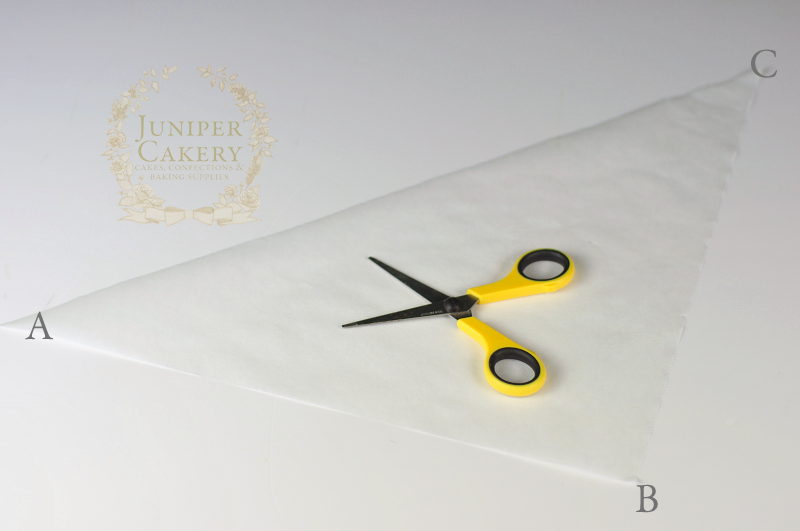
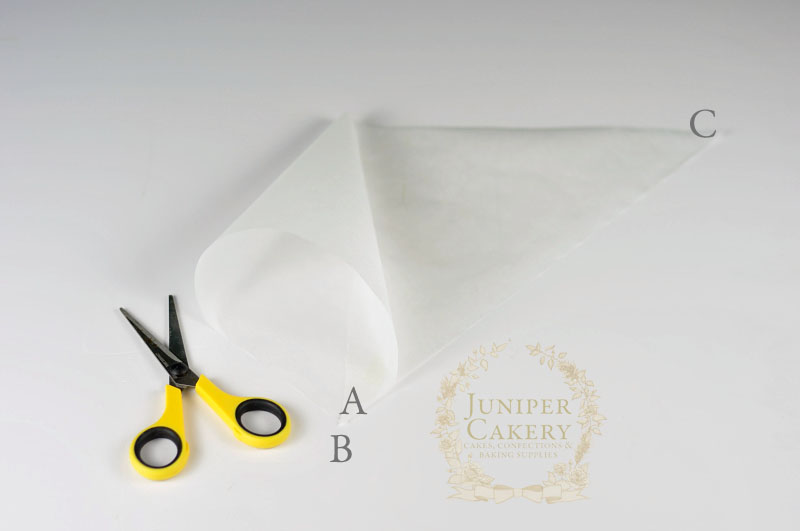
Step 3: Think of each corner as being marked with a letter. The middle point should face you and be corner B. The outer points should be A and C. A being the left and C being the right.

Step 4: To form the cornet bring point A to point B to form a conical shape.

how to make a parchment cornet by Juniper Cakery

Step 5: Take point C and bring this to point B. This should, in a sense, double up the cornet shape.

Step 6: Take your piping tip and fit into the bottom of the cornet as with a disposable piping bag. You can adjust the points to fit the tip.

Step 7: When all points meet rip two notches parallel to each other and fold this to hold the bag.

Step 8: Fold the piping bag at the points a few times to secure.

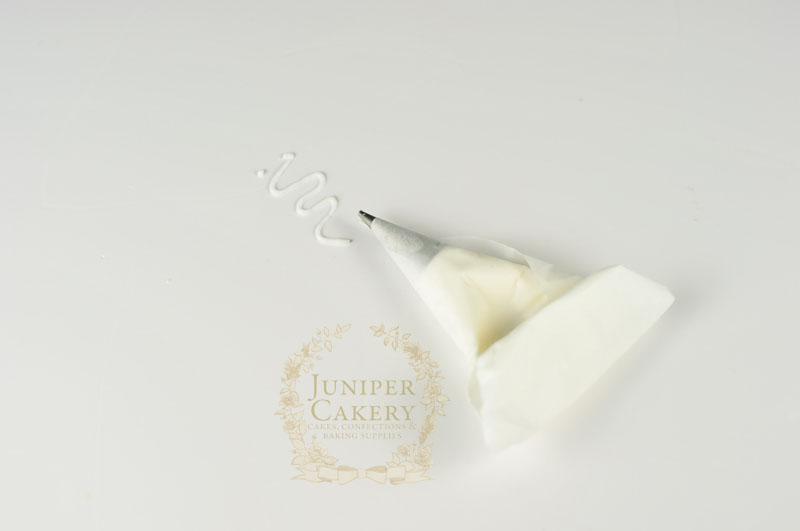
Step 9: Fill with a little royal icing.

how to make a parchment  piping bag by Juniper Cakery

Step 10: Fold the parchment cornet in on itself from the sides and then from the top a few times and you’re ready to pipe!

Royal icing dots tutorial by Juniper Cakery

How to pipe royal icing polka dots

 You’ll need…

  • Parchment cornet/cone filled with royal icing and fitted with a small plain round tip
  • Cake, cookie or fondant/sugarpaste covered cupcake
  • Food safe paintbrush
  • Icing sugar
  • Dressmaker’s pin (optional)

How to pipe dots with royal icing by Juniper Cakery

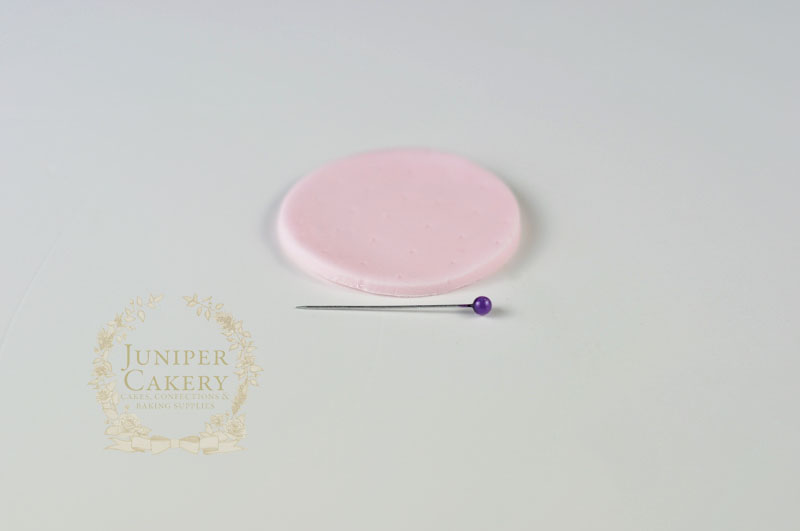
Step 1: When you’re relatively new to piping out polka dots or a design made up of small royal icing dots it’s a good idea to mark out your design or pattern with pin pricks. Use a clean dressmakers pin to do so.

Step 2: With your parchment cornet/cone filled with royal icing and fitted with a seamless (this is important as a seam can send your royal icing out crooked and hard to control) small round piping tip and position yourself at a good height to your cake or cookie. For cakes work from the direct front and for cookies or cupcakes work from directly above.

Piping dots with royal icing by Juniper Cakery

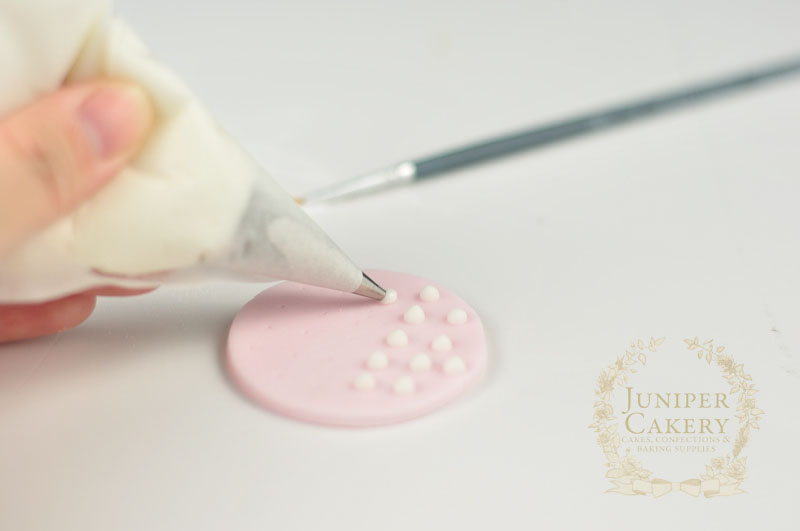
Step 3: Apply a little pressure to add a small dot of royal icing. Don’t pipe for too long if you need a larger dot as this will create ridged spots that won’t look too elegant, instead swap to a large round tip if needed. Another tip is to not place the piping tip too close to the surface or else you’ll be left with flat spots instead of nicely rounded dots.

Step 4: Don’t worry if you’re left with a bit of a tip to each dot. This is fairly normal; if you’ve the perfect consistency dots do ‘settle’ after a few seconds and without spreading out. If you do have tips that don’t settle you can flatten these slightly with a food safe (only ever used on edible items) paintbrush dipped in a  little icing sugar. You’ll need to work fast  as royal icing sets quickly. It may be frustrating but don’t be tempted to pipe out all your dots before tapping the tips down because they’ll have dried before you have the chance!

Royal icing dots tutorial by Juniper Cakery

Keep practising! It takes a little time to get any technique perfected especially when it involves royal icing. If you’re feeling adventurous why not edge a cake with the pearl border we showed you how to create last week and decorate with this week’s dainty polka dot tutorial! Next we’ll be showing you how to use royal icing to stencil designs on your cakes and cookies!


Evil Purple Minion Cake!

Of all the novelty cakes we create our favourite to make are minion cakes! Who doesn’t love those insane, fruit obsessed, nonsensical and cute little hench-people in the Despicable Me movies? This week we had lots of fun creating a cake version of the ‘evil’ purple minion of Despicable Me 2 for a birthday party. We loved this little misfit so much we just had to post some photos of it on the blog!

Evil Minion birthday cake by Juniper Cakery

We used a small 6″ hemisphere cake pan to bake the domed head and the rest of the body was made from 1 inch thick layers of three 6 inch circle cakes; all vanilla flavour. Each layer was sandwiched with our lovely and silky vanilla pod infused buttercream. We crumb coated the stacked layers and iced with custom coloured fondant / sugarpaste before transferring to a ‘metal sheet’ decorated cake drum.

Fun purple minion birthday cake by Juniper Cakery

Our favourite parts of the minion included creating the fun hair, ‘knobbly’ teeth, stitched pocket and rather nonchalant eyeball! Of course, we enjoyed every other aspect of this cake; from the silver lustre dust painted board and dungaree buttons to the stretched, floppy arms.

Awesome evil purple minion cake by Juniper Cakery

When it comes to minion cakes we love how customisable they are. We love the idea of adding towers of baked treats next to an especially gluttonous little minion or adding some fun personalised costumes for them to wear! If we had to create a pair of minions to represent the both of us they’d be balancing cake orders in fetching yet impracticable tweed ensembles. What would your minion version look like?


Tutorial: Intro to Royal Icing… Piping Pearl Borders!

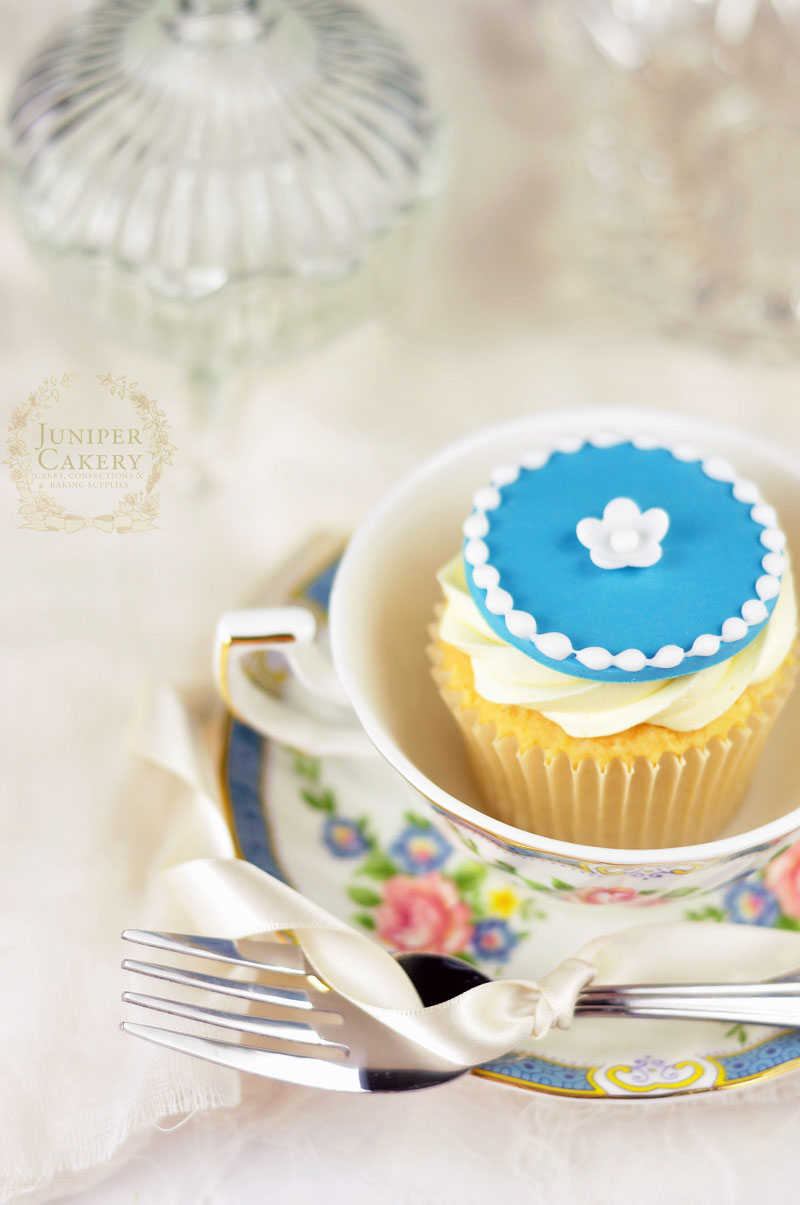
After a rather hectic couple of months full of magazine work, large cake orders and a pile of admin work our Tutorial Tuesday segment is back with a vengeance! Though we still have a myriad of responsibilities plus some fabulous plans for the next few months (why not sign up to our monthy newsletter to stay in the know) we’ve streamlined our work-plan somewhat to help maintain certain aspects of the blog; including our weekly tutorials! Without further ado here is this week’s tutorial… how to pipe pearl borders with royal icing! This handy technique is perfect for finished cakes, adding detail or creating delicate edgings on cupcakes or cookies!

How to pipe pearl borders with royal icing by Juniper Cakery

When it comes to working with royal icing you can be forgiven for being a little stand offish if faced with a piping bag of that seemingly tempestuous mix, however, all it takes is one good recipe that you feel comfortable working with and whipping up. That’s why with this week’s tutorial for piping dainty pearl borders we’re sharing our simple recipe for royal icing. Before we tried this recipe we would sadly waste large amounts of icing sugar just to pipe a small pearl or shell border. We often lamented over why so many royal icing recipes listed their ingredients in large volumes and, worse yet, with measurements too odd to scale down. This recipe is possibly the most straightforward we’ve come across, creates the least amount of waste, and it has always yielded what we find the best consistency for piping.

Our royal icing recipe

  • Whites from 1 medium egg
  • 188g icing/confectioner’s sugar
  • 1 teaspoon lemon juice (and extra to wipe down your bowl and whisk attachment)
  • Kitchen scales
  • Stand-up mixer with whisk attachment and metal bowl
  • Small round writing piping tip
  • Disposable piping bag

Step 1: Wipe down the bowl of your stand up mixer with lemon juice along with your whisk attachment.

Step 2: Add the whites of 1 medium egg to the bowl and whisk on high speed until white and frothy.

Step 3: Add in the icing/confectioner’s sugar and mix until incorporated.

Step 4: Finally add in the lemon juice. You need your royal icing to be the consistency of runny honey so add a little more lemon juice if you find your icing too thick.

Tutorial on how to pipe with royal icing by Juniper Cakery

Be aware that royal icing never lasts too long. It’s best to always make and use it fresh as the sugar soon begins to crystallize making it hard to work with. If you are, however, going back to using the icing in a few hours we’d recommend covering the icing with cling film/saran wrap directly on the icing’s surface in a bowl and then double covering over the bowl itself. If you also have some royal icing in a piping bag cling film the nozzle of your piping tip to stop the tip from getting clogged with crystallized sugar.

If you find the consistency of the royal icing too thin or thick don’t panic. It’s easy to adjust the consistency by either adding icing sugar gradually if it is too thin or adding a little bit of water if you think it is too thick.

As well as the royal icing you’ll also need a good seamless plain round piping tip (we used a 2.5 writer tip by PME for a small yet dainty pearl size and shape) and a disposable piping bag. As this is the beginner lesson we’ll save the parchment paper cornet/cone tutorial for next week and instead concentrate on the recipe and border piping method!

How to pipe Royal Icing Pearl Borders!

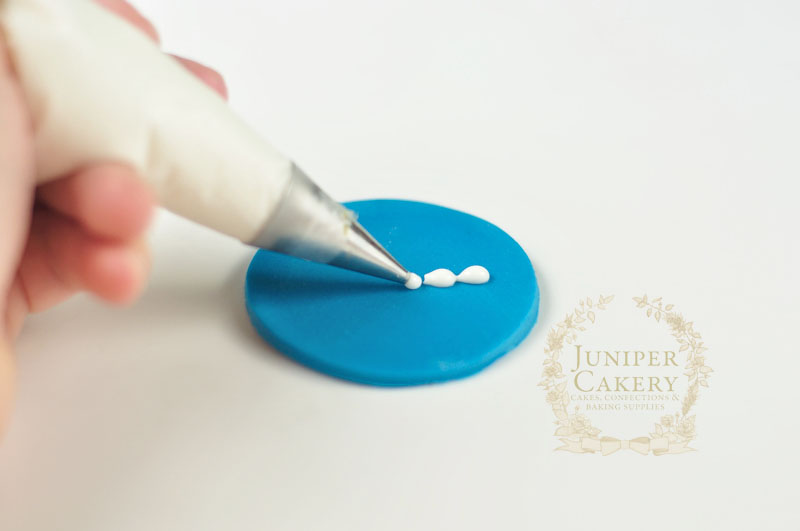
Piping pearl borders with royal icing looks relatively simple and straightforward… that is until you actually physically have to do them! Our top tip to get even, delicate and elegant piped pearl borders is to establish a good rhythm! Even before we begin piping directly onto a cake we have a quick practice on a clean surface to quickly check the consistency of the icing, establish the appropriate pressure we need to get certain sized pearls and to make sure we get a quick rhythm.

To get a nice even rhythm we repeat these three steps in our head until we’ve finished our border work; Squeeze. Stop. Swipe.

Squeeze. Stop. Swipe.

How to pipe with royal icing by Juniper Cakery

Squeeze the royal icing out at a 45 degree angle between the cake board (or stand) and cake (for cupcakes do this at a 90 degree angle). Squeeze with a nice even pressure. Don’t squeeze too hard or you’ll have royal icing flooding out everywhere. Also, don’t squeeze too fast or you’ll never have control over your border.

Pipe with royal icing tutorial by Juniper Cakery

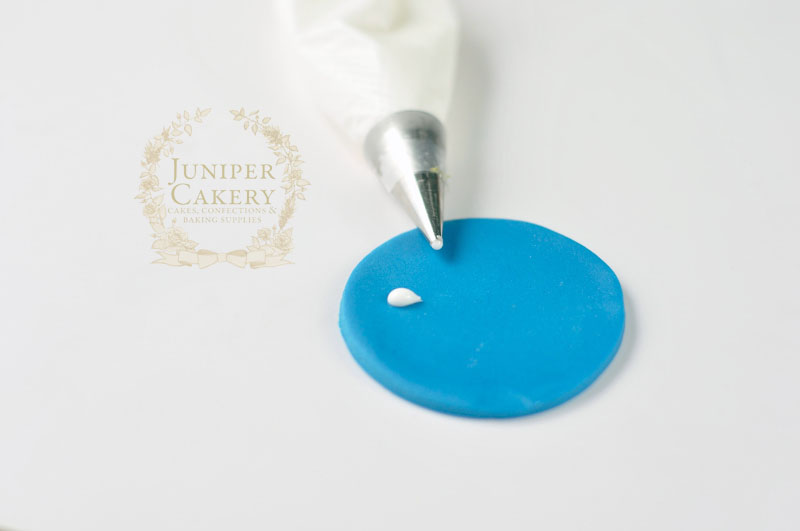
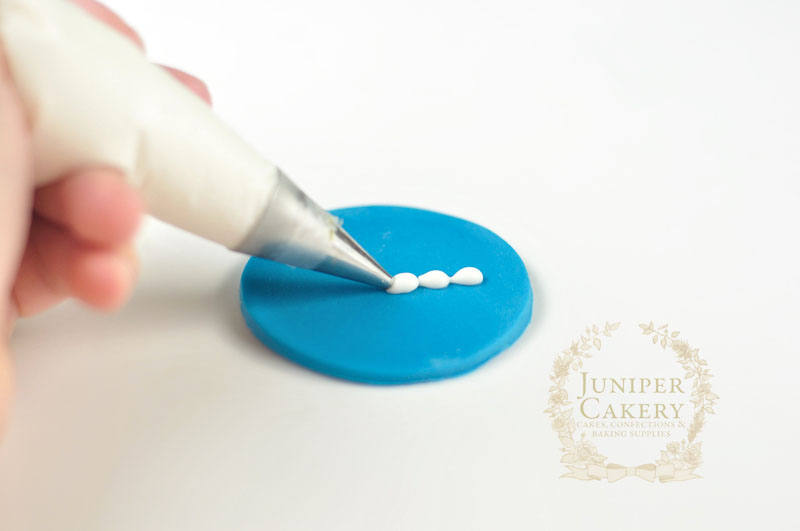
Stop when you’ve squeezed enough royal icing to create a lovely glistening pearl. A lot of beginners just keep going when attempting pearl or shell borders as they can look a little like cursive hand-writing and seem unbroken, but these borders are broken. You need to stop to establish a nice rounded pearl shape and not a continuous line of undefined royal icing squiggles!

Piping with royal icing how to by Juniper Cakery

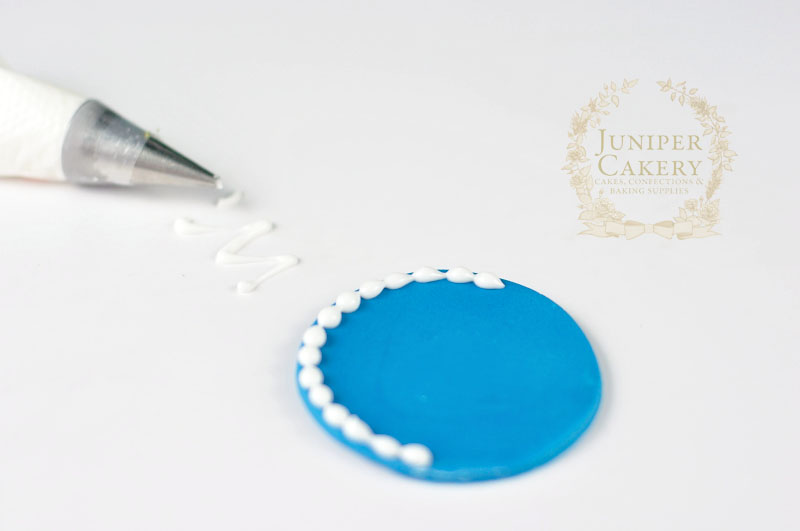
Swipe the piping bag away in the direction you wish your border to continue with no pressure pushing out more royal icing. This creates a nice tapered or tear drop tail to your pearl which not only creates a good looking border, but helps mark out where your next pearl should be placed. You should then begin your next piped pearl on the tail of your last. When you squeeze once again the royal icing will fill the gap a little, but should still create a lovely defined shape!

Intro to royal icing by Juniper Cakery

Keep practising! Working with royal icing and even piping borders with buttercream takes a little practise to get just right, but you will get there if you keep at it. The brilliant thing about the ‘squeeze. swipe. stop’ method is that it can be used to make almost any border look even and professional. We use this technique to pipe out shell borders and buttercream borders too! 

Learn how to pipe with royal icing by Juniper Cakery

Next week we’ll be showing you the next step at getting used to working with royal icing; piping polka dots plus how to create a parchment paper cornet/cone to use as a piping bag! Royal icing polka dots is a fabulous way to add texture or a pretty yet subtle detail to cakes!


Tea, Macarons & Recipe Book Birthday Cake!

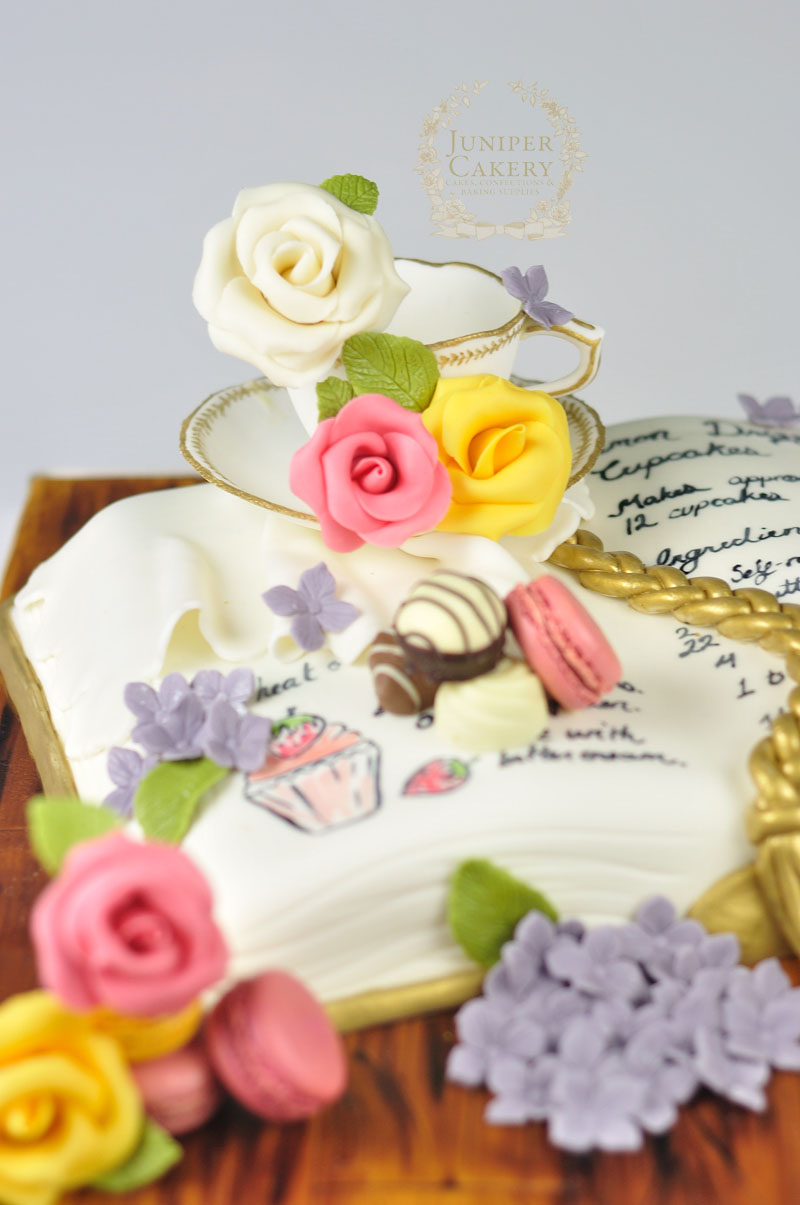
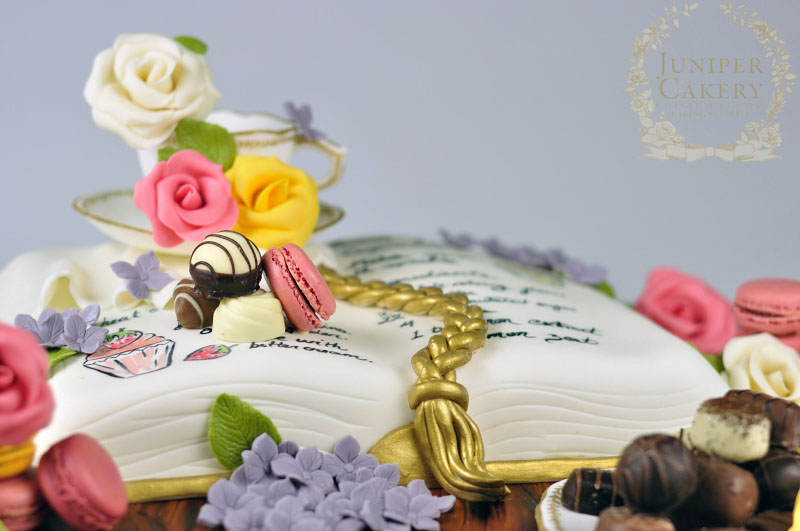
It was our head baker Carol’s birthday last Sunday and of course we created her a rather lovely cake to celebrate the occasion. After a few initial ideas we set our sights on a recipe book themed cake adorned with roses, sweet treats and a rather fancy teacup! We also had to add Carol’s favourite colour purple to the cake’s colour palette to help tie it in with Carol’s birthday decorations and gifts. We didn’t even make her bake the actual cake herself!

Tea, macarons and recipe book cake by Juniper Cakery

Pretty recipe book and tea cake  by Juniper Cakery

Lovely recipe book cake by Juniper Cakery

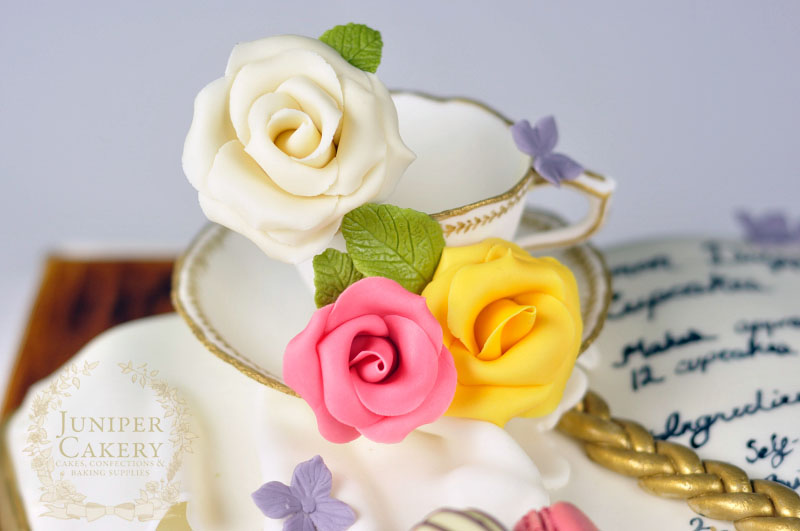
We created a lovely little edible teacup with gum paste / modelling paste hand-painted with gold lustre dust edging and detail. Alongside this we also created a matching edible side plate for all of the delicious chocolate truffles to be piled upon!

We have an old tutorial up here to help you create a sweet edible teacup and saucer of your very own!

To add the gold detail with used some gold lustre dust mixed with a little vodka and carefully painted the edges with a fine paintbrush used only for food items. This takes quite a steady hand so practice makes perfect indeed!

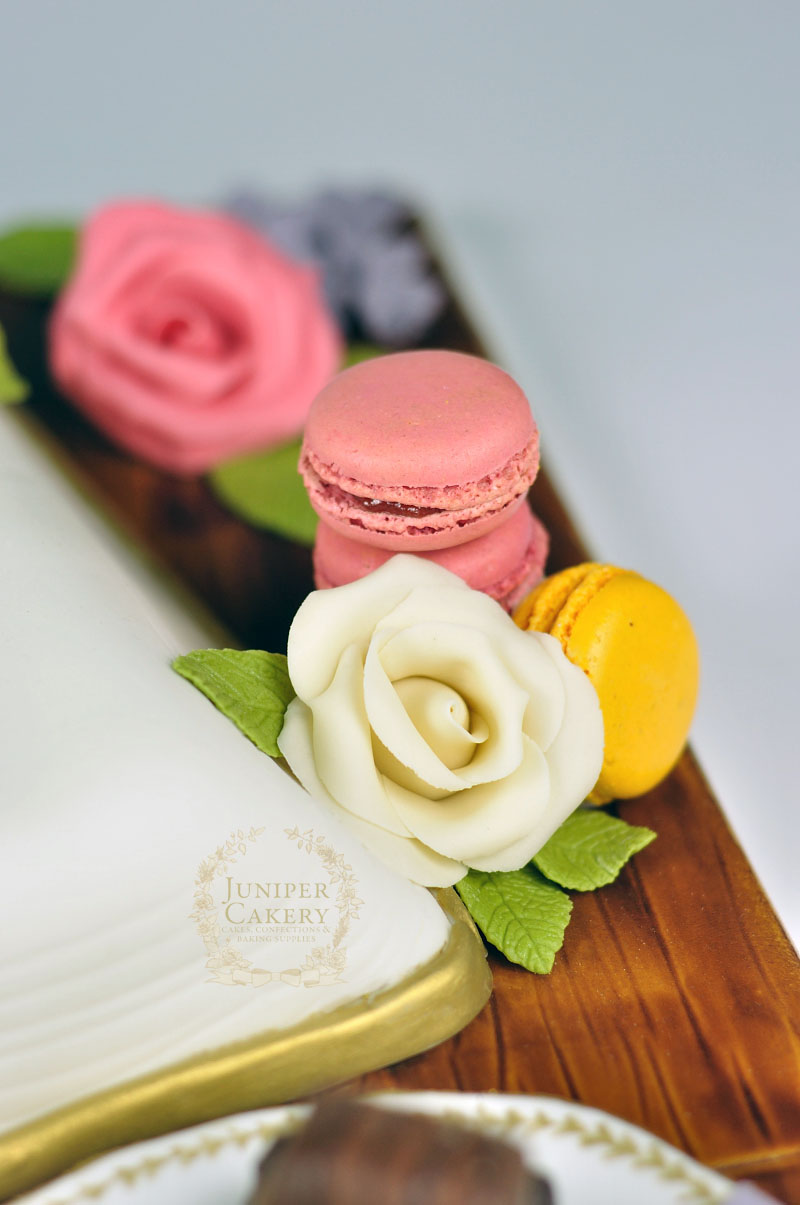
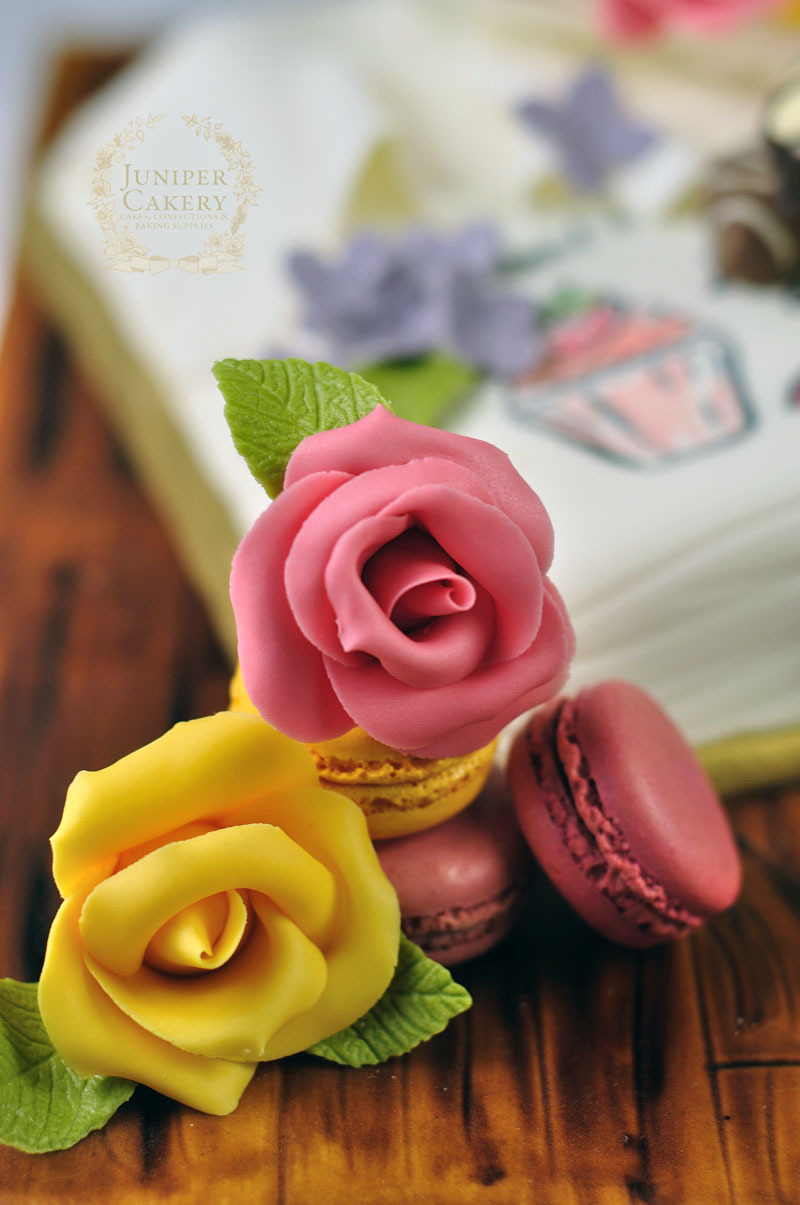
Sugar gum paste roses and macarons by Juniper Cakery

Above are our Cherry Macarons, Passion Fruit Macarons and handmade sugar gum paste roses and leaves. We toppled the macarons onto each other and then adorned them with florals to add a nice little touch of whimsy!

For the macarons we created them in sorbet influenced flavours such as Raspberry, Passion Fruit and Cherry to help establish a lovely bright, Summer colour palette; perfect for a June birthday!

Cute recipe book cake by Juniper Cakery

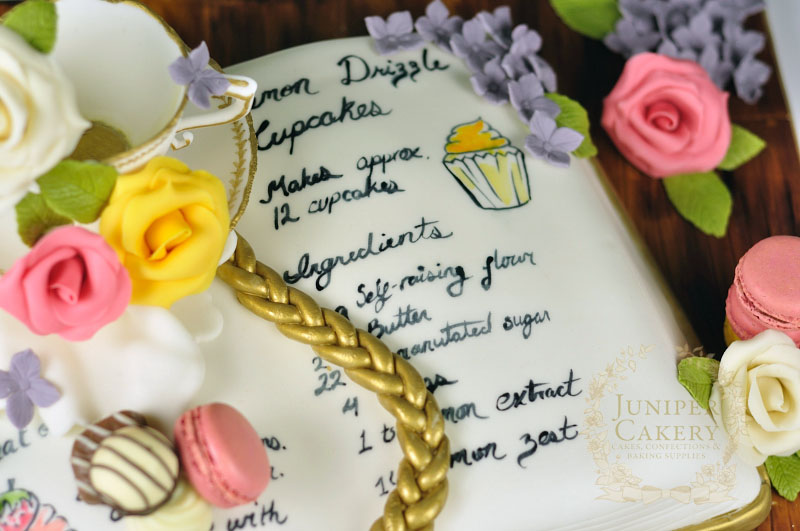
We added one of our head baker’s favourite recipes for Lemon Drizzle Cupcakes to her recipe book cake by hand-painting in the illustration and ingredients list. The left side of the book cake displays baking instructions for our fruity Strawberry Cupcakes filled with home made strawberry preserve.

We created a sweet yet cluttered scene with the placement of hand-made sugar roses, hydrangeas, chocolate truffles and edible chinaware!

Gum paste edible teacup by Juniper Cakery

Making the edible teacup took  two hours to cut, shape and paint; it then took some patience and a few days to harden and be ready to assemble and place onto of the cake. A top tip is to use melted white chocolate in a disposable piping bag to seal the joint of the teacup and affix the shaped handle to the side. White chocolate sets fast and keeps a good hold.

Recipe book cake with macarons and roses by Juniper Cakery

Here are some of our Raspberry Macarons filled with a raspberry preserve alongside a fruity Passion Fruit Macaron filled with a lemon curd whipped buttercream.

Sweet recipe book birthday cake by Juniper Cakery

Some of the extra features on this birthday cake are sugar hydrangeas, a gold painted braid bookmark, hand-painted wood stained board and a lightly ruffled napkin placed underneath the perched edible teacup.

We’re happy to say that we not only had the chance to actually devour a little bit of this cake, but that Carol seemed to be rather enthralled with her birthday cake!


×