National Cupcake Week: Banoffee Pie Cupcake Recipe!

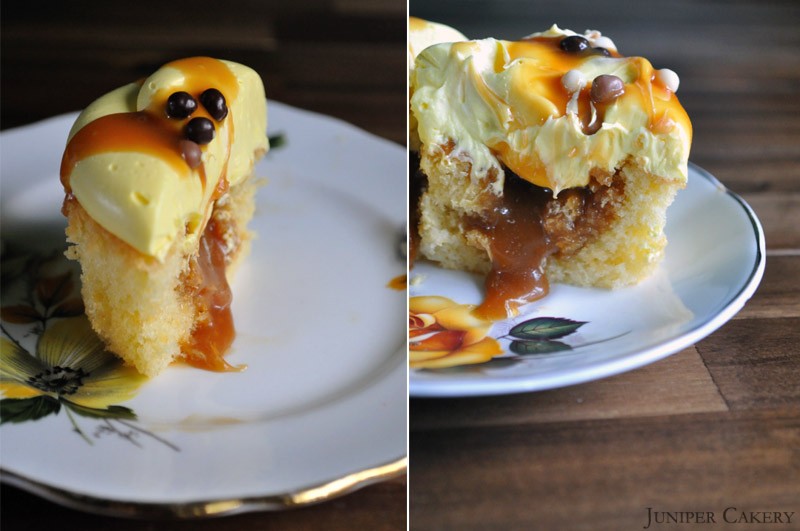
Hurrah! National Cupcake Week has arrived in the UK (though if you’re abroad feel free to join in too)! To celebrate we’ll be sharing five delicious ‘Classic British Dessert’ recipes in cupcake form. Excited? We are too. Our first super tasty cupcake for you to re-create at home pays homage to the crowd pleasing Banoffee Pie. Our cupcake version is a fluffy and light vanilla bean cupcake filled with salted caramel sauce, swirled with creamy white chocolate and banana buttercream, drizzled with more salted caramel sauce and then finished with triple chocolate crisp balls. What a perfect way to begin the week!
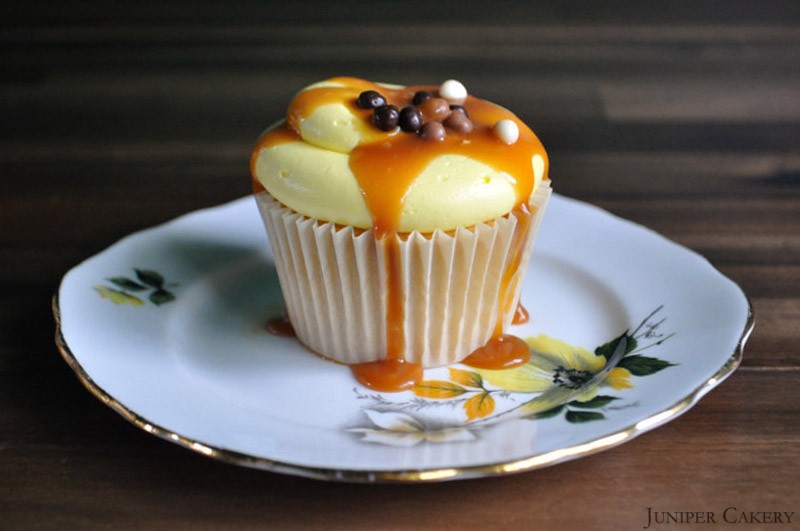
Banoffee Pie Cupcake

Basic Vanilla Cupcake Recipe (Makes 12 Cupcakes)

4 free range eggs
226g self-raising flour
226g caster sugar
226g butter
1 bourbon vanilla pod

Cream your butter in a mixer then add the caster sugar. Add in the flour along with half of the eggs for around one minute. Once half of the eggs are combined add the remaining mix along with the seeds inside your bourbon vanilla pod and mix for about 5 minutes.

Separate the batter into each cupcake case until 2/3 full and place on the top shelf of a pre-heated oven at Gas Mark 3/325F/170C. Bake for around 20/25 minutes.

Once cooled core the centre of your cupcakes using a handy cupcake corer. Now begin making your delicious salted caramel sauce!
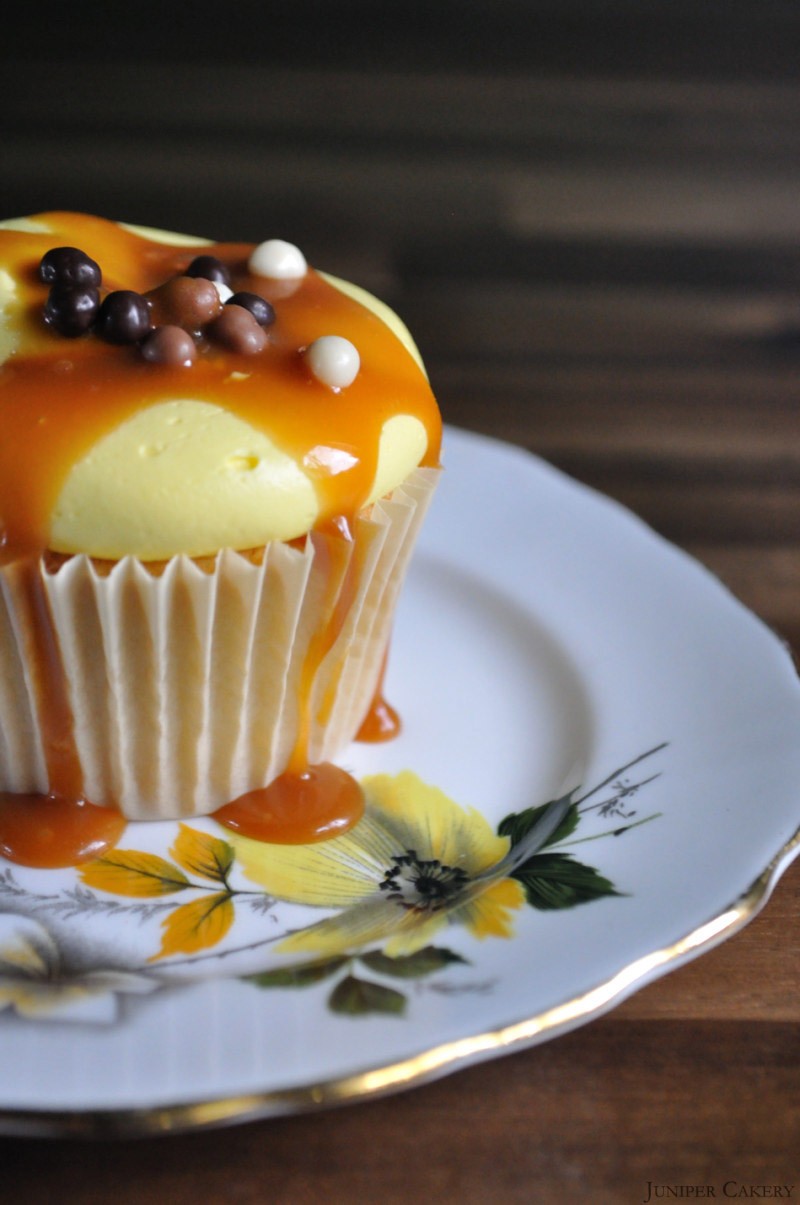
Banoffee Pie Cupcake

Salted Caramel Recipe

175g brown sugar
115ml single cream
60g butter (no low fat or margarine spread)
1 teaspoon of salt
1 teaspoon of vanilla extract

Add all your ingredients into a saucepan on medium heat. Whilst this cooks whisk your caramel mixture for up to 8 minutes until it thickens. Cook a little longer to thicken further. Finally, remove from your stove and leave to cool.

To add to your cored cupcakes simply use a teaspoon to add into the centre of your cakes! Store the rest of your salted caramel sauce in an airtight container and enjoy drizzled atop of sweets and desserts! This sauce should last for up to 4 days.

Ready to begin creating your banana buttercream?
Banoffee Pie Cupcake

Banana Buttercream Recipe

250g butter
400g icing sugar
6 - 12 drops of banana natural essence
70-100g white chocolate buttons or callets

Add half of the butter diced into pieces. Cream the butter in a mixer then gradually add icing sugar and the remaining butter (cut into cubes) until you get a smooth, creamy texture. Melt your white chocolate buttons or callets in a bowl sat in hot water. Once melted add to your buttercream and gently mix. Finally, add the banana natural essence to taste.
Banoffee Pie Cupcake

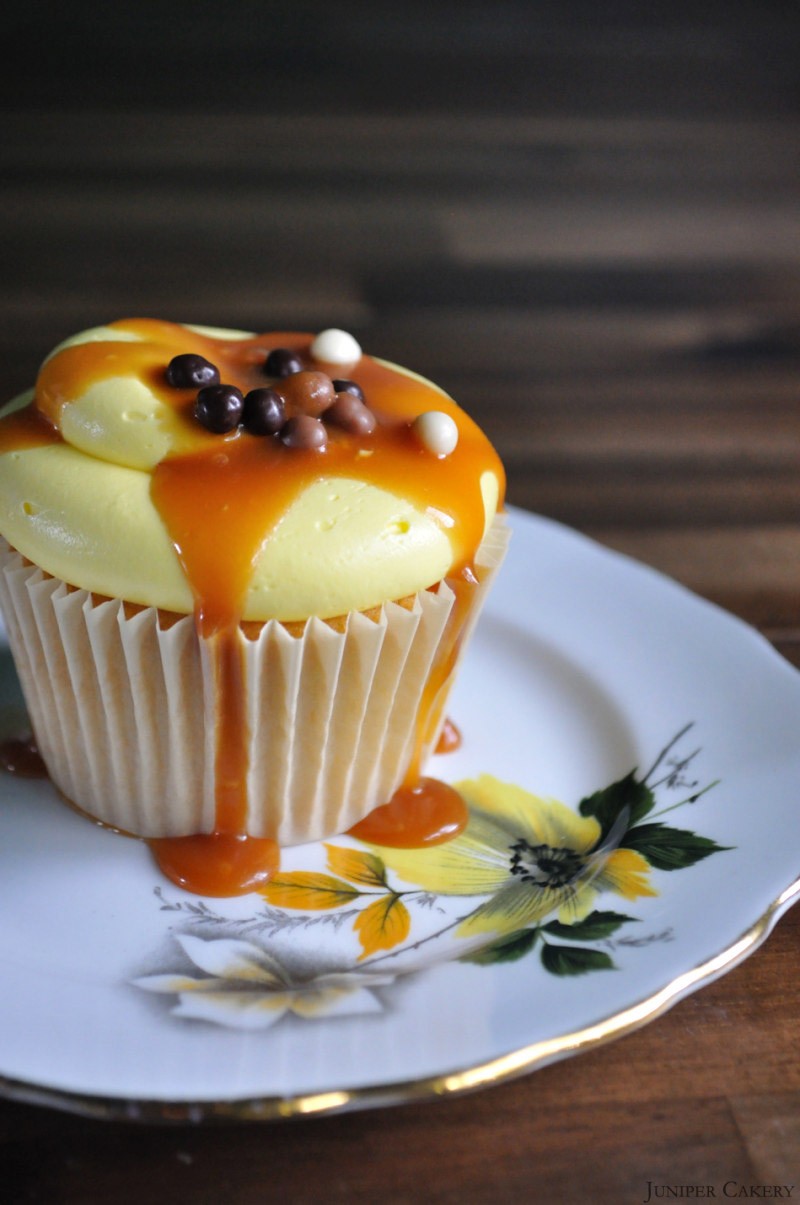
Swirl your salted caramel filled cupcakes with your silky banana buttercream, drizzle with about a teaspoon of caramel sauce and topple with sprinkles. At last, you should had a batch of banoffee inspired cupcakes ready to enjoy!


Recipe: White Chocolate Cupcakes!

Here is a cupcake recipe for all the white chocolate lovers out there! This cupcake is a lovely creamy, soft and smooth white chocolate crammed delight. It’s perfect for the chilliness of the coming months, but if you want something with a bit of bite why not throw in some lemon extract into the batter with a handful of blueberries, raspberries or blackberries. Either way this is a wonderful cupcake for a well deserved treat!

Recipe: Triple White Chocolate Cupcakes

Recipe: Triple White Chocolate Cupcakes

Vanilla and White Chocolate cupcakes (makes approximately 12)

226g self raising flour
226g butter
226g caster sugar
4 eggs
1 Bourbon Vanilla Pod
2 handfuls of white chocolate chips or buttons

Step one: Preheat your oven to Gas Mark 3/325F/170C

Step two: Cream the butter with sugar and once well mixed add in the seeds from the inside of your vanilla pod, flour and then the eggs.

Step three: Set out twelve cupcake cases in your pan and fill each case 2/3 full. Tumble some white chocolate chips/buttons into your batter.

Step four: Bake from around 12-18 minutes or until a golden brown on top and leave to cool on a counter.

Recipe: Triple White Chocolate Cupcakes

White Chocolate Buttercream

We make our buttercream using our own intuition. We’ve tried countless recipes; all of which failed to pass our test (and stability) tests. It’s best that you begin to develop and ‘eye’, ‘feel’ and ‘taste’ so that you know when your frosting is perfect for you. For starters though, the recipe below is a rough guide…

250g butter
250-350g icing sugar
100g of white chocolate chips/buttons
1 Bourbon Vanilla Pod
Extra white chocolate chips/buttons to decorate
855 piping tip/nozzle
Piping bags

Step one: Cut your butter into small cubes and cream your butter until soft. Gradually add icing sugar until a good consistency and add the seeds from a vanilla pod..

Step two: Melt 100g of white chocolate buttons and once partially cooled add to your buttercream. Mix well. Add a little extra icing sugar if needed.

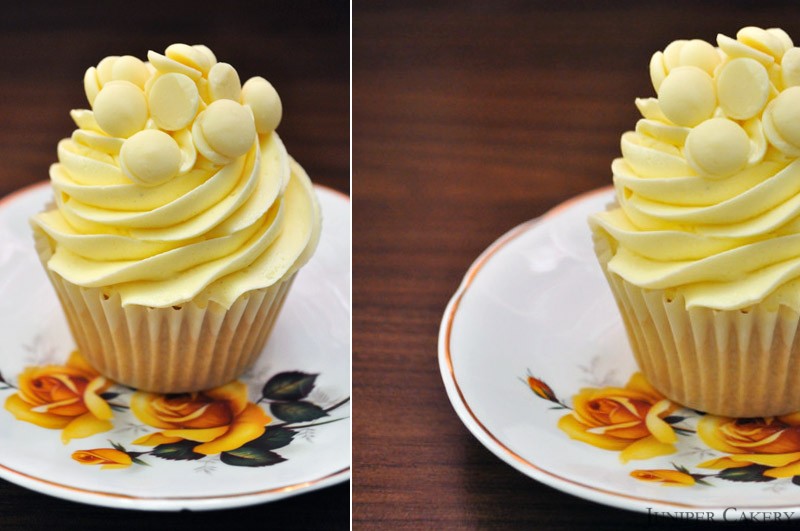
Step three: Fill a piping bag fitted with an 855 piping tip/nozzle (this tip/nozzle creates lovely ruffled buttercream) with your white chocolate buttercream.

Step four: Now you can pipe lots of generous and tasty swirls of buttercream on top of your cupcakes once they have cooled down and topple some tasty white chocolate chips/buttons on top!

Recipe: Triple White Chocolate Cupcakes


Tutorial Tuesday: How to Make an Edible Fondant Coffee Cup!

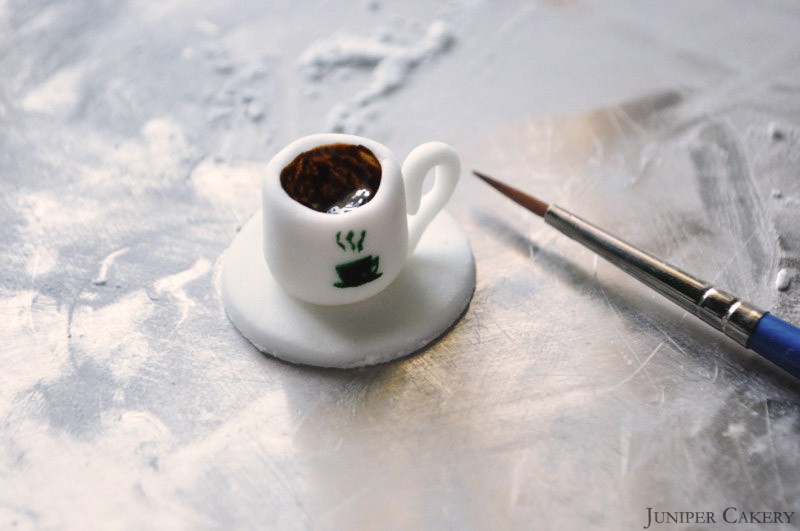
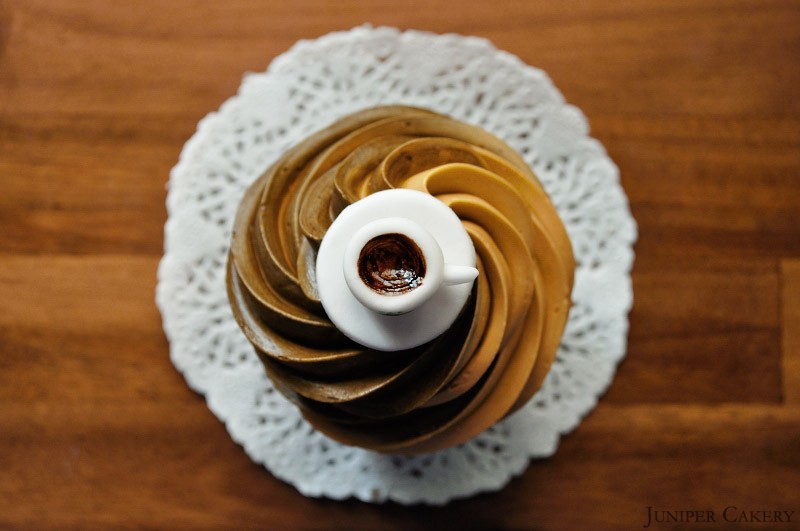
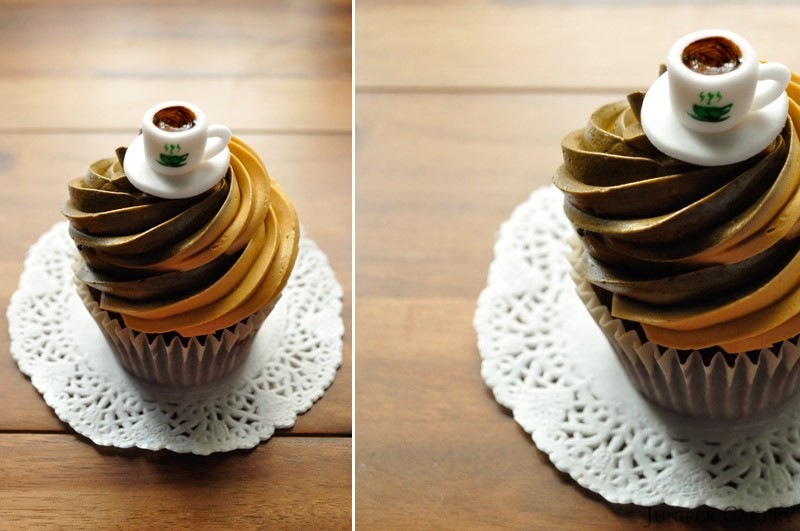
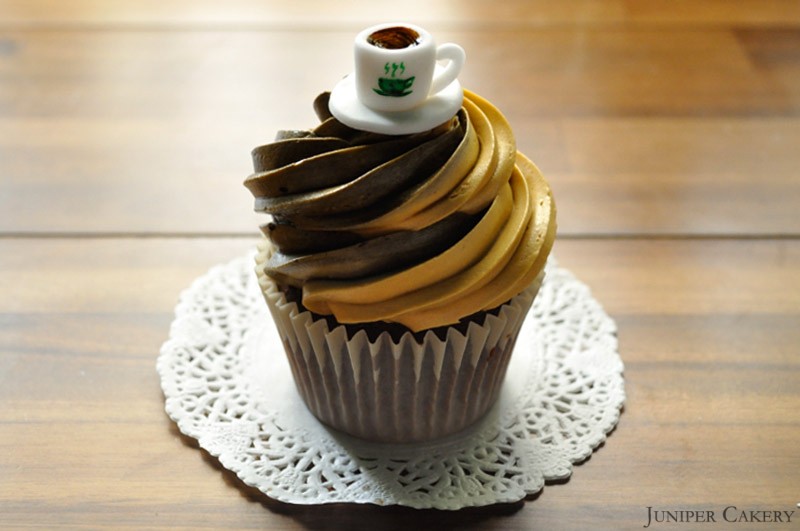
Since we created our Caramel Mochaccino cupcake complete with a tiny edible coffee cup perched on top we’ve been inundated with messages and emails asking how me made this. So here is our tutorial on how to re-create your own fondant cup of coffee. It’s obviously perfect to top cupcakes with, but also would add to an afternoon tea or dinner ‘scene’ on a cake. Another great thing is that it is super quick and easy to make!

TUTORIALcoffeecup

What you will need…

Sugarpaste/fondant
Ball tool
Piping tip
Paint brush
Green gel food colour
Brown gel food colour

DSC_0007_208

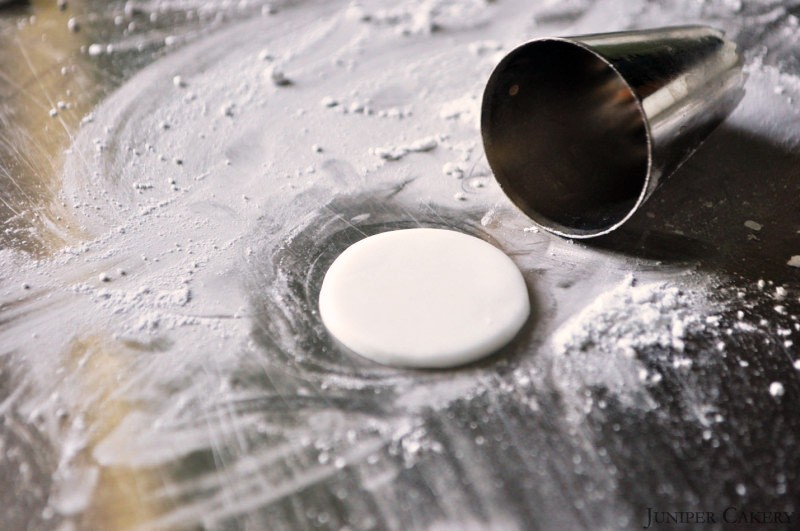
Step one: Roll out your sugarpaste / fondant on a floured surface and using the large end of a piping tube to cut out a circle. This will be your ‘saucer’.

plate

Step two: Using your ball tool indent the centre of your saucer slightly.

DSC_0017_213

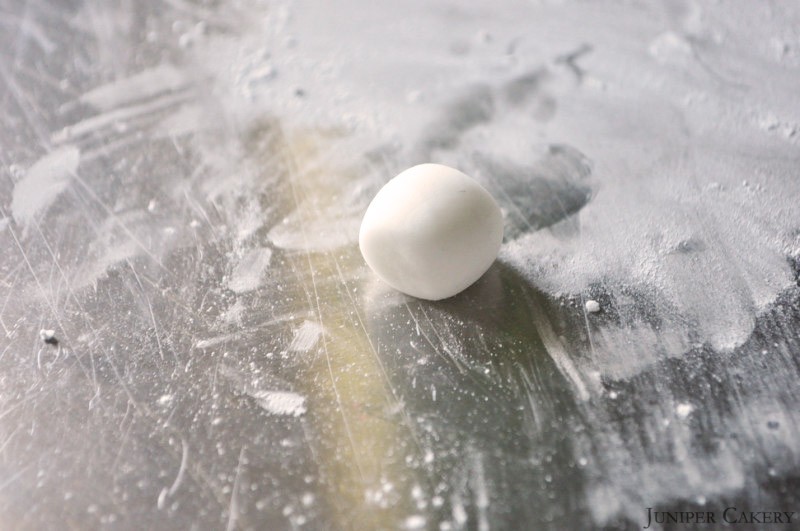
Step three: To make your actual coffee cup create a marshmallow shape around 1.5cm heigh. Make sure that the small ends are fairly flat. Set aside.

DSC_0010_209

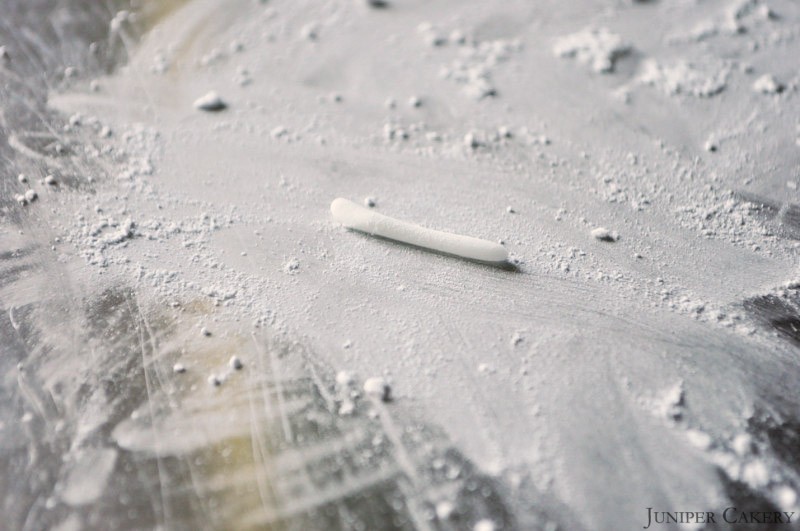
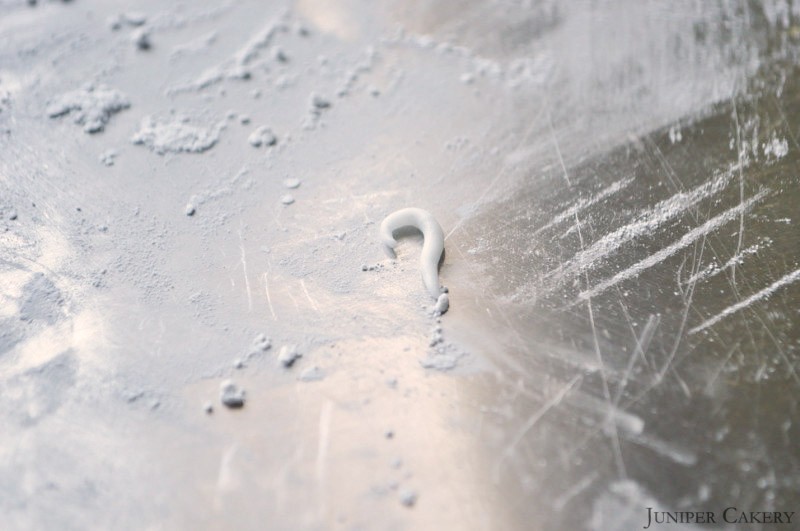
Step four: To make the handle for your cup roll out a little bit of sugarpaste / fondant into a thin sausage shape.

DSC_0024_214

Step five: Now shape this into a nice sized curve. Set aside.

DSC_0022_211

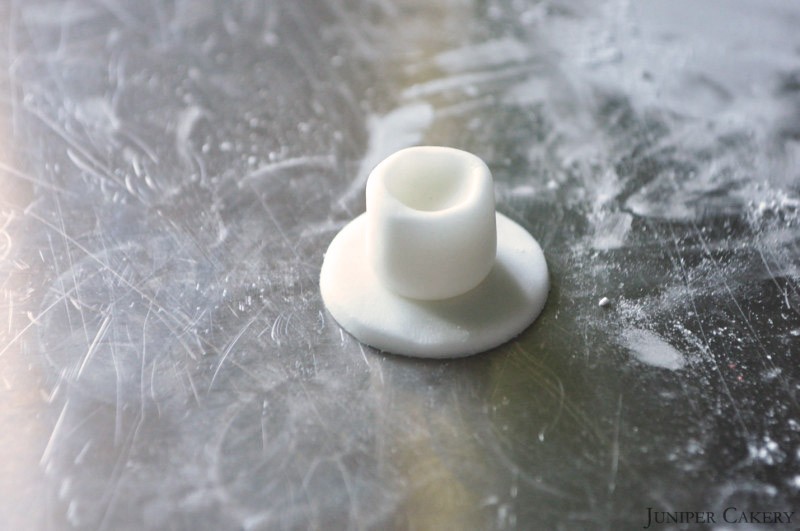
Step six: Indent your coffee up at the top with your ball tool.

DSC_0026_217

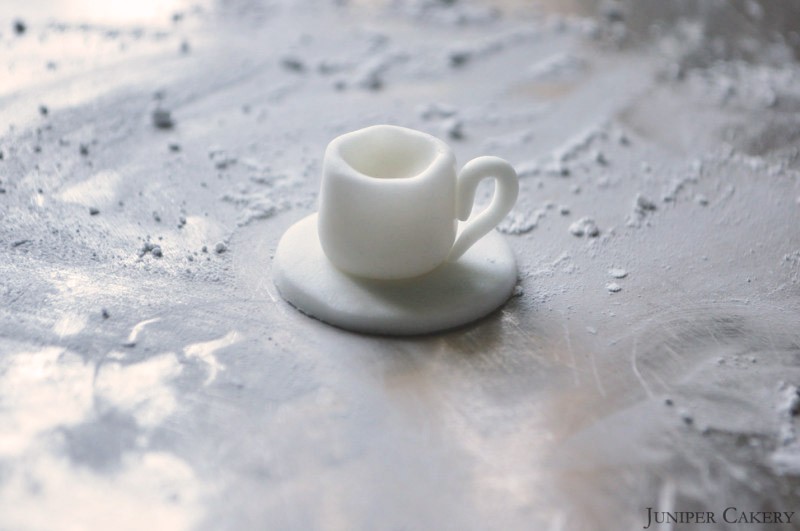
Step seven: Dab some water onto the centre of your saucer and place your cup on top to fix it into place. Paint a little water down one side of your cup and carefully attach your handle.

DSC_0028_216

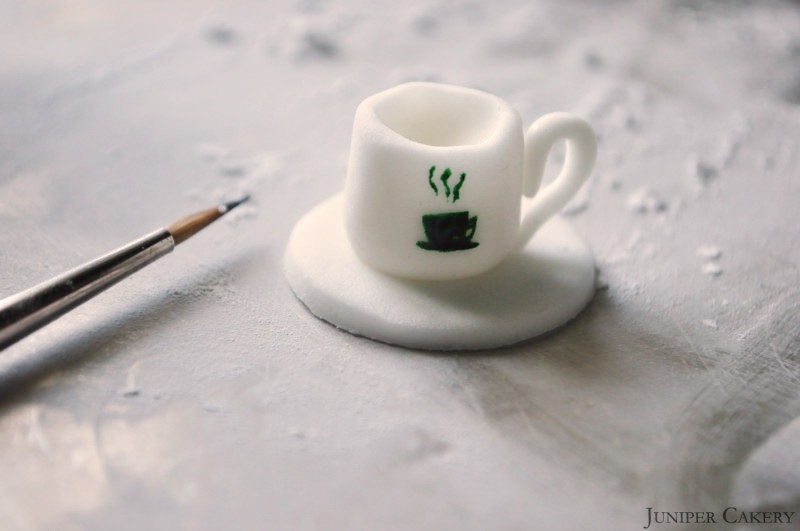
Step eight: Add some extra detail by painting a ‘logo’ onto the front of the coffee cup with a paintbrush and some food gel colour paste.

DSC_0029_215

Step nine: ‘Pour’ in some coffee by painting the inside of your cup with brown food gel paste!

Caramel Mochaccino

You should now be left a really fun and playful little coffee cup to nestle atop of coffee flavoured cupcakes! For teacups and tea themed cupcakes make your cups a little more slim and add some traditional pattern like ‘swags’ or polka dots. Also, try painting the edges with edible gold paint and use a weaker brown colour to paint in the actual beverage.

Caramel Mochaccino

Caramel Mochaccino


Recipe: Raspberry and Bergamot Cupcakes!

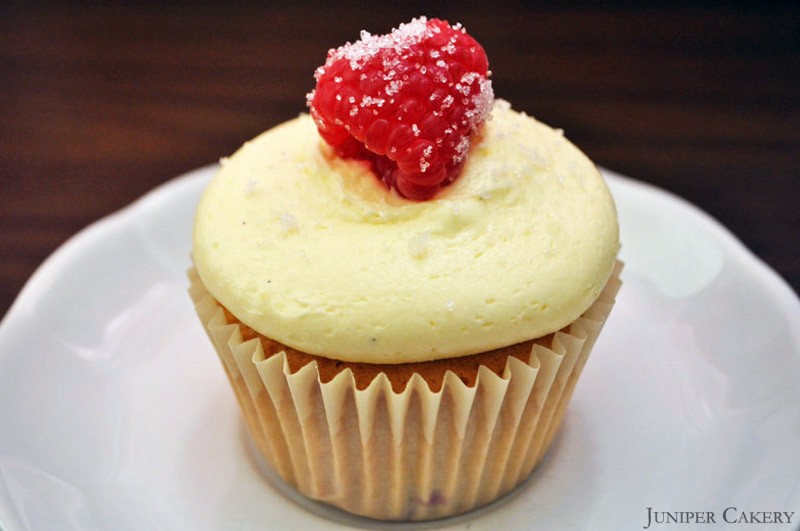
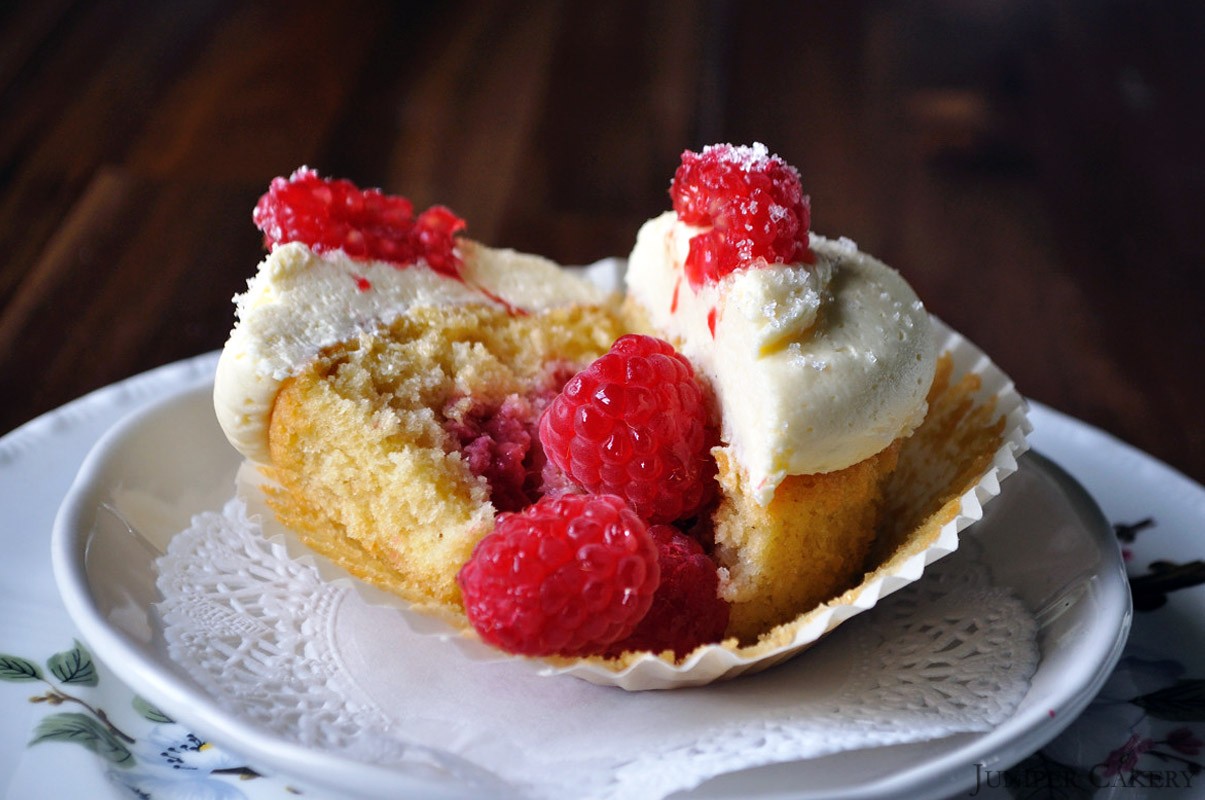
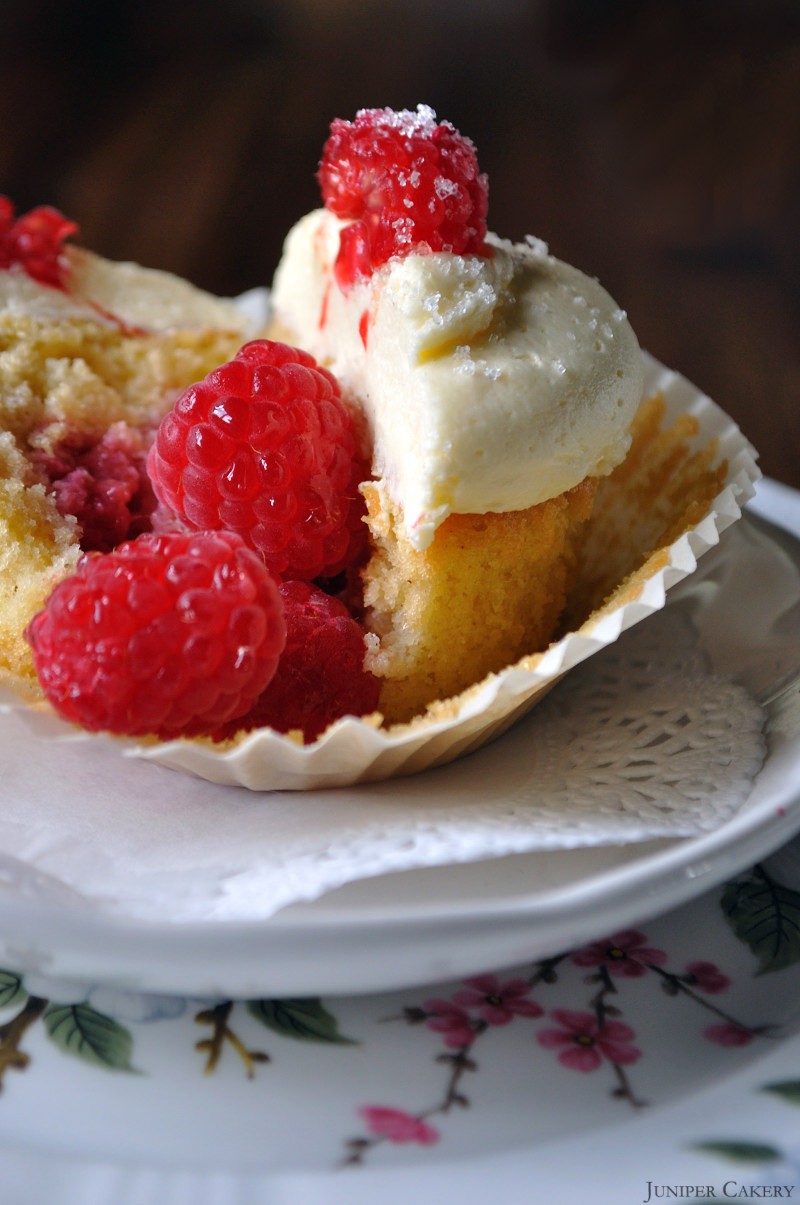
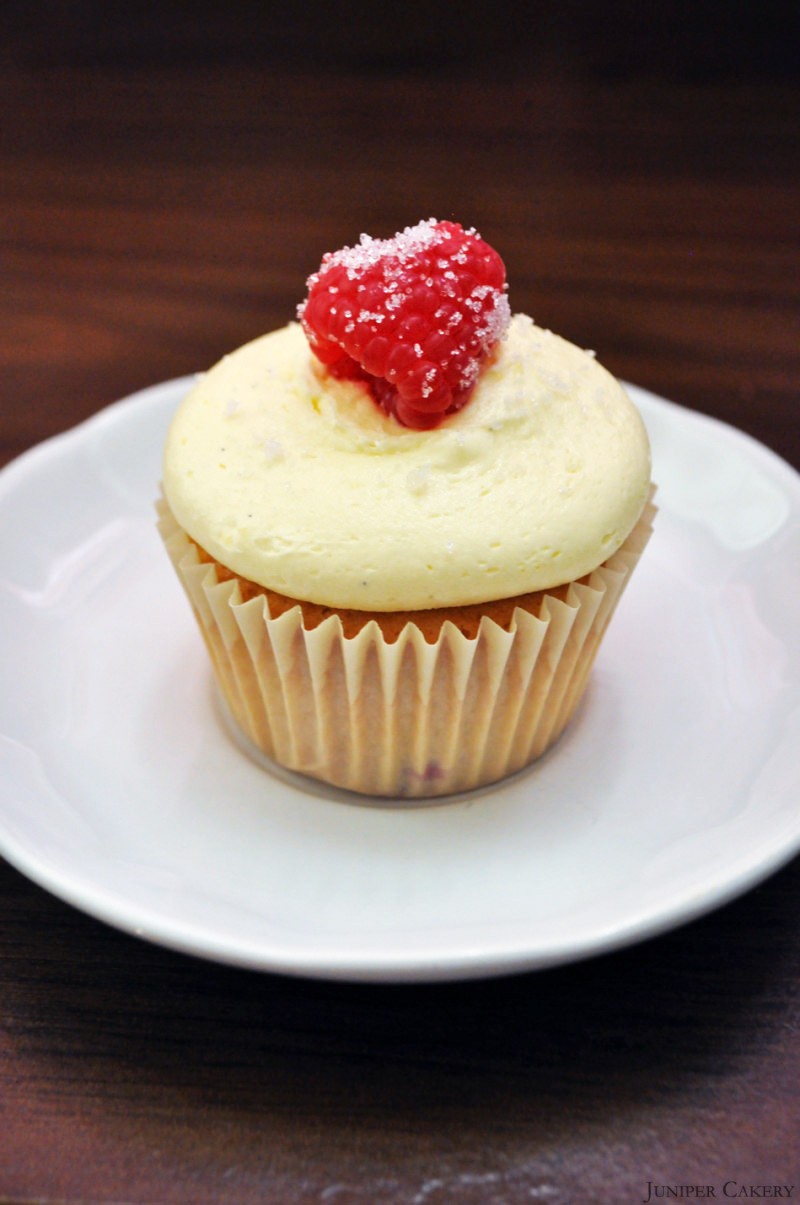
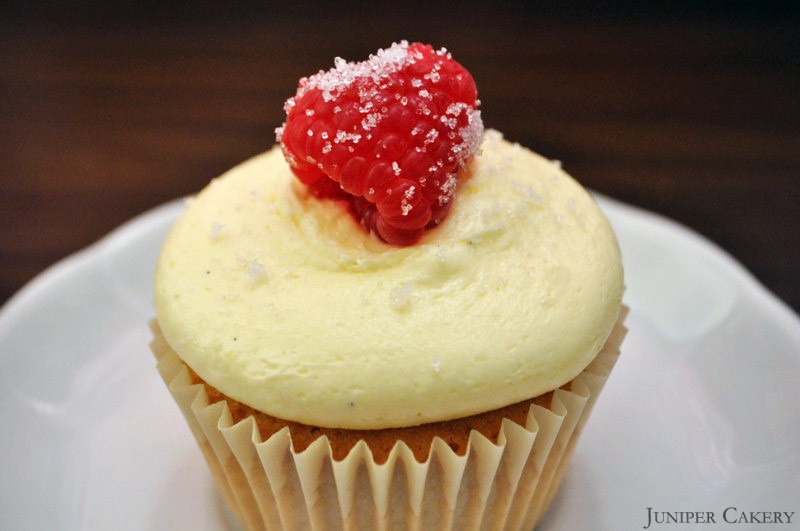
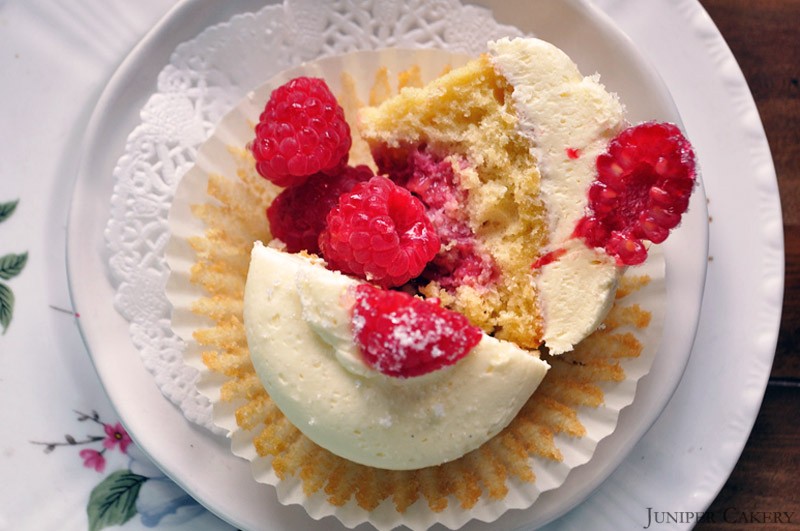
Bergamot has a wonderfully soft floral and citrus taste which pairs perfectly with tart flavours. For this cupcake recipe we teamed it with tangy raspberries baked inside. Another great thing about baking with bergamot extract is the smell; be prepared for a lovely earl grey tea scent travelling through your home when you have these cupcakes in the oven! Why not follow our recipe below for a batch of cupcakes perfect for an afternoon treat.

Recipe: Raspberry, Bergamot and Vanilla Cupcakes

Recipe: Raspberry and Bergamot Cupcakes

Recipe: Raspberry, Bergamot and Vanilla Cupcakes

Recipe: Raspberry, Bergamot and Vanilla Cupcakes

Makes approximately 12 cupcakes

Raspberry cupcakes recipe

226g self raising flour
226g butter
226g caster sugar
4 eggs
3 raspberries per cupcake

Step one: Preheat your oven to Gas Mark 3/325F/170C

Step two: Cream the butter with sugar and once well mixed add in the flour and then the eggs.

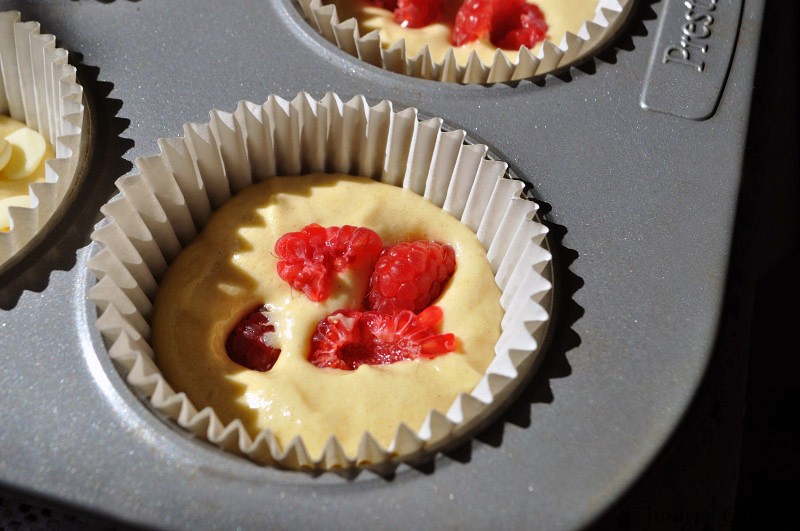
Step three: Set out twelve cupcake cases in your pan and fill each case 2/3 full. Push your raspberries into each cupcake case full of batter.

Step four: Bake from around 12-18 minutes or until a golden brown on top and leave to cool on a counter.

Recipe: Raspberry, Bergamot and Vanilla Cupcakes

Bergamot Buttercream recipe

We make our buttercream using our own intuition. We’ve tried countless recipes; all of which failed to pass our taste and stability tests. It’s best that you begin to develop an ‘eye’, ‘feel’ and ‘taste’ so that you know when your frosting is perfect for you. For starters though, the recipe below is a rough guide…

250g butter
250-350g icing sugar
1 teaspoon Bergamot Extract
Raspberries to decorate (we dampened ours and rolled them in caster sugar)
808 piping tip/nozzle
Piping bags

Step one: Cut your butter into small cubes and cream your butter until soft. Gradually add icing sugar until a good consistency.

Step two: Add the 1 teaspoon Bergamot Extract and mix well.

Step three: Fit a piping bag with 808 piping tip/nozzle and fill with your vanilla buttercream.

Step four: Now you can pipe lots of generous and tasty swirls of buttercream on top of your cupcakes once they have cooled down and finish with a lovely fresh raspberry!

Recipe: Raspberry, Bergamot and Vanilla Cupcakes

Recipe: Raspberry and Bergamot Cupcakes


Recipe: Honey Whiskey Cupcakes!

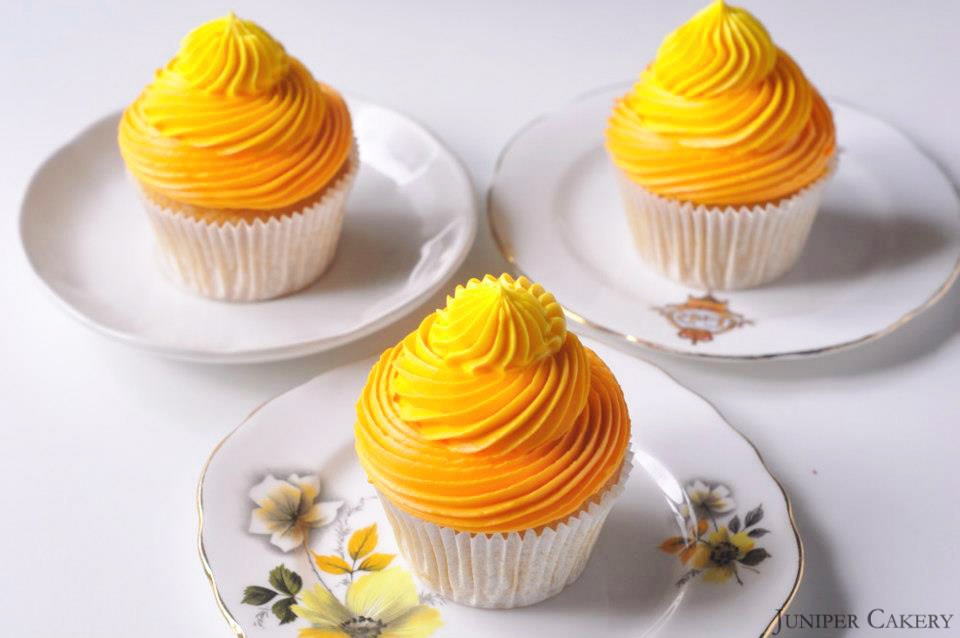
These honey whiskey cupcakes are the perfect boozy treat exclusively for grown ups! They’re a little more rustic than the trend for cocktail infused cupcakes and the rich, deep flavour of the honey adds a great sweetness to the buttercream. By adding bourbon vanilla pod seeds in your buttercream with a splash (or several) of Tennessee honey whiskey you’ll get a lovely creamy taste too. Follow our recipe below for some indulgent treats!

Honey Whiskey Cupcakes

Honey Whiskey Cupcakes

Vanilla Cupcake Recipe (makes approximately 12 cupcakes)

226g self-raising flour
226g butter
226g caster sugar
1 Bourbon vanilla pod
4 eggs
Cupcake cases

Step one: Preheat your oven to Gas Mark 3/325F/170C

Step two: Cream the butter with the sugar and once well mixed add the eggs then gradually add the flour and seeds from your vanilla pod.

Step three: Set out your cupcake cases in your pan and fill each case 2/3 full.

Step four: Bake from around 12-18 minutes and leave to cool on a counter. TIP: To stop the tops of cakes and cupcakes from hardening when cooling place slices of bread on top of them as they cool.

Tennessee Honey Whiskey Buttercream

250g butter
300g – 400g icing sugar
50-75ml of Tennessee Honey Whiskey by Jack Daniels
Honey Gold Gel Food Colour Paste by Sugarflair
Piping bags
808 piping tip

Step one: Cut your butter into small cubes and cream your butter until soft. Gradually add icing sugar until a good consistency.

Step two: Add the honey whiskey to taste. Colour with a little Honey Gold Gel Food Colour Paste by Sugarflair.

Step three: Fit a piping bag with a 808 piping tip (to get a lovely smooth-look buttercream like our cupcake). Fill your piping bag with your buttercream.

Step four: Pipe some generous swirls atop your cupcakes. We pipe our cupcakes from the centre and around whilst cutting in on top.

Honey Whiskey Cupcakes


Tutorial Tuesday: How to Make Quick and Simple Fondant Roses!

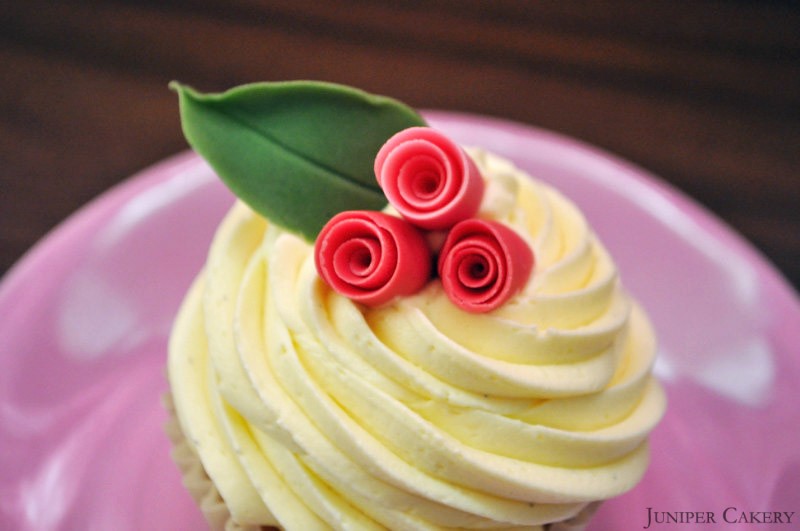
Sometimes you don’t need multi-petaled flowerpaste roses, delicate ruffled peonies or realistic hydrangeas to top floral themed cupcakes and cakes with. If you’re aiming for simple designs and convenience then these super quick and easy fondant roses will be perfect for creating flower adorned treats! They’re also small and sweet (no pun intended) enough to top cookies, mini cakes, whoopie pies and macarons with!

How to make quick and simple fondant roses

How to make quick and simple fondant roses

How to make quick and simple fondant roses

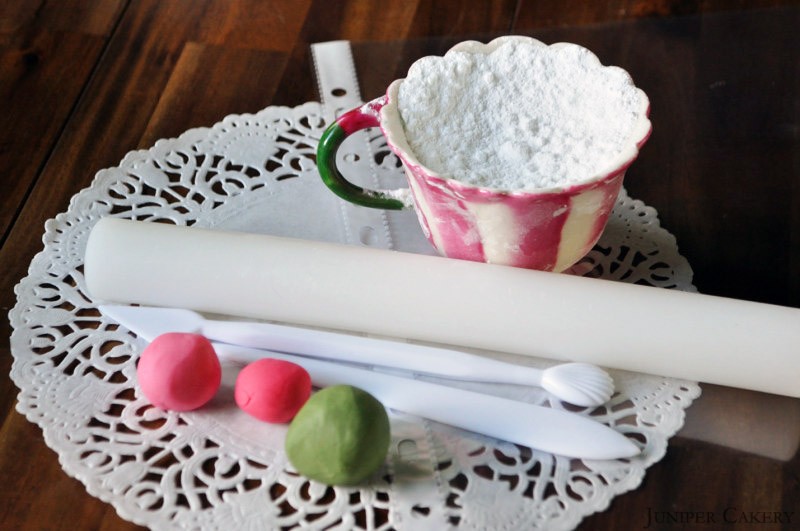
What you will need…

Green sugarpaste / fondant (we used Juniper Green by Wilton to colour white/ivory sugarpaste)
Whatever colour you wish for the roses
Fondant rolling pin
Blade modelling tool
Veiner modelling tool
Icing sugar
A clear filing pocket
Scissors

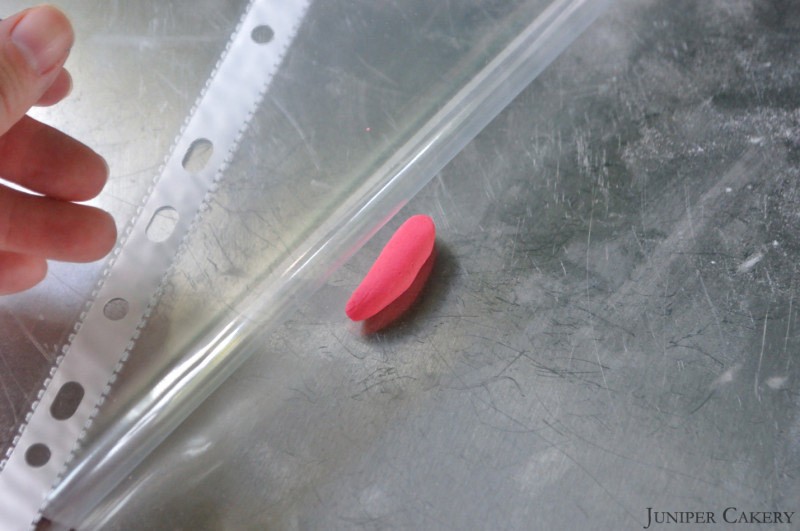
How to make quick and simple fondant rosesStep one: Cut open your filing pocket so that you can flip it open and shut easily. Using these pockets is a great tip we’ve picked up for flower making. They enable you to create thinner and smoother petal edges. Your petals are also least likely to stick to the clear material!
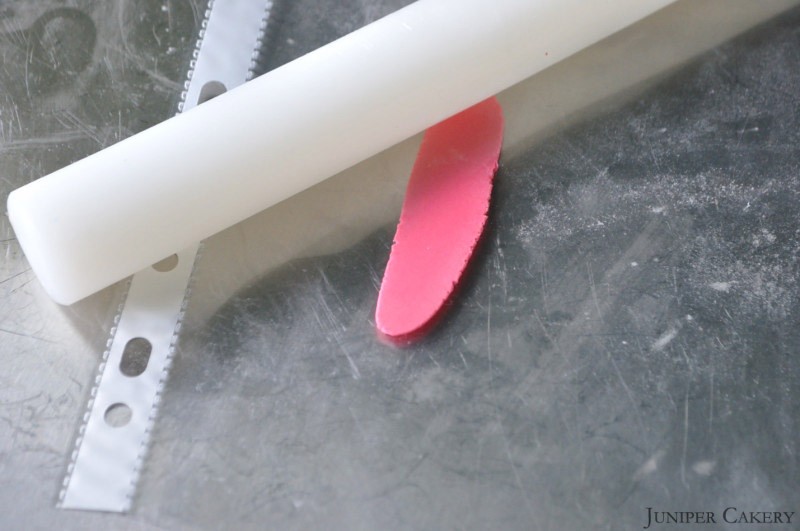
Step two: Roll and shape a little sugarpaste / fondant into a ‘slug’ shape. Place this inside your clear filing pocket.

How to make quick and simple fondant roses

Step three: With your sugarpaste / fondant inside your pocket use a fondant rolling pin to roll it out to around 2mm.

How to make quick and simple fondant roses

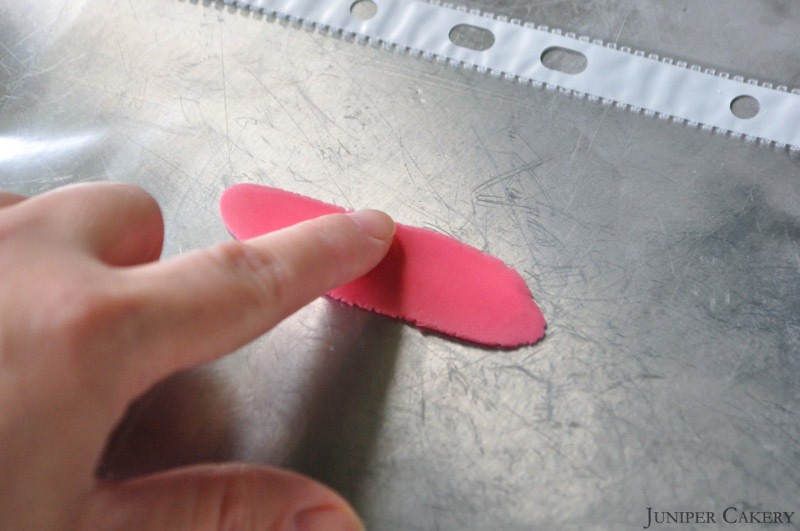
Step four: With your sugarpaste / fondant still inside the pocket press and rub along the long edges to get lovely smooth and thin edges.

How to make quick and simple fondant roses

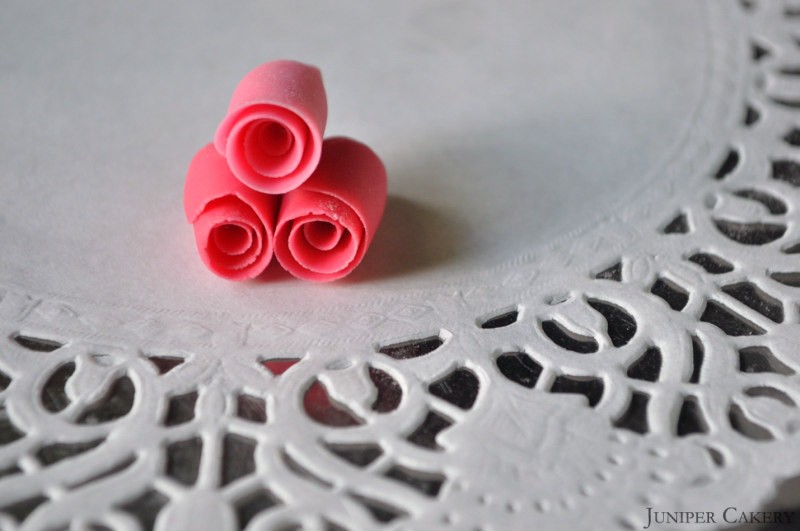
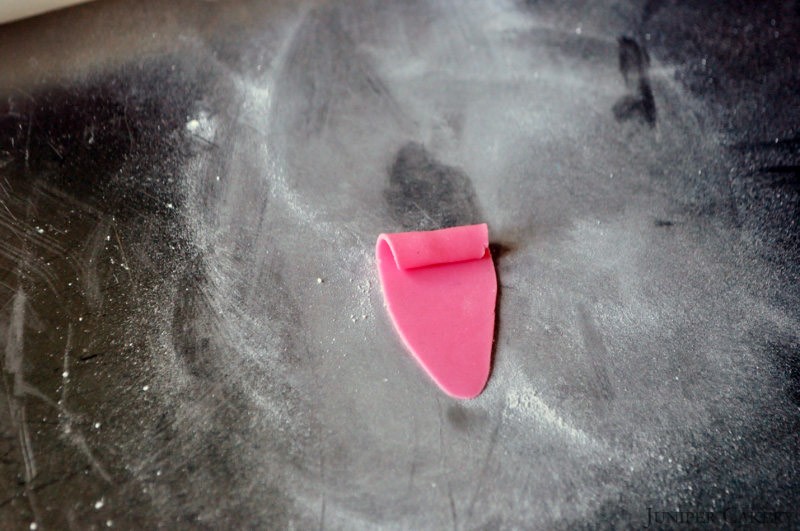
Step five: Take your piece out from the pocket and lay on an icing sugar dusted surface. Gently begin to roll your sugarpaste / fondant. Pick which end you prefer as your better petal edge and pinch the end you don’t want to show. Your rose should taper slightly to the end.

How to make quick and simple fondant roses

How to make quick and simple fondant roses

Step six: To make your leaf shape a small amount into a rough diamond shape.

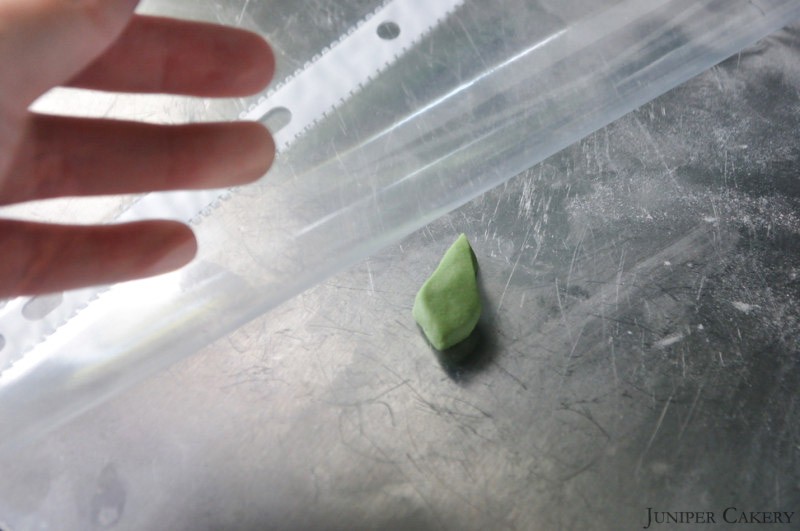
Step seven: Place this inside your clear filing pocket.

How to make quick and simple fondant roses

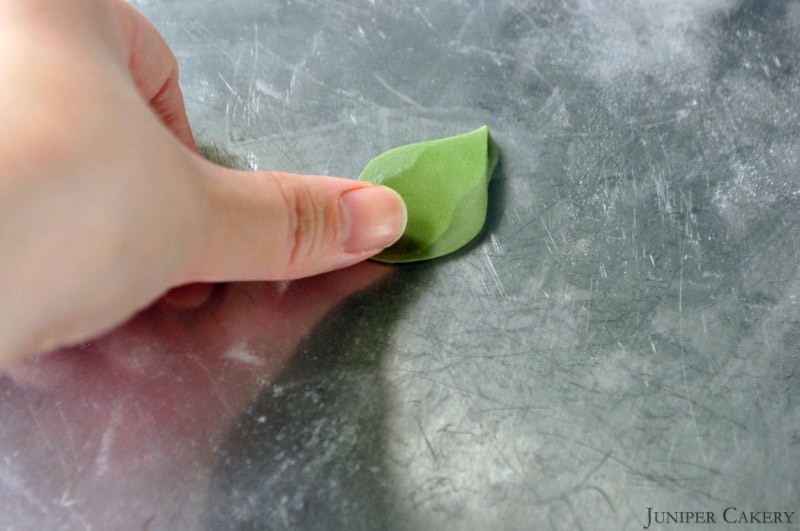
Step eight: Use your finger or thumb to press out and smooth down the edges of your leaf.

How to make quick and simple fondant roses

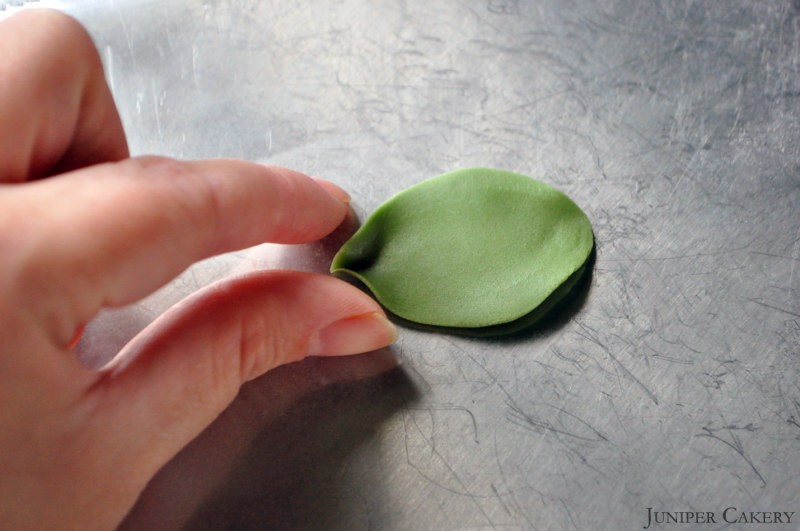
Step nine: Remove your leaf and set on a lightly icing sugar dusted surface. Shape the tip of your leaf by pinching the end with your fingers.

How to make quick and simple fondant roses

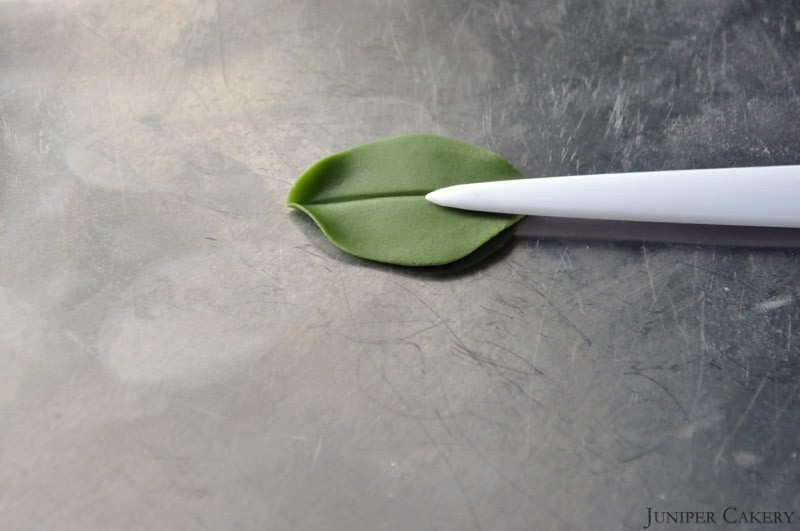
Step ten: Lightly scour a vein to your leaf with a veining tool.

How to make quick and simple fondant roses

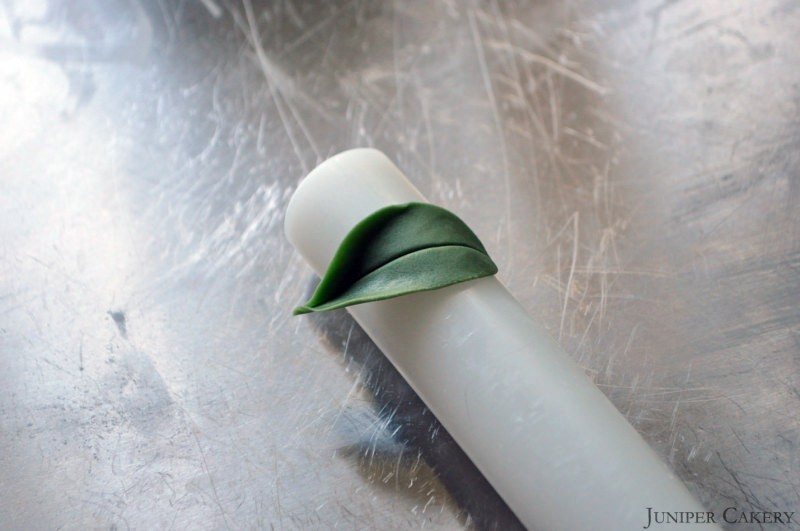
Step eleven: Leave your leaf to dry on a curved surface for a more flowing look.

Now you should have a lovely simple rose and leaf to adorn your baked treats with!

How to make quick and simple fondant roses


Recipe: Fizzy Pink Lemonade Cupcake!

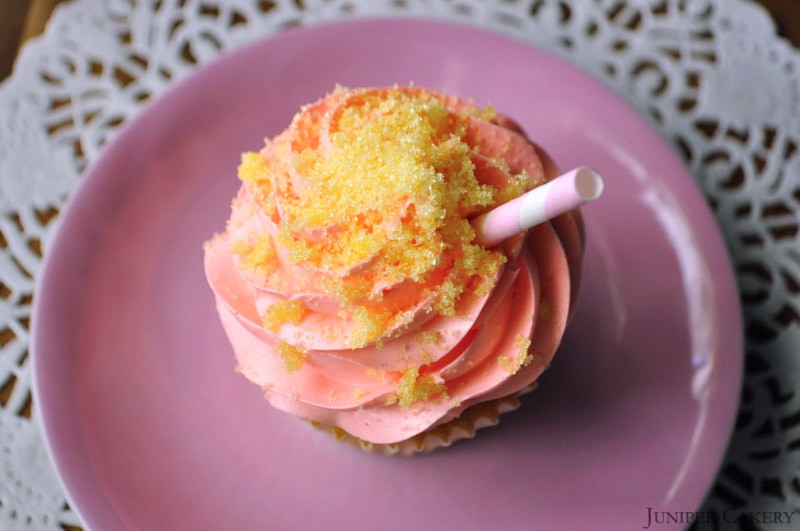
Summer is nearly over, so why not enjoy what is left of the sunny months with our recipe for Fizzy Pink Lemonade cupcakes! These will be a definite hit with both kids and grown ups at parties and barbecues. The soft lemon cake paired with the tangy lemon and pink grapefruit buttercream is fruity, sweet, refreshing and a wonderful summer inspired treat!

Pink Lemonade Cupcakes

Pink Lemonade Cupcakes

Basic Lemon Cupcake Recipe (makes approximately 12 cupcakes)

226g self-raising flour
226g butter
226g caster sugar
6-12 drops Lemon Extract
4 eggs
Cupcake cases

Step one: Preheat your oven to Gas Mark 3/325F/170C

Step two: Cream the butter with sugar and once well mixed add in lemon extract, flour and then the eggs.

Step three: Set out your cupcake cases in your pan and fill each case 2/3 full.

Step four: Bake from around 12-18 minutes or until a golden brown on top and leave to cool on a counter. TIP: To stop the tops of cakes and cupcakes from hardening when cooling place slices of bread on top of them as they cool.

Pink Lemonade Buttercream

250g butter
250g – 350g icing sugar
6-12 drops of Lemon Extract
6-12 Pink Grapefuit Essence
Pink Food Gel Paste by Squires Kitchen
Piping bags
858 piping tip
Lemon Sherbet Crystals
Retro Paper Straw

Step one: Cut your butter into small cubes and cream your butter until soft. Gradually add icing sugar until a good consistency.

Step two: Add lemon extract and your pink grapefuit essence to taste. Colour with pink food gel. Mix in some tangy lemon sherbet crystals for a hit of fizz.

Step three: Fit a piping bag with a 858 piping tip (to get a lovely traditional buttercream ruffle like our cupcake). Fill your piping bag with your buttercream.

Step four: Pipe some generous swirls atop your cupcakes, gently top with lemon sherbet crystals and add press half a retro paper straw into your buttercream!

Pink Lemonade Cupcakes


Our Lemon and Passion Fruit Cupcakes in Craftseller Magazine

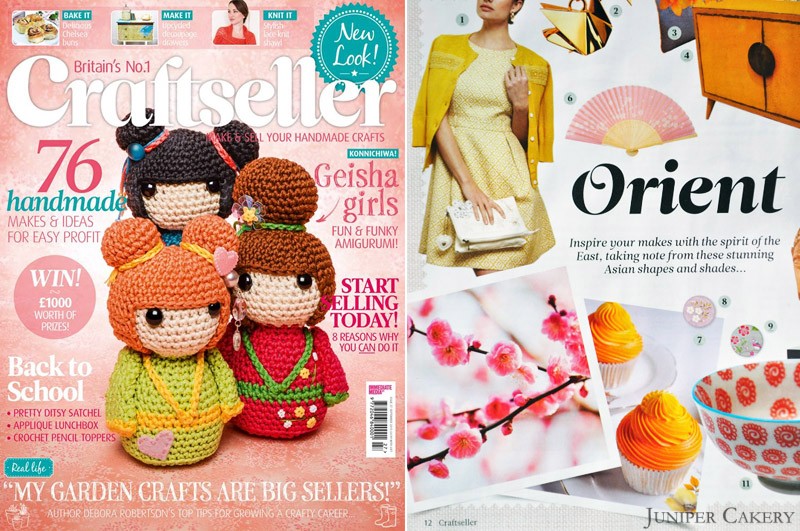
Yay! Our super fruity and bright Lemon and Passion Fruit Ombré cupcakes were featured in this month’s issue of Craftseller magazine! Head to page 12 of the magazine to see our zesty cupcakes in all their glory. If you’d love to re-create these particular cupcakes yourself why not give our recipe a try?

craftseller-august

Lemon and Passion Fruit cupcakes by Juniper Cakery


Tutorial Tuesday: How to Make Sugarpaste / Fondant Bows!

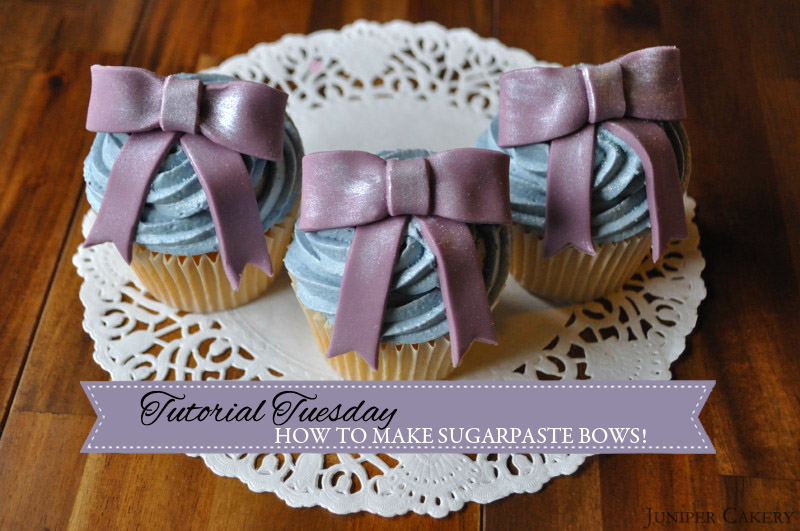
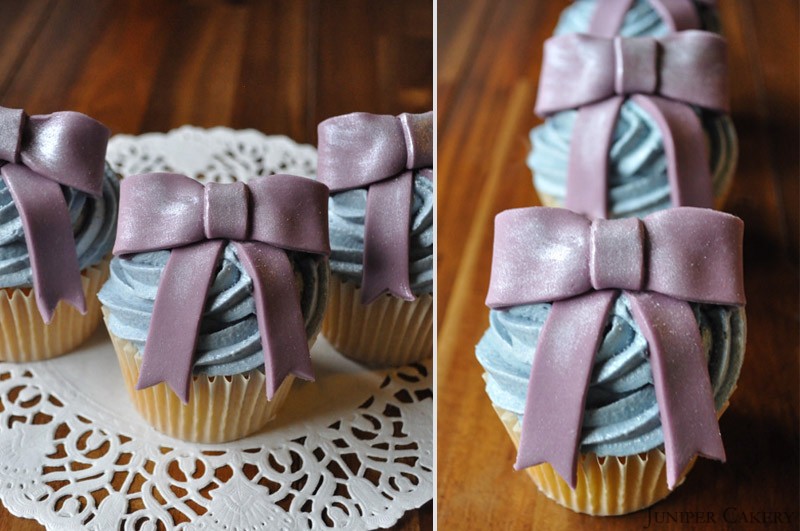
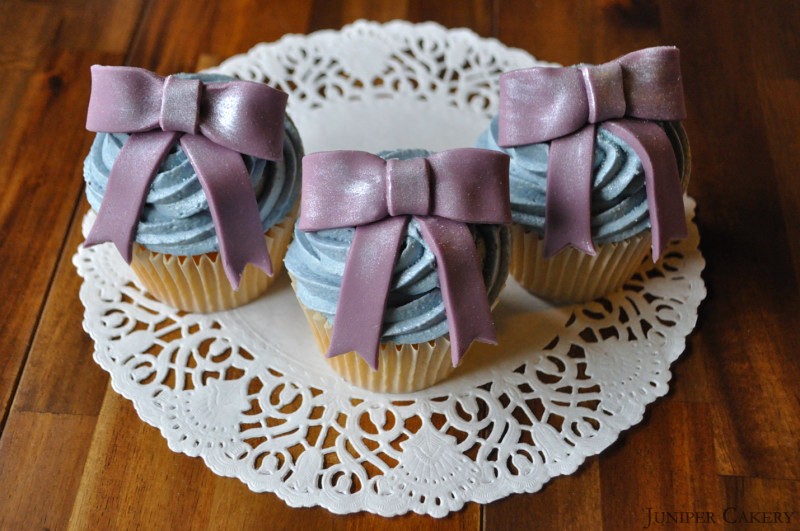
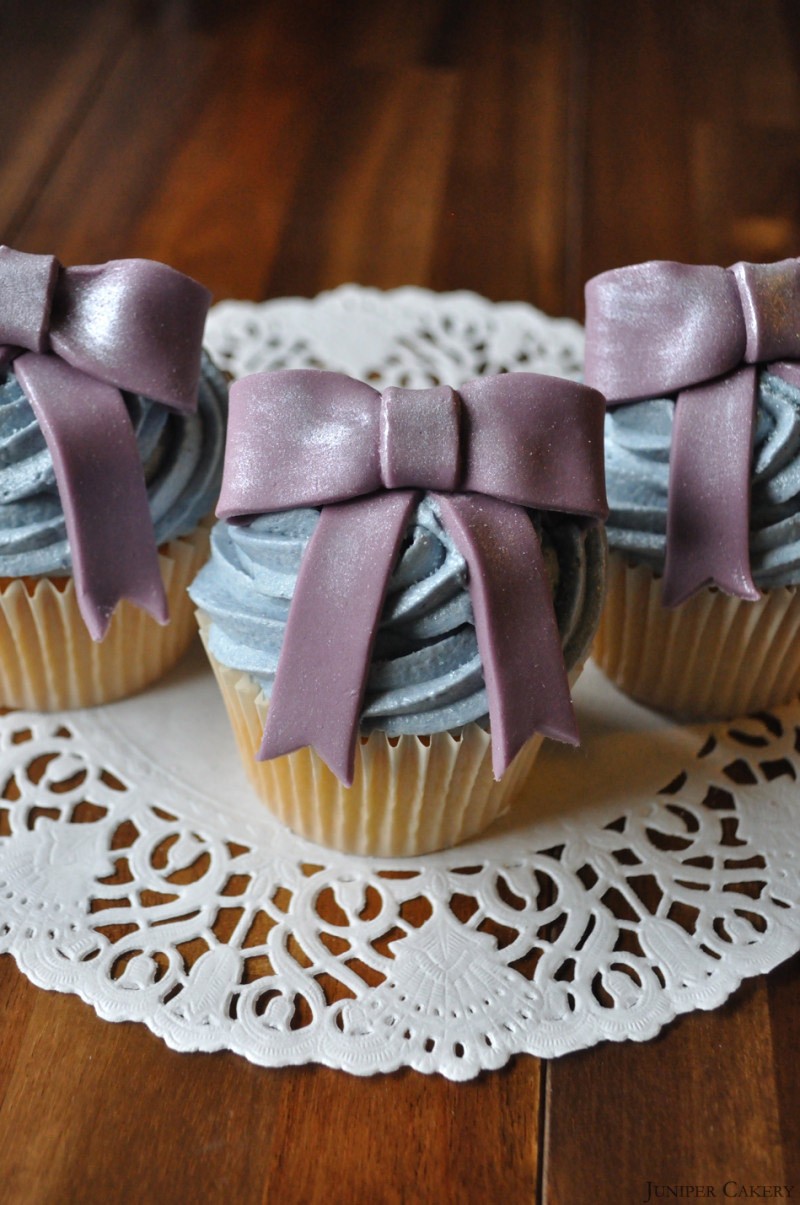
In this week’s cake decorating Tutorial Tuesday we show you how to create simple edible sugarpaste bows! These are quick to make and perfect for topping cupcakes with. They’re also easily adapted to match lots of events, parties and seasons. Paint them gold and silver for New Year’s or wedding anniversaries, use red or green sugarpaste for Christmas, stick to pastels for Baby Showers or use bright rainbow colours for fun children’s birthday parties. You can even hand paint small dots and floral patterns for bow topped cupcakes fit for afternoon teas.

Tutorial Tuesday: How to Make Edible Bows for Cakes and Cupcakes

Tutorial Tuesday: How to Make Edible Bows for Cakes and Cupcakes

What you will need…

Sugarpaste (either pre-coloured or coloured yourself using food gel paste colours)
Blade tool (we used the handy blade tool by Tala in this set of modelling tools)
Fondant rolling pin
Icing sugar
Edible Glue
Tylo Powder
Cupcakes
Lustre dust to decorate

Tutorial Tuesday: How to Make Edible Bows for Cakes and Cupcakes

Step one: Add a tiny sprinkle of Tylo powder to your sugarpaste to help firm the paste. This makes it dry quicker and firmer.

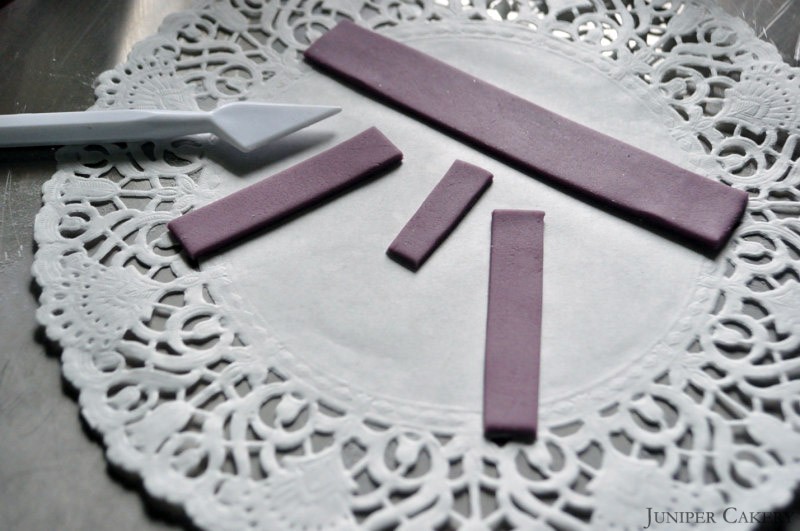
Step two: Roll out your sugarpaste using your fondant rolling pin. Slice out rectangular pieces using your blade tool like the parts in the image above. The long rectangle is your actual bow piece. The smallest rectangle is the band of your bow. The two medium sized rectangles are the tails of your bow.

Tutorial Tuesday: How to Make Edible Bows for Cakes and Cupcakes

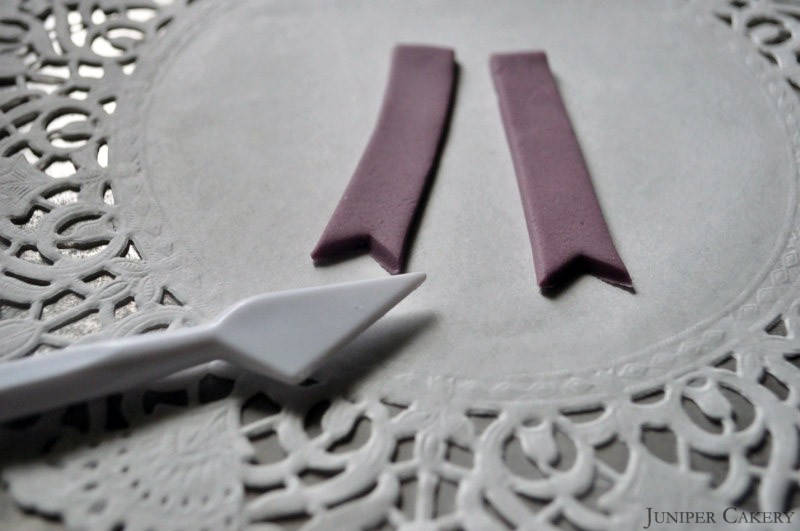
Step three: Cut triangular notches out of the bottom of your bow tails.

Tutorial Tuesday: How to Make Edible Bows for Cakes and Cupcakes

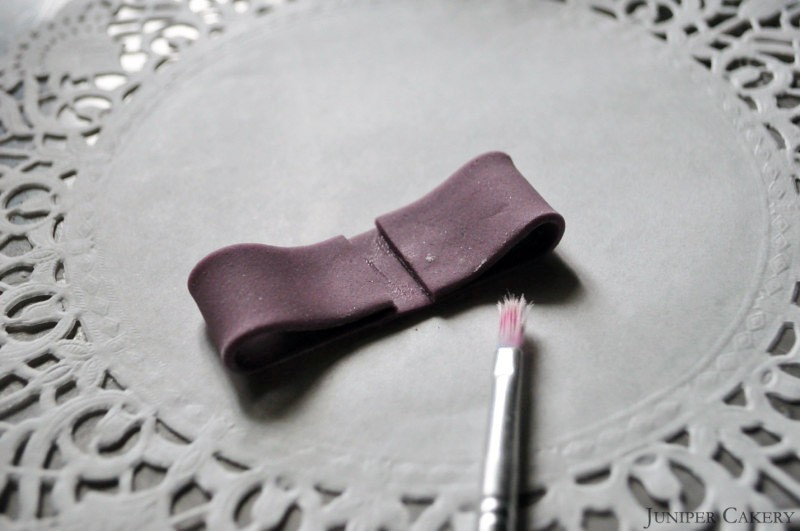
Step four: Take the longest rectangle and flip over. Paint some edible glue in the middle and gently fold over the ends of the rectangle to the middle. Make sure the loops of the bow stay ‘looped’ or rounded.

Tutorial Tuesday: How to Make Edible Bows for Cakes and Cupcakes

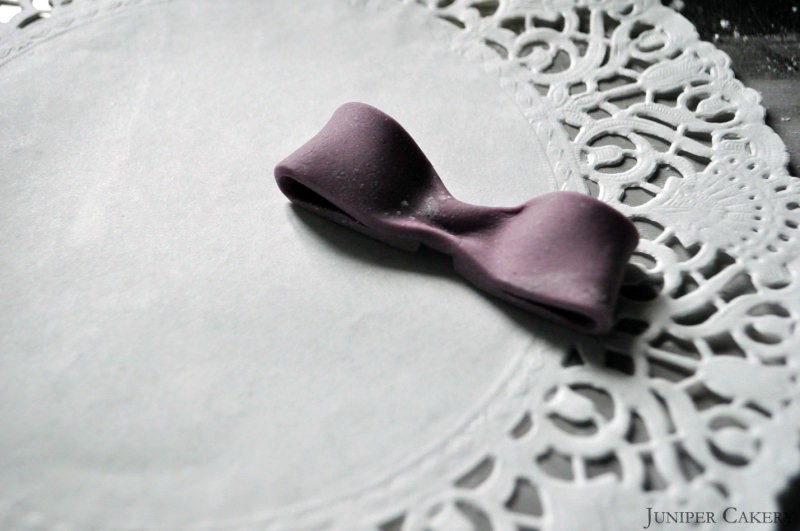
Step five: Gently pinch the middle to make the bow shape.

Tutorial Tuesday: How to Make Edible Bows for Cakes and Cupcakes

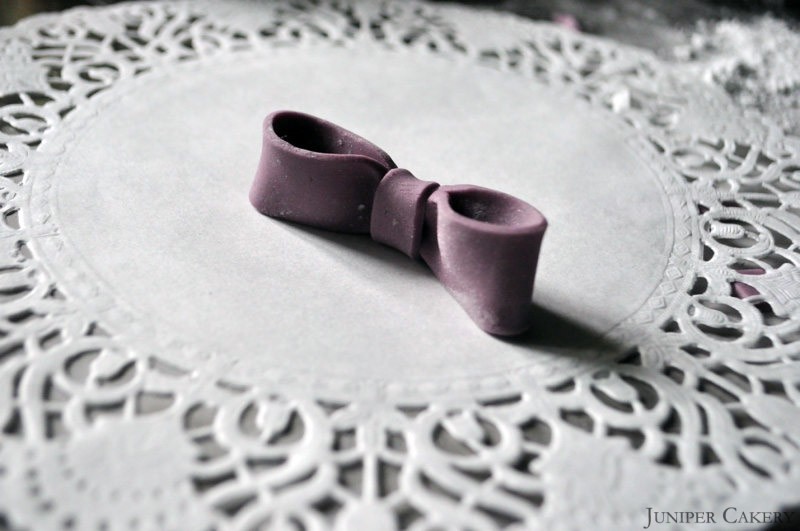
Step six: Take your smallest rectangle and flip it over. Paint edible glue on the back. Place your larger looped bow across so the smallest rectangle can be folded over the pinched centre of the bow.

Tutorial Tuesday: How to Make Edible Bows for Cakes and Cupcakes

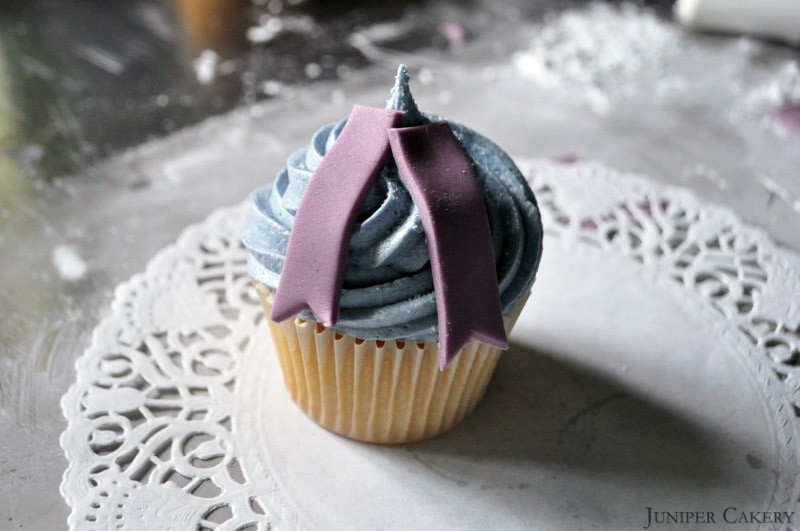
Step seven: With your piped cupcake fix your bow tails on the top in the middle.

Step eight: Take your large bow section and nestle it on top of the tails and into the buttercream of your cupcake.

Tutorial Tuesday: How to Make Edible Bows for Cakes and Cupcakes

Voila! You now have a cupcake finished with a lovely edible bow! You can make these extra fancy by creating sugarpaste cameos or brooches to attach to the centre of your bows, add edible pearls to the buttercream or gild your bows with edible gold or silver leaf!

Tutorial Tuesday: How to Make Edible Bows for Cakes and Cupcakes


Recipe: Cookies ‘n’ Cream Cupcakes!

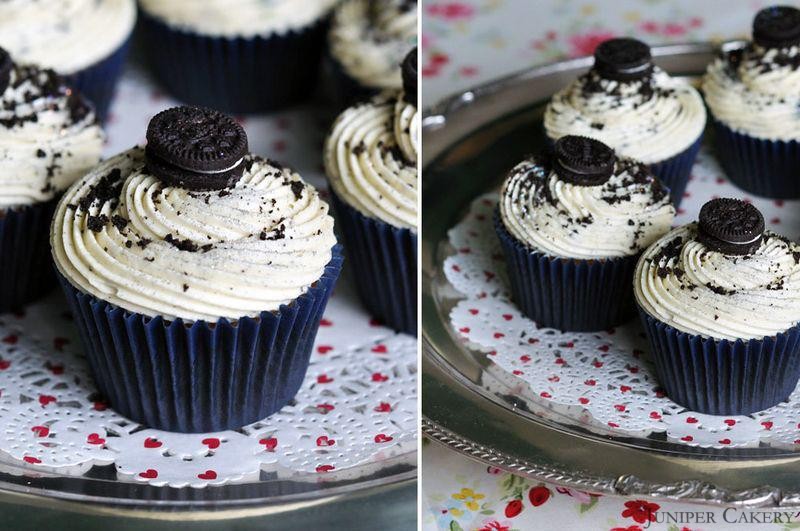
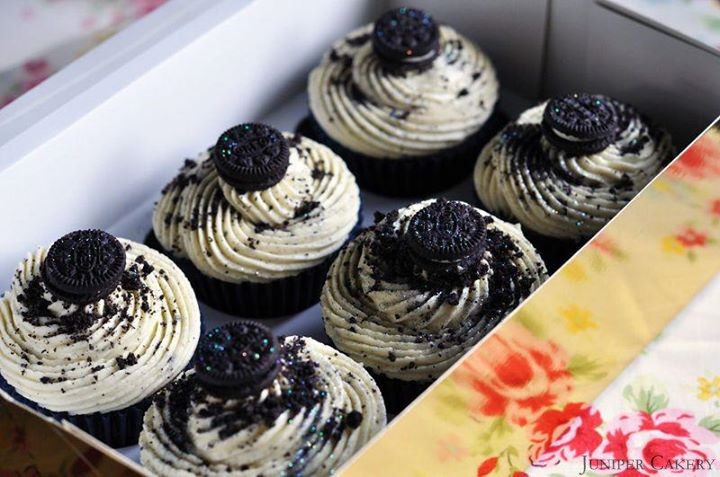
Cookies ‘N’ Cream is our favourite flavour! It’s a soft chocolate cake swirled with a cookie and bourbon vanilla pod infused buttercream then finished with more crunchy cookie crumbles! Sound good? If so then why not give our recipe below a try and enjoy them yourself!

Recipe: Cookies and Cream Cupcakes

Basic Chocolate Cupcake Recipe (makes approx. 12)

226g self-raising flour
226g butter
226g caster sugar
4-5 heaped tablespoons of cocoa powder (depending on brand)
4-5 eggs
60ml canola or rapeseed oil
1 vanilla bourbon pod
Cupcake cases

Step one: Preheat your oven to Gas Mark 3/325F/170C

Step two: Cream the butter with sugar and once well mixed add in the flour, vanilla bourbon pod seeds, cocoa powder, oil and then the eggs.

Step three: Set out your cupcake cases in your pan and fill each case 2/3 full.

Step four: Bake from around 12-18 minutes then leave to cool on a counter. Remember to try not to eat them!

Recipe: Cookies and Cream Cupcakes

Cookies ‘n’ Cream Buttercream

250g butter
250-350g icing sugar
vanilla bourbon pods
Piping bags
868 piping tip 
Cookies ‘n’ Cream Crunch Sprinkles by Wilton

Step one: Cut your butter into small cubes and cream your butter until soft.

Step two: Gradually add icing sugar until a good consistency.

Step three: Add the seeds from your 3 vanilla bourbon pods along with around 3 heaped teaspoons of Cookies ‘n’ Cream Crunch Sprinkles by Wilton. Mix well. TIP: Add your Cookies ‘n’ Cream Crunch Sprinkles by Wilton at the last possible moment to avoid getting a grey buttercream. You want lovely flecks of cookie in your frosting!

Step four: Scoop your delicious buttercream into a piping bag fitted with an 868 piping tip (if you’d like to create the linear swirl we’ve piped). Pipe a generous swirl of frosting atop your cupcakes and sprinkle with Cookies ‘n’ Cream Crunch Sprinkles by Wilton!

Recipe: Cookies and Cream Cupcakes

These cupcakes are an instant crowd pleaser. By adding real and good quality vanilla bourbon pods to your cookies ‘n’ cream buttercream you get a gorgeous ice cream-like flavour to your frosting. Once these cupcakes are ready to eat save yourself a few because they will suddenly disappear!


×