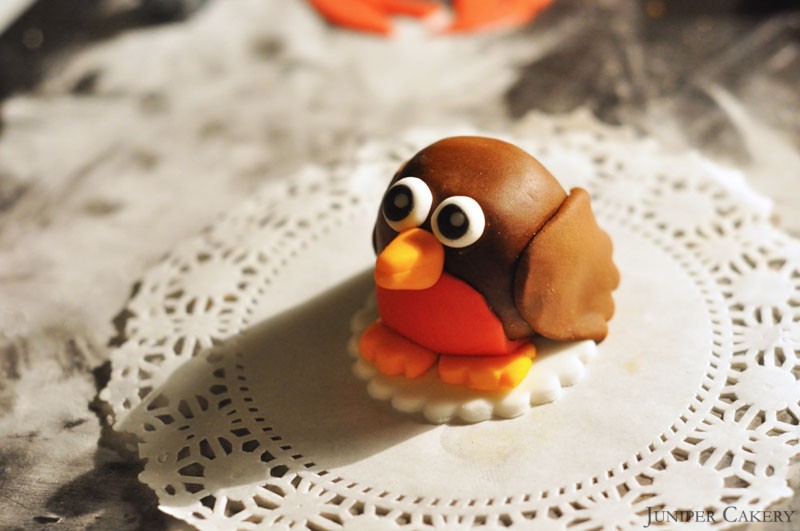
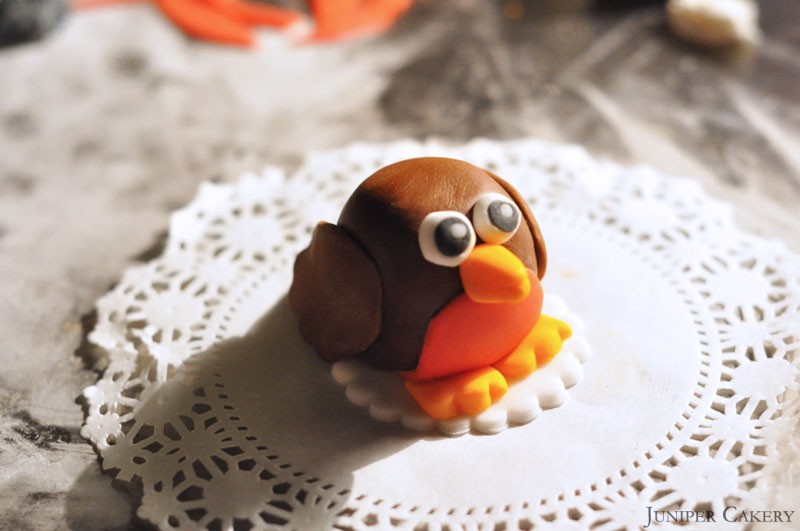
Today’s tutorial shows you how to make your own adorable little sugarpaste robin who can sit perfectly atop your festive cakes and cupcakes! You can also follow this tutorial at other times of the year, but use different colours, to create other types of birds appropriate to the season.
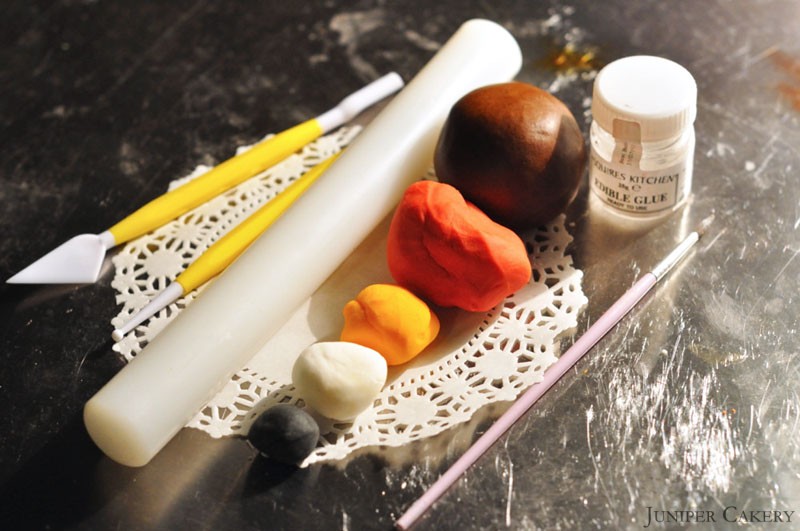
What you need:
PME Blade tool
PME Ball tool
Fondant rolling pin
Renshaw Modelling Paste (coloured by hand in Wilton Paste colours white, black, golden yellow, brown and red)
Paintbrush
Edible glue
Toothpicks
Scalloped pastry/cookie cutters
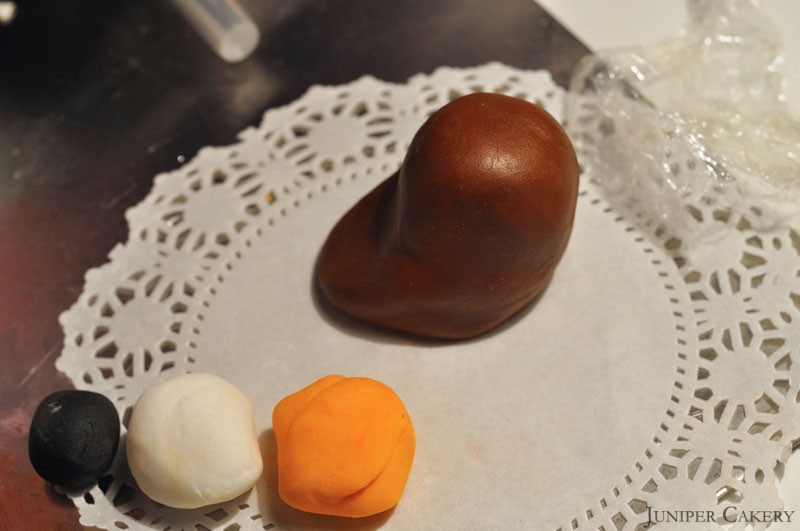
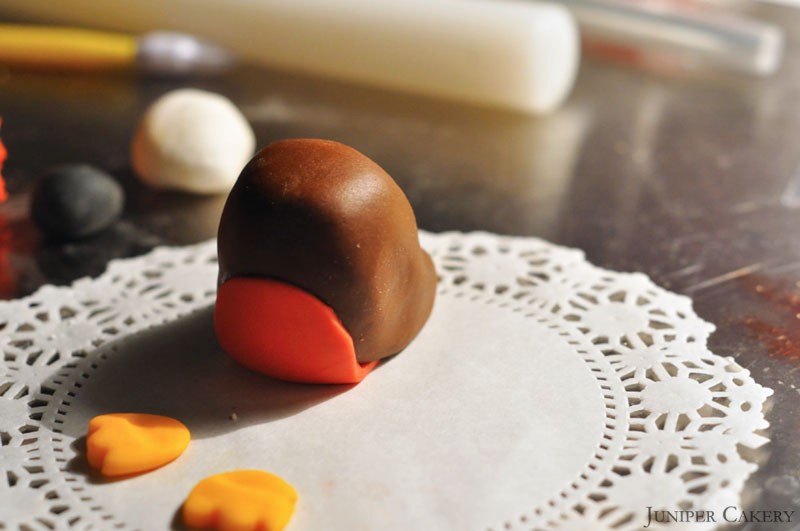
Step one: Take your brown modelling sugarpaste and mould into ‘comma-like’ shape. The base should extend out into your robin’s tail feathers. The top of the ‘comma’ shape should be bulbous as this will be your little robin’s head.
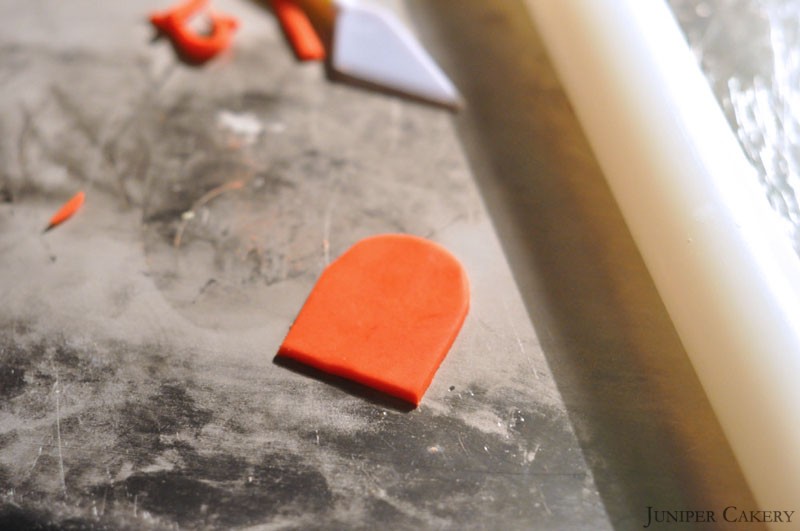
Step two: To make your robin’s red breast roll out your red modelling paste and cut out a rounded rectangular shape as in the above picture.
Step three: Take some edible glue and paste the robin’s breast to the front.
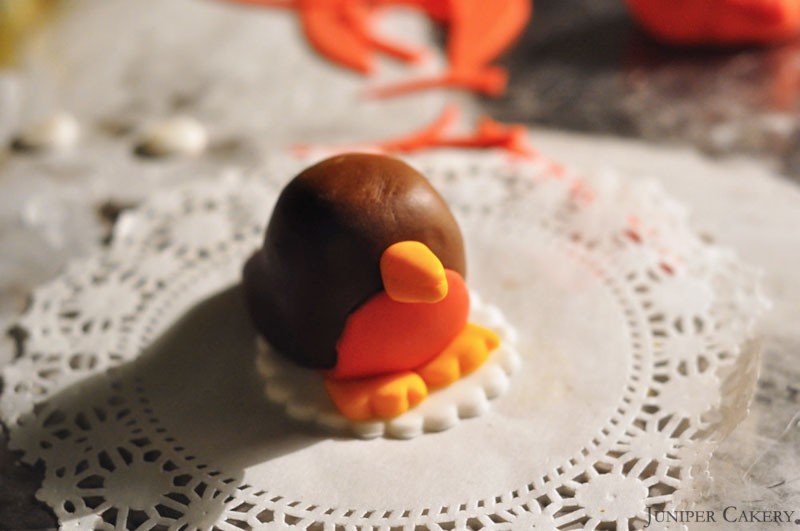
Step four: Now to make your little robin’s feet! Take two small balls of the golden yellow paste, roll flat into small oval shapes and use the scalloped edge of your Tala cutter to make the toes. Now indent the ends that will tuck under the robin so they will fit underneath. Use some edible glue to stick the feet to your robin.
Step five: For the beak make a small angular cone of golden yellow colour modelling paste. Use the blade tool to indent the bird’s ‘mouth’ into the beak.
Step six: Now take a toothpick and one third of it. Use this piece to attach the beak. To do this simply press into the robin’s head, paint edible glue to the revealed end and carefully affix the beak.
(We place our little robin on a lovely scalloped sugarpaste ‘doily’. To do this roll our some spare modelling paste and cut out with your Tala cutter.)
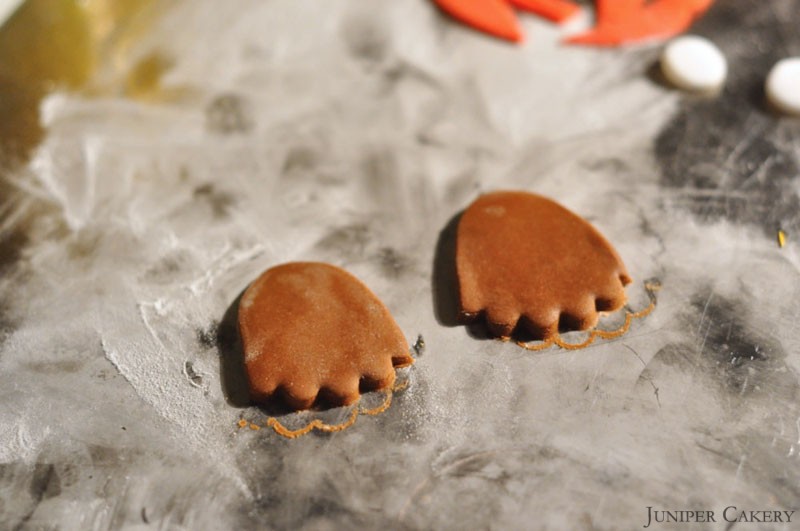
Step Seven : To make your robin’s wings simply roll out two medium ovals of brown modelling paste and cut the ends with your scalloped Tala pastry cutter.
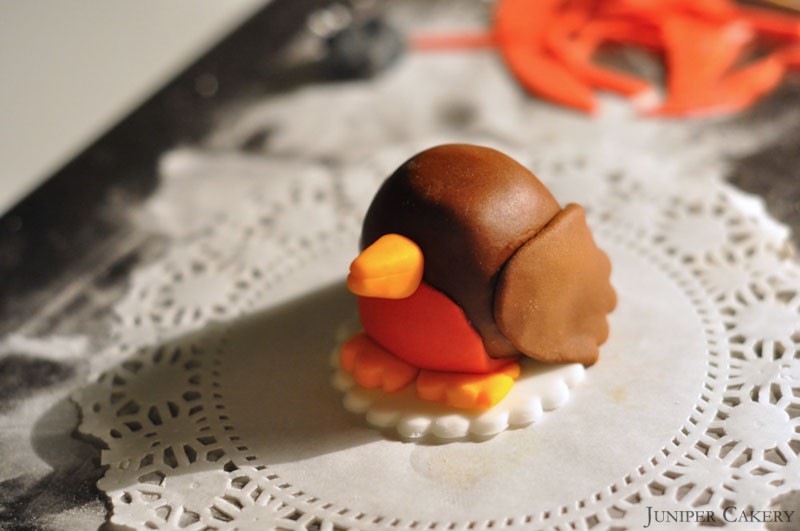
Step eight: Affix the wings to the sides of your robin with a little bit of edible glue.
Step seven: Finally, for the eyes shape and roll out two small white circles and two smaller black circles. Glue the black circles atop the larger white ones and then using super tiny pieces of white modelling paste attach these to the black circles (make sure these tiny white pieces point in the same direction).
Voila! Now you have a very sweet sugarpaste robin to nestle atop your beautiful winter-y cakes and cupcakes!
Merry Christmas from Juniper Cakery!


Really liked what you had to say in your post, 'Re-launch Week Tutorial No. 4' : How to create a sugarpaste robin! - JUNIPER CAKERY | Beautiful baking and cake decorating supplies | JUNIPER CAKERY | Beautiful baking and cake decorating supplies, thanks for the good read!
— Tyron
http://www.terrazoa.com