Browsing Tag

Christmas

8th December 2016 // 0 Comments

Recipe: Pink Candy Cane Twist Cookies!

Recipe for pink candy cane cookies

The festive season pretty much means that you can stuff yourself silly. Obviously, we take this seriously seeing as we whip up a frenzy of sweet treats for a living. One of the cosiest things about winter setting in is enjoying a hot cocoa… with as many cookies, biscuits, candy canes as you can manage! This week’s Christmas recipe is for pink candy cane cookies that don’t need any form of cookie cutter whatsoever. For anyone who doesn’t normally obsessively bake and ice cookies having huge drawers upon drawers of cookie cutters this recipe and tutorial is going to be pretty handy. Keep reading for our cute pink peppermint candy cane cookies recipe!

Cute candy cane cookie recipe by Juniper Cakery

Pink peppermint candy cane cookies recipe and tutorial

Pink peppermint candy cane cookies recipe!

Ingredients and tools needed…

01: In a stand-up mixer cream the butter and sugar together with the peppermint extract or essence. Make sure to mix until just combined. If you over beat the mixture this can lead to misshapened over spread cookies whilst baking. Not a good thing!

02: Add in the egg and lightly mix. Again you don’t want to over mix your ingredients. You’re also going to be adding in the dry ingredients soon which will then mix in the egg a little more.

03: Add in the flour and set your mixer to a low speed. Combine until a dough forms. You don’t need to use the dough hook for this if your stand-up mixer came with one. We always use the simple paddle attachment.

04: When a dough has formed separate it into two halves. Set one half to the side and add some pink food colouring to the half left in your mixer before then mixing it on a slow speed until it’s lovely and pink (you can colour it red or green instead too).

05: Gather up both doughs and wrap each separately with cling film before leaving them to chill in the fridge for at least 1 hour and 30 mins. It’s OK if you have loads of other things to do and end up chilling the cookie dough for 4 hours to even a full day. We’ve never had a problem with this.

06: Whilst your dough is in the fridge you’ll need to preheat your oven to 180c/350f/gas mark 4.

07: When chilled remove both doughs from the fridge and knead them a little after taking out of the cling film. Flour your work surface (with plain flour) and roll out to a good thickness. For these cookies try to roll them to a thickness of 4-5mm each colour.

First roll out one colour dough and set it aside. Then roll out your other colour. When ready take one and lay i over the other dough before rolling both a little more.

Candy cane twist cookie recipe

08: Now you need to twist and shape them into candy canes! Take a sharp knife or a pastry cutter and cut off any ragged edges from your rolled out dough so that you’re left with a tidy rectangle or square. Then cut this piece into a series of long strips around 1 1/2cm wide each.

How to make candy cane twist cookie recipe

09: Pinch the strips of dough together along all sides so that both colours bind together.

How to make candy cane twist cookie recipe by Juniper Cakery

10: Using a cake smoothing tool roll out the strips to form even ‘ropes’. You can do this by simply rolling your pinched strip of dough forward and backward with the smoother.

Peppermint candy cane twist cookie recipe

11: Now whilst working on your cookie tray gently twist your two toned dough to form candy cane-like stripes running up them! Try not to pick up your cookie dough. You can twist them with the palms of your hands. Roll one end of the cookie dough towards you and with your other palm roll the opposite end away from you.

Peppermint candy cane twist cookie recipe by Juniper Cakery

12: Curl and arrange into candy cane shapes and place them in the fridge for 30 minutes to chill.

09: Once they’re ready and chilled you can put them in your preheated oven for around 6-10 minutes. Set your time to 6 minutes first and test them. To check if they’re ready poke one lightly. If the cookie stays dented then it needs to bake for a little longer. If the dent comes back up then they’re ready!

10: Leave to cool for around 1 hour and enjoy!

Cute candy cane cookie recipe

We like these cookies left plain, but if you want to add a little bit extra festive cheer why not drizzle with white candy melts and add cute sugar snowflake sprinkles? You can even dip them into melted chocolate and then sprinkle on crushed candy cane pieces!

Whilst this candy cane cookies recipe calls for a peppermint extract you can give your biscuits a whimsical taste with bubblegum flavouring or even cotton candy!

Peppermint candy cane cookie tutorial

Recipe for pink candy cane cookies by Juniper Cakery

6th December 2016 // 1 Comments

Tutorial: Cute Fondant Gingerbread Character!

Adorable gingerbread topper tutorial

Last week we were ridiculously busy with festive orders (we’ve lost track how many of our cookies, cakes, macarons and cupcakes left us in the past 7 days) so we sadly couldn’t finish up our Christmas themed tutorial. This week, however, we have one and it’s insanely cute! Say hello to Ginger. We whipped up gingerbread people macarons and cookies recently so it was obvious that we had to complete the collection and make a little gingerbread character perfect for cakes and cupcakes! Keep on reading this post to find out how to make one of your very own!

Fondant gingerbread character tutorial!

Materials and tools needed…

Fondant gingerbread person tutorial by Juniper Cakery

Christmas cake topper tutorial

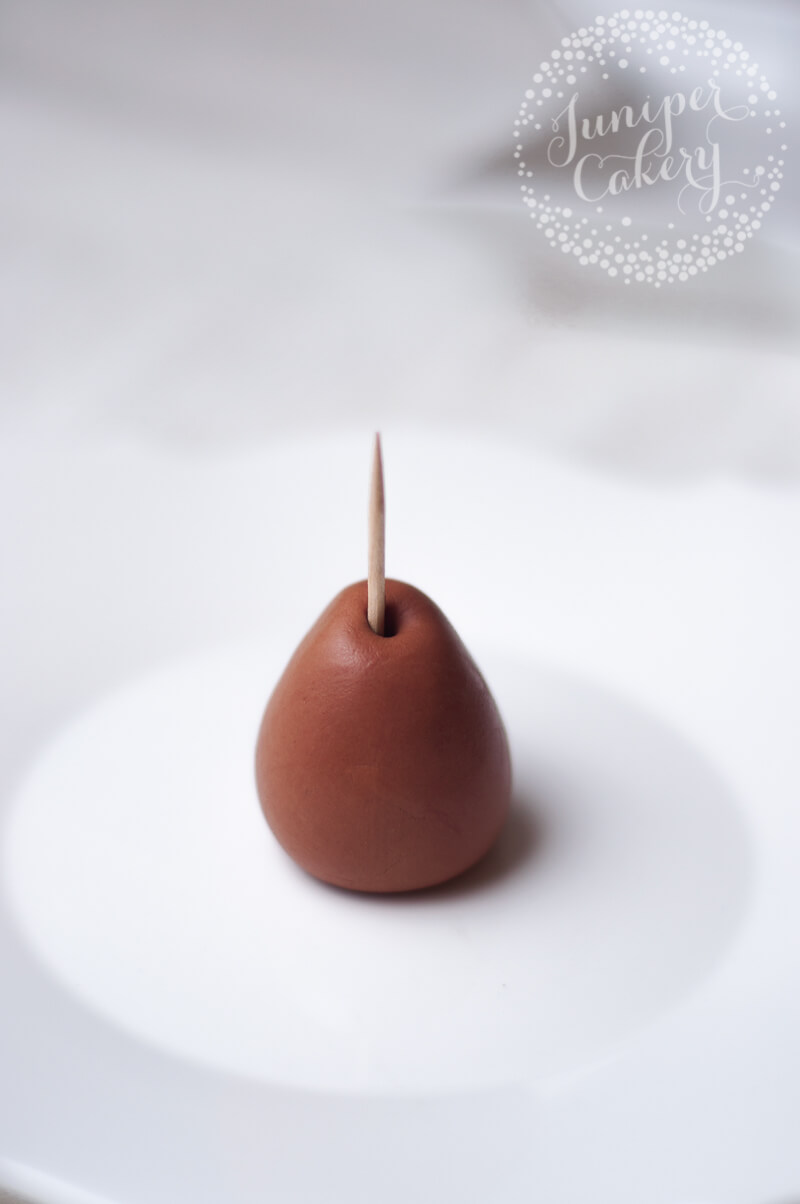
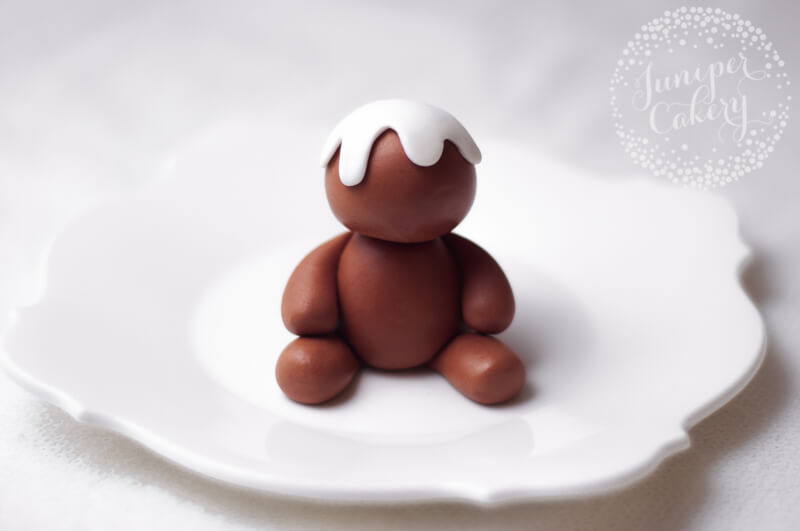
01: Begin with the body. Roll some brown fondant (you can use gum paste or modelling paste too) and mould into a rounded teardrop shape. Skewer down it’s centre with a cocktail stick or a piece of uncooked spaghetti.

Festive gingerbread cake topper tutorial

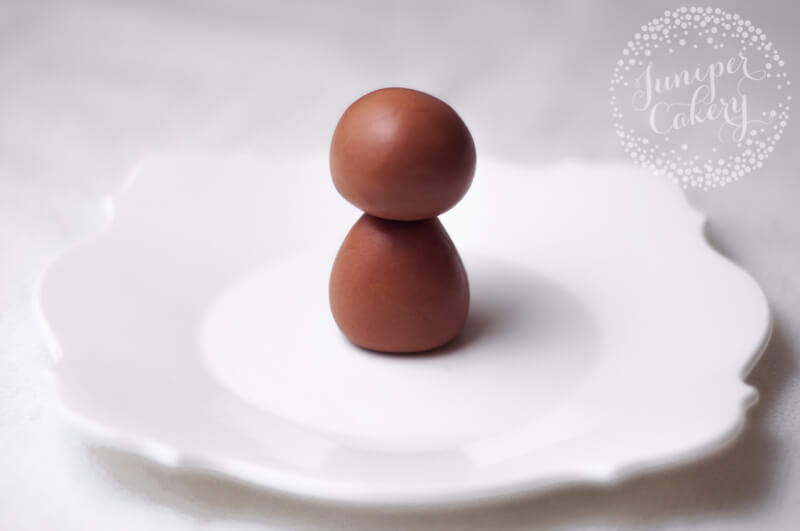
02: For the head roll a smooth ball of brown fondant and attach on top of your body via the cocktail stick or uncooked spaghetti. Make sure that this is fitted on nice and central. If not your little gingerbread person could lean, tilt oddly or just plain fall over.

Festive gingerbread cake topper tutorial by Juniper Cakery

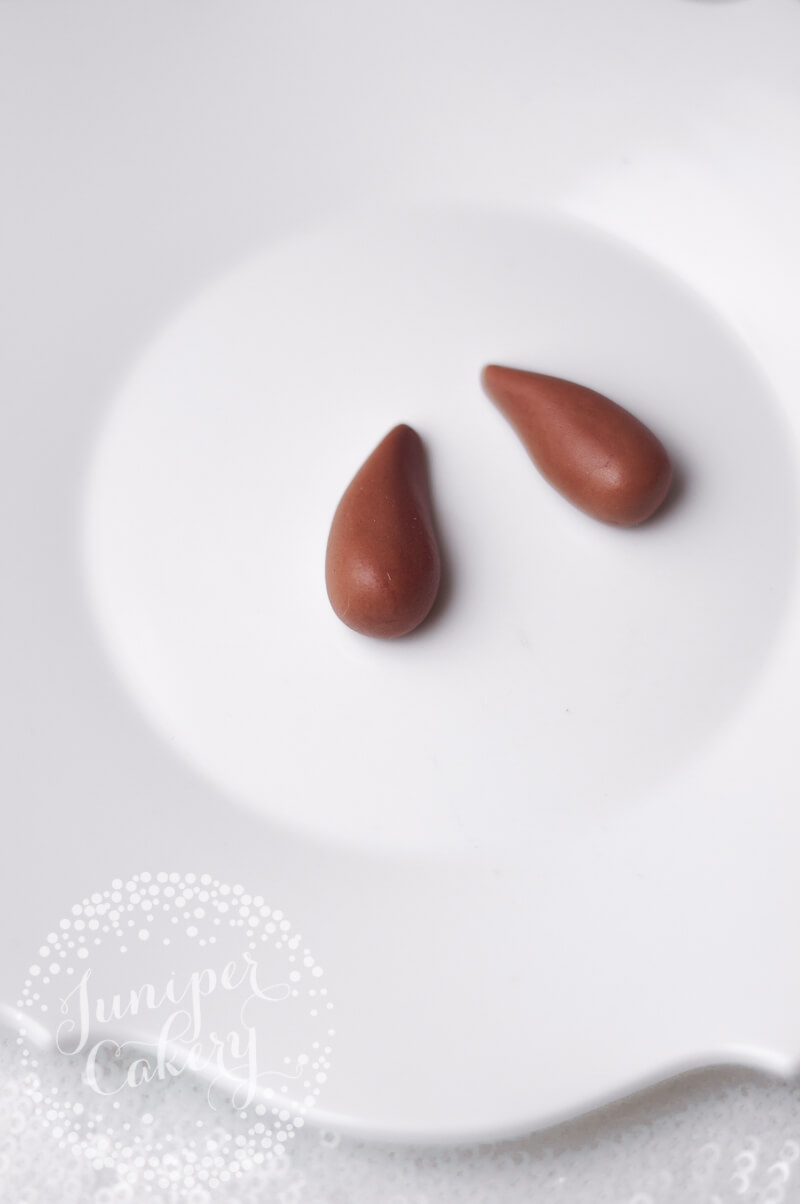
03: Take 2 smaller pieces of brown fondant / sugar paste and mould into chubby teardrop shapes, repeat this for another 2 pieces making 4 in total. These are going to be the arms and legs!

How to create a fondant gingerbread character

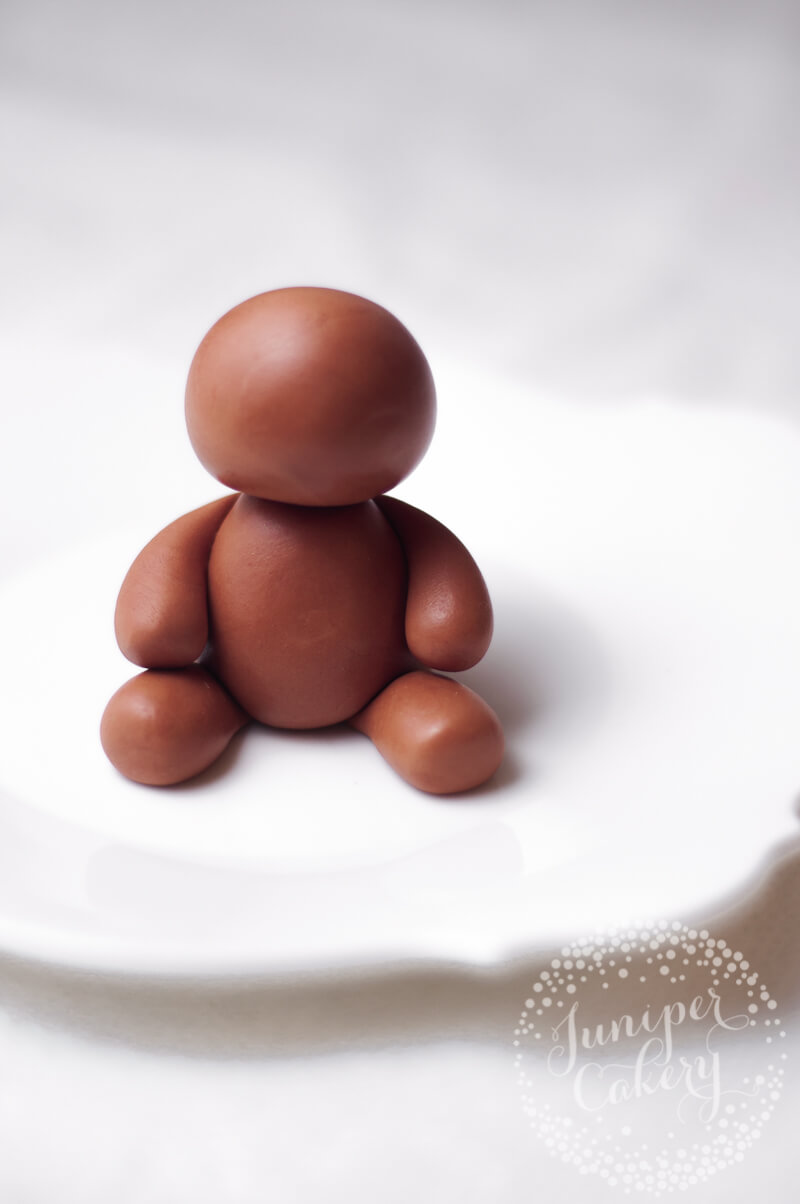
04: With some edible glue arrange and attach the limbs in place. You may need to hold the arms lightly until they’re secure.

Festive gingerbread cake topper tutorial from Juniper Cakery

05: To add the icing on top roll out a small circle of white fondant / sugar paste and with a small sharp knife cut a wavy shape from it. Smooth any rough edges and with some edible glue attach on top of the head before patting it down gently.

Gingerbread cake topper tutorial from Juniper Cakery

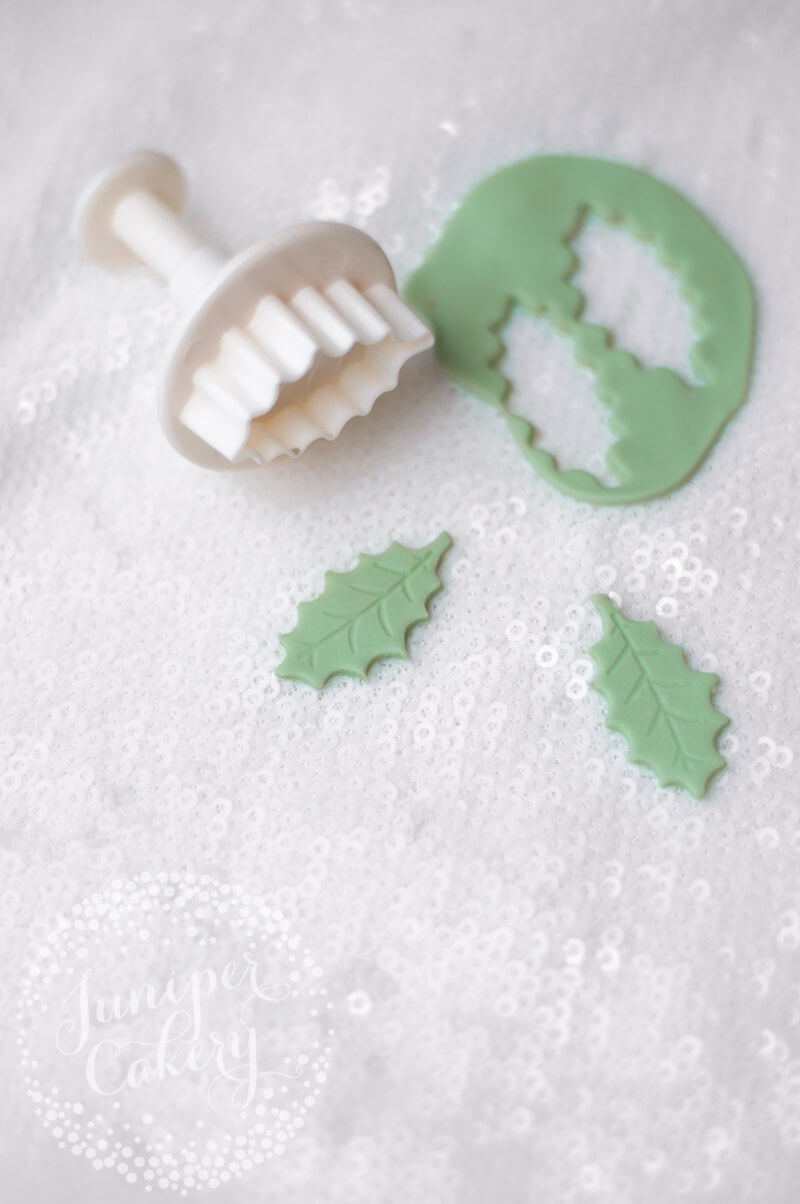
06: Roll out some green fondant / sugar paste and use your holly leaf plunger cutter to cut out some festive foliage! If you want the leaves to set a little curved then leave them to dry on a flower former or even some scrunched up cling film.

Fondant gingerbread cake topper tutorial from Juniper Cakery

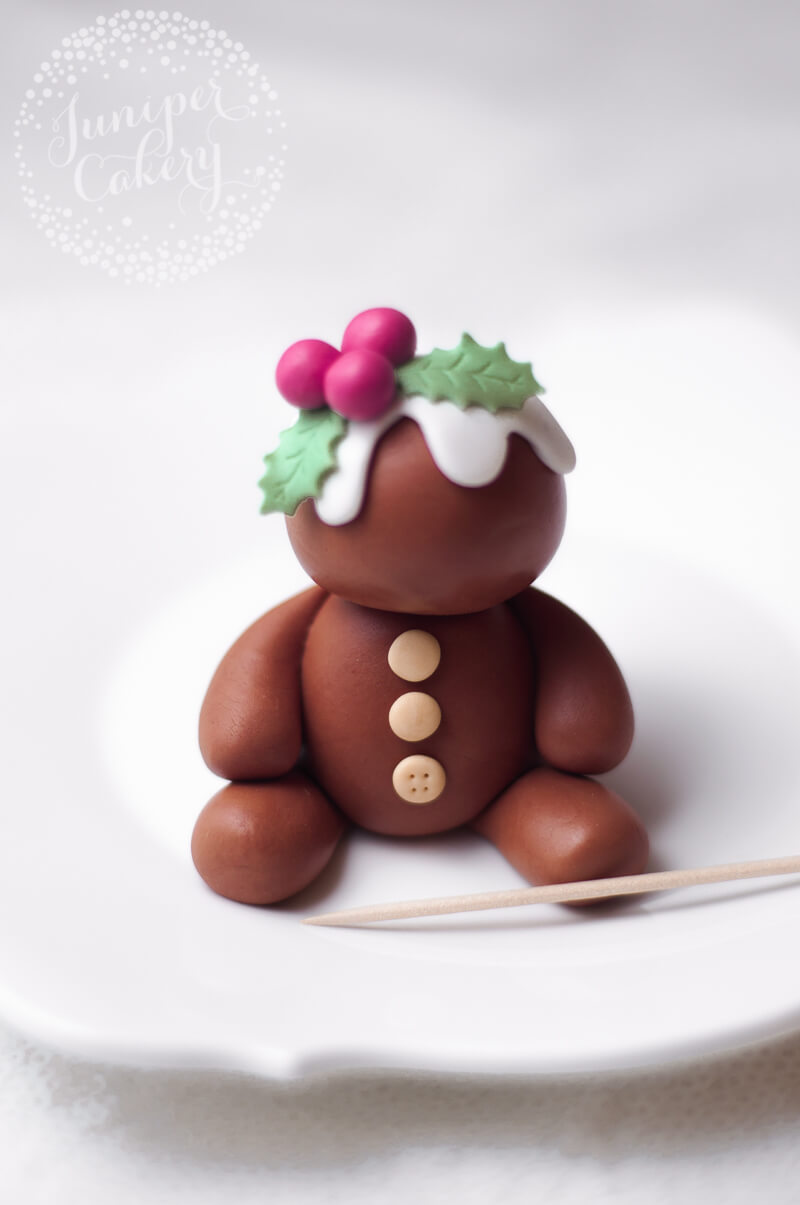
07: When your holly leaves are ready attach with a dab of edible glue on top of your fondant gingerbread character.

08: Take some pink fondant and roll out three balls. Add these on top and in the centre of your holly leaves.

Fondant gingerbread topper tutorial from Juniper Cakery

09: One of our favourite things about this little cutie is the tiny little buttons! These are super easy to make too. Make three tiny balls of caramel tinted fondant and stick to the front of your figure with edible glue. For the button detailing simply use the sharp end of a cocktail stick to poke 4 holes. You can paint these buttons now or when you’re completely finished. We generally wait until everything is done to add any painted elements.

Fondant gingerbread topper tutorial for Christmas

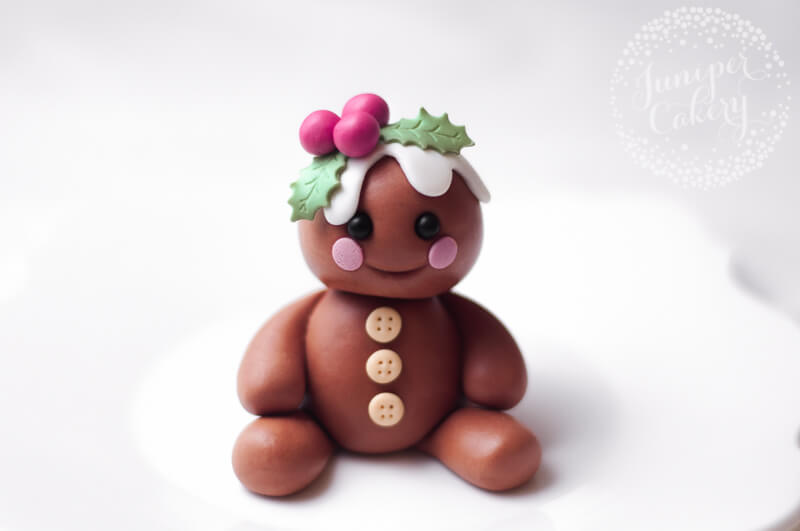
10: For the face indent two eye sockets using a small ball tool and attach the black edible sugar pearls. Then using the bottom end of a piping tip create it’s smile before finished each end with pink confetti sprinkles for some sweet rosy cheeks!

Fondant gingerbread character tutorial for Christmas

11: Add the cute cookie-inspired detailing to it’s arms and legs with either some royal icing (we just piped wavy lines in place) or thinly rolled out white fondant!

Learn how to make a gingerbread character form fondant

Now you can add your adorable little fondant gingerbread character to festive cakes and cupcakes! How amazing would this little beauty be on sweet treats at a Candyland themed Christmas party? Pair it with swirly lollipops, candy cane decorated cakes and gum drop studded cookies for an impressive dessert table!

Fondant gingerbread person tutorial guide by Juniper Cakery

3rd December 2016 // 0 Comments

5 Stress Free Baking Hacks for Christmas!

Stress free baking hacks for Christmas

Keeping on top of things during the Christmas period seems near impossible every single year especially for the home baker with a project list full of treats! The secret is to keep it simple, plan in advance and utilise a few handy baking hacks for Christmas. There are a few stress-reducing tips and tricks that are so going to help in the run up to all the festivities. From baking cookies in advance and freezing them to using blitzed candy canes in every recipe for an instant Christmas feel you’re bound to find a time-saving idea to get you ready for December 25th!

5 stress free baking hacks for Christmas!

Gold mini star cookies by Juniper Cakery

01: Bake in advance!

This is definitely one of the handiest baking hacks for Christmas! To a novice baker this might sound crazy. Seriously though, baking a little in advance and freezing your bakes not only saves time, but it makes things like cake easier to carve/level/work with. For cake once baked leave to fully cool then wrap in cling film, then foil and place level in a freezer. Try not to set your cakes on a wire rack in the freezer though as this will indent your cakes. You can freeze cakes weeks in advance to get you ready.

Our favourite and best sugar cookie recipe

Freezing cookies? Bake them, leave to fully cool down, set inside an airtight container and freeze for up to a month! Remove the shapes you want to decorate when you need them (put the rest back in the freezer), ice and box/bag when dry. Easy!

NOTE: We wouldn’t advise this tip for cupcakes, however, as the extra moisture in the freezer will make cases peel away.

Christmas bark by Juniper Cakery

02: Reach for the candy melts!

Not necessarily a baking hack BUT it’s too good to not list. Some of the easiest cake and cupcake decorations can be made using candy melts! They’re perfect. All you need to do is melt them, pipe a design and they should set in a matter of minutes. Plus if they’re just not setting quick enough you can place them in the freezer for 5 minutes.

Pipe fun Christmas trees with coloured candy melts on a cookie tray lined with parchment or greaseproof paper. Add cool sprinkles or candy and leave to set. When ready carefully peel the paper from under each and then nestle into buttercream swirled cupcakes or attach to the side of a frosted cake. Instant Christmas cheer!

You can even make super easy festive bark using candy melts, crushed candy canes and super fun Christmas themed sprinkles too. Just melt down your candy melts, pour and smooth onto a lined cookie tray (make sure not to smooth it out too thin) and throw on the candy and sprinkles before leaving it to set! When hard break into shards and add to cakes and cupcakes.

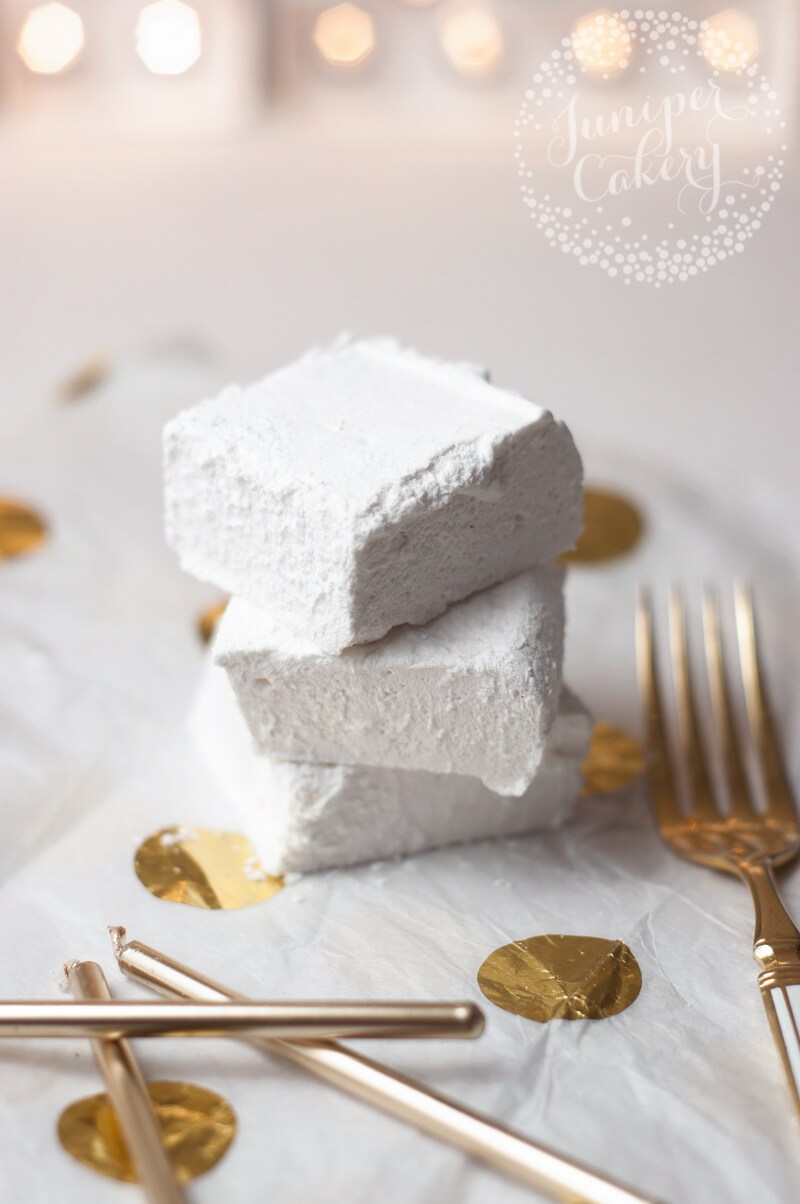
Homemade marshmallows

03: Marshmallow heaven!

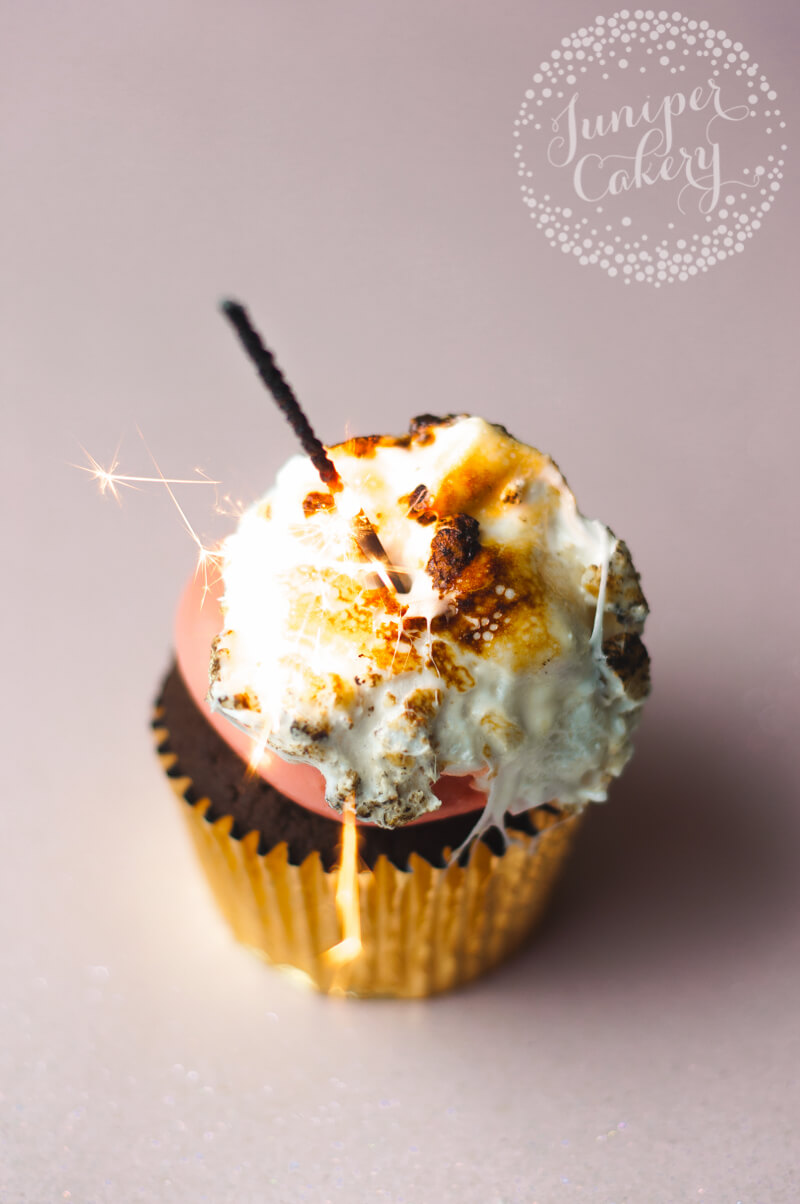
Marshmallows are the perfect winter treat, plus they can help add a touch of cosiness to anything really. Instead of stressing out over time consuming cake pops use giant marshmallows! Turn a simple chocolate cupcake into a winter favourite by adding a giant toasted marshmallow on top. Once you’ve frosted your cupcakes add large marshmallows to a cookie baking tray (make sure each is around 2 inches apart so they don’t melt into each other) and place in an oven for a few minutes until they soften and begin to melt and flatten a little. Remove and blow torch the tops to toast.

Why not even dip a cute retro stripe straw in some melted chocolate then half skewer into a large marshmallow, dip halfway into chocolate or candy melts, add sprinkles and once dry tie a pretty bow onto the straw.

Raspberry S'Mores Cupcake by Juniper Cakery

You can also toast marshmallows and blitz them to add into buttercream. Gently heat up and add on top of sugar cookies for a melted snowball design. Or even bake into goey brownies with broken pretzel pieces!

Why not try out our classic vanilla marshmallow recipe to add to cakes, cupcakes, in between chewy cookies or even dropped into hot cocoas!

Add sprinkles into cupcake or cake batter

04: Sprinkles are your best friend!

Sprinkles don’t have to just go ON a cake or cupcake. They can get mixed into the batter too! You can instantly jazz up a bake to make it fit in with your festive party by just adding in a handful or two of coloured sugar sprinkles into the batter before you bake it. Try red and green confetti sprinkles for a traditional Christmas look, add blue for Hanukkah or try purple, pink and blue for a popular Frozen themed treat!

When it comes to decorating you can even create a message or pretty shape on top of your frosted cake by popping a cookie cutter on top and adding sprinkles inside of it. Remove the cutter and you should be left with a fun and festive shape or greeting!

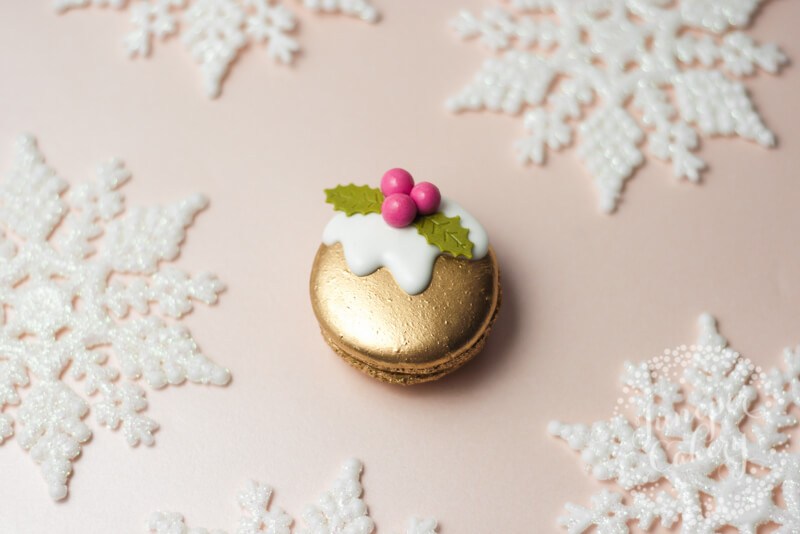
Christmas pudding macaron by Juniper Cakery

05: Keep it simple and sweet!

This tip isn’t so much a hack, but a piece of essential advice! Try not to overwork yourself by picking out recipes you’ve never tried before (unless you have time for a practice run). The easiest and simplest thing you can do to make baked treats this season stress free and fun is to tweak your go-to recipe a little. If you have a basic cupcake recipe you use for plain or vanilla flavours why not try adding some festive mixed spice into it with a little gingerbread spice for a fun gingerbread-style cupcake swirled with vanilla buttercream? Amp up some of your usual chocolate cookies or biscuits with some mini fudge pieces, smother with thick salted caramel sauce and add a sea salt pretzel on top along with some gold star sprinkles!

The exact same rule goes when it comes to decorating your homemade treats. It’s great to challenge yourself, but new techniques are going to need some prep and practice. To avoid tearing your hair out stick to simple yet effective designs. To make our 24k gold Salted Caramel macaron more festive (as if the gold didn’t already do it) we added a little royal icing and some fondant features to transform it into a cute Christmas Pudding style macaron! See? Simple yet seasonal! Why not create winter-y themed vanilla cupcakes into snowballs by carefully rolling the butter creamed tops in sanding sugar and snowflake sprinkles?

1st December 2016 // 1 Comments

Recipe: Classic Gingerbread Cookies!

Gingerbread cookies recipe by Juniper Cakery

One of the best and most exciting thing about the Christmas season for us is the day when we finally get to bake our own gingerbread cookies. It varies depending on our workload… sometimes we begin in mid-November or if we’re rushed off our feet the scent of spiced cookies doesn’t make it’s way through the halls until mid-December. This year we’re insanely busy, but to fit in our biscuit baking marathon around work we decided to offer up our classic go-to gingerbread cookies recipe! Check out our recipe below for some seriously amazing festive sweets!

Festive gingerbread cookies recipe from Juniper CakeryChristmas gingerbread cookie recipe by Juniper Cakery

Our classic gingerbread cookies recipe!

Ingredients needed…

  • 215g light brown sugar
  • 3 tablespoons treacle
  • 3 tablespoons golden syrup
  • 2 tablespoons allspice
  • 2 tablespoons ground ginger
  • 2 tablespoons ground cinnamon
  • 1 teaspoon ground nutmeg
  • 1 teaspoon bicarbonate of soda
  • 250g chilled salted butter - diced
  • 560g plain flour (plus extra for dusting)
  • 5 tablespoons room temperature water

01: In a saucepan on medium heat add the light brown sugar, treacle, golden syrup, all of your spices (allspice, ginger, cinnamon and nutmeg) with the 5 tablespoons of water. Gently stir until well incorporated.

02: Now lower the heat a little and piece by piece add in the butter and stir until melted. Melting the butter down can take a little bit of patience at this stage.

03: Add in the teaspoon of bicarbonate of soda. Be aware that your mix may expand or froth a little bit at this point. It’s OK if it doesn’t though. Remove from the heat.

04: Now you can pour your syrup-like mixture into the bowl of a stand up mixer once it has cooled down to around room temperature.

05: After pouring in your spice/syrup mix add in your plain flour and mix on a slow speed until a slightly sticky dough forms! Place in your fridge to chill for 2 hours at least.

06: Roll out your dough (around 5-6mm is a good thickness) onto a floured surface and cut out all your cookie shapes then place onto a lined cookie tray. Place back into the fridge for 3o minutes to chill and firm them up. This helps stop your cookies from spreading!

Tip!

Don’t worry if your dough is stiff and hard to roll out. If this happens just leave it for around 5 minutes at room temperature then knead it a little to make it workable.

If you want your cookies to have indented details in them (like our cute gingerbread biscuits) then do this now. For our gingerbread faces all we used was a small ball tool for the eyes and buttons and a scallop tool for the smiles.

How to make gingerbread cookies

Tip!

Try not to use greaseproof or parchment paper to line your baking tray as the heat tends to make the paper crinkle which will lead to wonky cookies! We use Silpat mats (make sure they fit your trays) to bake up all our cookies!

07: Pre-heat your oven to 200 degrees C / 400 degrees F / Gas mark 6 and bake for around 8-10 minutes.

Tip!

Here’s a super handy tip that we use every time to check if our cookies are done… gently poke / indent one of your cookies with a finger. If the dough rises back up and the indentation disappears then they’re ready. If not then try baking them for another 2 minutes before testing again.

08: Once removed from the oven set them aside to cool down before you decorate them (if you’re going to anyway).

Recipe for gingerbread cookies

Now you can enjoy your homemade gingerbread cookies… or get them ready for friends and family! To decorate each you can dip them in dark chocolate, royal ice them, add candy details or even use fondant to decorate. We love the idea of whipping up traditional gingerbread people, covering them with milk chocolate and using crystallised ginger pieces and crushed candy canes to decorate.

How to bake gingerbread cookies for Christmas

Tasty gingerbread cookies recipe


26th November 2016 // 0 Comments

Top 10 Christmas Cookie Baking Essentials!

It’s not just winter or Christmas. Oh no. It’s also cookie season! ‘Tis the season when even complete novices break out the cookie cutters and baking trays. Whipping up a frenzy of fun biscuits for everyone is wonderfully sweet (pun fully intended) and fun. Bake snowflakes and dust with icing sugar, bag up and slip into everyone’s stockings for a winter-y treat. Make lots of sprinkle studded stars for Christmas dinner favours. Or get creative with a towering gingerbread house adorned with royal icing snow. Check out our top 10 Christmas cookies baking essentials list for some handy tools and ideas!

Christmas cookie baking essentials

Our top 10 Christmas cookie baking essentials!

01:Mixing bowls!

It sounds like a cliché, but you can never have too many mixing bowls… especially any by Mason Cash. We absolutely love them. They’re super sturdy, plus they come in a variety of gorgeous colours. This particular bowl is amazing. It’s a whopping 29cm in diameter plus it’s not too tall which means it’s perfect for hand mixing various cookie doughs from sugar to chocolate chip!

Large Mason Cash mixing bowl

02: Stars!

It’s Christmas so sprinkling stars onto everything is more then acceptable right now. Royal ice your sugar cookies and sprinkle with confetti style star sprinkles. Use sugar stars to gently mix into sugar cookie dough for a sweet surprise.

Star sprinkles by Edible by Design

03: Copper cookie cutters!

Copper cookie cutters have a wonderful vintage feel to them which instantly say Christmas time! We love that copper kitchenware have grown more and more popular each year. This festive season use a pretty copper reindeer cutter to bake fun cookies. Ice them with initials for cute personalised gifts, use as table dressing pieces or tie with bows onto jar cookie mixes for a great gift idea!

Copper reindeer cookie cutter by Eddington’s

04: Cookie / biscuit jar!

Obviously you’re going to need somewhere to keep all your homemade cookies. Where else then a glass cookie jar so that everyone else can see just how gorgeous your biscuits are during the holiday season. You can even make it super festive with a white box and some golden bells tied around it’s neck!

Glass cookie jar by Kilner

05: Spatulas!

This Mason Cash (we don’t work for them… honest) spatula is seriously our favourite. We rave about it on a regular basis. One of the worst things when hand mixing doughs is a cheap spatula with a rough wood handle that makes your skin sore. This spatula is super smooth, plus its perfect for doughs, batters and even folding macaron mixture.

Spatula by Mason Cash

06: Snowflakes!

These intricate snowflake cookie cutters are gorgeous. If you’re scared about icing or decorating cookies then utilising more design-led cutters (that feature stamped or cut out detail) is the way to go! Cut, bake and then dust with icing sugar and you’re done!

Snowflake cookie cutters by Lakeland

07: Royal icing!

We like to make our’s from scratch, but it’s pretty understandable why anyone would rather opt for a mix when it comes to royal icing. This pre-made royal icing mix by Squires Kitchen is perfect for decorating cookies. Simply whip up as per the instructions, add gel or paste food colour (if needed) and ice away!

Royal icing mix by Squires Kitchen

08: Stylish mugs!

We fully advocate taste testing so obviously you’re going to need a sweet Christmas-y mug to help you out. We love this stylish mug by Bombay Duck. What’s not to love about it… it’s got a touch of gold and it has a perfect festive message!

Be bright & sparkle mug by Bombay Duck


09: Sugar sprinkles!

Sprinkles are a ridiculously quick way to make any bake fit a theme or holiday. These cute white snowflake sprinkles can be added to freshly iced cookies as well as festive cupcakes. You can even add to the inside of cool piñata sugar cookies for a surprise!

Snowflake sprinkles


10: Cookie baking trays!

Cookie baking trays don’t sound very exciting do they, but gold ones do. Or at least they do to us (incase you can’t tell we love gold). Glam up your bakes with this simple yet stylish golden cookie tray!

Gold cookie baking tray by KitchenCraft


SaveSave

SaveSave