Browsing Tag

meringue kisses

19th July 2018 // 1 Comments

Rainbow Unicorn and Mermaid Birthday Cake!

Rainbow Unicorn and Mermaid Birthday Cake by Juniper Cakery

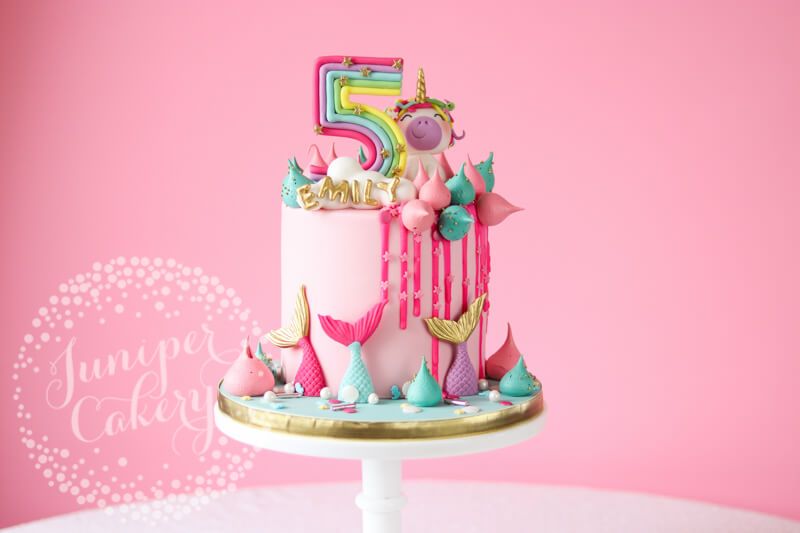
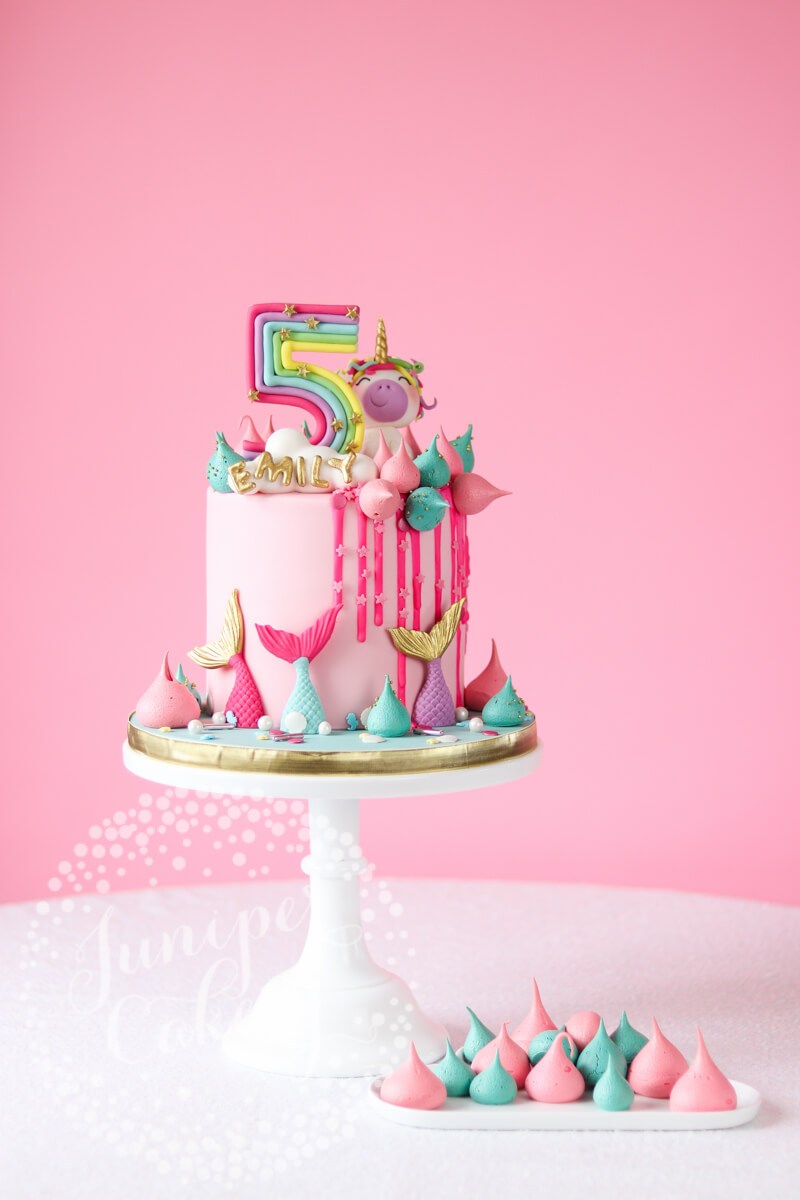
This mermaid birthday cake has to easily be one of the craziest fun cakes we’ve been asked to create so far. The inspiration behind this was little Emily’s love for a My Little Pony movie about unicorn mermaids (seriously… why didn’t this exist when we were 5?!?). Armed with images of her rainbow streaked and glitter covered party invites we had all the inspiration we needed. Our idea in the end was of a giant pink marshmallow (where else are unicorns going to live?) floating Île de Floattant style on a turquoise sea inhabited by mermaids. This possibly makes us sound insane, but sometimes it helps for us to build a small story behind the design of a cake. We think it helps add a little extra fun.

Mermaid Birthday Cake by Juniper Cakery

Recently the lovely The Shire Bakery sent us some pretty cool sprinkles. These included lots of metallic rods, tiny star studded mixes and a fun sea / mermaid themed bottle! We needed certain colours for this cake so we created a more custom mix out of some of our favourites! In went the sugar pearls, shimmering sea shells, giant pink confetti pieces, baby blue seahorses, pastel yellow stars and pink/rose gold metallic rods! Perfect for a mermaid birthday cake!

Rainbow Unicorn Birthday Cake by Juniper Cakery

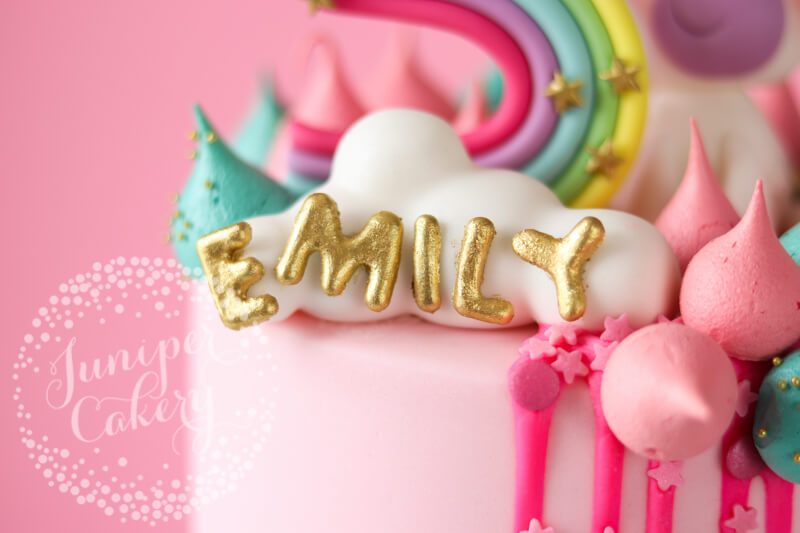
Nestled on top was Emily’s own magical unicorn, a huge rainbow 5 and a cloud with her name in gold! The fondant number 5 was tricky as it needed to be larger than the unicorn, hold itself up and be heavily decorated. Any added weight can make a custom fondant number or letter snap. To get around this we created the piece in advance and added a hidden support structure inside.
Bright and fun rainbow unicorn cake by Juniper Cakery

Unicorn and mermaid birthday cake

Super Cool Rainbow Birthday Cake by Juniper Cakery

Bright meringue kisses on a unicorn and mermaid birthday cake by Juniper Cakery

Fun mermaid unicorn cake by Juniper CakeryCute little unicorn birthday cake by Juniper Cakery

We do a lot of cakes topped with fondant unicorns so we try to make every single one different. Some have pink ombré hair and some sport a rainbow style. Some unicorns are star studded and some have a little added glitz! We gave this little cutie a super excited expression with a slightly upturned head, closed-tight eyes and a cheeky smile! We also dusted her with edible lustre and added rainbow stars in her wild rainbow mane.

Rainbow mermaid tails on a party cake by Juniper Cakery

Loving the board on this beauty! We created fondant mermaid tails with bright fondant and edible gold paint. We then surrounded these with sprinkles meringue kisses as ‘rocks’. The pretty turquoise meringues were studded with tiny gold sprinkles from Fancy Sprinkles! These added a little extra fun to the plain pink kisses with the texture and extra gold.

Also, running down the cake is a seriously so-bright-you’ll-need-sunglasses hot pink drip! We used a cocoa butter based food colouring for this as normal food colour is generally water based. We all know what happens to chocolate when a bit of water hits it… it seizes up! Yikes.

Mermaid cake by Juniper Cakery

Now for a final look at this magical rainbow covered mermaid birthday cake! We loved it from start to finish. What’s not to love really… cute unicorn… mermaids… rainbows… stars… cake!

Bright mermaid cake by Juniper Cakery

SaveSave

20th April 2017 // 2 Comments

Recipe: Unicorn Poop Meringues!

We love unicorns. We love them soooo much that we thought we’d have a super-duper-special-magical-fantastical unicorn themed April! Yes indeed. If you’re looking to whip up a frenzy of enchanted rainbow sprinkled treats then look no further. This week to kick start our unicorn collection of sweets we’re sharing our Unicorn Poop Meringues recipe!

Unicorn poop meringues recipe by Juniper Cakery

Unicorn poop meringue recipe by Juniper Cakery

Magical unicorn poop meringues recipe!

Serves / makes approx. 10 to 18 - depending on how large you pipe your kisses poop

Ingredients and tools needed…

01: Firstly, pre-heat your oven to 160 degrees C (fan) / 180 degrees C (non-fan) / 325 degrees F / gas mark 4.

02: Next you need to heat up your caster sugar. Sounds weird, but it helps the sugar to dissolve quicker into the whipped egg whites which leads to silky smooth and non-grainy meringues! Yay! Pour the sugar onto a baking tray and place in your pre-heated oven for 5 minutes.

03: Add the egg whites to your stand-up mixer (you can use a bowl and hand held mixer, but it’s a little harder to control and manage) and mix on high with the whisk attachment until they start to look lovely and frothy. When ready add in the cream of tartar and mix until combined.

Tip! Any left over grease from previous use could effect your egg whites and stop them from whipping up nicely. To stop this you’ll need to use lemon juice to wipe your mixing bowl with. Leave to dry or wipe the juice away!

Meringue kisses recipe by Juniper Cakery

How to make rainbow meringue kisses by Juniper Cakery

04: Whilst on medium speed spoon in your heated sugar mix. Your meringue should look glossy and it should also begin to stiffen up. At this stage you can add in any flavour or even colour you like. For this unicorn poop meringue recipe we added in a few drops of cotton candy flavouring. Mix until stiff.

NOTE: Our method calls for 3 separate batches of fully tinted meringue. Each one is made individually and then added down the sides of the piping bag to create the rainbow colours! Now this might seem a little too much work, but it’s the way we’ve created our rainbow unicorn poop.

We’ve found that if you make one big batch of meringue, separate it and then colour by hand you risk vastly over-mixing which leads to badly cracked meringues (one or two small cracks are normal).

A lot of people like to paint the inside of their piping bags with food colouring to get the rainbow effect. This is so that as the meringue gets piped out the colour streaks down the outer sides of the kisses. We prefer to colour the entire meringue for two reasons. Firstly, we’re super control freaks so leaving something to chance is our idea of a nightmare. Secondly, (OK, so it’s another control issue) you can all to easily paint too little colour or even too much!

Making three separate batches of meringue in different colours sounds l-o-n-g, but trust us it’ll take even longer if your meringues crack or pipe out the wrong colours!

Rainbow meringue by Juniper Cakery

05: Now it’s time to prep your piping bag! Fit your piping bag with a large round tip and then place in a tall glass. Cuff the excess end of the bag over. The glass will act as a stand which is going to be ridiculously handy when adding your meringue!

Rainbow meringue kisses by Juniper Cakery

06: Add your meringue mixtures to a disposable piping bag fitted with a large plain round piping tip and on a lined baking tray pipe rows of meringue drops. Make sure to space these out at around 2cm as they’ll expand in the oven!

Fun unicorn poop meringue kisses recipe by Juniper Cakery

How to make rainbow unicorn poop meringues by Juniper Cakery

07: Sprinkle time!

08: Place your meringue kisses in the oven and bake for around 25 – 35 minutes. We use a convection oven (which is basically a fan assisted oven) so it took only 25 minutes for our meringues.

09: When ready remove the tray from the oven and set them aside to cool down.

Bright unicorn poop recipe by Juniper Cakery

Yay! Now you can arrange them onto cute cake stands, add them to favour boxes or even nestle them on top of buttercream cakes! They’re the perfect dessert table accompaniment or as little thank you sweets.

Bright unicorn poop recipe via Juniper Cakery

22nd September 2016 // 0 Comments

Recipe: Chocolate Dipped Mocha Meringue Kisses

Mocha meringue kisses recipe for Autumn treats

It’s September and the mornings are getting wonderfully crisp right now. We absolutely love this time of year. Maybe we’re strange, but we love to start work even earlier in the morning. Hello there 6am meetings with giant mugs of hot coffee and freshly baked croissants (yes, we bake croissants for power/work breakfasts when we feel so inclined). Whilst sipping on a morning latte and biting into mini pain au chocolates just out of the oven we thought of putting together a quick how-to for some tiny sugary bites… a meringue kisses recipe. This is a version of our go-to meringue recipe that is perfect for Autumn mornings; studded with bursts of coffee and dipped in creamy Belgian chocolate of course!

Dark chocolate dipped meringue kisses

Belgian chocolate dipped mocha meringue kisses recipe!

Ingredients needed…

  • 35g egg whites
  • 70g caster sugar
  • 1/2 teaspoon cream of tartar
  • 2 teaspoons instant coffee granules
  • 2 teaspoons sieved cocoa powder (optional)
  • A handful of dark Belgian chocolate chips, buttons or callets

How to make coffee meringues with chocolate

01: Pre-heat your oven to 160 degrees C (fan) / 180 degrees C (non-fan) / 325 degrees F / gas mark 4.

How to make meringue kisses

How to bake meringue kisses

02: One of the first things you need to do for this meringue kisses recipe is heat up that sugar. This helps it to dissolve better and quicker into the whipped egg whites which means lovely smooth and non-grainy meringues! Yay! Pour the sugar onto a baking tray and place in your pre-heated oven for 5 minutes.

Recipe for meringue kisses with coffee

Mocha meringue recipe

How to create mocha meringues

03: Add your egg whites to the bowl of a stand-up mixer and mix on high with the whisk attachment until they start to look like the lovely frothy eggs above. When ready add in the cream of tartar and mix until combined.

Meringue kisses recipe

The perfect meringue

04: Whilst on medium speed spoon in your heated sugar mix. Your meringue should begin to look gorgeously glossy and it should also begin to stiffen up.

Coffee meringue kisses recipe

05: Grind your coffee granules down roughly and mix in the cocoa powder (the cocoa is optional, however, as it depends on how chocolate-y you’d love your meringues). We left the cocoa powder out of ours to get a stronger hit of coffee for each kiss. Remember not to completely grind down all your coffee.

How to bake coffee meringues

Coffee meringue

06: Add the coffee mix to your meringue and whip until incorporated. Ours looked like this, but if you’ve added cocoa powder then you should be left with a light chocolate looking meringue.

Coffee meringue kisses with chocolate

06: Spoon the meringue into a disposable piping bag fitted with a medium plain round piping tip and on a lined baking tray pipe rows of meringue drops. Make sure to space these out at around 2cm.

Recipe for tasty mocha meringue kisses

Mocha Meringue Kisses Recipe

07: Now place them in the oven and leave them to bake for around 25 - 35 minutes. We use a convection oven (which is basically a fan assisted oven) so it took only 25 minutes for our kisses to be done.

08: Remove your tray of meringue kisses from the oven once they’re ready and set them aside to cool. We always recommend investing in a marble pastry slab as leaving your bakes to cool on marble means they’re ready in half the time!

Chocolate Dipped Mocha Meringue Kisses Recipe

09: Once ready and cooled down you can start melting down your chocolate. Add the chips or buttons to a microwave safe jug/bowl and heat at 30 second intervals gently stirring the chocolate at each check point until ready. Pour or dollop your melted down chocolate onto a plate so that you can dip your meringues.

Chocolate Dipped Mocha Meringue Kisses

10: Meringues are delicate so it’s important that you’re gentle when picking them up and dipping them into the melted chocolate. Don’t grab the very tips of them. Instead pick them up lower down close to the middles. Carefully dip them into the melted chocolate and place them on a tray lined with greaseproof paper to set.

Chocolate and Coffee Meringue Recipe

11: Setting time can vary depending on the weather, but they should be ready when the chocolate no longer looks wet. If you live in a warm and humid climate you could be waiting for your kisses to dry for around an hour.

If you want to check your local levels of humidity (essential for anything involving sugar) then try out a handy app in the iStore or via android!

Homemade meringue kisses recipe

Now you can enjoy your homemade chocolate dipped mocha meringue kisses with a hot cup or coffee (or tea… or even hot chocolate loaded with whipped cream and marshmallows). These little gems are hygroscopic (they soak in moisture from the atmosphere around them) so as soon as they’re done store them in an airtight container and keep in a cool dry place. They should last for a good 2 weeks so they’re great to keep for a succession of mid-afternoon pick-me-ups!

Coffee and chocolate meringue recipe

Easy meringue kisses recipe

One of the best things about this meringue kisses recipe is that you can add or leave out whatever amount of coffee you like. Add in an extra teaspoon of coffee to your mix for more of an espresso hit. Up the chocolate, add a dash of vanilla bean paste and sift cocoa powder on top for more of a chocolate-y mocha taste.

If you’re feeling super adventurous you can try adding a small amount of chilli flakes into your melted chocolate before dipping, add sprinkles of brown sugar on top of each before lightly blow torching for a coffee creme brûlée effect or even adding finely chopped toffee into the meringue before piping for a caramel latte flavour!

Tasty coffee meringue recipe


SaveSave

SaveSave