Browsing Tag

our top 10

27th February 2016 // 0 Comments

Our Top 10 Tools for Perfect Cupcakes!

We get A LOT of emails, messages and even the odd phone call from people asking us how we get our cupcakes to look so perfect. It’d be super silly for us to just give away all of our hard earned and hard learned techniques, tips and tricks, but we can point people in the right direction. This post, top 10 tools for perfect cupcakes, is just one of our offerings into the world of creating utterly irresistible petite treats. A lot of skill and hyper-criticism (seriously, you have to be the meanest person in the world when it comes to your own work) is involved in any vocation, but gathering up the best tools and ingredients is a great place to start!

Must-have tools for perfect cupcakes!

01: Piping tips!

A damn good selection of piping tips are pretty essential on our list of tools for perfect cupcakes. How else would anyone achieve those temping buttercream frosted beauties? Closed star tips can whip up flurries of rose swirls or gorgeous ruffles, plain tips are perfect for sleek cupcakes (but this takes practice and silky buttercream as piping with a plain round tip shows every imperfection), and pastry or French (nozzles with open and tiny zig zag edging) can add a nice bit of texture to your frosting.

We use Ateco piping tips 98% of the time as they’re large, stainless steel, seamless and make the perfect swirls. They can be a little pricey in the UK as they’re imported from the USA and also can be a little harder to find BUT see them as an investment and spend the extra pennies!

Ateco 6-Piece Pastry Tube and Tips Set

02: Disposable piping bags!

There are lots of different (and great) piping bags on the market from non-disposable fabric Tala bags to even silicone piping bags! We prefer to use thin plastic disposable bags. Stiffer ones seem to hinder our piping so these are the kind we’d recommend. Piping cupcakes isn’t as easy as it looks and a piping bag that doesn’t boss you around (super stiff) really helps pipe out utterly perfect buttercream swirls! A lot people prefer stiffer feeling bags so if that’s what you’re used to then stick to it.

100 Large Plastic Disposable Icing Piping Pastry Bags

03: Cupcake corer!

Filling cupcakes can help take your treats to the next level and open up a world of tastebud tantalising flavour combinations so investing in the perfect cupcake corer is pretty much a no brainer. There are a few ways to fill up cupcakes with ganache, cream or fruity preserves such as using a bismarck tube or even just cutting into the centre of the cupcake with a small knife. A cupcake corer is quicker and more importantly… uniform.
Tala Cupcake Corer

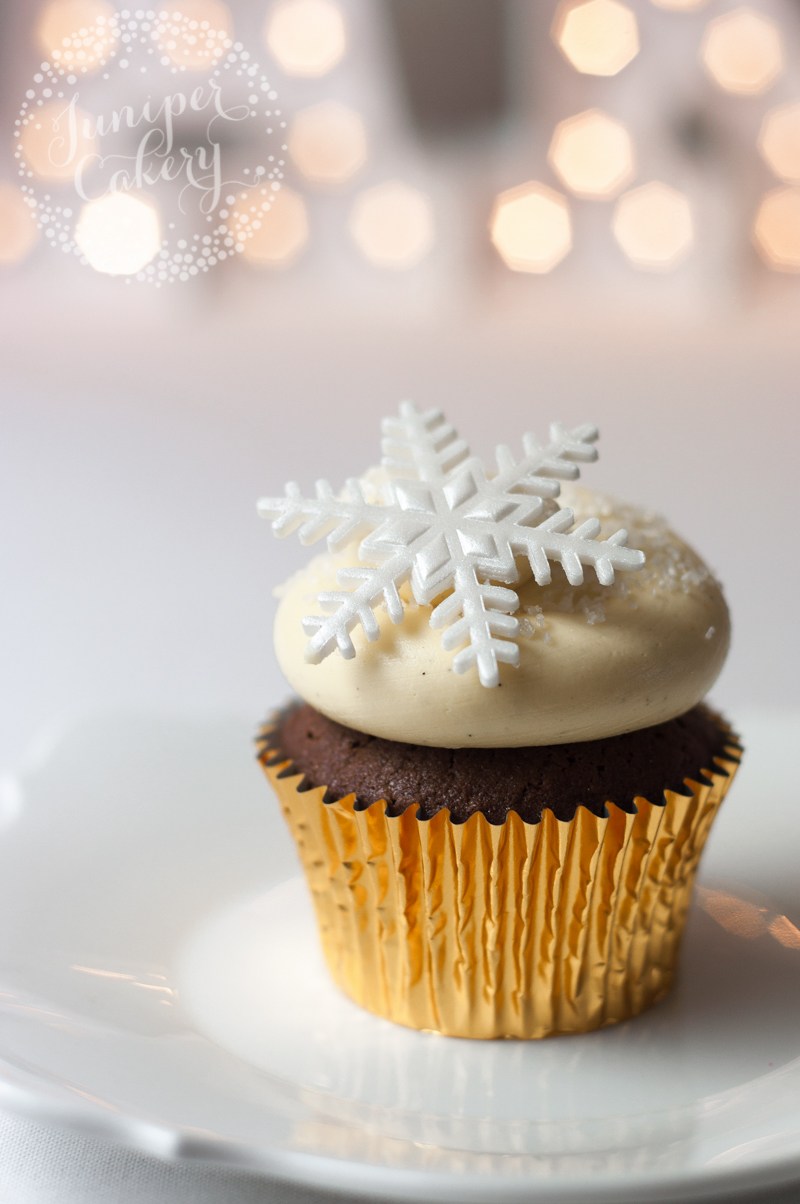
Christmas cupcake by Juniper Cakery

04: A good spatula!

Being able to mix, separate and even smooth your buttercream ready to pipe atop of your cupcakes is all helped by the humble spatula. The one we’ve recommended is our ultimate favourite! The rubber end has the perfect amount of give and stiffness to properly ‘deflate’ macaron mix with, scrape our KitchenAid bowls clean and even out the surfaces of sticky un-set marshmallows.

Mason Cash Elite Spatula

05: KitchenAid mixer!

We often sound like we work for KitchenAid, but honestly we don’t. We cannot rate their stunning stand-up mixers and accessories high enough. Not only are they damn beautiful, but they are unbelievably sturdy and efficient. If you want to get serious about making perfect cakes and cupcakes then you really need to think (and buy) serious. Making sure you have the right tools for perfect cupcakes means you need to spend a little extra money. In other words… get a KitchenAid!

KitchenAid K45SS Classic Stand Mixer - White

06: Extra KitchenAid bowl!

The busier you get the more having extra KitchenAid bowls and attachments will be a life saver! We often have to mix batter and buttercream in a short space of time from each other so having a spare bowl and paddle attachment comes in pretty handy. It’s also great when you have an order that’s particularly time-consuming such as rainbow layer cakes or cakes that incorporate different flavour buttercreams and fillings.

KitchenAid Frosted Glass Bowl

07: Premium quality vanilla bean paste!

Something as simple as the best vanilla bean paste or extract you can find could elevate any number of cupcake flavours. Seriously, a good vanilla is universal when it comes to creating mouth-watering flavours. When added to chocolate it gives out a subtle creaminess underneath, it can also help tone down more tangy flavours like Passion Fruit or lemon, and stabilise an otherwise more acidic champagne infusion.

Make sure that you stick to a bean paste or extract though as these are not only natural and the best quality, but they won’t taste fake or ‘chemical-like’. Anything labeled ‘flavouring’… steer clear from!

Nielsen Massey Madagascar Bourbon Pure Vanilla Bean Paste, 118ml

08: Good cupcake cases!

Thin or cheap cupcake cases can be an utter nightmare and make otherwise delicious cupcakes look greasy and inedible. The last thing you want is for the moisture or fat from your cupcakes to seep out through the cases. It doesn’t look appetising or professional, plus all that moisture is just going to bleed into the cupcake box! Shop around and opt for thicker cases or premium quality foil cases. We always buy 65gsm thick premium cupcake cases or larger gold foil cases.

Scrumptious 51 x 38 mm Foil Coated Paper Cupcake Cases, Gold

09: Gel or paste food colours!

Don’t waste your time, money and sanity on liquid food colouring. They’re just going to be a major let down. Not only do they never manage to achieve vibrant enough colours they thin or water down any batter or buttercream you add them to. Gel or paste colours are a lot more concentrated when it comes to pigments so you get amazing colour results without having to throw the entire tube or bottle in. PLUS… they don’t dilute the consistency of your mix!

The Pro-Gel range by Rainbow Dust is by far one of our favourite brands/collections of gel or paste colours to use. There are just so many colours to choose from, plus you really never need to add too much to get a great shade! Our favourite colours by Rainbow Dust include… Strawberry (which creates a more subtle and natural pink), Grey (amazing… no strange green, purple or blue tinted grey at all), Black (again… no blue, green or purple tints), Purple, Claret (a beautiful red/pink shade), Eucalyptus, Cream, Olive Green, Mint Green, Peach and Navy Blue.

Rainbow Dust ProGel Professional Food Colouring Set - Summer Colours

10: Ice cream scoop!

For anyone brand new to baking the necessity of an ice cream scoop may seem a little odd on our list of tools for perfect cupcakes, but it’s a great way to quickly and evenly distribute batter into cupcake cases. Scoop up some of your mix and drop into your cases. Depending on how big or small your liners are you may need to add an extra scoop or even add only half to begin with.

Kitchen Craft Metal Ice Cream Scoop

20th February 2016 // 1 Comments

Our Top 5 Tips For A Beautiful Instagram!

We get a lot of comments on our Instagram telling us how beautiful our feed is which is awesome because we spend a fair bit of time and effort on it. We’re not going to be those people who say they just throw any picture up at any time and somehow get lots of comments, likes, re-posts etc on every one. Or that we just use a simple point and shoot and somehow end up with bright clean and perfectly focused images. Nope. There’s a damn lot of work in making sure your work and Instagram feed is super polished. One of our favourite mottos is… “Go the extra mile, it’s never crowded” and we try to keep this in mind every working day. So if you’re ready to take your Instagram to the next level read our 5 tips for a beautiful Instagram feed!

Our top 5 tips for a beautiful Instagram!

01: Get serious!

Whether you’re running an Instagram account for your personal/lifestyle blog or for your business you need to get serious. If you’ve been snapping ‘behind the scenes’ shots with your iPhone, a plain old point and shoot camera or even your iPad then stop. Whilst it’s true you can take a great pictures with a smartphone or tablet for the absolute best quality we always use our DSLR and a 50mm lens. Treat yourself to a good camera, learn how to use it, learn how to style and get snapping!

This article on E!Online about celebrity Instagram accounts helped us better understand how to run ours so give it read.

We recommend…

02: Pick your colours!

People react to visuals naturally, which is both good and bad in this age of social media. Good? The work is already essentially done. It’s like preaching to the choir. Bad? Due to people remembering or noticing images before text in their everyday lives you have to work harder to keep them interested and give you their likes and comments. This is where something simple like sticking to a colour scheme helps… majorly. Our colour palette is determined by our brand colours of gold, pink and white. We do our best to try and stick to these for a stylish and consistent feed. Obviously, because what we do relies on bespoke designs for customers not everyone is going to want pink, white or gold cakes. Our way around this is to implement a bright white in the scene when it comes to photographing our work. It’s the perfect neutral colour… clean, crisp and chic! We even add small styling props such as gold cake forks or gold rimmed champagne glasses into a shoot.

03: Calm down on the filter obsession!

A lot of filters are just too much and using them can dull an image instead of lift it. It’s generally like looking at badly lit Lomography photos that weren’t processed well. Be subtle and simple. We edit our photographs using the amazing Adobe Lightroom and they’re usually ready. Every now and again we’ll do a slight second edit on them using the popular VSCO Cam app on our iPads; specifically the strikingly subtle HB1 filter. It’s perfect. It slightly ups the contrast and then de-staurates your images a little for a faint bold yet retro look. Perfect for Instagram!

04: Be selective!

If you’re Instagram is linked to your lifestyle/travel blog or a business then you need be very very picky with what you photograph and what you share. It’s perfectly fine if you have a personal account to post up photos of you in your pyjamas there, but this is just a major NO for anything professional. By all means post up some personal shots, but remember to be selective and be aspirational (and remember all the other tips too… you’re on holiday, but the rest of the Instagram world isn’t). Holidaying in Scotland or skiing in Canada? Post up a snap of the landscape or your aprés ski treat. No images of a drunk falling over in a kilt or your log cabin being taken over by a moose OK? They’re funny, but they’re not relevant and they’re definitely not aspirational.

05: Timing is everything!

Now you have the perfect images and you’re ready to upload them, but you’re just not ready yet. If you have a UK audience and you’re up editing your photographs at midnight ready to unleash them onto Instagram… wait. You’re not going to get nearly as many likes or comments past 12am than if you were to post one up at noon on a weekend. Maybe a few insomniacs or some international Instagrammers. Keep a track of when you post images and what activity you get for a week or two to get to know your audience. Also, keep holidays in mind. If Saturday seems like a good day, but you get nothing from an amazing image post on the last Saturday before Christmas then it’s not you… it’s everyone else busy panic buying gifts! You can also sign up for Instagram analytics websites such as Iconosquare, or Minter.

There you have it! Our super handy tips for a beautiful Instagram feed! Put every single one of these snippets of advice into practice and you should be on your way to Insta-stardom!

6th February 2016 //

Perfect Valentine Gifts For the Baker in Your Life!

Sweet Valentine Gifts for Bakers

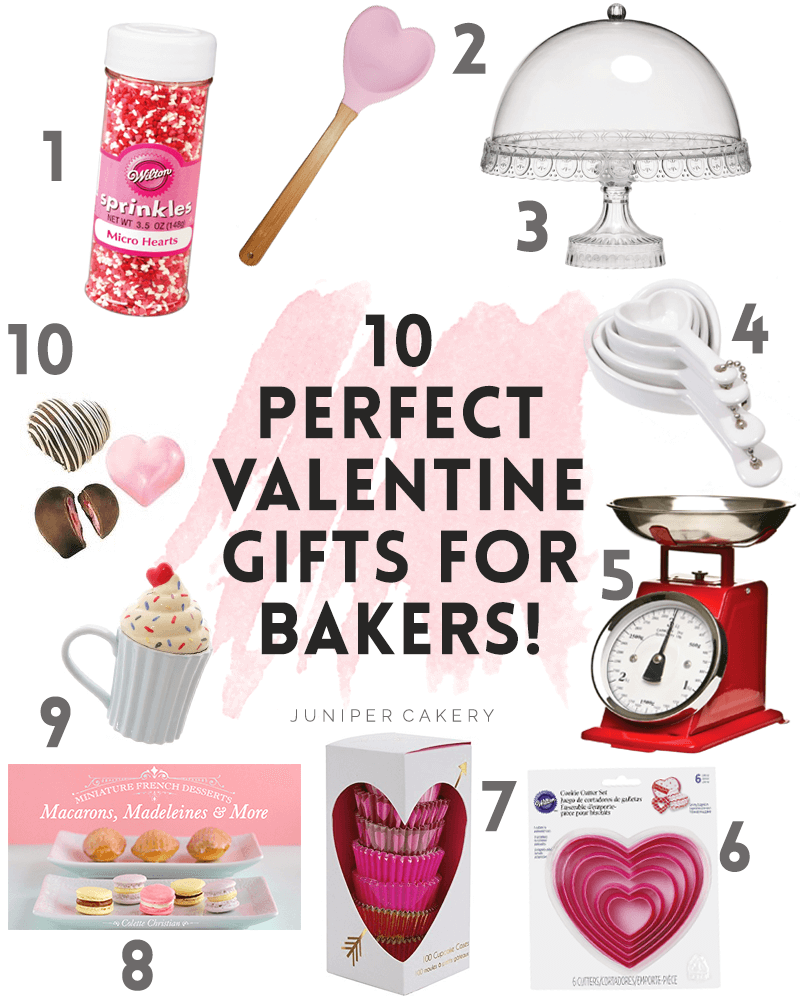
If your sweetheart is a whizz in the kitchen and just LOVES to whip up all kinds of treats then they’re bound to fall head over heels with our list of perfect Valentine gifts for bakers! For novice bakers and even more advanced cake artists getting a fun gift they’re sure to use on their next project or even just to bake up a weekend sweet with is perfect. Our jobs entail everything to do with cake and we’d love everything on this list! So for some Valentine gift ideas for bakers read on…

10 Valentine Gifts for Bakers

Valentine gifts for bakers!

01: Novelty sprinkles!

Seriously, it doesn’t matter if you or your loved one is a novice baker or pretty advanced sprinkles will always be a quick and cute way to add instant colour and design to home bakes. These utterly adorable mini sprinkles are teeny tiny hearts that look a little quirkier than the normal full sized ones. They’re perfect to top dainty macarons with, add to generously swirled cupcakes or even use as details on iced cookies (the pink ones would make great button noses on animal figures).

Mini Valentine Sprinkles by Wilton

02: Heart shaped silicone mixing spoon!

Sometimes a fun novelty themed mixing spoon or spatula can help bring a smile to someone’s face. We’re pretty sure this one may do just that. Plus, it’s available in a gorgeous powder blue and even more lovely pistachio green shade as well as soft pink. It’s perfect for mixing colour or flavouring into cake batter or even silky buttercream, adding chocolate chips or fudge pieces to cookie dough and spooning cupcake mix into cases.

Heart Shaped Silicone Spoon

03: Vintage style cake stand!

Who can resist this gorgeous vintage style glass cake stand? Not only does it feature a glass base that reminds us of antique perfume bottles, but it comes with a matching dome to help protect those homemade cakes in the most stylish of ways! You could assemble tempting cupcakes, easy macarons and freshly baked cookies underneath the glass dome too for a rustic yet glam bakery look.

Glass Cake Stand with Dome

04: Ceramic heart shaped measuring spoons!

Measuring spoons are pretty essential when it comes to baking and even cooking. Dolling out the right amounts of cinnamon, vanilla or allspice can obviously be even more fun and chic with this subtle novelty set of ceramic spoons. Nestle these in a gold gift box with heart shaped sprinkles, a handy cookie recipe book and some Valentine’s themed Hershey’s Kisses for a truly sweet gift!

Ceramic Heart Measuring Spoon Set

05: Retro red kitchen scales!

We have these scales (in cream) and they’re used pretty regularly. Design-wise they’re just the right amount of vintage chic and practical prowess. We’ve also had these scales for some time and they look and work just like the day we bought them! The fun retro red is sure to brighten up any kitchen too.

Premier Housewares 5 Kg Kitchen Scale Retro Style, Red

06: Heart cookie cutter set!

Good heart shaped cookie cutters not only make cute Valentine themed gifts, but they’re an essential for any baker! You’re sweetheart can whip up heart shaped cookies, lovely fondant cupcake decorations or use to indent designs into sugar paste work. For a really sweet idea tie up the cutters with a big bow and pop into a Valentine gift bag filled with the perfect ingredients for cookie baking (especially these Valentine themed M&Ms!).

Wilton Nesting Cutters, Set of Six - Heart

07: Valentine cupcake cases

Cupcakes are always a classic sweet to whip up in the kitchen and for years now they just seem to get more and more popular. Why not treat your Valentine to these gorgeous love themed cupcake cases? Featuring heart prints and vibrant pinks and reads they’d help make the most stunning cupcakes.

Meri Meri Hearts and Arrows Assorted Valentines Day Mini Baking Cases, Pack of 100

08: Macarons, Madelines & More Class!

This class is fabulous. We signed up for this video lesson on Craftsy some time ago. Even though we’ve been making macarons for years now we even picked up a few extra helpful tips and explanations on how to mix them perfectly and even niggly reasons why they can sometimes fail. It’s a great class for both beginners and advanced bakers plus your Valentine can chat to the instructor whilst watching, pause it when it’s time to shoot off to work or even check out how other students are doing!

Macarons, Madelines & More Craftsy Class

09: Fun cupcake mug!

Of course every baker needs a break or two during a hard day’s work! This amazing cupcake shaped mug is perfect for your Valentine to enjoy a hot cup of tea mid-baking session or even get their morning coffee fix before work! We love this design because of the cute red heart on top, but there’s several different colours and styles for you to choose from too.

Cute Cupcake Ceramic Mug with Lid

10: Heart Shaped Truffle Mould!

Last but not least here’s a fun heart shaped truffle mould for you or your Valentine to whip up deliciously tempting chocolates! Simply melt tempered chocolate, fill the moulds and leave to set. If you’re feeling ambitious you can fill each with salted caramel or fruity raspberry centres!

23rd January 2016 //

Our 10 Essential Baking Tools for Beginner Bakers!

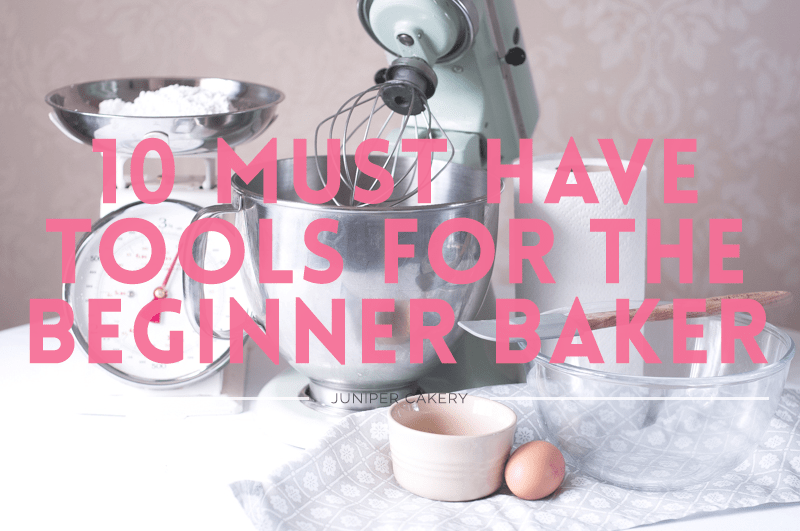
10 must have tools for the beginner baker

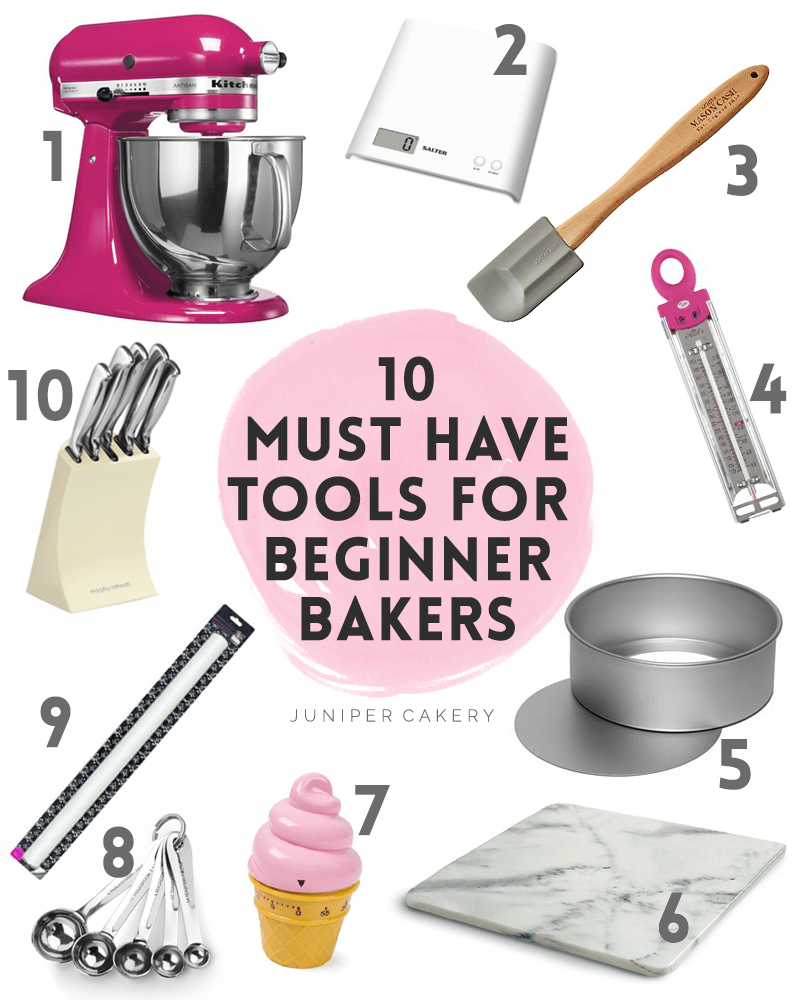
Top 10 must have baking tools for beginner bakers

01: A damn good stand-up mixer!

We love love LOVE our KitchenAid Artisan mixer. Love it. We’ve used others, but they’ve just not kept up with our demands. They’re also pretty beautiful as well as being incredibly robust and reliable. We love ours so much that we’ve already convinced a fair few people to buy a KitchenAid (one person even changed their kitchen to match their mixer). We don’t work for them we swear. Anyway, everyone has their own preferences though so shop around, if you can try some out or really look at the parts in store before you succumb to KitchenAid desires (JOKE… seriously though they’re perfect).

KitchenAid 5KSM150PSECB food processor - food processors (Stainless steel, Metal, 50 - 60 Hz)

02: SCALES!

Scales are important. They’re so important we capitalised the title for this section. Cups just don’t do it. They’re not as accurate, convenient, professional or even worldwide. Most recipes list ingredients in weight measurements so if you do use cups you’re then going to have to faff around converting the amounts. Invest in some good scales (digital are best) and you’re ready to bake!

Salter Arc Electronic Scale, White

03: Good quality spatulas and utensils!

Don’t scrimp on any tools or you’ll regret it later. A well made spatula and a cheap spatula can make all the difference between a perfect macaron or the a butt-ugly macaron sent from Satan’s yard sale. Our top brands for utensils are Tala, Mason Cash and KitchenCraft. Depending on where you live in the world you’ll find brands and styles that you prefer to work with, so shop around and find what you’re most comfortable with!

Mason Cash Elite Spatula, Beech

04: Thermometers!

We’ve amassed a small collection of thermometers that help us run our kitchen pretty efficiently. Two main thermometers you will need to invest in are an oven thermometer and a candy thermometer. Use your oven thermometer to check your oven temperatures are accurate. They’re handy as not many people realise that oven temps drop every time you open the oven door. Candy thermometers can be used for making Italian meringues or Sucre Cuit method macarons as well as for candies, chocolates and sauces.

Tala Jam and Confectionary Thermometer, Raspberry

05: Excellent baking pans or tins!

Cheap or bog standard (British for ‘average’) baking pans and tins just won’t do. Instead spend a few extra pennies on some good, durable, straight-edge cake tins. Our absolute favourites are by Silverwood. They are amazing. They’re well made, sharp, strong and seamless. Alongside this tip we’d also recommend opting for loose bottom pans and staying away from springform which can cause odd shaped sides on a cake.

Alan Silverwood Anodised Round Cake Pan 10″/25cm loose based

06: Cooling surface!

Whilst most people use wire racks to help set their bakes out of the way to cool we prefer a good marble slab or marble pastry board. It’s permanently cold, sturdy and won’t leave annoying wire lines across your cakes and cookies. The last thing you want on a naked cake are those wire indentations running along a cake you aren’t covering up!

Extra Large Heavy Marble Pastry Board / Chopping Board by verygoodbuys

07: Timer!

It happens. You put a cake in the oven and you think you’re going to remember when to take it out, but someone calls or you have work to do. You forget about the cake until the distinct smell of burning finds its way to your nose and the panic sets in. You can pick up a small kitchen timer from most grocery or department stores. You can even find some really cute novelty timers out there too. If you’re more tech-y then utilise your iPhone or tablet. We use our iPads to mainly keep track of things in the kitchen because we’re often on ours replying to emails, managing social media or playing Plants vs Zombies. There are apps to time multiple activities too such as Timer+ which is perfect for a busy kitchen!

Cute Home Ice Cream Shaped Kitchen Timer

08: Measuring spoons!

Sometimes a recipe calls for a teaspoon of this or a tablespoon of that. It seems like it’d be OK to just use an actual teaspoon or tablespoon right? Wrong. Different designs and companies tend to yield different sized tea and table spoons which is pretty annoying. Grab a good quality set of stainless steel measuring spoons to help make all your bakes more accurate.

Tala 5-Piece Stainless Steel Measuring Spoon Set, Silver

09: Rolling pins!

We have three main rolling pins in our kitchen. Three. Main. If we counted all our rolling pins then we’d have around 7. Crazy, but at times essential. We have a heavy 6lb Kingpin rolling pin, a long PME silicone rolling pin and a super SUPER long silicone rolling pin by The Little Venice Cake Company. Each have different jobs… the Kingpin is perfect for quickly flattening out stiff fondant (or a lot of it) or cookie dough. That 6lb in weight is so useful. The long rolling pin is good for cookies and rolling fondant / sugar paste for small to medium cakes. The super long rolling pin is ideal for covering both large and deep cakes. Then there are smaller rolling pins for cupcake work, florals and sugar craft.

Little Venice Cake Company Large Professional Smooth Rolling Pin

10: Sharp knives!

Good quality knives of varying sizes that are kept in tip top condition are a must in any kitchen. For baking you’ll find them handy for a whole list of things from chopping and transferring ingredients, freeing the sides of cakes from baking pans, cutting custom shapes from rolled cookie dough and tidying up the edges of fondant / sugar paste cake boards. Make sure to have a selection of styles, sizes and edges to help you out with different tasks!

Morphy Richards 79005 Accents Five Piece Knife Block - White

9th January 2016 // 0 Comments

Top 10 Tips for The Beginner Baker!

Everyone has some form of New Year’s resolutions that more often than not involve being better at something (even being better at not eating too much cake… which may be something we fail at)! Anyway, whether you’re learning an entirely new skill or making sure you perfect a hobby we’re sure a few tips and tricks are welcome. We bake and design cakes for a living so we receive hundreds of emails in a year from people asking what, how and WTF. With this firmly in mind for the new year we thought we’d put together a (hopefully) helpful post with our personal top 10 tips for the beginner baker!

Top 10 tips for the beginner baker!

01: Plan ahead!

Too many people decide to take a huge project at the drop of a hat. We’ve heard it all before; someone asks us what went wrong and when we ask how they started and then it generally goes a little something like this…

Baker decides on a cake they want to make for a friend (or worse yet… their own wedding) - an ambitious two tier cake for a beginner who has only made cupcakes previously. One day before the Baker’s friend’s birthday they finally begin baking, mixing up buttercream, prepping jams and making decorations (flowers, figures etc). At 2am they’re pretty frazzled, tired, covered in sugar. No sleep is had with the cake crumbling and about to fully fall to pieces. The buttercream is melting and seeping down the entire cake. At 5pm an hour before the friend’s party they give up and decide to cover and hide sections of the cake with either real flowers (and there are a lot of flowers out there that are toxic and can’t touch food) or candy. Cake gets taken to the party and then collapses in on itself resulting in one huge cake fail.

The most obvious thing is that no planning was done. (OK, so there is also a complete misunderstanding of personal limitations and lack of experience too, but that’s a whole different section!) Too many people think “It’s just cake” and then are utterly deflated and on the edge of despair when “just a cake” turns into “just a disaster”. Even a small buttercream / bakery-style cake for us is a detailed production so imagine what needs planning for a two tiered floral birthday cake? One of the best tips for the beginner baker is to plan in advance!

Course of action? Find what cake you want to try and make (make sure it matches your ability - be honest), finalise colour palettes / flavours / size, sketch out your design with notes and adjustments, type up a bake & make list a week prior to the due date including a full shopping list of ingredients or decor, make any flowers or figures at least 2 days before the due date and keep them in a cool and clean environment, cover and trim your board 2 days in advance too, bake / crumb coat / ice your cake the day before it needs to be picked up or delivered and spend the rest of the day adding details and decor!

02: Prepare what you need!

Weigh and lay out all ingredients and tools on your workspace in advance and on the day. It’ll help make you feel less panicked and more organised to see everything you need to bake up the perfect cake. You may even have completely ran out of something like piping bags or greaseproof paper. Finding out at the last minute is soooo annoying. We’re human and we’ve all done it. Everyone has that moment when they remember seeing that bottle of Madagascan vanilla paste in the cupboard and think they won’t need to pick any up from the store, but when it comes to the big day it turns out to actually be coffee extract.

03: Don’t blame the recipe!

A lot of people like to try out recipes they find in books, magazines or even on the internet. This is great as there are some pretty awesome things to make out there. The only problem is that some people are a little to quick to blame the source of the recipe. Too many things can make a cake or macarons or cookies go wrong which aren’t the fault of the chef, blogger or author. Everyone we’ve met in the food development industry tests, tests and then tests recipes over and over again to make sure it’s perfect before it gets published. Think about it; why would anyone want to release a recipe that doesn’t work and is bound to get complaints? There are, unfortunately, lots of factors that could hinder your progress with a recipe. Your oven could well be off… it’s common knowledge in the industry that ovens can be below or over the temperature you think it is. Humidity is also a pesky little tyrant depending on where you live (it’s often blamed for dismal macarons and even fondant). Ingredients vary from brand to brand and country to country - e.g, some sugars contain different anti-caking agents and can seem more or less sweet than other companies. Quality of ingredients vary too. If a recipe recommends couverture chocolate then they’ve done so for a reason.

Also, READ the recipe. That may sound obvious, but the amount of emails we get asking us why there’s cream in a frosting recipe when we’re referring to ‘cream’ as an instruction or verb not a ingredient or noun. Sit down, have a cup of tea and read through everything you need and everything you need to do. You’ll find yourself less flustered and less likely to mess up. Sometimes one of the most obvious tips for the beginner baker is the most overlooked.

04: Taste test!

Baking involves flavour; pretty obvious huh? You’d be surprised how many people don’t test and assess what they eat - even their own recipes! This is a pretty fun exercise you can develop every time you eat (a great excuse to go out for dinner). To be a better baker you need to train your taste buds! Try out your’s and someone else’s cakes and work out what you liked and didn’t like about both. What would you change? Was your lemon cake lacking in flavour; did it need a bit of a kick? Try adding more lemon oil or using Limoncello for grown-up cakes! Is your buttercream too sweet? Try adding less icing sugar into the mix, switch to a different brand or maybe you’re flavouring it with too much of a sweet thing like caramel sauce.

05: Tools of the trade!

Lots of people new to a hobby get a little insane with collecting all the tools they think they need. Sometimes you really don’t need absolutely every little thing a company makes. Any company is trying to bring in the money at the end of the day so of course they’re going to release some tool that you just have to have when really it’s may not be that useful to you. Don’t go throwing money around when you’re just beginning. Instead invest wisely and buy slowly. For example, we don’t use cake levellers. Ever. They’re not really necessary. We simply use sharp knives, a clean spirit level (that’s only used for cake… no cross contamination), a stern eye and a steady hand! If anything we’ve found cake levellers to be more of a hindrance. By the way… we’ll be putting together a super handy blog post soon about baking tools that are perfect for beginners!

06: Be your own worst critic!

This tip is a hard one to put into motion for some people. For others it’s too easy! Basically, it’s pretty difficult to get the balance right. People who are good at what they do tend to have around 70% self-criticism and 30% self-awesomism (not a word or official statists too, but let’s pretend they are). You need that balance. You need to be your own worst critic because your friends and family don’t want to hurt your feelings or discourage you so it’s totally up to you to judge your work not them. In a nutshell, don’t trust your loved ones; trust your gut. Think about it… you make a wonky-melting-down-one-side-cake-that-tastes-rammed-full-of-crazy-chemicals-and-thus-may-be-inedible and your parents tell you it’s brilliant. Of course they would. Ignore them. Really look at that cake, taste it, assess what went wrong and vow to be better. You can do it! Being your own worst critic is the only way for you to really do better and move on to greatness!

07: Buy the best!

When it comes to tool shopping from spangly new cake pans to candy thermometers always pay a little more for a better product. It’s pretty much the same as the famous Vivienne Westwood quote “Buy less. Choose well.” Don’t be tempted by those cheap as chips (British phrase there basically meaning super cheap) deals for 500 cupcake cases on Ebay from Taiwan for £3. Don’t do it. They may be nice to your purse right now, but int he long run they won’t be. Get to know your brands, their reputation and opt for them instead of anything unknown. Our favourite brands (that we more than regularly use on a daily basis) include… Tala, Ateco, Rainbow Dust, PME, Sugarflair, KitchenCraft, Nordic Ware and Silverwood.

08: Know your stuff!

It’s important to learn and grow familiar with your ingredients. If you don’t understand them or know why you need them then you’re not going to know what you’re doing. If you concoct a cool cake flavour it makes sense to understand and plan out how it’s going to work. E.g, why would a dairy and gluten free whisky cake need some extra planning? Making a cake with substituted ingredients like no dairy or using gluten free flour makes it much less stable to work with. Adding an extra wet element into the mix then just makes matters worse. Solution? Test different dairy free butters and gluten free flours. Reduce whisky into a thicker liquid, shop around for whisky essence or opt to have a whisky glaze or buttercream to infuse flavour. There are some pretty fantastic books on the science of baking and how to understand ingredients such as… How Baking Works by Paula Figoni and Understanding Baking by Joseph Amendola and Nicole Rees.

09: Check your oven!

Ovens are insane. They can be under or over temperature so it makes sense to check it before you even think about putting a cake in there. Buy a good oven thermometer (NOT a candy thermometer or even a human one… naughty), place it inside and pre-heat (any degrees you like). Once your oven is ready check that it matches the thermometer. Chances are it won’t. Now you can do one of two things… call a specialist to have your oven fixed or you can keep the degrees difference in mind. So if you’re oven should be 200 degrees C and thermometer says it’s 180 degrees C remember whenever you back that your oven is 20 degrees C below what it should be.

10: Get some scales!

Though this may be the last tip on the list it’s a very important piece of advice! Cups really aren’t reliable. Sorry, but they’re not. Scales aren’t scary in the least; they’re actually waiting to be your best friend! Traditional style scales are great and we use some in our kitchen, but for finicky things such as macarons digital scales are perfect. They also make sorting out ingredients quicker and make less mess too!

Now go forth into the kitchen armed with our top tips for the beginner baker and whip up a masterpiece!