Tutorial: Intro to Royal Icing…Stencil Designs!

We’re now onto week three of our ‘Intro to Royal Icing’ tutorial series which we hope you find easy to follow and pretty darn useful. Working with royal icing seems daunting, but with a straightforward recipe and some patience and practice it needn’t be! For our first tutorial of the collection we showed you how to pipe delicate pearl borders and we shared our go-to recipe for royal icing, then last week we featured a how to on making a parchment paper cornet/cone and how to pipe polka dots, this week we’re going to show you how to use stencils and royal icing to apply some fabulous designs onto your cakes and cupcakes!

How to stencil with royal icing by Juniper Cakery

Stenciling cakes tutorial by Juniper Cakery

How to use stencils with royal icing

You’ll need…

  • A flat and clean stencil
  • Cake, cookie or flat fondant disc to top a cupcake (fondant/sugarpaste covered is best)
  • Royal icing (find our recipe here) the consistency of toothpaste
  • Spatula
  • Trex or Crisco (optional)

Step 1: One of the first steps (if obvious) is to make sure that your stencil is the appropriate size for the surface you wish to decorate! Also, it’s best if your stencil is flat so look after them to avoid kinks, bends or folds. If you’re a fresh faced beginner it’s best to steer clear of over-complicated stencil designs until you’re more proficient!

Royal icing stencil tutorial by Juniper Cakery

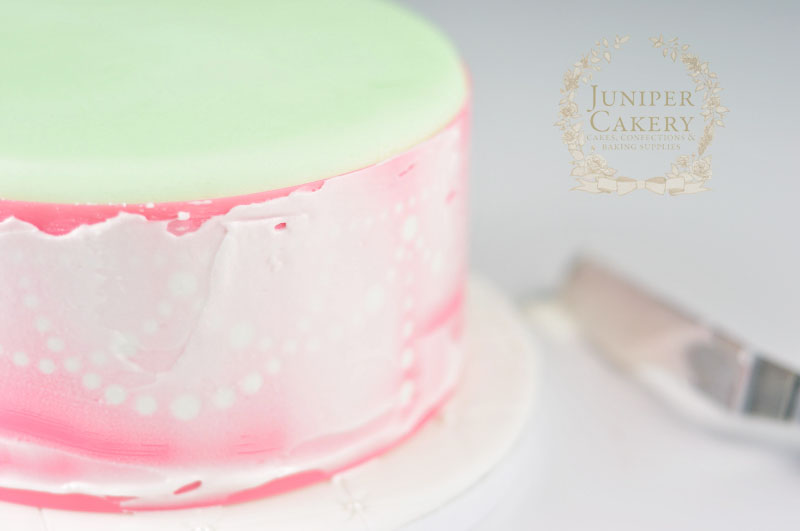
Step 2: Apply the stencil to the surface (some people paint Trex or Crisco onto the side of the stencil that will touch the cake to help stick it on, some utilise pins instead, and some have someone generous enough to lend their steady hands for a few moments), hold down steadily yet lightly before you apply your royal icing. 

Tutorial on how to stencil with royal icing by Juniper Cakery

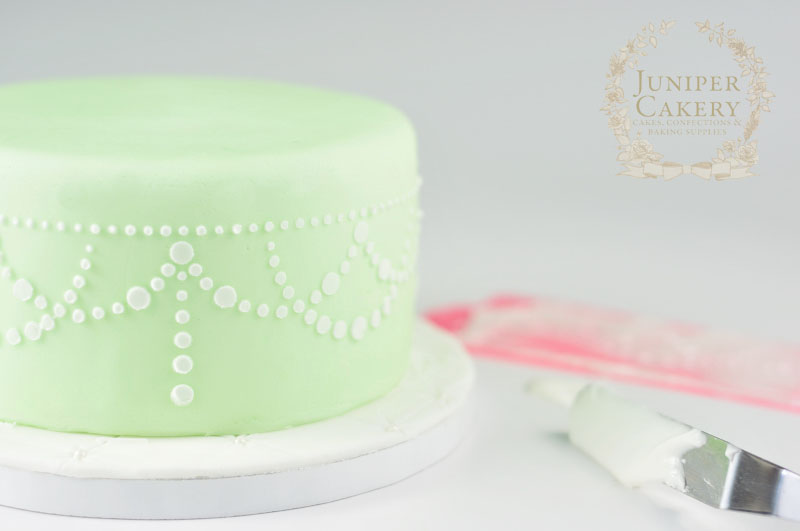
Step 3: With a good spatula (we recommend a cranked or angled spatula for good control). Whilst holding the stencil steady apply some royal icing and use the spatula to smooth over the stencil. Scrape excess royal icing away with the spatula and when ready slowly peel the stencil away. Remember to always work pragmatically… clean and wipe your stencil between each cookie or side of a cake to avoid blurred or indecipherable designs. Impatience will lead to mess! 

How to stencil onto cakes with Juniper Cakery

Tutorial on how to stencil cakes by Juniper Cakery

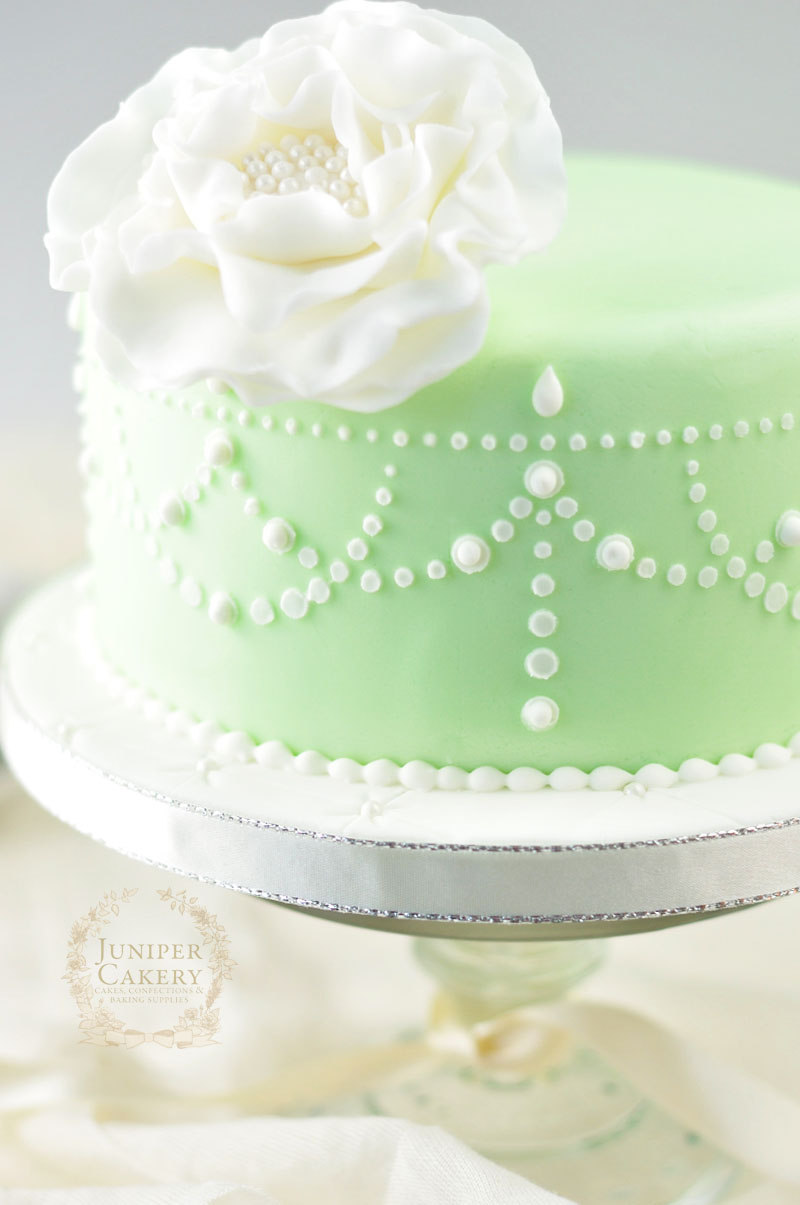
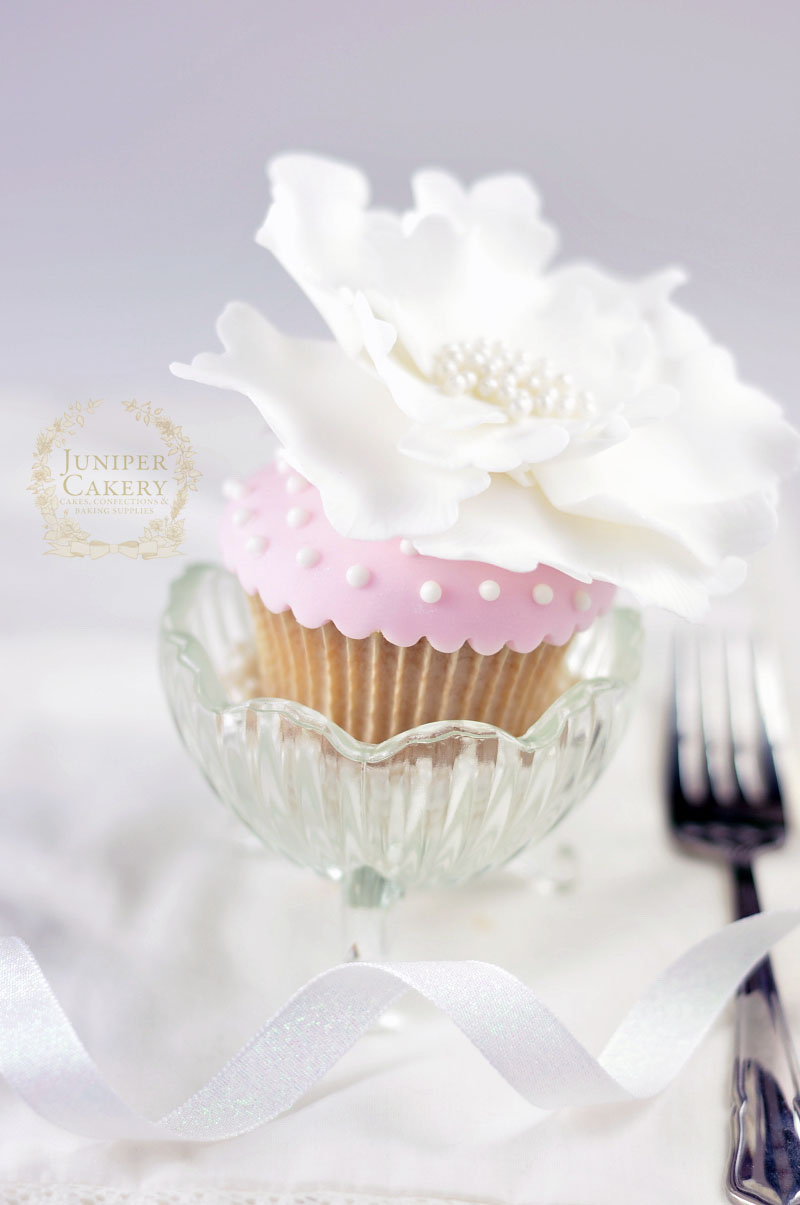
Once you become more confident with this technique adding stencil designs to your cakes and cookies with royal icing will be a fantastic and fast way to add detail! Now that our ‘Into to Royal Icing’ series is over why not keep test your new-found skills on a batch of cookies or cupcakes? Stop by next week to find out what our next collection of tutorials will be!


All photographs, designs (including all baked and decorated goods), tutorials and written content belong to and are copyright to Juniper Cakery unless otherwise stated. Please do not copy! Copying and re-publishing our work without our permission or claiming it as your own work could lead to legal action from us. If you wish to feature our work do contact us for permission.

Tutorial: Intro to Royal Icing… Piping Polka Dots!

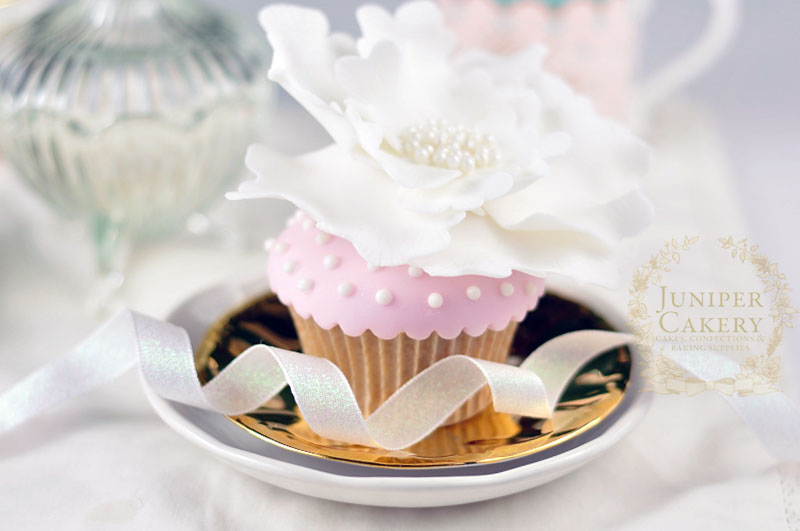
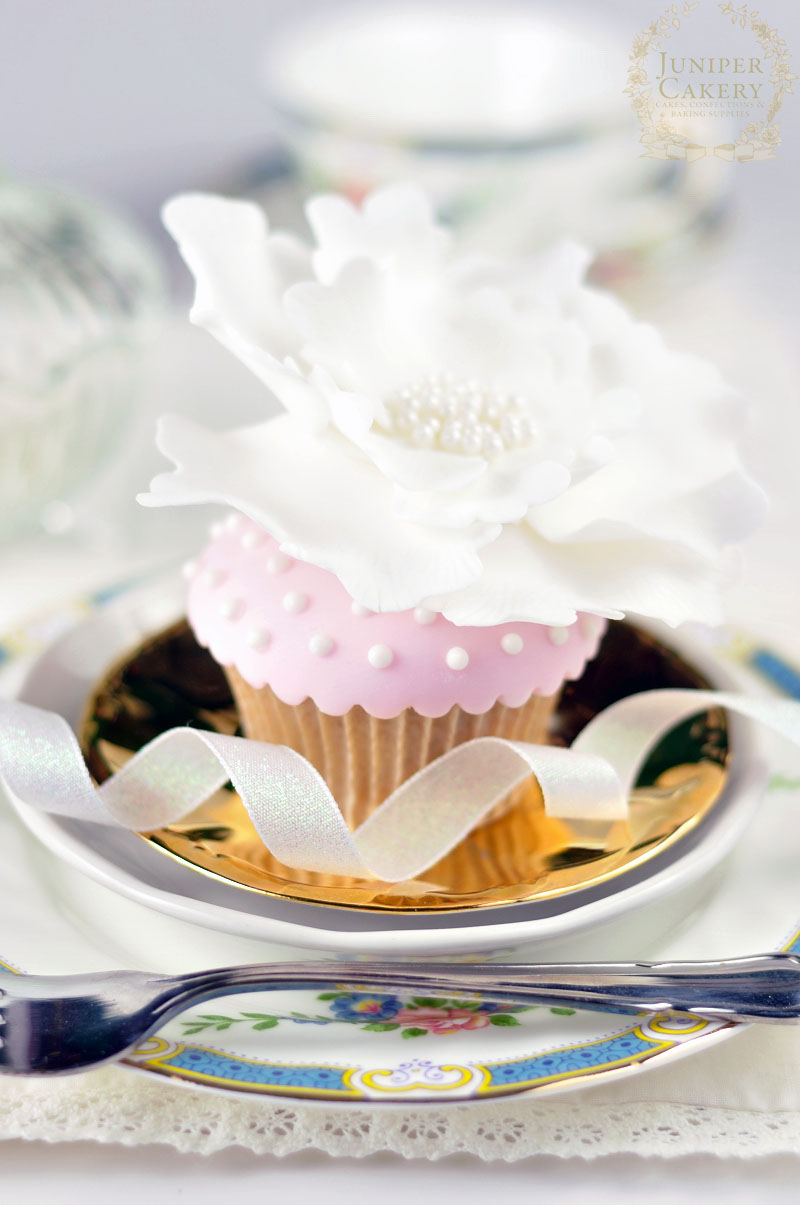
Last week we kick started our ‘Intro to Royal Icing’ tutorials with our go-to royal icing recipe and a tutorial on how to pipe a lovely and delicate pearl border! Now it’s time for us to show you how to pipe polka dots (or random dots if you like) onto cakes, cookies and cupcakes. This technique is wonderful and perfect for adding texture to decorated treats; piping royal icing dots into a polka dot formation also adds a very subtle vintage feel to a finished cake!

Polka dot icing tutorial by Juniper Cakery

This week we’re also going to show you how to create a parchment cornet /cone used for piping royal icing designs. We use a combination of both parchment cornets and disposable piping bags and personally haven’t noticed too much of a different between the two. One notable thing is that the smaller parchment cornet is better if piping smaller or more ‘fiddly’ detail due to the way you end up holding it and also due to the size. Using a parchment cornet is generally great for writing, string-work or lace.

How to make a parchment cornet / cone

You’ll need…

  • Parchment paper
  • Scissors
  • Piping tip
  • Small round piping tip (we used a 2.5 writer tip by PME
  • Royal icing (find our recipe here) the consistency of toothpaste


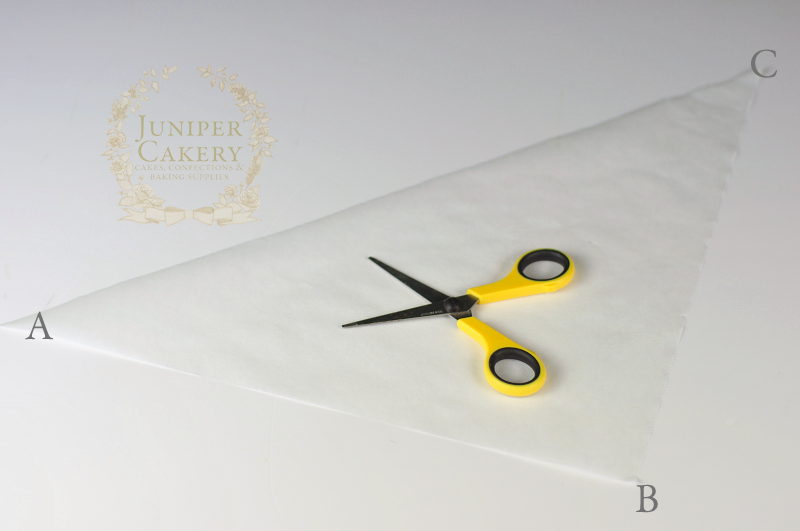
Step 1: Take a roll of parchment paper and cut a square portion from this.

Step 2: Fold corner to corner to form a triangle and cut down the fold.

how to make a parchment cone for royal icing by Juniper Cakery

Step 3: Think of each corner as being marked with a letter. The middle point should face you and be corner B. The outer points should be A and C. A being the left and C being the right.

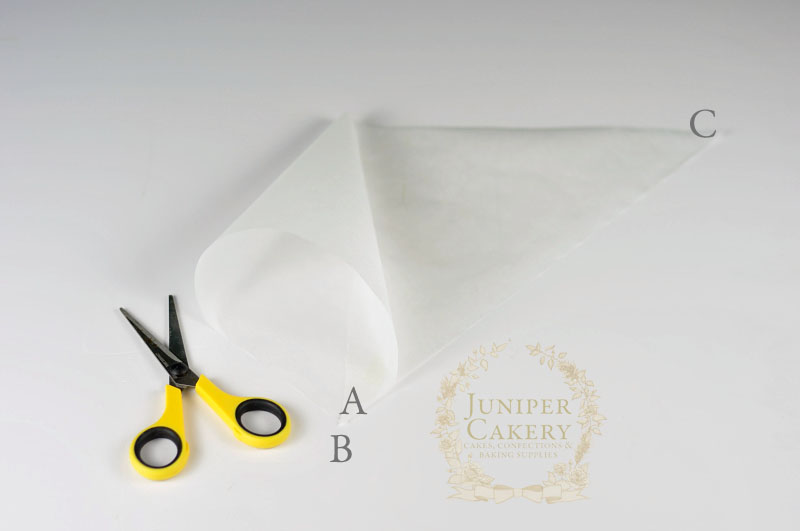
Step 4: To form the cornet bring point A to point B to form a conical shape.

how to make a parchment cornet by Juniper Cakery

Step 5: Take point C and bring this to point B. This should, in a sense, double up the cornet shape.

Step 6: Take your piping tip and fit into the bottom of the cornet as with a disposable piping bag. You can adjust the points to fit the tip.

Step 7: When all points meet rip two notches parallel to each other and fold this to hold the bag.

Step 8: Fold the piping bag at the points a few times to secure.

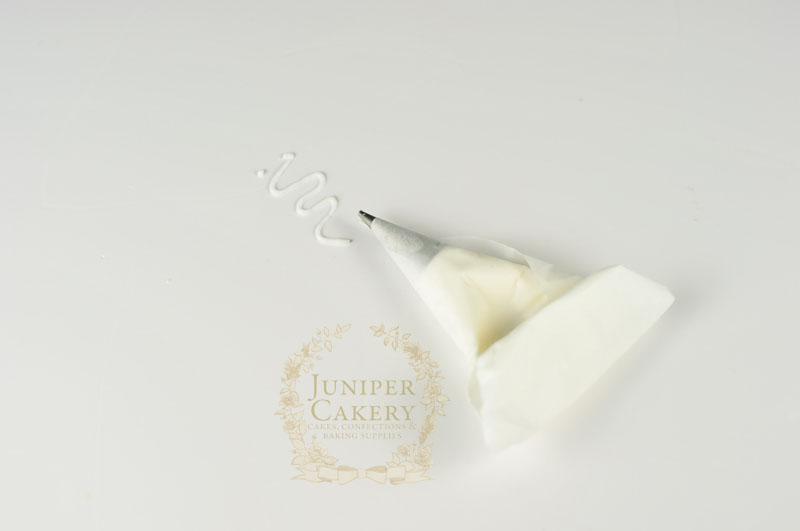
Step 9: Fill with a little royal icing.

how to make a parchment  piping bag by Juniper Cakery

Step 10: Fold the parchment cornet in on itself from the sides and then from the top a few times and you’re ready to pipe!

Royal icing dots tutorial by Juniper Cakery

How to pipe royal icing polka dots

 You’ll need…

  • Parchment cornet/cone filled with royal icing and fitted with a small plain round tip
  • Cake, cookie or fondant/sugarpaste covered cupcake
  • Food safe paintbrush
  • Icing sugar
  • Dressmaker’s pin (optional)

How to pipe dots with royal icing by Juniper Cakery

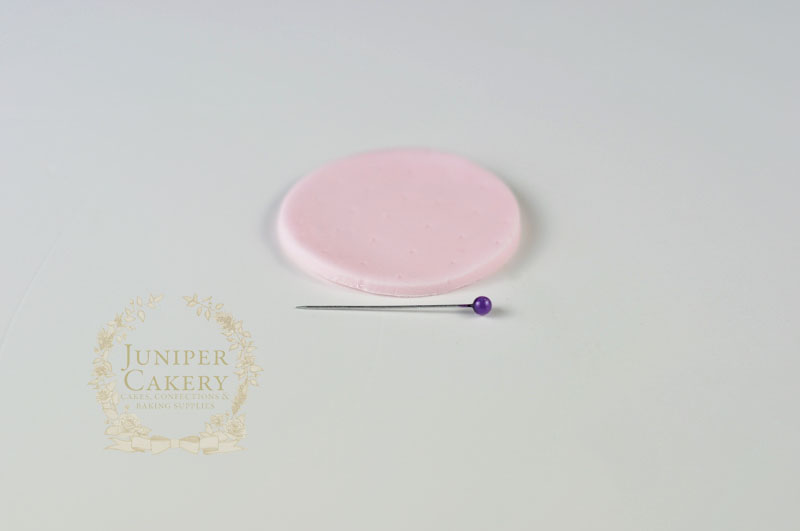
Step 1: When you’re relatively new to piping out polka dots or a design made up of small royal icing dots it’s a good idea to mark out your design or pattern with pin pricks. Use a clean dressmakers pin to do so.

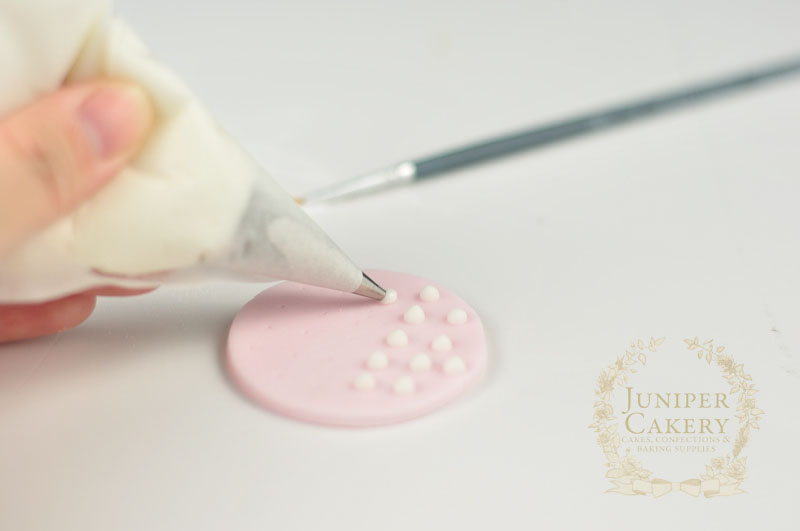
Step 2: With your parchment cornet/cone filled with royal icing and fitted with a seamless (this is important as a seam can send your royal icing out crooked and hard to control) small round piping tip and position yourself at a good height to your cake or cookie. For cakes work from the direct front and for cookies or cupcakes work from directly above.

Piping dots with royal icing by Juniper Cakery

Step 3: Apply a little pressure to add a small dot of royal icing. Don’t pipe for too long if you need a larger dot as this will create ridged spots that won’t look too elegant, instead swap to a large round tip if needed. Another tip is to not place the piping tip too close to the surface or else you’ll be left with flat spots instead of nicely rounded dots.

Step 4: Don’t worry if you’re left with a bit of a tip to each dot. This is fairly normal; if you’ve the perfect consistency dots do ‘settle’ after a few seconds and without spreading out. If you do have tips that don’t settle you can flatten these slightly with a food safe (only ever used on edible items) paintbrush dipped in a  little icing sugar. You’ll need to work fast  as royal icing sets quickly. It may be frustrating but don’t be tempted to pipe out all your dots before tapping the tips down because they’ll have dried before you have the chance!

Royal icing dots tutorial by Juniper Cakery

Keep practising! It takes a little time to get any technique perfected especially when it involves royal icing. If you’re feeling adventurous why not edge a cake with the pearl border we showed you how to create last week and decorate with this week’s dainty polka dot tutorial! Next we’ll be showing you how to use royal icing to stencil designs on your cakes and cookies!


All photographs, designs (including all baked and decorated goods), tutorials and written content belong to and are copyright to Juniper Cakery unless otherwise stated. Please do not copy! Copying and re-publishing our work without our permission or claiming it as your own work could lead to legal action from us. If you wish to feature our work do contact us for permission.

Tutorial: Intro to Royal Icing… Piping Pearl Borders!

After a rather hectic couple of months full of magazine work, large cake orders and a pile of admin work our Tutorial Tuesday segment is back with a vengeance! Though we still have a myriad of responsibilities plus some fabulous plans for the next few months (why not sign up to our monthy newsletter to stay in the know) we’ve streamlined our work-plan somewhat to help maintain certain aspects of the blog; including our weekly tutorials! Without further ado here is this week’s tutorial… how to pipe pearl borders with royal icing! This handy technique is perfect for finished cakes, adding detail or creating delicate edgings on cupcakes or cookies!

How to pipe pearl borders with royal icing by Juniper Cakery

When it comes to working with royal icing you can be forgiven for being a little stand offish if faced with a piping bag of that seemingly tempestuous mix, however, all it takes is one good recipe that you feel comfortable working with and whipping up. That’s why with this week’s tutorial for piping dainty pearl borders we’re sharing our simple recipe for royal icing. Before we tried this recipe we would sadly waste large amounts of icing sugar just to pipe a small pearl or shell border. We often lamented over why so many royal icing recipes listed their ingredients in large volumes and, worse yet, with measurements too odd to scale down. This recipe is possibly the most straightforward we’ve come across, creates the least amount of waste, and it has always yielded what we find the best consistency for piping.

Our royal icing recipe

Royal Icing Recipe for Piping and Stringwork
Write a review
Print
Ingredients
  1. 188g icing / confectioner's sugar
  2. 1 medium egg - the whites only
  3. 1 teaspoon lemon juice
  4. Extra lemon juice to clean bowls and whisk
Instructions
  1. The first thing we do before whipping egg whites is wipe any bowl or whisk we're going to use with lemon juice. This cuts and cleans away any left-over grease residue which can hinder your whites from whipping.
  2. In the bowl of a stand-up mixer add the egg white and whisk on high speed until frothy.
  3. Once the white has frothed gradually add the icing sugar and whisk on high speed.
  4. Whilst whisking add a teaspoon of lemon juice and whisk until fairly stiff peaks form.
Notes
  1. Be sure to use only metal bows and whisks. Plastic holds onto grease which can stop egg whites from whipping.
http://junipercakery.co.uk/blog/

Tutorial on how to pipe with royal icing by Juniper Cakery

Be aware that royal icing never lasts too long. It’s best to always make and use it fresh as the sugar soon begins to crystallize making it hard to work with. If you are, however, going back to using the icing in a few hours we’d recommend covering the icing with cling film/saran wrap directly on the icing’s surface in a bowl and then double covering over the bowl itself. If you also have some royal icing in a piping bag cling film the nozzle of your piping tip to stop the tip from getting clogged with crystallized sugar.

If you find the consistency of the royal icing too thin or thick don’t panic. It’s easy to adjust the consistency by either adding icing sugar gradually if it is too thin or adding a little bit of water if you think it is too thick.

As well as the royal icing you’ll also need a good seamless plain round piping tip (we used a 2.5 writer tip by PME for a small yet dainty pearl size and shape) and a disposable piping bag. As this is the beginner lesson we’ll save the parchment paper cornet/cone tutorial for next week and instead concentrate on the recipe and border piping method!

How to pipe Royal Icing Pearl Borders!

Piping pearl borders with royal icing looks relatively simple and straightforward… that is until you actually physically have to do them! Our top tip to get even, delicate and elegant piped pearl borders is to establish a good rhythm! Even before we begin piping directly onto a cake we have a quick practice on a clean surface to quickly check the consistency of the icing, establish the appropriate pressure we need to get certain sized pearls and to make sure we get a quick rhythm.

To get a nice even rhythm we repeat these three steps in our head until we’ve finished our border work; Squeeze. Stop. Swipe.

Squeeze. Stop. Swipe.
How to pipe with royal icing by Juniper Cakery

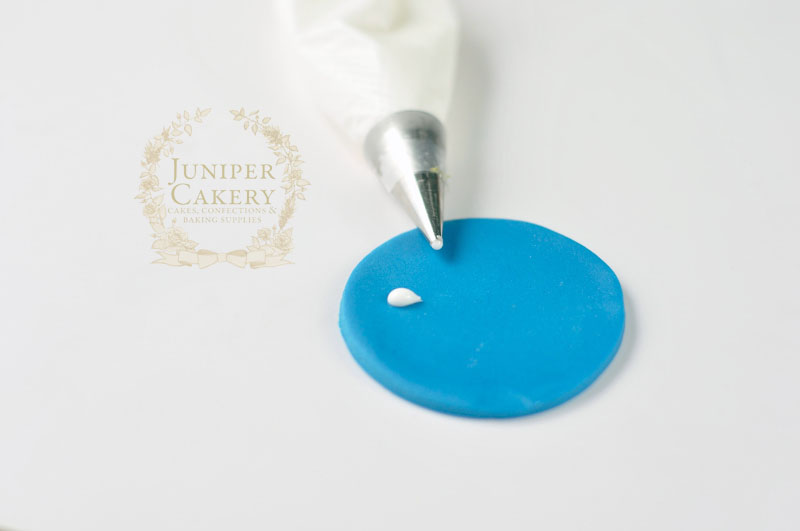
Squeeze the royal icing out at a 45 degree angle between the cake board (or stand) and cake (for cupcakes do this at a 90 degree angle). Squeeze with a nice even pressure. Don’t squeeze too hard or you’ll have royal icing flooding out everywhere. Also, don’t squeeze too fast or you’ll never have control over your border.
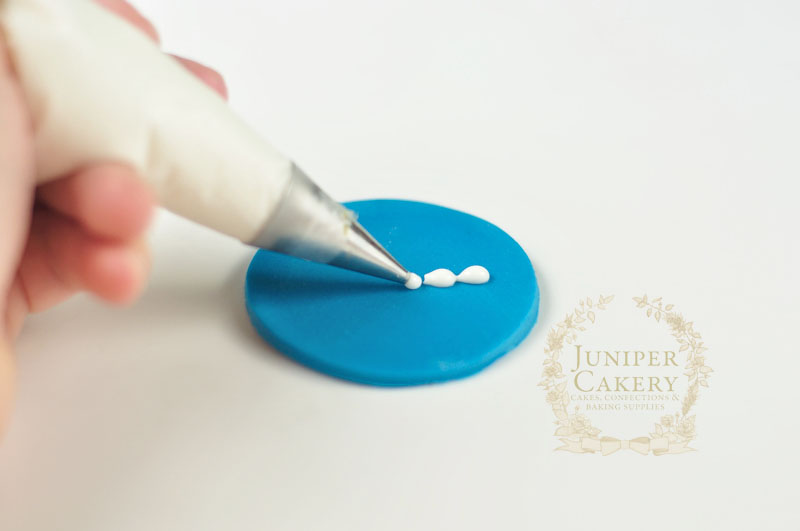
Pipe with royal icing tutorial by Juniper Cakery

Stop when you’ve squeezed enough royal icing to create a lovely glistening pearl. A lot of beginners just keep going when attempting pearl or shell borders as they can look a little like cursive hand-writing and seem unbroken, but these borders are broken. You need to stop to establish a nice rounded pearl shape and not a continuous line of undefined royal icing squiggles!
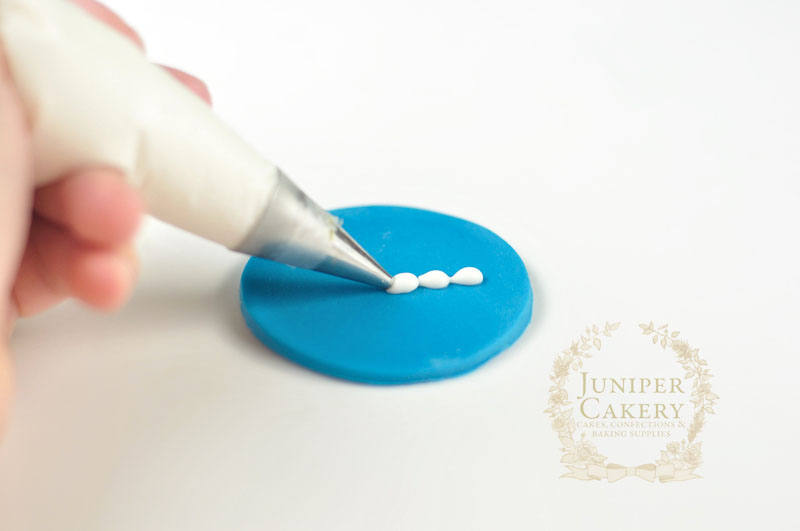
Piping with royal icing how to by Juniper Cakery

Swipe the piping bag away in the direction you wish your border to continue with no pressure pushing out more royal icing. This creates a nice tapered or tear drop tail to your pearl which not only creates a good looking border, but helps mark out where your next pearl should be placed. You should then begin your next piped pearl on the tail of your last. When you squeeze once again the royal icing will fill the gap a little, but should still create a lovely defined shape!
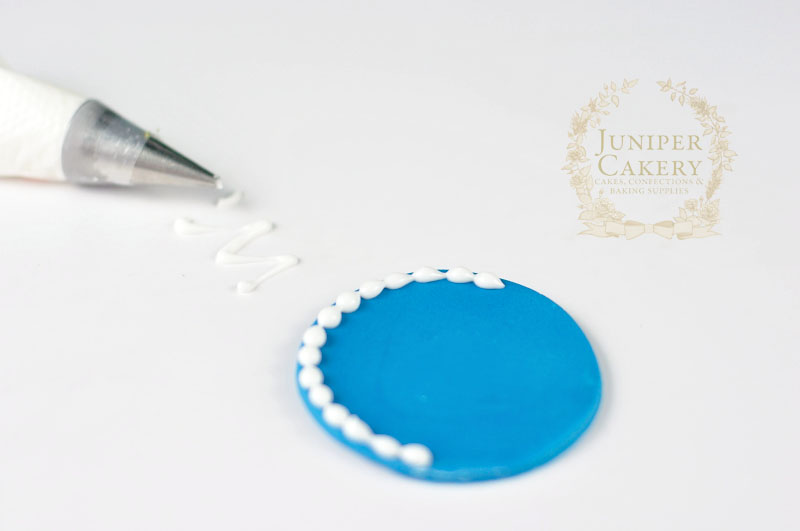
Intro to royal icing by Juniper Cakery

Keep practising! Working with royal icing and even piping borders with buttercream takes a little practise to get just right, but you will get there if you keep at it. The brilliant thing about the ‘squeeze. swipe. stop’ method is that it can be used to make almost any border look even and professional. We use this technique to pipe out shell borders and buttercream borders too! 
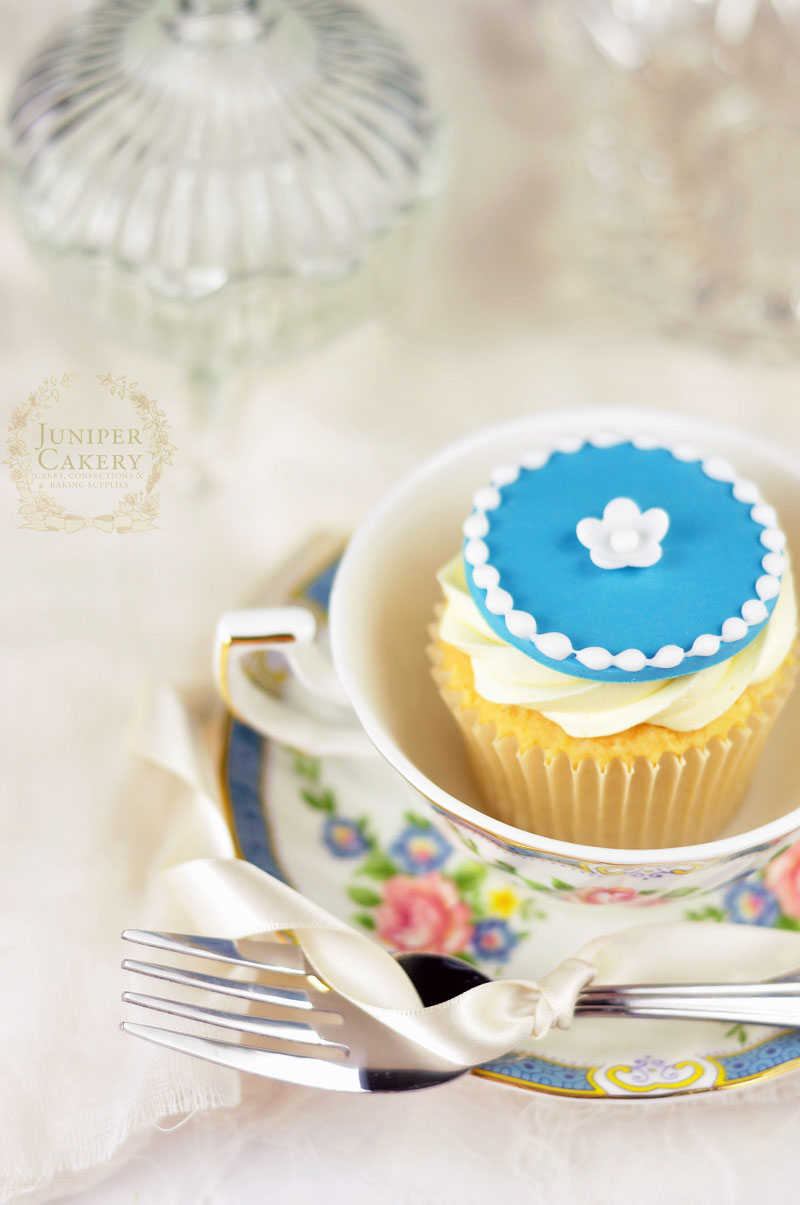
Learn how to pipe with royal icing by Juniper Cakery

Next week we’ll be showing you the next step at getting used to working with royal icing; piping polka dots plus how to create a parchment paper cornet/cone to use as a piping bag! Royal icing polka dots is a fabulous way to add texture or a pretty yet subtle detail to cakes!


All photographs, designs (including all baked and decorated goods), tutorials and written content belong to and are copyright to Juniper Cakery unless otherwise stated. Please do not copy! Copying and re-publishing our work without our permission or claiming it as your own work could lead to legal action from us. If you wish to feature our work do contact us for permission.