Winter Tales Recipe and Tutorial: Chilli Chocolate Log Cabin Cupcakes

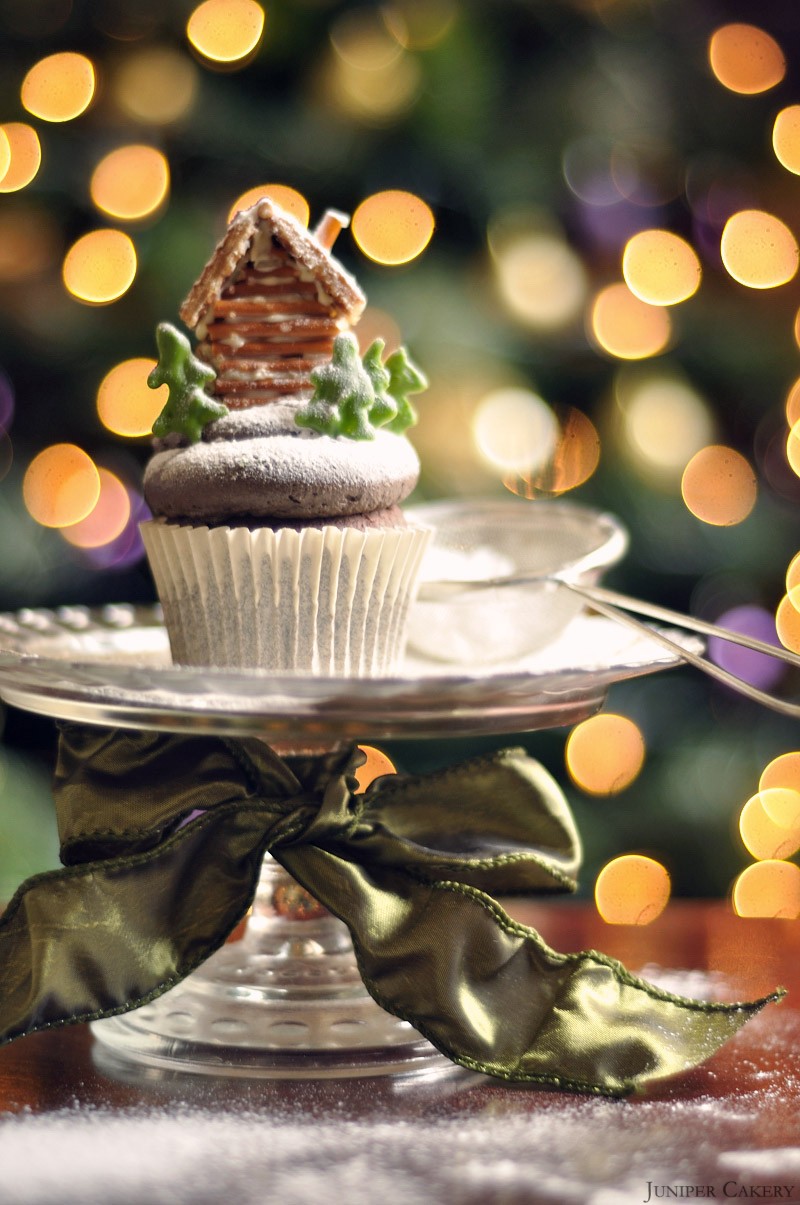
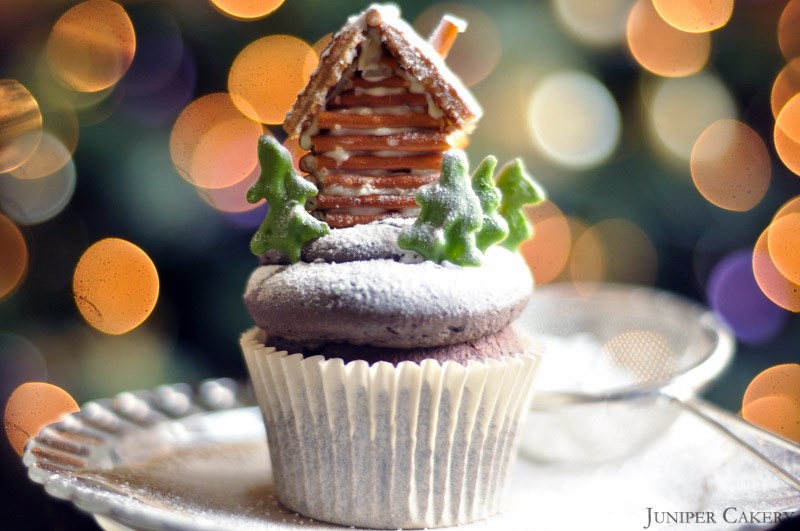
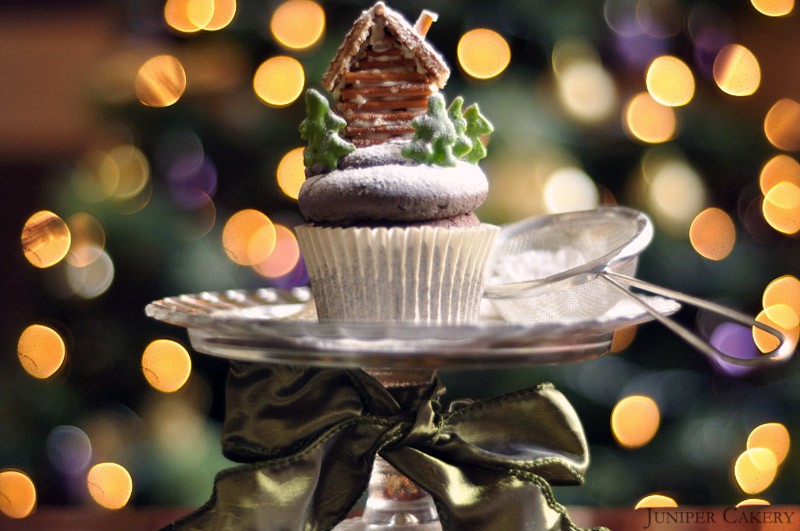
What better way to warm up during the cold autumn and winter months than with a little hint of chilli in your home baking! Paired with rich and creamy dark chocolate the dash of chilli essence adds a wonderful tingle of heat to your taste buds; perfect for the adventurous at heart. With the addition of a picturesque edible log cabin, just like Little Red Riding Hood’s unfortunate grandmother’s, and charming hand piped chocolate trees, both dusted with icing sugar snow, these Chilli Chocolate Log Cabin Cupcakes make a delightful winter treat for everyone! Why not set them lovingly inside Christmas themed cupcake boxes and surprise your loved ones! Be warned, however, you’ll find them such a hit with everyone that you may need to bake them again and again!
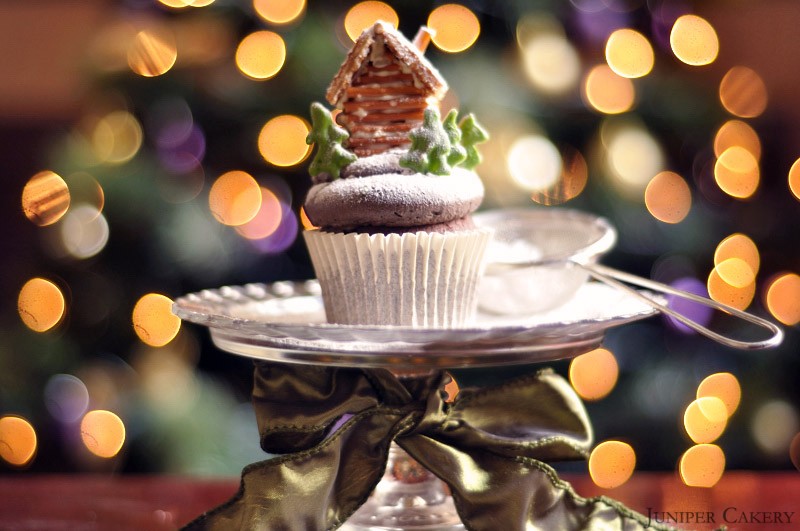
frontfull

sidefull

Chocolate Cupcake Recipe (makes approx. 12 cupcakes)

226g self raising flour
226 butter
226g caster sugar
2-3 tablespoons of cocoa powder mixed into a paste with boiling water
1 teaspoon baking powder
4 eggs

Pre-heat your oven to Gas Mark 3 / 160C / 325F and line a cupcake pan with cupcake cases. Cream your butter and sugar first. When creamy add your eggs and combine together with the flour. Mix well until silky and add in the cocoa powder paste and baking powder, mix again and fill your cases with the batter. Bake for around 20 minutes to 30 minutes or until a cake tester comes out clean when tested.

sidetopview

Chilli Chocolate Ganache Filling

100g dark chocolate callets, chips or buttons
6-12 drops of natural chilli essence
50ml double cream

In a bowl set over a saucepan of simmering hot water on medium heat melt the chocolate with the double cream. Whisk every few minutes until fully melted and add in the natural chilli essence to taste. Remove from the heat and whisk for around 2 minutes before chilling for 10-15 minutes in a freezer. Repeat the whisking and chilling process until your ganache is the consistency of thick peanut butter. Once ready use a good cupcake corer to remove the centres of your cakes and fill with your delicious chilli chocolate ganache! Once filled set these aside and begin making your delicious chilli chocolate buttercream.

Chilli Chocolate Buttercream Recipe

250g butter
250-300g icing sugar (keep testing when adding to make sure it is the consistency and sweetness you are comfortable with)
6-12 drops of natural chilli essence
100g melted dark chocolate callets, buttons or chips
1-2 tablespoons of cocoa powder
808 or 809 plain round piping tip
Disposable piping bag

Dice the butter and add to your mixer to cream. Then gradually add icing sugar and the remaining butter (cut into cubes) until you get a smooth, creamy texture. Add the cocoa powder, melted chocolate and chilli essence.

For more hints and tips see our tutorial on how to make buttercream here.

Once your buttercream is ready fill up a disposable piping bag fitted with a piping tip (we used a plain round tip such as an 808 or 809 tip) and generously swirl your ganache filled cupcakes! Now set aside to create your little log cabins!
frontcloselog

How to Make the Miniature Edible Log Cabins and Trees

You will need…

Pretzel sticks (if in the UK try the Polish or World foods aisle of your supermarket)
Candy melts
Disposable piping bag
Dutch waffles (aka stroopwafels) OR pieces of ‘wheaties’ cereal for the roof
Icing sugar
White nonpareil sprinkles (optional)

step1

Step one: Carefully cut down your pretzel sticks to around 2.5cm in length. You’ll need quite a few of these so prepare a lot. If you have any leftovers save them in an airtight container for snacks later on.
DSC_0136_647

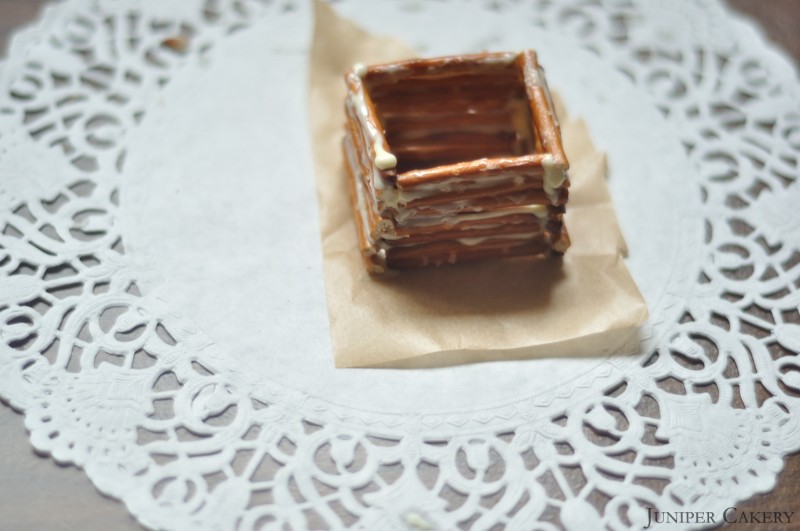
Step two: Begin ‘glueing’ your log cabin together by carefully piping a thin line of candy melt atop of each pretzel ‘log’ as you go. For extra support you can ‘glue’ small vertical pretzel sticks into the inside along the ‘log wall’.
step7

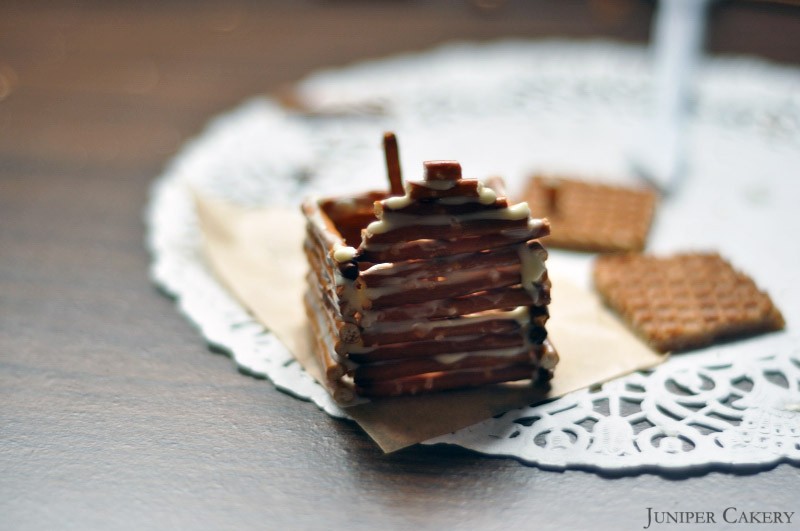
Step three: To create the roof pitch shape of the house cut down some sticks into descending sizes. Stick these together using the method in step two to create a triangle. Candy melt this to your log cabin wall.

step6

Step four: Cut out some squares of your caramel stroopwafels the size of each side of the roof.

Step five: Using a blade tool carefully punch a hole in one of the roof sides, fill with a little candy melt and angle in a small piece of pretzel stick for a chimney. ‘Glue’ the sides to your house.

Step six: To add windows and doors simply draw them on using a black edible ink pen and a steady hand! (optional)

Step seven: Added some little candy trees made from coloured candy melts. To create these yourself see our Peppermint Forest cupcake recipe and tutorial!

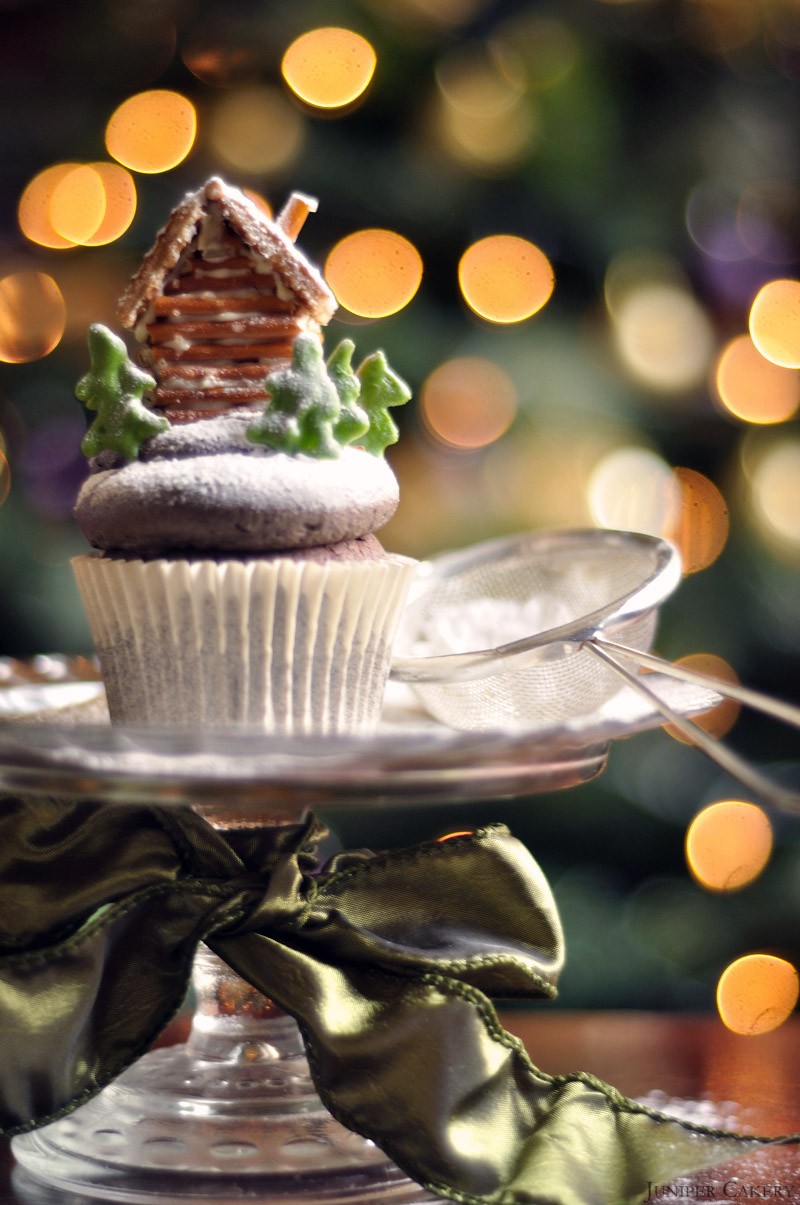
Step eight: Nestle your adorable log cabin atop your cupcake and dust with a sprinkling of icing/confectioner’s sugar to create a festive snowy scene!
sidesievefocus

Hurrah! Now it’s time to really see your cupcakes come together! Pop your adorable little log cabins atop a generously swirled cupcake, stick your hand piped trees around your cabin and dust with icing sugar through a sieve for a lovely snowy scene!
frontfirst


Winter Tales Recipe and Tutorial: Vanilla Snow Queen Cupcakes

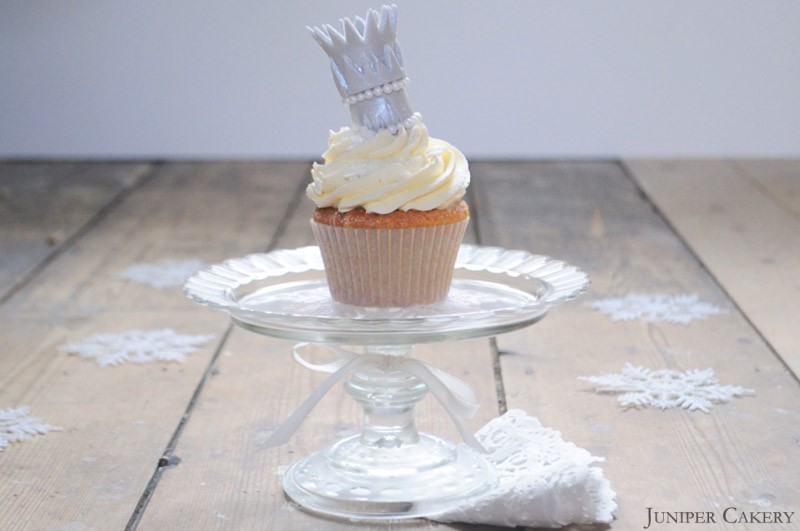
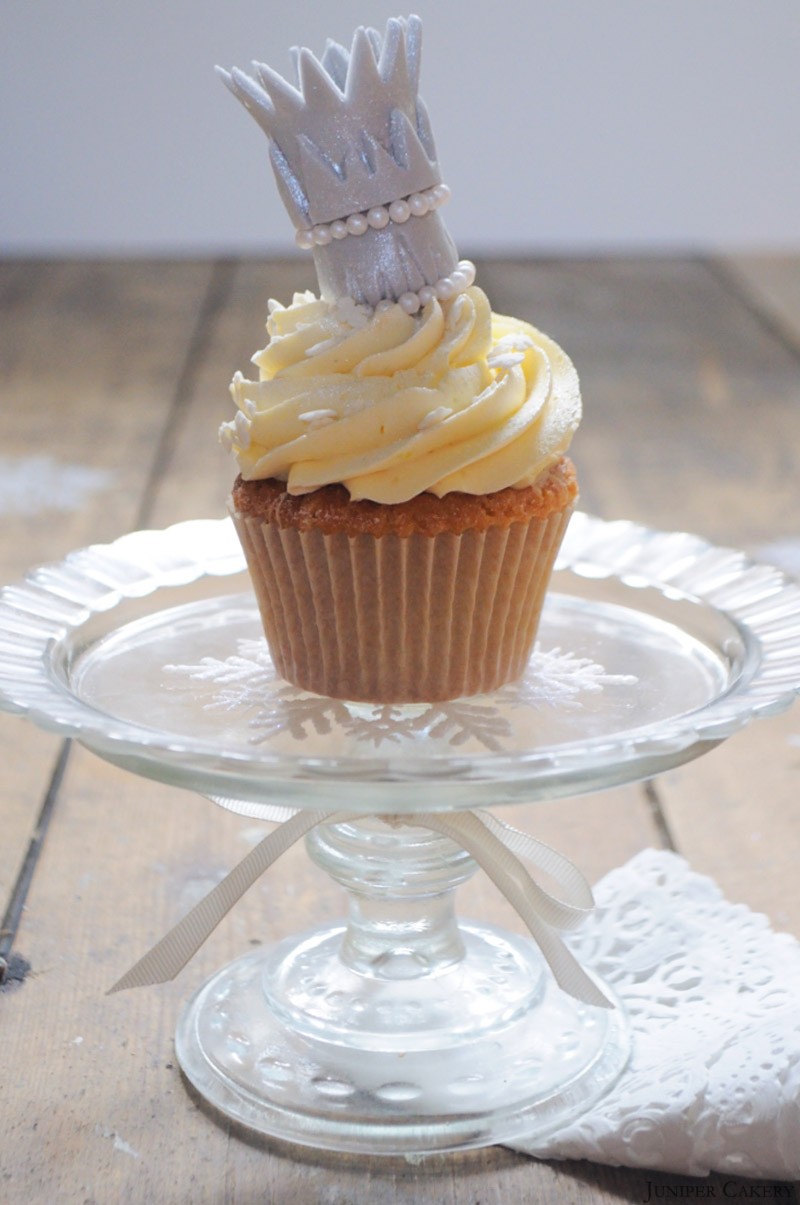
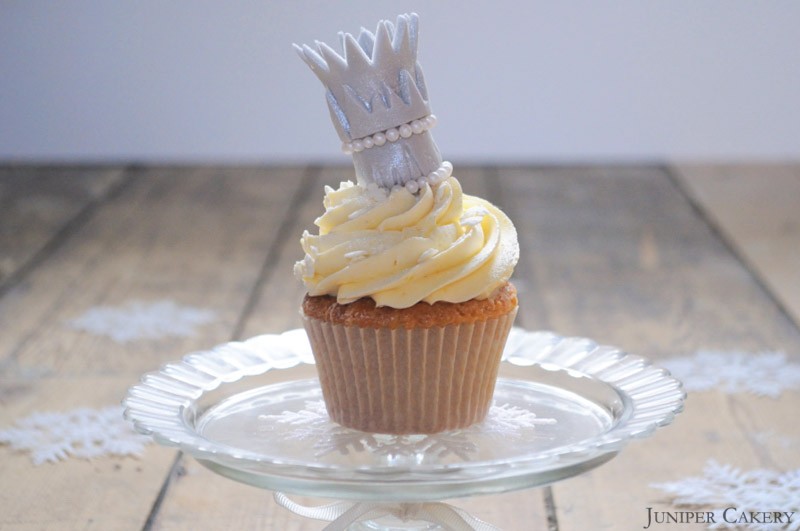
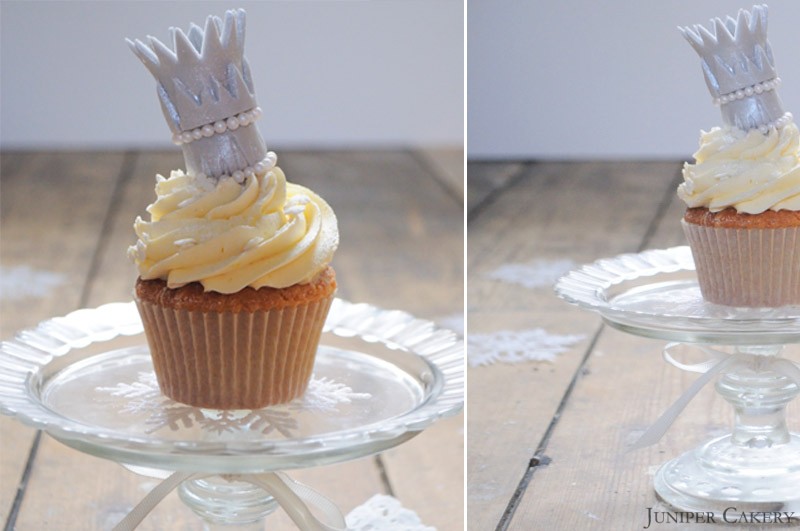
As cold, frosty mornings set in across the land here in the UK it’s time for the Snow Queen to begin her reign. What better way to see in the chilly season with these Vanilla Snow Queen cupcakes; soft and light vanilla cakes filled with luxurious white chocolate ganache, swirled with white vanilla buttercream and finally finished with a beautiful, sparkling crown! Display them atop a lovely silver platter or a pristine white tiered cake stand sprinkled with edible glitter for an extra frosty look. The wonderful thing about these particular cupcakes is they manage to be both fun for the kids yet full of glitz and glamour for more grown up sophisticated parties!

Vanilla Snow Queen Cupcake by Juniper Cakery

Vanilla Snow Queen Cupcake by Juniper Cakery

Vanilla Cupcake Recipe (makes approx. 12 cupcakes)

226g self raising flour
226 butter
226g caster sugar
4 eggs
1 bourbon vanilla pod

Pre-heat your oven to Gas Mark 3 / 160C / 325F and line a cupcake pan with cupcake cases. Cream your butter and sugar first and when ready add your eggs and vanilla. Once combined add the flour, mix well and pour your batter into your cases. Bake for around 20-30 minutes or until a cake tester comes out clean when tested.

White Chocolate Ganache Filling

200g white chocolate callets, chips or buttons
100ml double cream
Glass bowl
Whisk
Saucepan of hot water

In a glass bowl pour in the chocolate with the double cream and set into a saucepan of hot water. Stir gently with the whisk until melted and incorporating together. Remove from the hob and leave the bowl of chocolate and cream to set either in a refrigerator or on a windowsill in cold weather (cover with cling film if doing so). The ganache will be ready to fill your cupcakes with when it has the consistency of peanut butter.

Vanilla Buttercream Recipe

250g butter
250-300g icing sugar (keep testing when adding to make sure it is the consistency and sweetness YOU’D like)
6-12 drops of natural vanilla essence
Icing and buttercream whitener

Add half of the of butter diced into pieces. Cream the butter in a mixer. Then gradually add icing sugar and the remaining butter (cut into cubes) until you get a smooth, creamy texture. Add the flavour to taste and add a few drops of icing whitener at a time until you’re happy with the colour.

For more hints and tips see our tutorial on how to make buttercream here.

How to Make the Snow Queen’s Crown

You will need…

Gray sugarpaste / fondant (we used coloured plain paste with liquorice gel paste food colour)
Tylo powder
Lustre dust
Fondant rolling pin
Straight edge blade tool
Ball tool
Edible glue
Paintbrushes

Step one: Add some tylo powder to your white or gray sugarpaste / fondant. You should only add a small amount; around 1/4 of a teaspoon per 250g.

1

2

Step two: Using a fondant rolling pin roll out your paste until around 3mm-4mm thick. With the straight edge blade tool cut out an elongated crown shape around 5-6cm in width at the bottom (but growing larger towards the top) and height.

DSC_0078_578

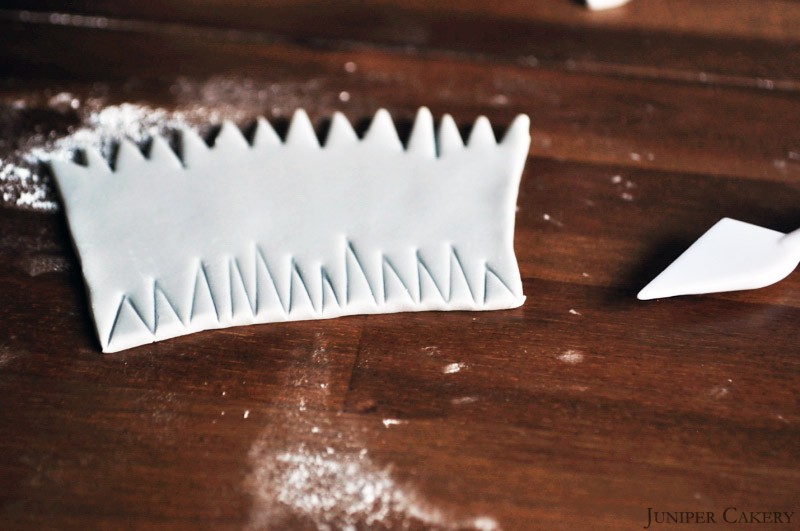
Step three: Using the blade tool cut out a series of un-regimented ‘spikes’ along the top of the crown. Still using the blade tool indent ‘spikes’ along the crown’s bottom.

3

Step four: Roll out some gray fondant and cut a small strip. Cut ‘spikes’ along the top.

Step five: Using some dabs of edible glue attach the jagged strip from step four along the middle of the crown.

Step six: To create the pearls on the Snow Queen’s crown indent sections of the crown with the ball tool. Roll up some small white fondant balls and attach by adding a dab of edible glue into the indentation and lightly pressing the small ball into it. Alternatively you could use pearl beads.

Step seven: To shape your crown carefully stand it upright and paint the edges with edible glue before gently pressing together. Leave to set.

Step eight: Once your crown is set brush generously with silver lustre dust (avoiding the white fondant balls you’ve just attached). Leave for a few minutes and then dust once more.

Step nine: To make the pearls shimmer lightly brush them with a new paintbrush and some pearl lustre dust.

Once your crown is ready you can assemble your Vanilla Snow Queen cupcakes! Pipe each cake with your vanilla buttercream, gently nestle your crowns into the frosting and sprinkle generously with snowflake sprinkles! You can also add some edible glitter for some extra sparkle if you wish.

Vanilla Snow Queen Cupcake by Juniper Cakery

Vanilla Snow Queen Cupcake by Juniper Cakery

Voila! Congratulations on your collection of gorgeously glimmering Vanilla Snow Queen cupcakes; perfect for the frosty festive season.


Winter Tales Recipe and Tutorial: Peppermint Forest Cupcakes

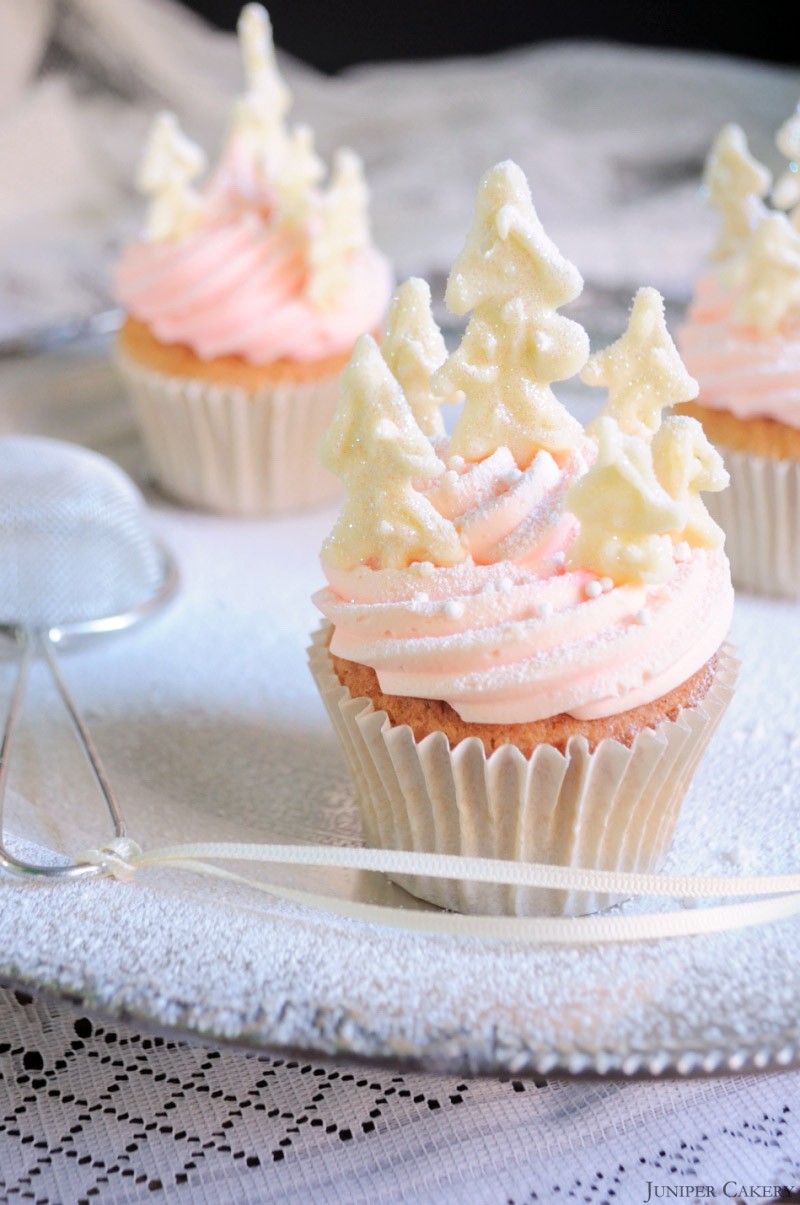
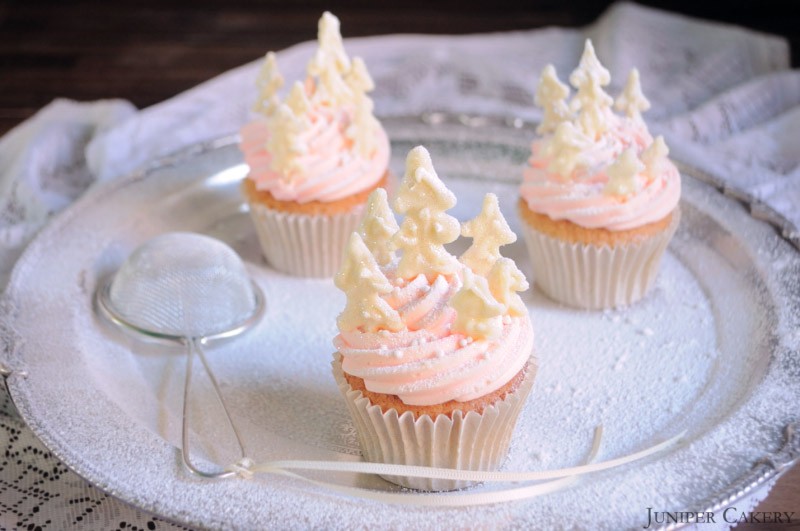
We commence the frosty yet festive season with a collection of winter themed cupcake recipes and tutorials created to help make your party stand out and keep the frazzled stress levels at bay. These adorable and sweet (no pun intended) Peppermint Forest cupcakes evoke a crisp Winter Wonderland paired with Germanic fairytales and a childhood favourite board game for the American-bred half of Juniper Cakery… Candyland! We loved the idea of this so much that all of our ‘Winter Tales’ recipes and tutorials encompass a fairy tale-esque theme. Why not try our recipe and cupcake decorating tutorial for a truly magical batch of treats!

Peppermint Forest Cupcakes by Juniper Cakery

Peppermint Forest Cupcakes by Juniper Cakery

Peppermint Cupcake Recipe (makes approx. 12 cupcakes)

226g self raising flour
226 butter
226g caster sugar
4 eggs
6-12 drops of natural peppermint extract

Pre-heat your oven to Gas Mark 3 / 160C / 325F and line a cupcake pan with cupcake cases. Cream your butter and sugar first. When creamy add your eggs and vanilla extract. When combined together it is time to add the flour. Mix well until silky and pour the batter into your cases. Bake for around 20 minutes to 30 minutes or until a cake tester comes out clean when tested.

Peppermint Buttercream Recipe

250g butter
250-300g icing sugar (keep testing when adding to make sure it is the consistency and sweetness YOU’D like)
6-12 drops of natural peppermint extract
Pink gel paste food colour
White nonpareils to sprinkle
White edible glitter to sprinkle
828 open star piping tip

Dice the butter into pieces and add half to your mixer. Once the butter is smooth gradually add icing sugar and the remaining butter (also diced into cubes) until you get a smooth, creamy texture. Add the flavour to taste.

For more hints and tips see our tutorial on how to make buttercream here.

How to Make Your Peppermint Forest

You will need…

60g white candy melts
Disposable piping bag
White nonpareils to sprinkle
White edible glitter to sprinkle
2.5 PME Writing Piping Tip
Baking or parchment paper

Step one: Lay out a flat sheet of baking parchment paper (you may need more depending on how many trees you’d like to make).

Step two: Melt the candy melts by stirring them in a glass bowl set over a pan of boiling water. If you decide to melt them in the microwave take care not to burn them as they would become unusable.

Step three: Fit a disposable piping bag with the writing tip.

Step four: Add the melted candy melts into the disposable piping bag you just prepared.

Winter Tales Peppermint Forest Cupcakes

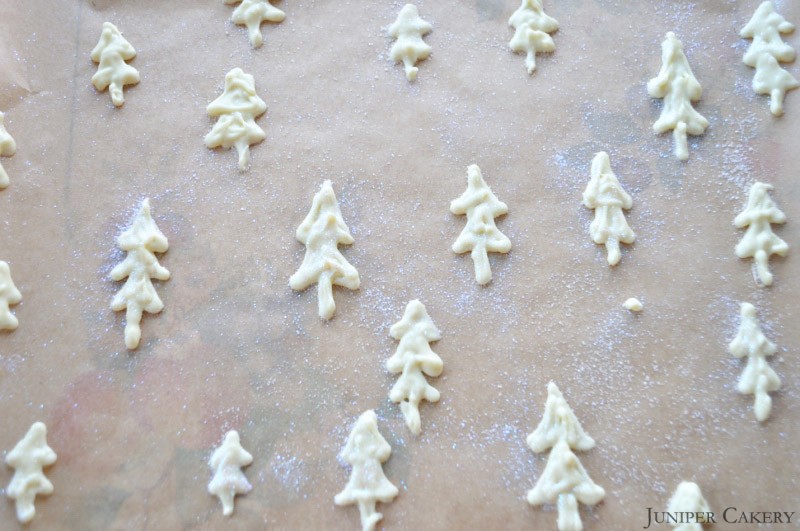
Step five: On the baking or parchment paper(s) pipe out some tree shapes varying from around 1.5cm to 6cm. Whilst still melted sprinkle with edible glitter or sprinkles. Leave to set.

Step six: Pipe your cupcakes generously with your lovely pink peppermint buttercream. We used the 828 open star piping tip which can be found at the link provided.

Step seven: Once your trees have hardened carefully lift them from the paper and insert them into the buttercream atop of your cupcakes. Nestle enough in to create a charming candy forest!

Step eight: Once your trees are in place sprinkle them with white edible glitter and white nonpareils.

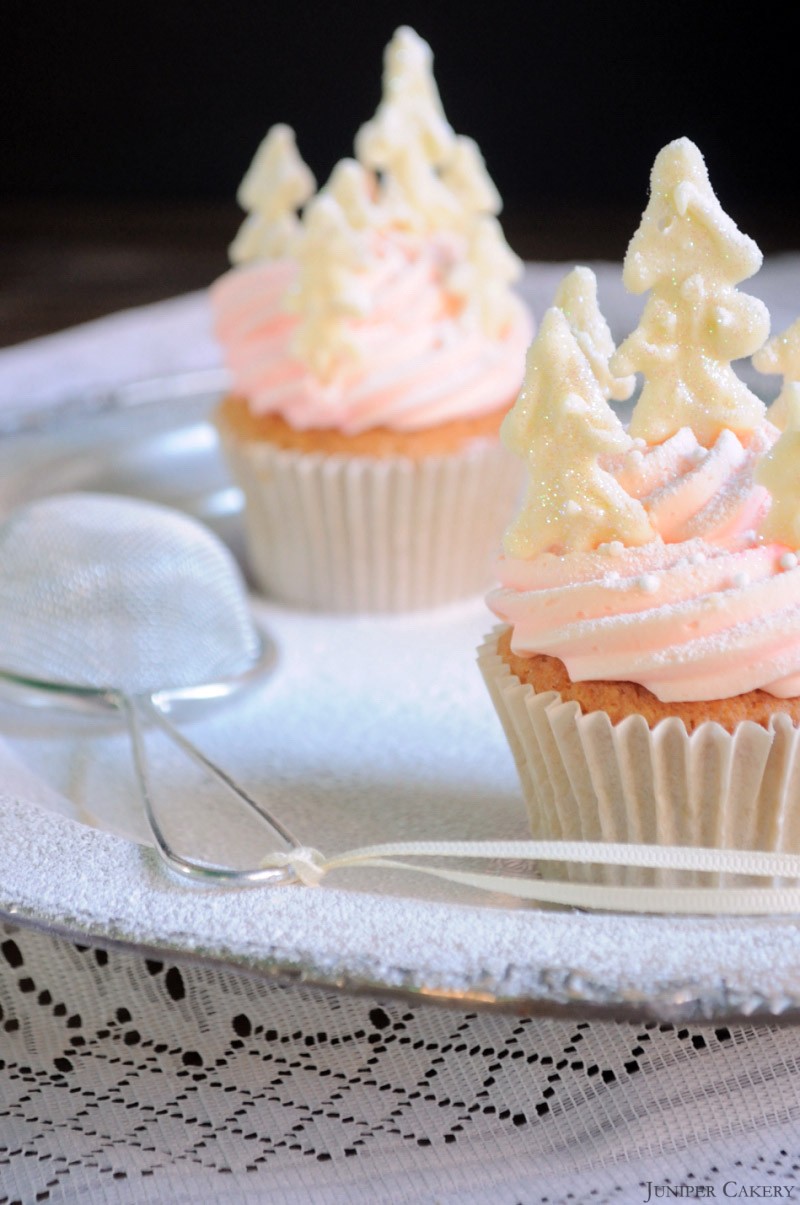
You should now be left with a pretty collection of peppermint cupcakes festooned with festive candy Christmas trees; perfect for a sweet winter treat!

Peppermint Forest Cupcakes by Juniper Cakery

Peppermint Forest Cupcakes by Juniper Cakery


Halloween Tutorial: D.I.Y Monster Cupcakes!

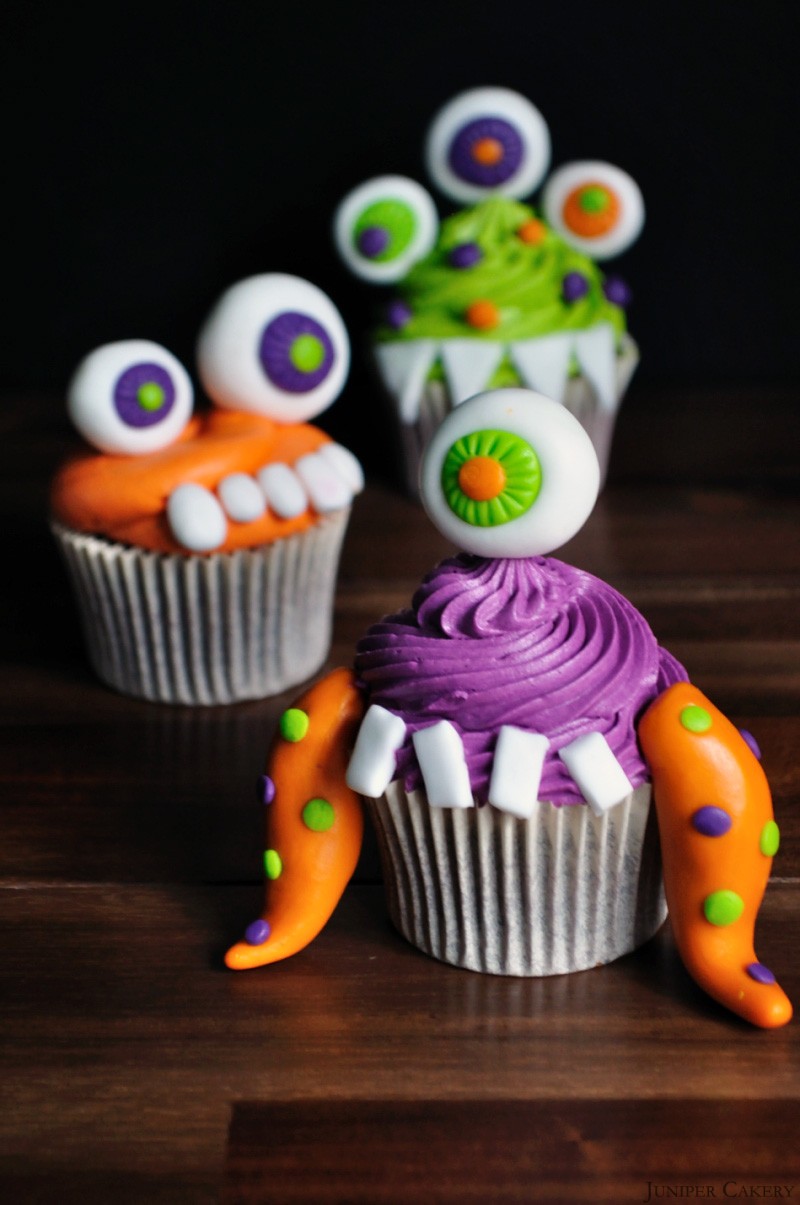
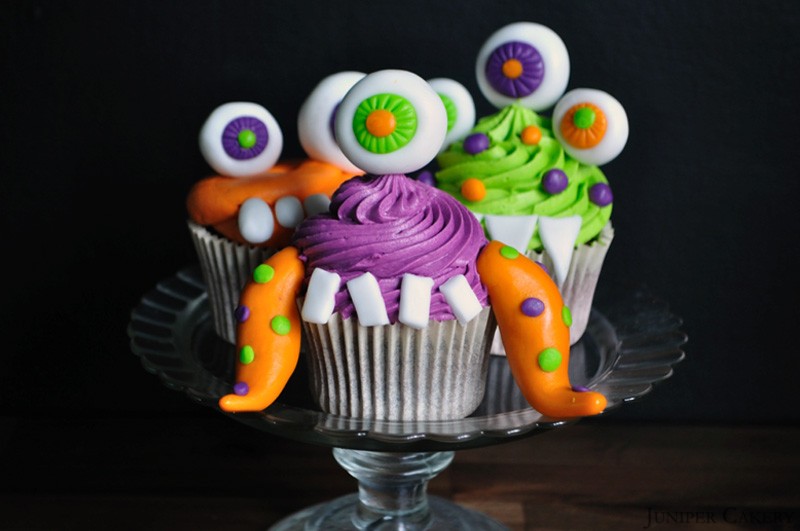
Here is our third instalment of our fang-tastically ghoulish Halloween Tutorial series for this month! This week we show you how to whip up and decorate a batch of fun D.I.Y Monster Cupcakes. These vibrant cakes are perfect for getting children involved with creating some spook-tacular Halloween party treats (they’re also great for fun-loving grown ups too). The great thing about these cupcakes is that you can sit and make a selection of different eyes, tentacles, teeth etc and mix and match them to form your own monsterous creation. We’re sure you’ll think these cupcakes are so ‘ghoul’ you’ll want to scare everyone away rather than share them!

D.I.Y Monster Cupcakes by Juniper Cakery

D.I.Y Monster Cupcakes by Juniper Cakery

What you will need…
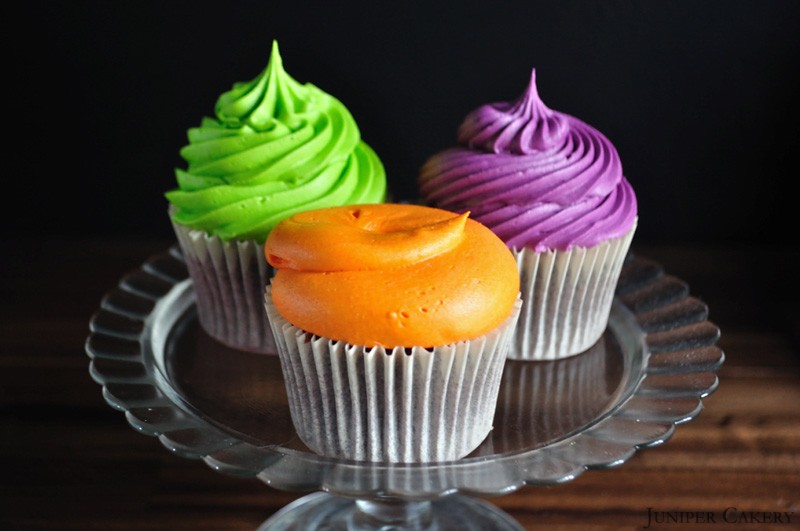
A batch of piped cupcakes in bright colours (we used Vine green, Grape/Violet and Orange)
3 brightly coloured balls of sugarpaste / fondant
1 ball of white sugarpaste / fondant
Toothpicks (cut the sharp ends off if planning to decorate these with kids)
Fondant rolling pin
Ball tool (with a larger and smaller ball on each end)
Edible glue
Sprinkles (optional)
Edible glitter (optional)
Scissors
Paint brush
Icing sugar or cornstarch to dust your surface
Candy melts
Disposable piping bags

D.I.Y Monster Cupcakes by Juniper Cakery

Step one: Pipe some generous swirls atop your cupcakes in a variety of colours. We used 809 (open round tip), 868 (fine toothed pastry tip) and 828 (larger toothed pastry tip).

D.I.Y Monster Cupcakes by Juniper Cakery

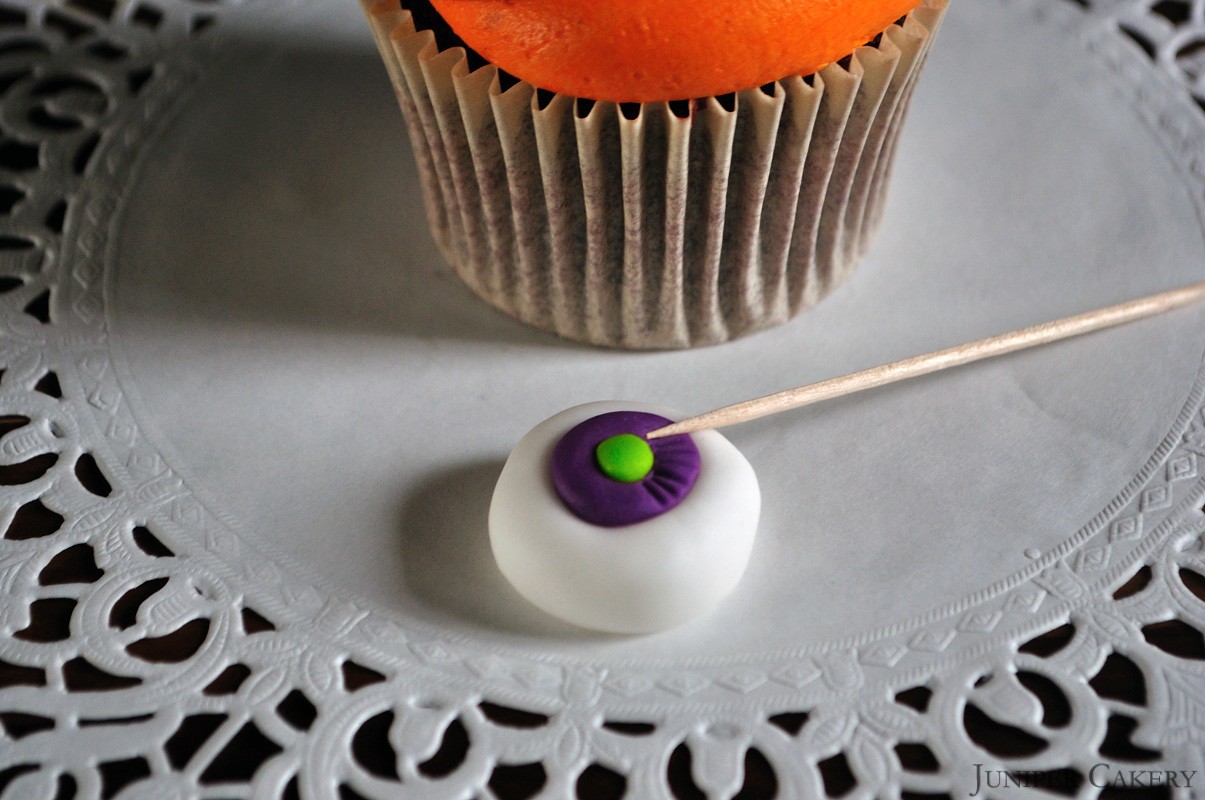
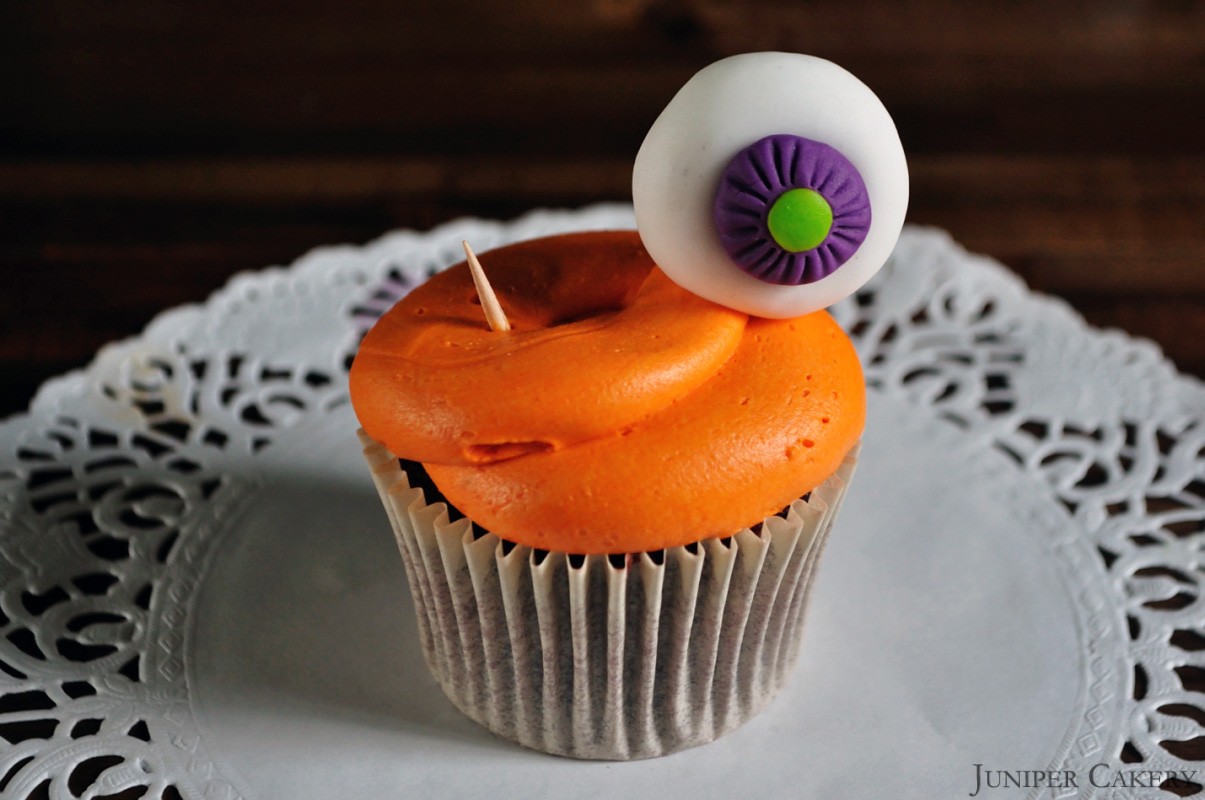
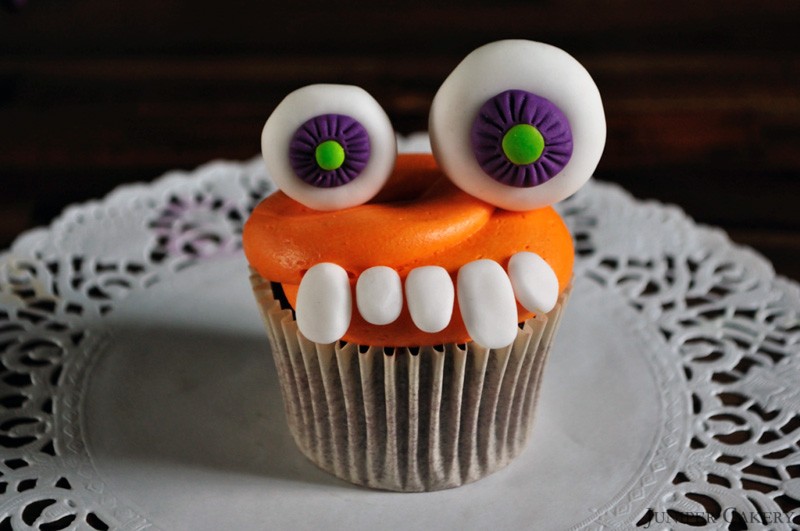
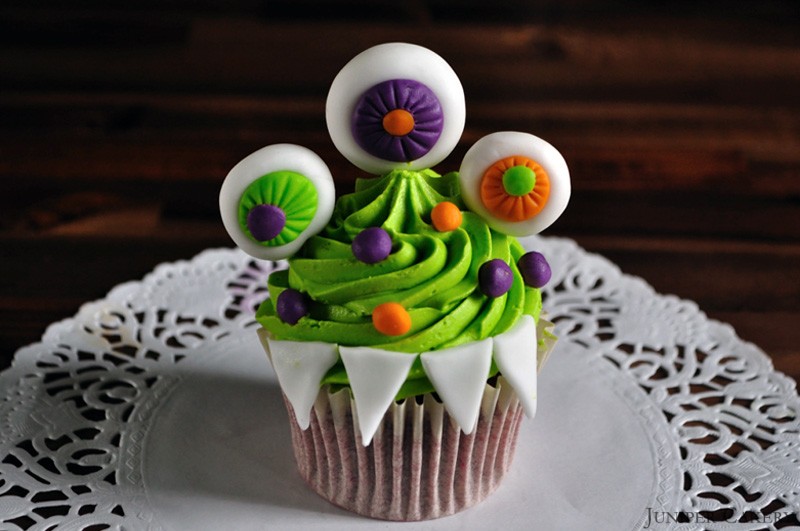
Step two: To make eyes roll out balls of white sugarpaste. Indent them with a large ball tool and apply some edible glue inside the impression. Roll up a smaller ball of coloured sugarpaste and gently press this into your white ball. Indent the smaller ball with a smaller ball tool. Roll up another colour in an even smaller size and press this in. Finally take a toothpick or blade tool and create indented lines to create an iris.

D.I.Y Monster Cupcakes by Juniper Cakery

Step three: After making the eyeballs you need to assemble them onto toothpicks to position them into your cupcakes. To help stop them sliding down the toothpicks apply a bit of melted candy melt into your toothpick where the eyeball will fit. Before it sets slide your eyeball onto the top and leave to dry. If you’re ready you can insert the eyes into your cupcake when set!

D.I.Y Monster Cupcakes by Juniper Cakery D.I.Y Monster Cupcakes by Juniper Cakery

D.I.Y Monster Cupcakes by Juniper Cakery

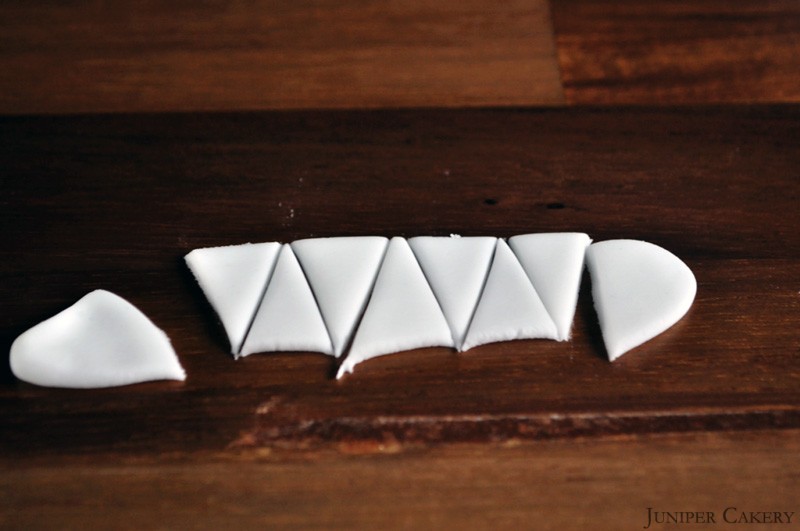
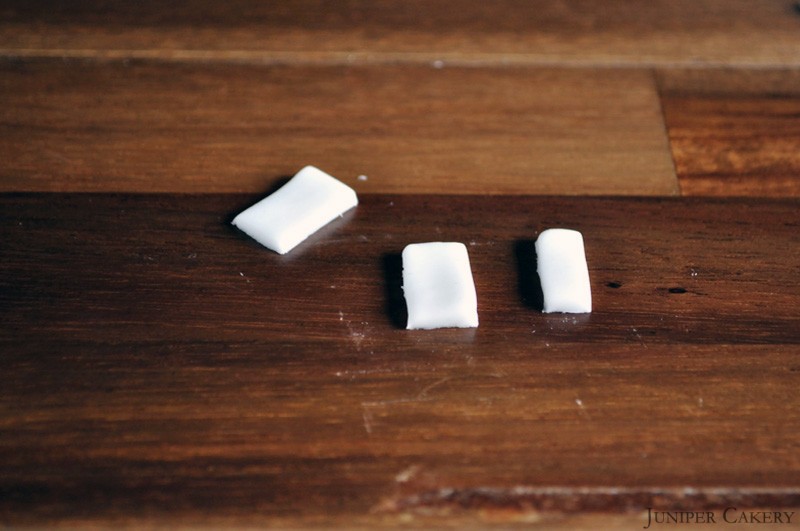
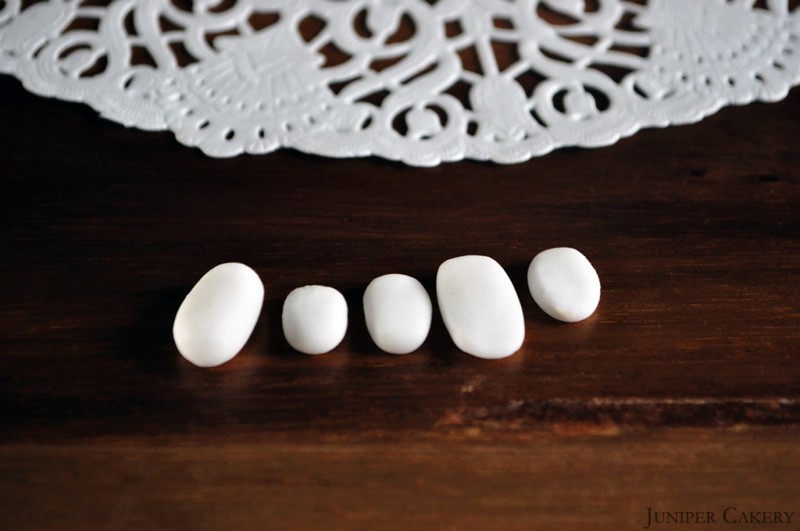
Step four: To create teeth simply play with white fondant to create sharp fangs, picket fence-style buck teeth or more human shaped dentures.

D.I.Y Monster Cupcakes by Juniper Cakery

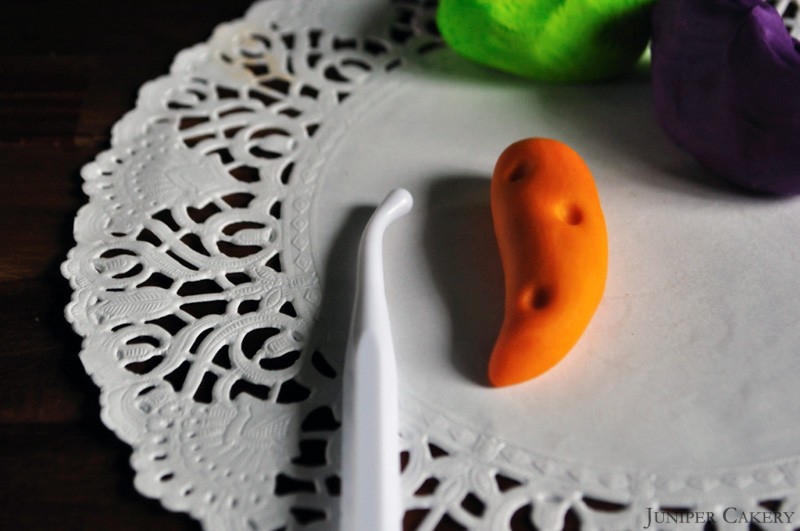
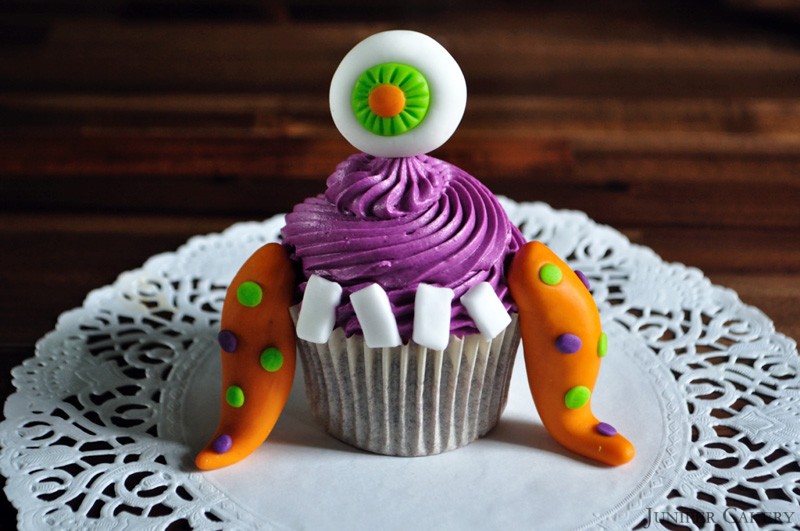
Step five: When it comes to tentacles shape some coloured sugarpaste / fondant into a variety of ‘slug’ shapes (make sure these are long enough to sit from your cupcake to your chosen surface… e.g. plate or cake stand). Add some ‘suckers’ by indenting with a small ball tool, some edible glue and small rolled up balls of coloured sugarpaste.

Step six: Try adding some extra customisation with sprinkles, cut out sugarpaste shapes or edible glitter!

D.I.Y Monster Cupcakes by Juniper Cakery D.I.Y Monster Cupcakes by Juniper Cakery

D.I.Y Monster Cupcakes by Juniper Cakery

Step seven: Now for the super fun part! Design and decorate your cupcakes with as many eyes, teeth, tentacles, spots etc as you wish.

D.I.Y Monster Cupcakes by Juniper Cakery

By the end of this tutorial you should be left with a batch of monsterous treats perfect for petrifying parties and spooky soirées!


Tutorial Tuesday: How to Make a Sugarpaste Owl!

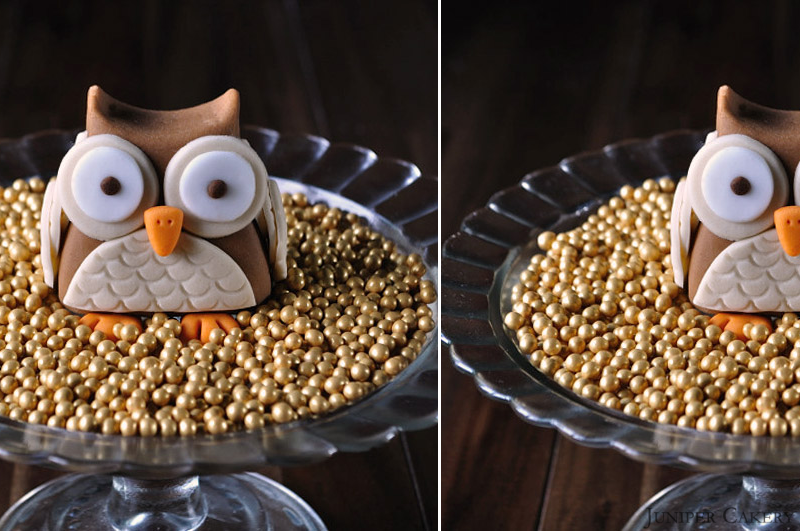
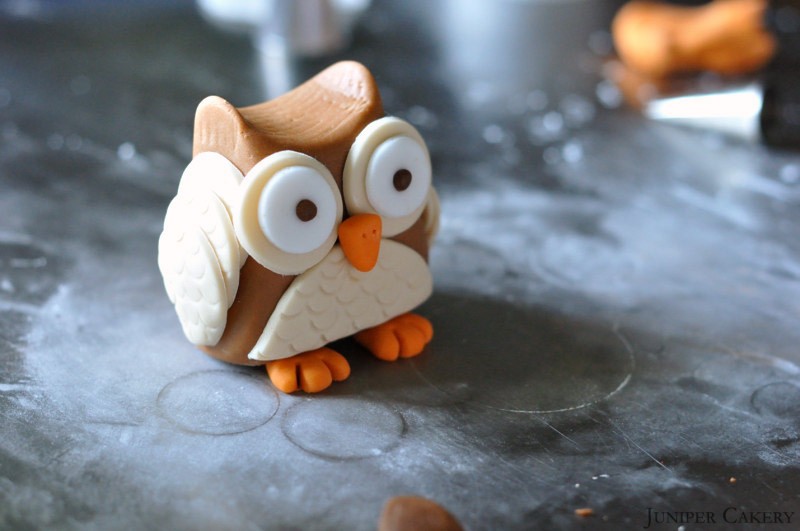
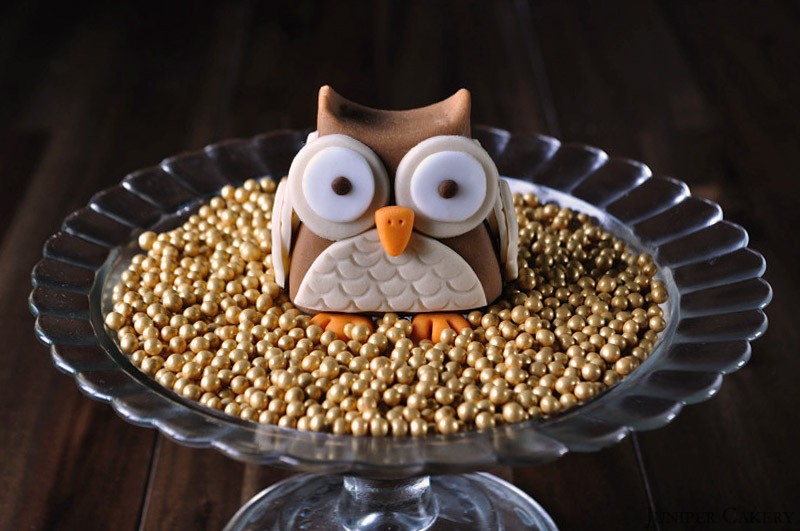
Yay! It’s now September which means that the lovely cosiness of Autumn (or Fall depending on where you are) is just around the corner! Autumn and winter are our favourite seasons here at Juniper Cakery and we get excited when they arrive every year. What’s not to love… lovely vibrant crisp golden leaves, cooler weather, bundling up in mis-matched knitwear, hot cocoa, spiced cakes, Halloween festivities and of course Christmas. With all this in mind this week’s tutorial is an adorable autumnal owl in fetching seasonal shades of browns and rust orange. This little creature will sit perfect on top of cupcakes and forest themed cakes!

How to make a sugarpaste / gumpaste owl

How to make a sugarpaste / gumpaste owl

What you need for this tutorial…

Sugarpaste / fondant in three complimentary colours
Water
Paintbrush
Round piping tip (use the large bottom for cutting)
Blade modelling tool
Ball modelling tool
Scallop and comb modelling tool
Circle cutters

How to make a sugarpaste / gumpaste owl

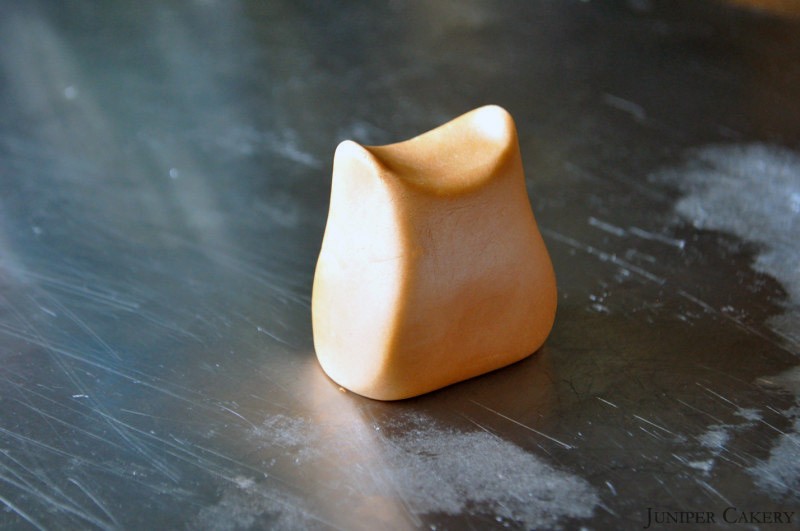
Step one: Use your chosen base colour to mould what we would describe as an upside down tooth shape as pictured above. Use your finger and thumb to pinch two ‘ears’ for your owl and smooth any stretches/cracks with your fingers.

How to make a sugarpaste / gumpaste owl

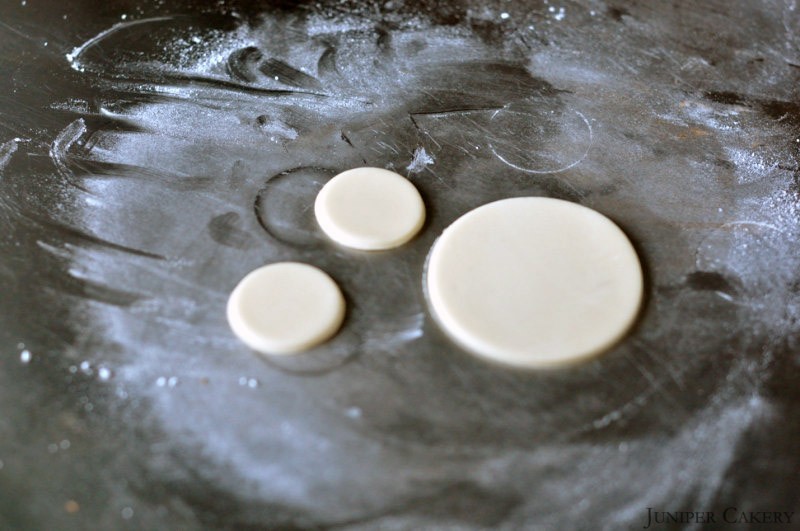
Step two: Using a small circle cutter and the end of a piping tip cut one small and two extra small circles out.

How to make a sugarpaste / gumpaste owl

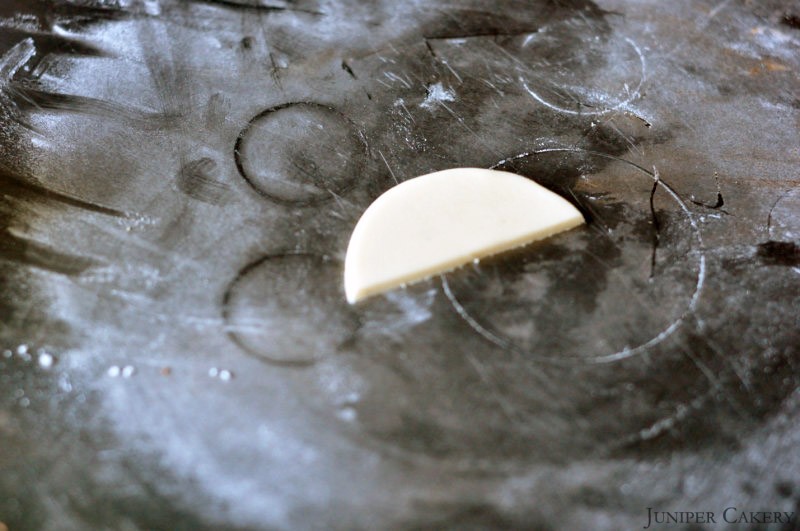
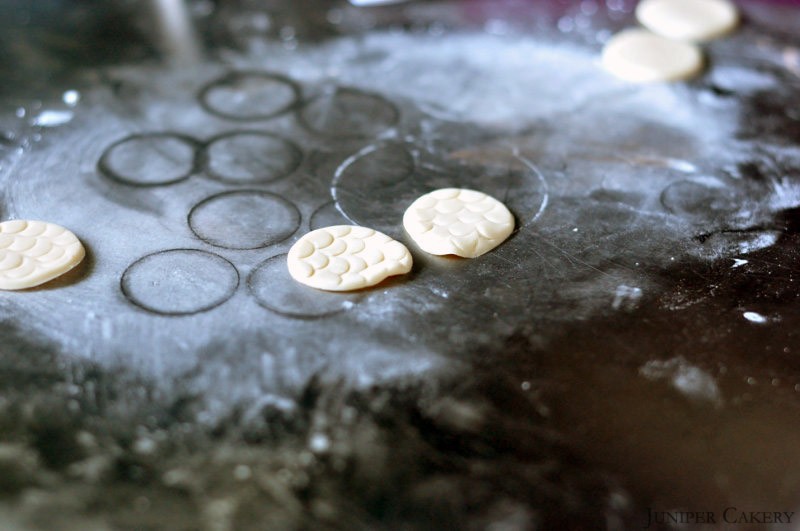
Step three: Slice the small circle into two halves. Into one of the halves create a ‘feathered’ pattern using the scallop and comb tool.

How to make a sugarpaste / gumpaste owl

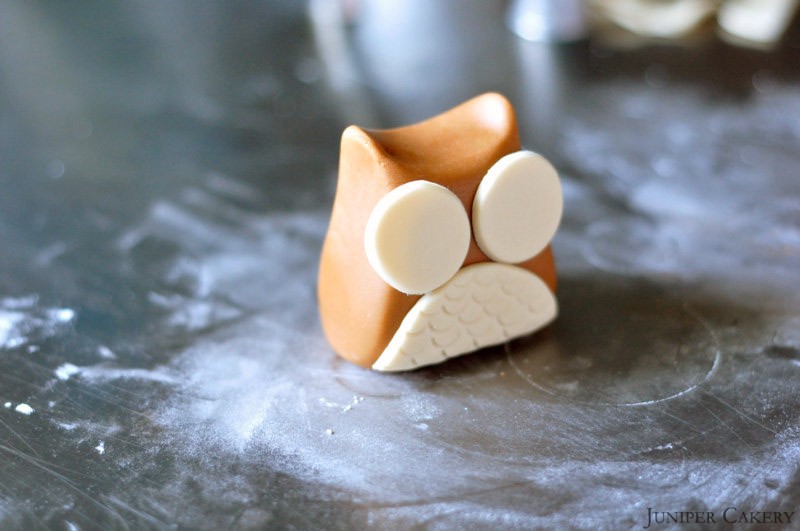
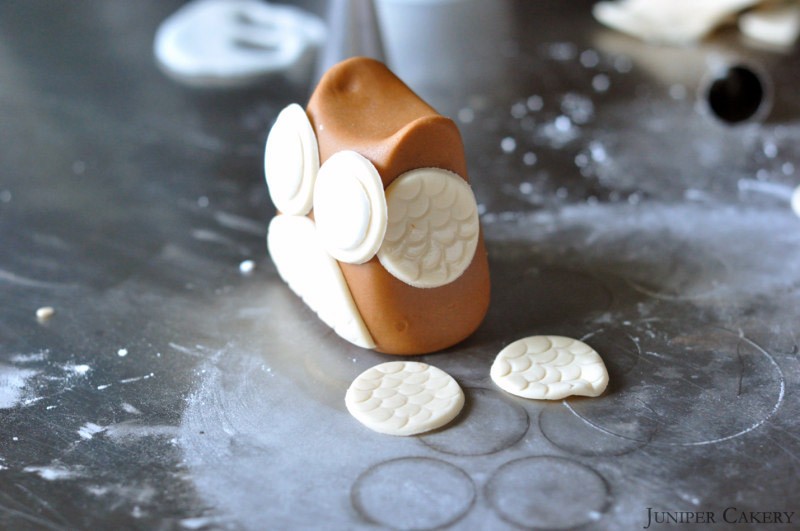
Step four: Now stick the two extra small circles in place as eyes and the half circle in place as a chest. For extra detail why not cut out smaller circles in an opposite colour and place them on top of the extra small circles, this will add extra dimension to your owl’s eyes.

How to make a sugarpaste / gumpaste owl

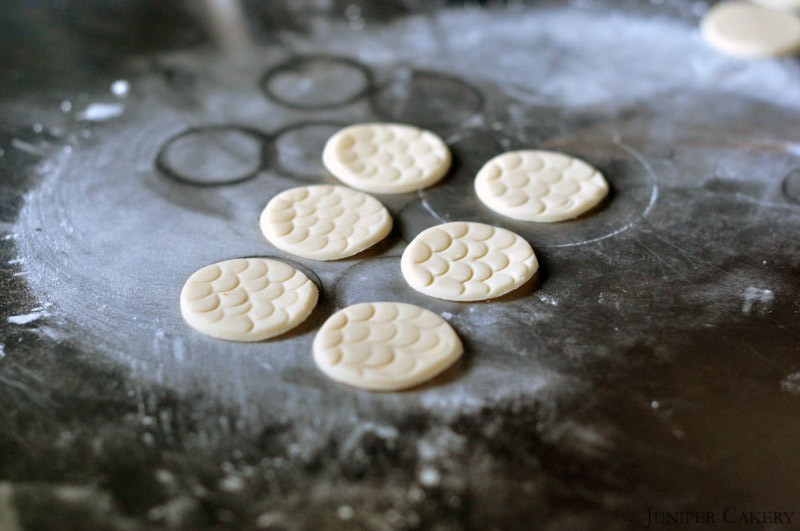
Step five: Using the piping tip again cut out three circles and add feathered detail using the scallop end of the scallop and comb tool.

How to make a sugarpaste / gumpaste owl

Step six: Pinch two of the circles with your finger and thumb to create a tapered ‘wing’.

How to make a sugarpaste / gumpaste owl

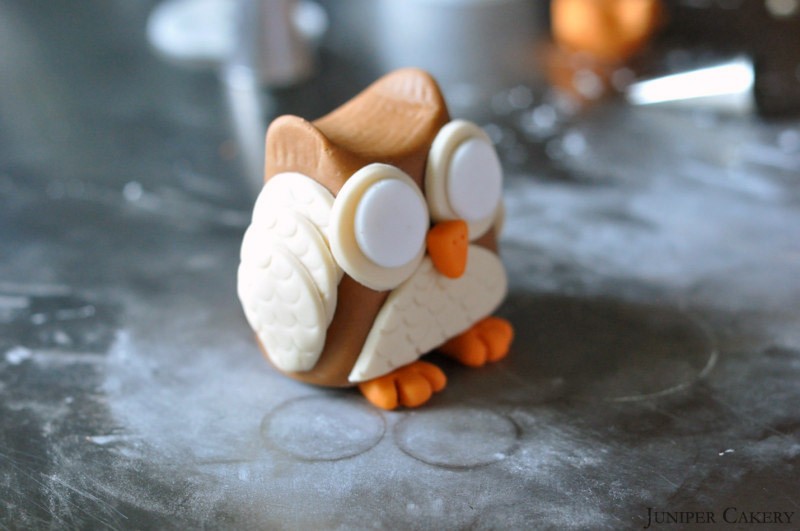
Step seven: Begin sticking the circles in place overlapping them as you go. Stick the tapered circle on last as this will finish your owl’s wing off nicely.

How to make a sugarpaste / gumpaste owl

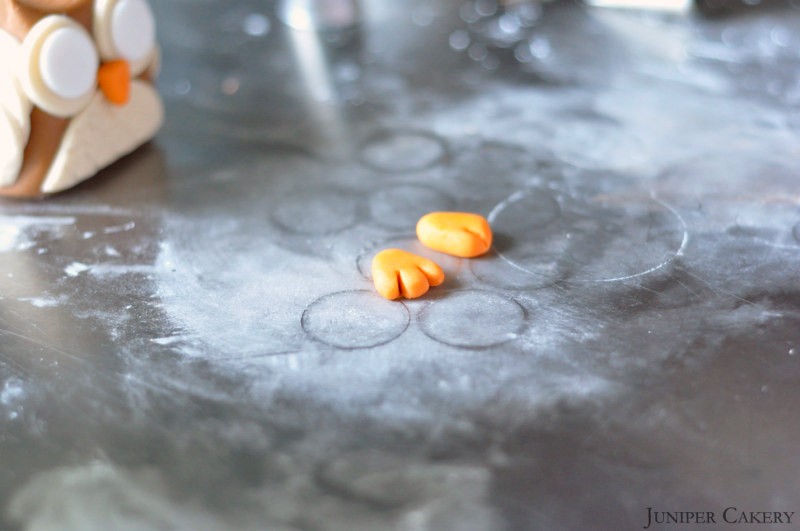
Step eight: Using a contrasting colour to your owl’s body make a chunky teardrop shape. Use the blade tool to make two slits at the non-tapered end, mould with your fingers to get rid of any sharp/rough edges. Repeat this once more and you now have your owl’s feet!

Step nine: Make a similar, but smaller, shape pinching the edges to get a triangle. Stick between the eyes, poke in two small holes and your owl now has a beak!

How to make a sugarpaste / gumpaste owl

Step ten: Stick in place using edible glue by simply sitting your owl on top of them. The weight will secure them and help the glue set.

How to make a sugarpaste / gumpaste owl

Step eleven: Roll two small balls of fondant, make an indentation in your owl’s eyes, and press in the two small balls for pupils!

How to make a sugarpaste / gumpaste owl

Now you’ve made your very own sugarpaste owl! This can be made in any colour for any occasion and your little owl can be nestled atop a cake and cupcakes!


Tutorial Tuesday: How to Make an Edible Fondant Coffee Cup!

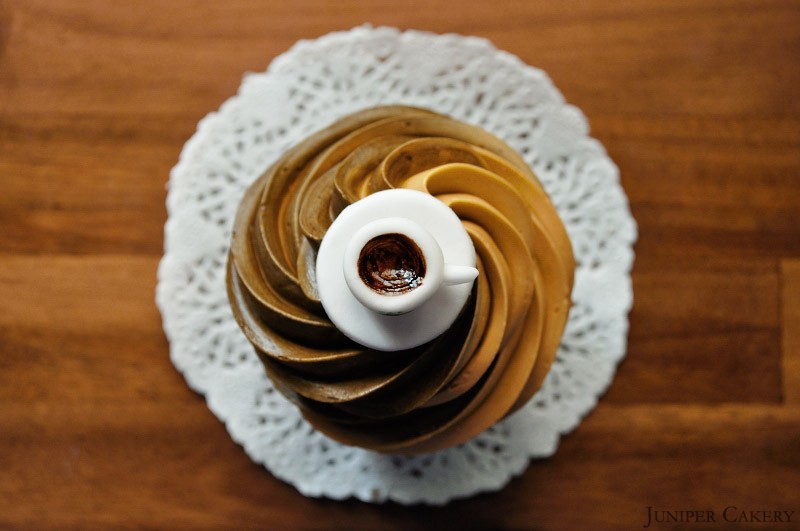
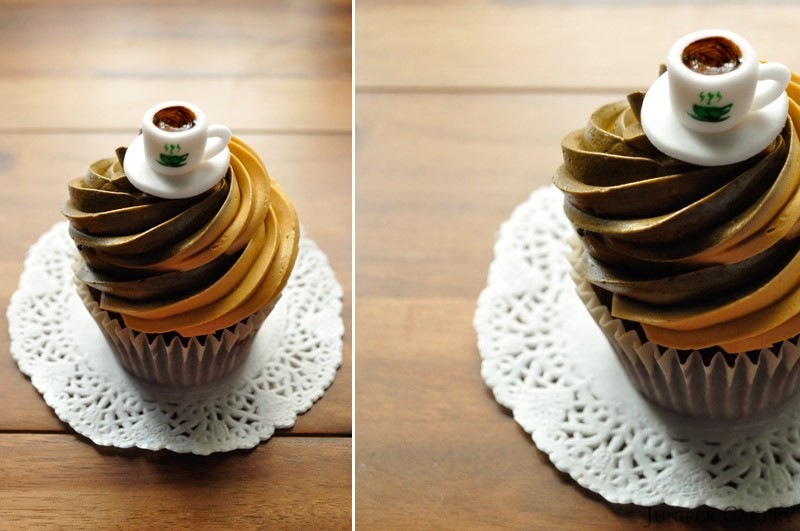
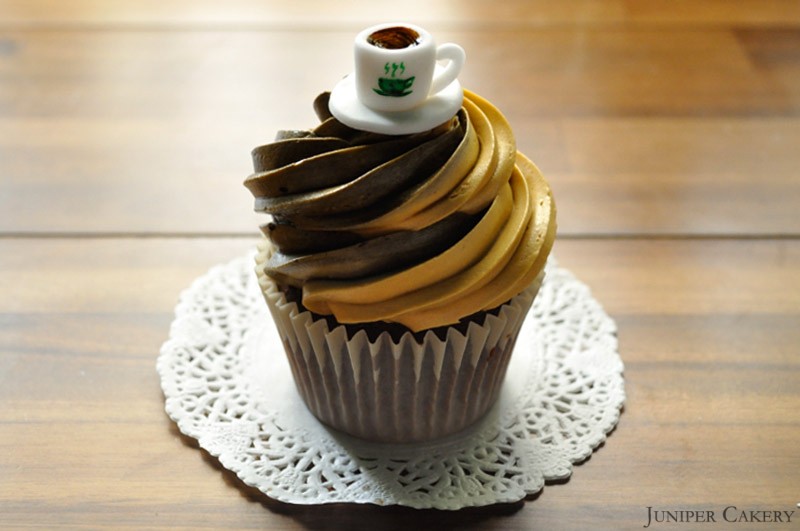
Since we created our Caramel Mochaccino cupcake complete with a tiny edible coffee cup perched on top we’ve been inundated with messages and emails asking how me made this. So here is our tutorial on how to re-create your own fondant cup of coffee. It’s obviously perfect to top cupcakes with, but also would add to an afternoon tea or dinner ‘scene’ on a cake. Another great thing is that it is super quick and easy to make!

TUTORIALcoffeecup

What you will need…

Sugarpaste/fondant
Ball tool
Piping tip
Paint brush
Green gel food colour
Brown gel food colour

DSC_0007_208

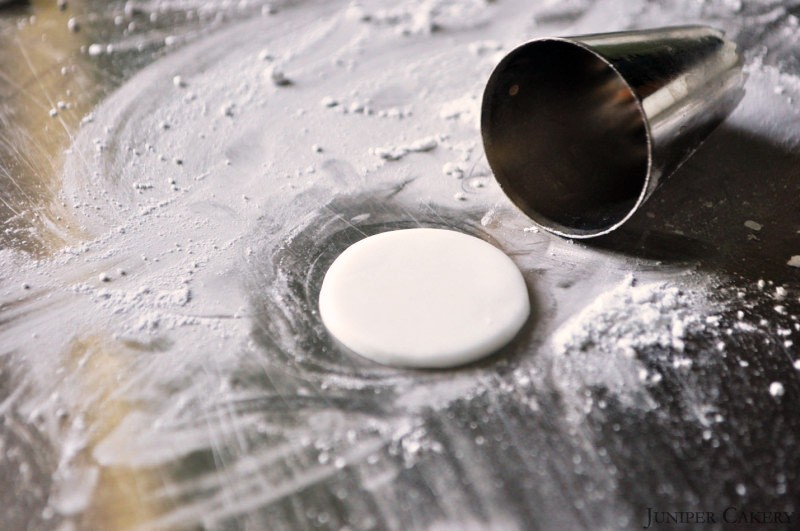
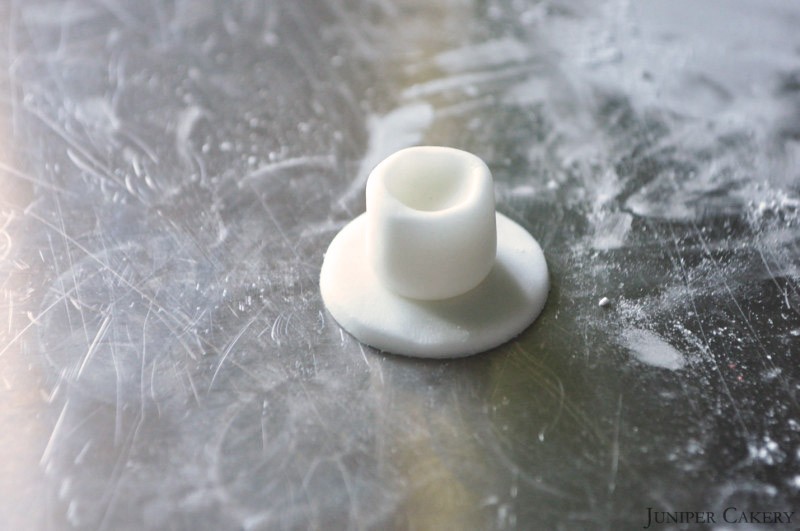
Step one: Roll out your sugarpaste / fondant on a floured surface and using the large end of a piping tube to cut out a circle. This will be your ‘saucer’.

plate

Step two: Using your ball tool indent the centre of your saucer slightly.

DSC_0017_213

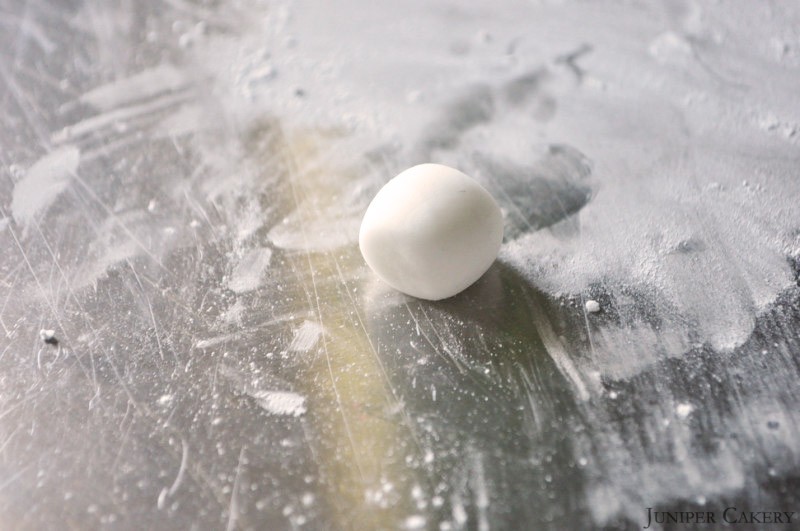
Step three: To make your actual coffee cup create a marshmallow shape around 1.5cm heigh. Make sure that the small ends are fairly flat. Set aside.

DSC_0010_209

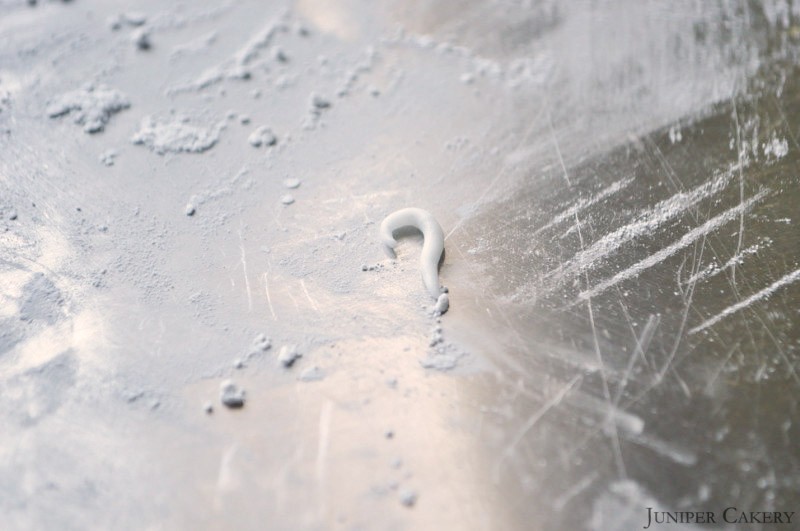
Step four: To make the handle for your cup roll out a little bit of sugarpaste / fondant into a thin sausage shape.

DSC_0024_214

Step five: Now shape this into a nice sized curve. Set aside.

DSC_0022_211

Step six: Indent your coffee up at the top with your ball tool.

DSC_0026_217

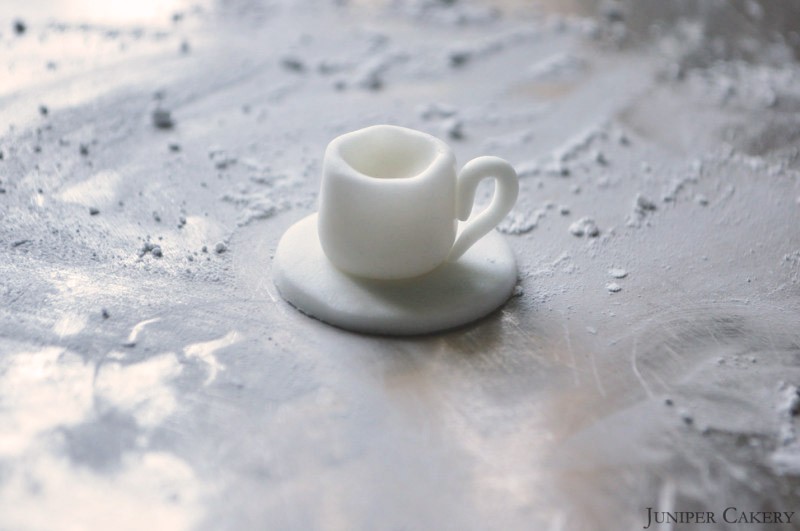
Step seven: Dab some water onto the centre of your saucer and place your cup on top to fix it into place. Paint a little water down one side of your cup and carefully attach your handle.

DSC_0028_216

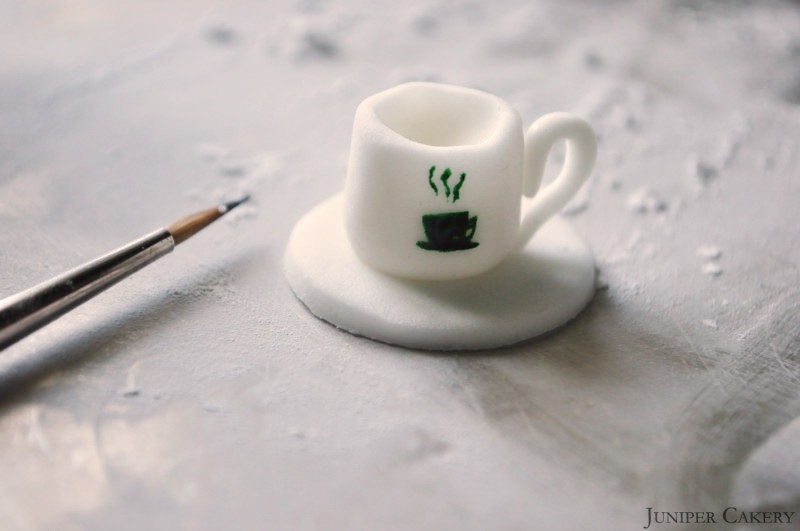
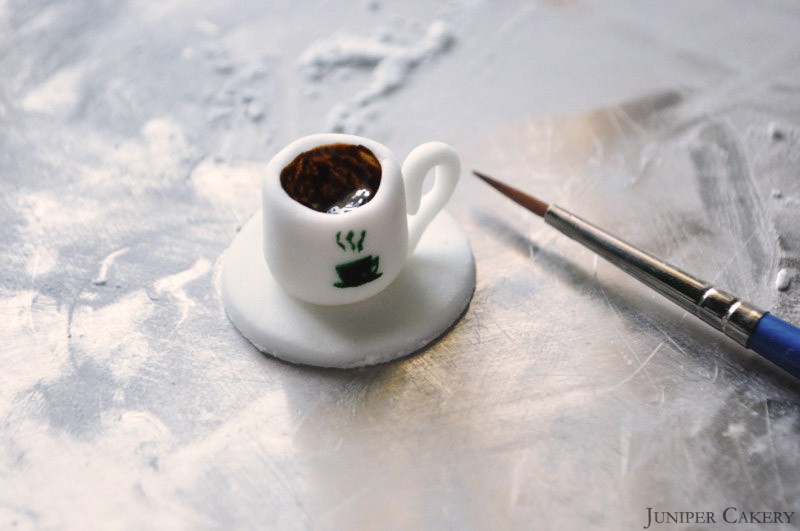
Step eight: Add some extra detail by painting a ‘logo’ onto the front of the coffee cup with a paintbrush and some food gel colour paste.

DSC_0029_215

Step nine: ‘Pour’ in some coffee by painting the inside of your cup with brown food gel paste!

Caramel Mochaccino

You should now be left a really fun and playful little coffee cup to nestle atop of coffee flavoured cupcakes! For teacups and tea themed cupcakes make your cups a little more slim and add some traditional pattern like ‘swags’ or polka dots. Also, try painting the edges with edible gold paint and use a weaker brown colour to paint in the actual beverage.

Caramel Mochaccino

Caramel Mochaccino


Tutorial Tuesday: How to Make Quick and Simple Fondant Roses!

Sometimes you don’t need multi-petaled flowerpaste roses, delicate ruffled peonies or realistic hydrangeas to top floral themed cupcakes and cakes with. If you’re aiming for simple designs and convenience then these super quick and easy fondant roses will be perfect for creating flower adorned treats! They’re also small and sweet (no pun intended) enough to top cookies, mini cakes, whoopie pies and macarons with!

How to make quick and simple fondant roses

How to make quick and simple fondant roses

How to make quick and simple fondant roses

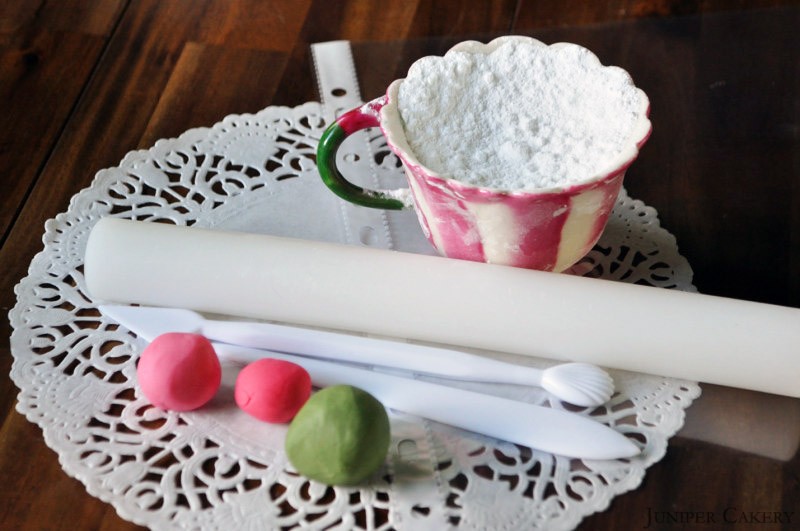
What you will need…

Green sugarpaste / fondant (we used Juniper Green by Wilton to colour white/ivory sugarpaste)
Whatever colour you wish for the roses
Fondant rolling pin
Blade modelling tool
Veiner modelling tool
Icing sugar
A clear filing pocket
Scissors

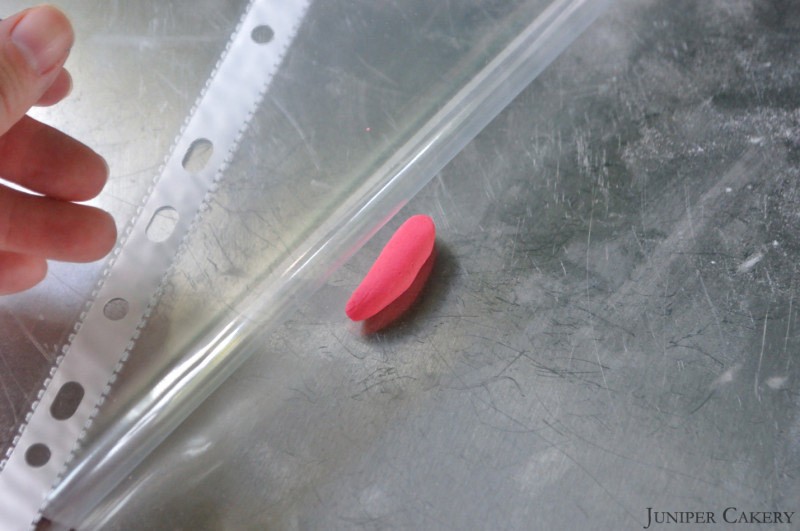
How to make quick and simple fondant rosesStep one: Cut open your filing pocket so that you can flip it open and shut easily. Using these pockets is a great tip we’ve picked up for flower making. They enable you to create thinner and smoother petal edges. Your petals are also least likely to stick to the clear material!

Step two: Roll and shape a little sugarpaste / fondant into a ‘slug’ shape. Place this inside your clear filing pocket.

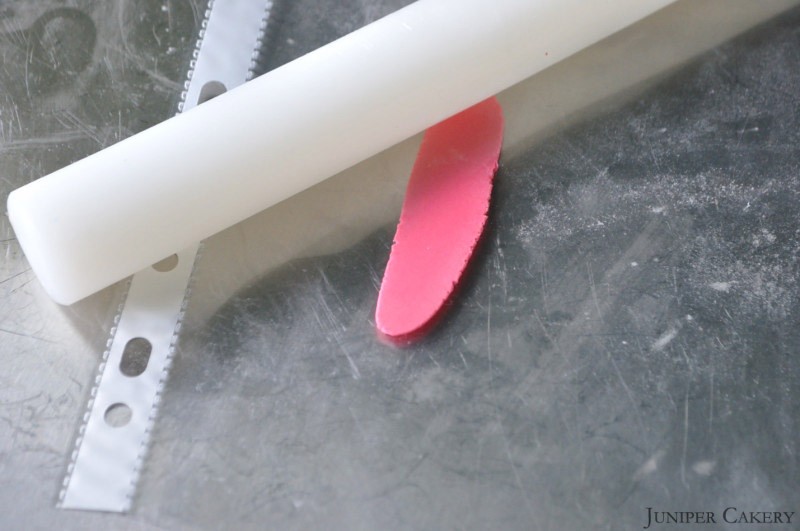
How to make quick and simple fondant roses

Step three: With your sugarpaste / fondant inside your pocket use a fondant rolling pin to roll it out to around 2mm.

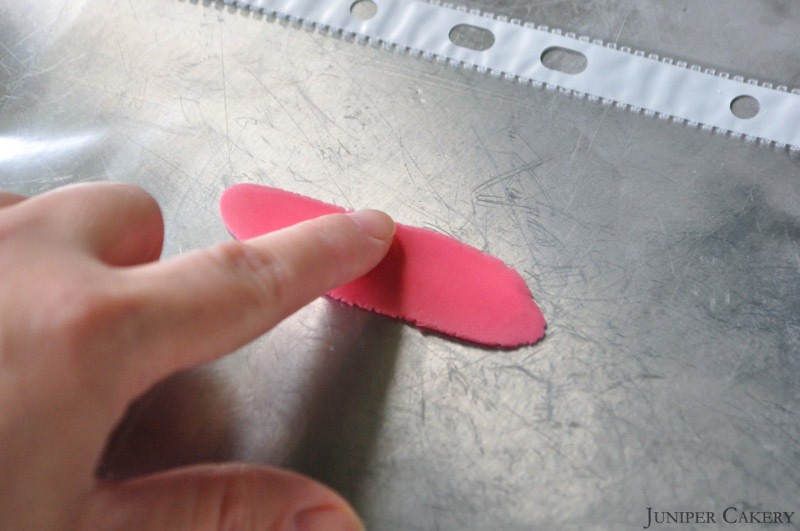
How to make quick and simple fondant roses

Step four: With your sugarpaste / fondant still inside the pocket press and rub along the long edges to get lovely smooth and thin edges.

How to make quick and simple fondant roses

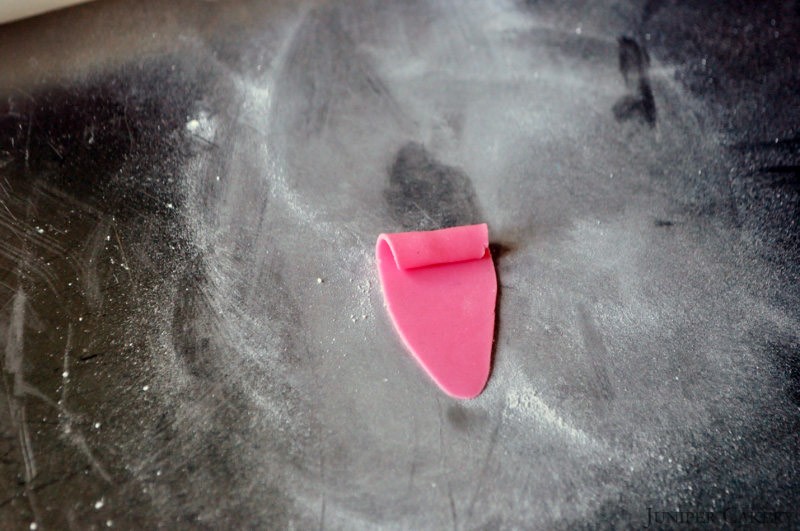
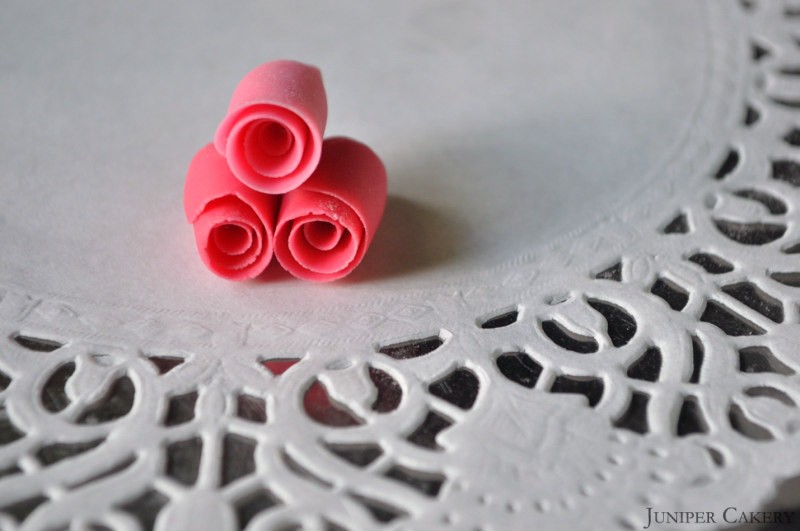
Step five: Take your piece out from the pocket and lay on an icing sugar dusted surface. Gently begin to roll your sugarpaste / fondant. Pick which end you prefer as your better petal edge and pinch the end you don’t want to show. Your rose should taper slightly to the end.

How to make quick and simple fondant roses

How to make quick and simple fondant roses

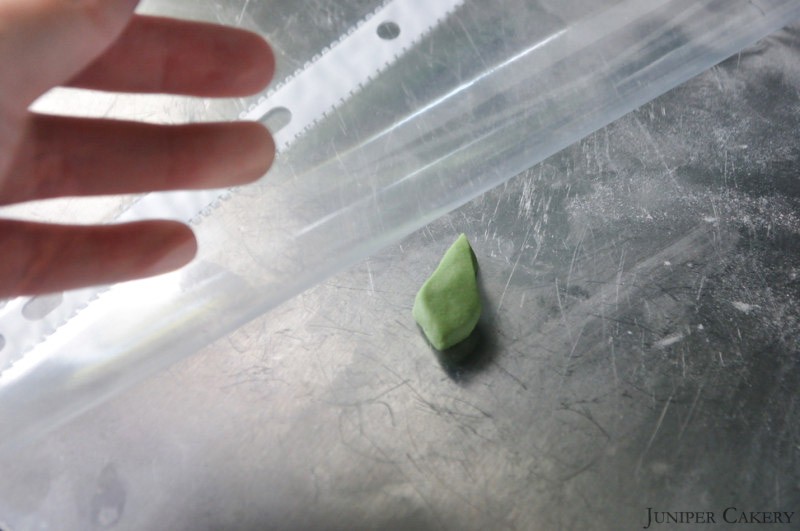
Step six: To make your leaf shape a small amount into a rough diamond shape.

Step seven: Place this inside your clear filing pocket.

How to make quick and simple fondant roses

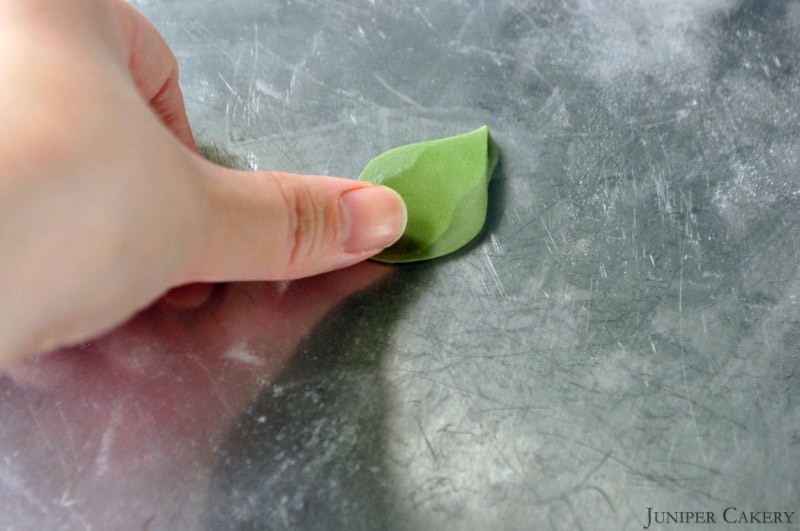
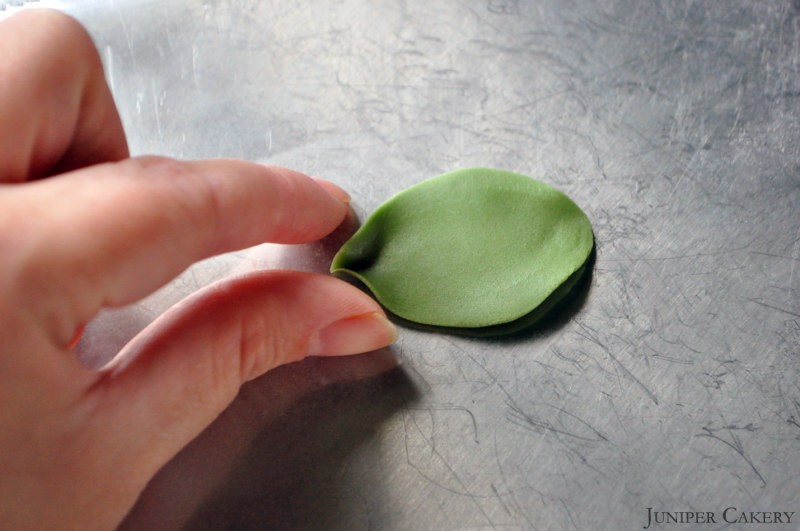
Step eight: Use your finger or thumb to press out and smooth down the edges of your leaf.

How to make quick and simple fondant roses

Step nine: Remove your leaf and set on a lightly icing sugar dusted surface. Shape the tip of your leaf by pinching the end with your fingers.

How to make quick and simple fondant roses

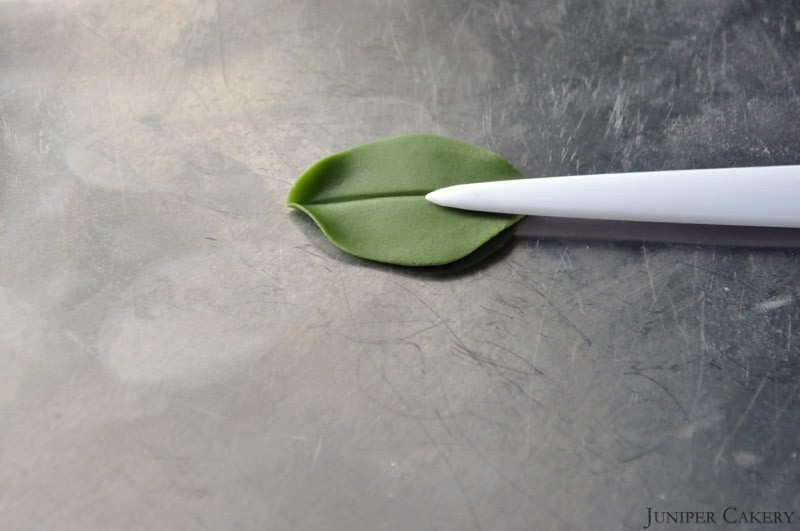
Step ten: Lightly scour a vein to your leaf with a veining tool.

How to make quick and simple fondant roses

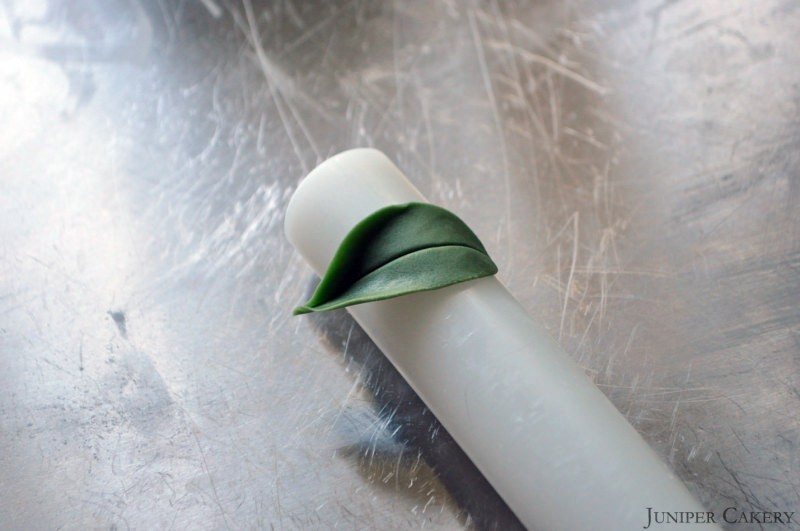
Step eleven: Leave your leaf to dry on a curved surface for a more flowing look.

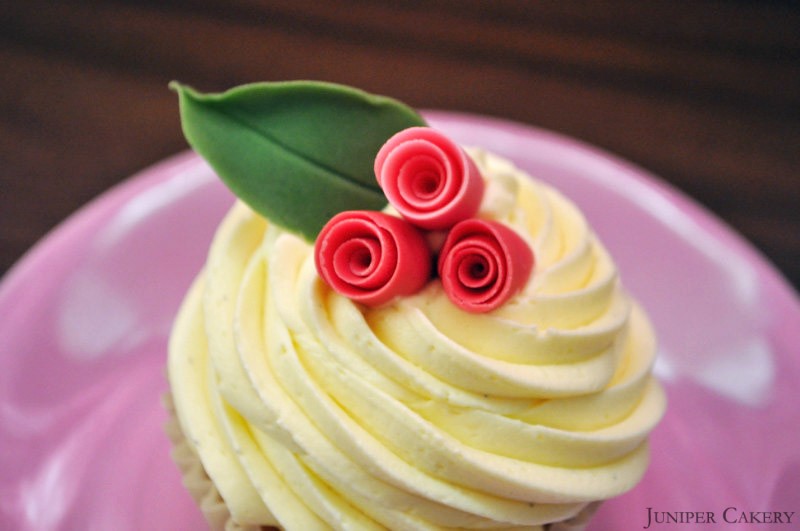
Now you should have a lovely simple rose and leaf to adorn your baked treats with!

How to make quick and simple fondant roses


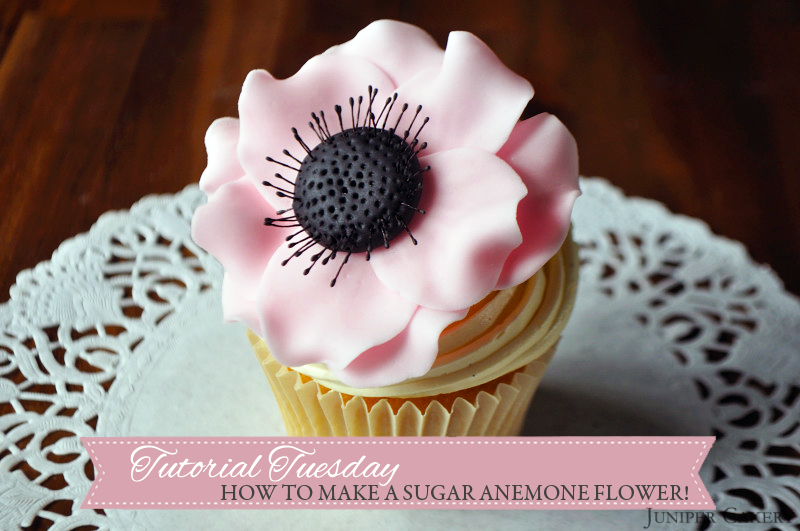
Tutorial Tuesday: How to Make a Sugar Anemone Flower!

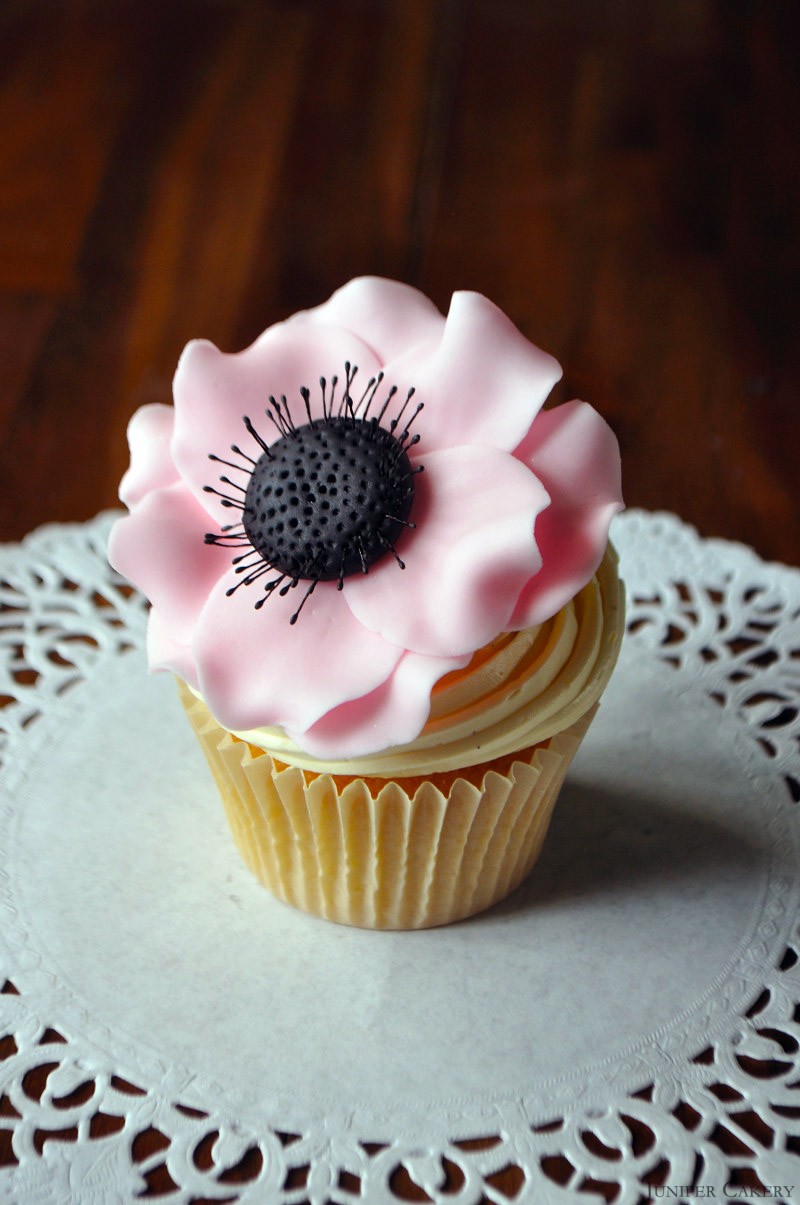
This week’s cake and cupcake decorating tutorial shows you how to create a beautiful and softly ruffled Anemone! We’ve been seeing Anemone flowers pretty much everywhere over the past couple of months. They’ve been found nestled into bouquets, fabric prints, photography and wedding decor They’re striking and unique on top of cakes and make cupcakes look instantly grown up and sophisticated too!
Tutorial Tuesday: How to make a sugar anemone flower for cakes

Tutorial Tuesday: How to make a sugar anemone flower for cakes

You will need…

Black sugarpaste
Pink sugarpaste (or any colour you like)
Tylo Powder (mix a little in your sugarpaste to help harden)
Quilting modelling tool
Ball modelling tool
Fondant rolling pin
Rose petal cutters
Flower Foam Pad
Black stamens or light colour stamens painted with black food dye
Edible glue
Paint brush
Flower forming cup
Foil
Icing sugar

Tutorial Tuesday: How to make a sugar anemone flower for cakes

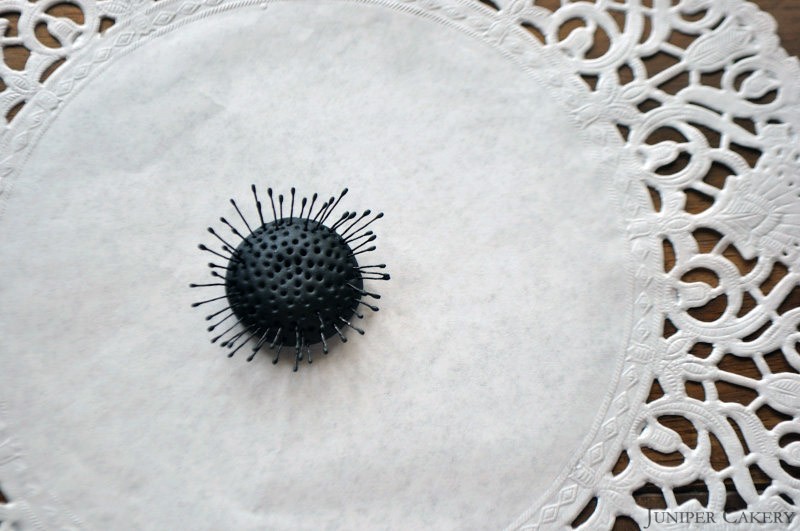
Step one: Create a ball about the size of a 10 pence coin (or 25 cents in the U.S) with your black sugarpaste. Flatten this slightly and smooth the surface.

Step two: Take your quilting tool and indent lots of ‘dots’ into the surface.

Step three: Cut down your stamens and insert these around the outer edge of the centre of your flower.

Tutorial Tuesday: How to make a sugar anemone flower for cakes

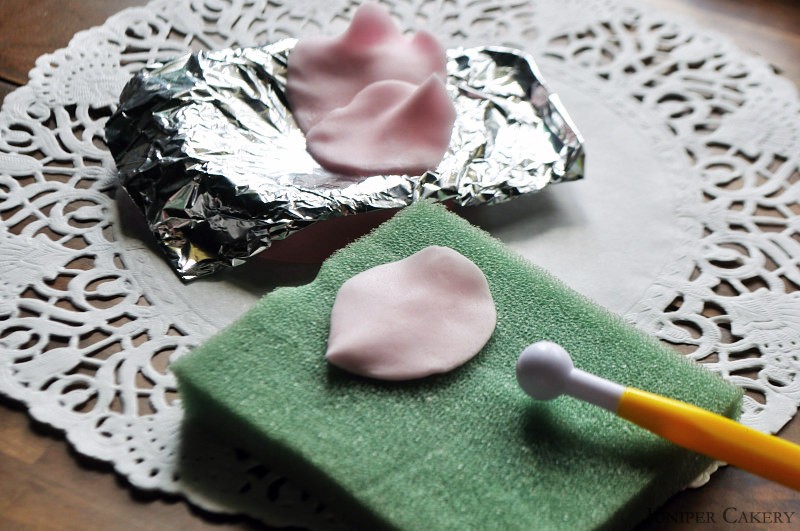
Step four: Cover your flower forming cup with foil and dust lightly with icing sugar so your petals won’t stick to the foil.

Step five: Add Tylo powder to the sugarpaste you’re using for the petals.

Step six: To make your petals roll out your sugarpaste thin and cut with your largest rose petals cutters.

Step seven: Now you need to ruffle the edges of your petals. To do this you need to lightly ‘massage’ the edges of your petals with your ball tool atop of a flower foam pad. Tweak the edge ever so slightly with your fingers.

Tutorial Tuesday: How to make a sugar anemone flower for cakes

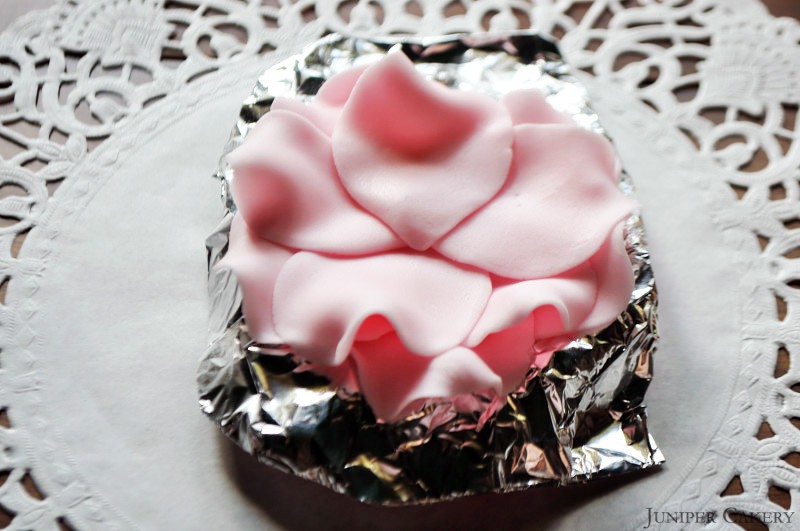
Step eight: We created 10 individual petals to create this Anemone. Nestle the first five petals into your forming cup and slightly atop each other with edible glue fixing them together. Lay the next layer of 5 petals where the petals of the first layer overlap.

Tutorial Tuesday: How to make a sugar anemone flower for cakes

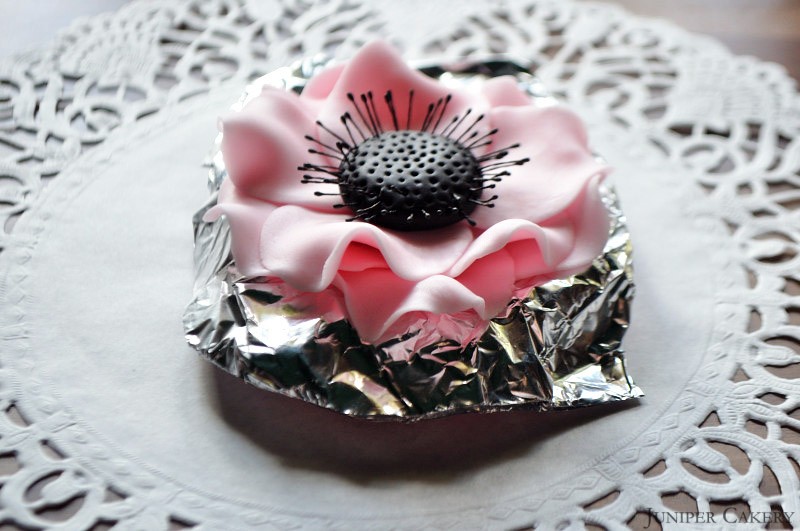
Step nine: Add some edible glue to the centre of your petals and attach the stamen studded centre you made earlier.

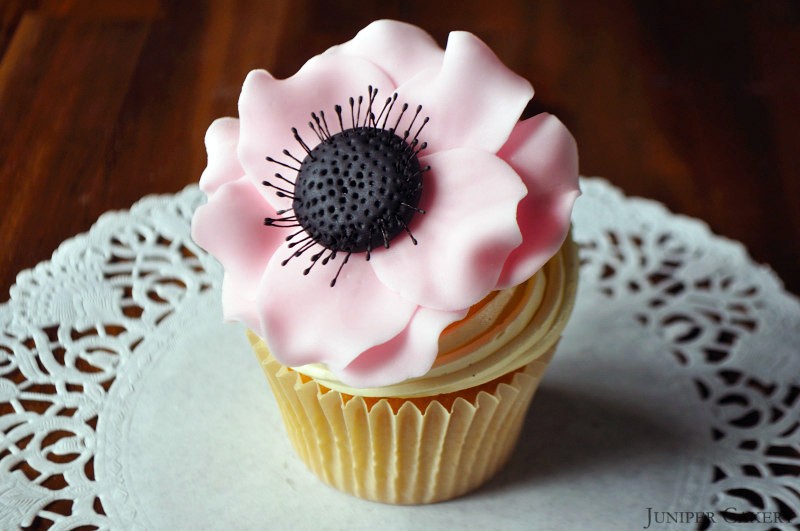
You should now be left with a gorgeous and elegantly ruffled Anemone flower; perfect for cakes and cupcakes!

Tutorial Tuesday: How to make a sugar anemone flower for cakes


Tutorial Tuesday: How to Use Tappits!

In this week’s tutorial we’re going to show you how to master the art of Tappits. Using these cutters to create text on your baked creations is time consuming, but your cakes will end up looking much more sleek and professional!

How to use tappits

Whether you’re making a cake for a family member or for a client you will most likely need to add a name or a phrase at some point. There are plenty of alphabet cutters available in the cake decorating world in all sorts of sizes and fonts so you may have used Tappits already. In our experience letters made using larger alphabet cutters are prone to stretching out of shape, or ending up bumpy and ripped at the edges. Letters made using Tappits, on the other hand, are much hardier than they look (they can also be fiddly and need a steady hand) and we’ve found they make any cake look instantly more polished.

Graduation Cake by Juniper Cakery

Once we mastered our Tappit making skills they soon became one of our most used tools in our kit. In this tutorial we offer you some simple tips to help make using them easier and quicker!

What you’ll need:

Tappit set
Fondant rolling pin
Modelling paste/sugarpaste coloured to suite your needs
Icing sugar
Paintbrush
Cocktail stick

How to use Tappits

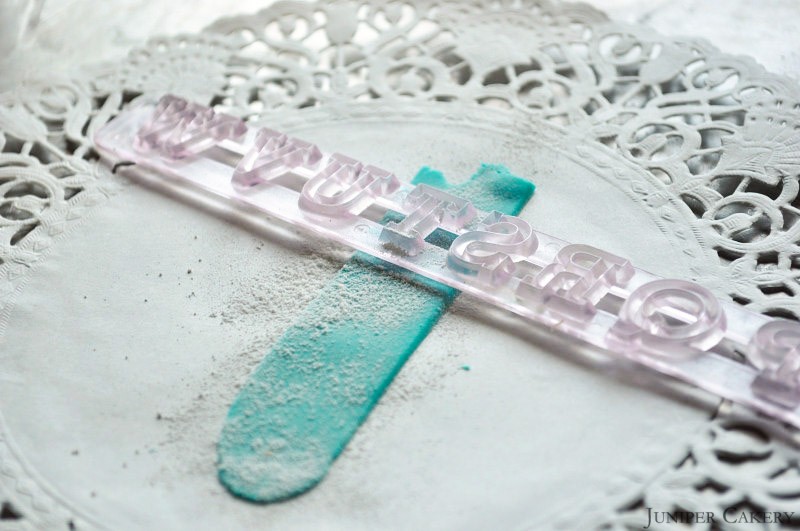
Step one: Using your fondant/sugarpaste rolling pin roll out your modelling paste/sugarpaste as thinly as possible (we use modelling paste as it is much more workable than sugarpaste but sugarpaste will work too if you add a little tylo/tylose powder). Now use the tappit strip cutter to create the perfect size to work with.

How to use Tappits

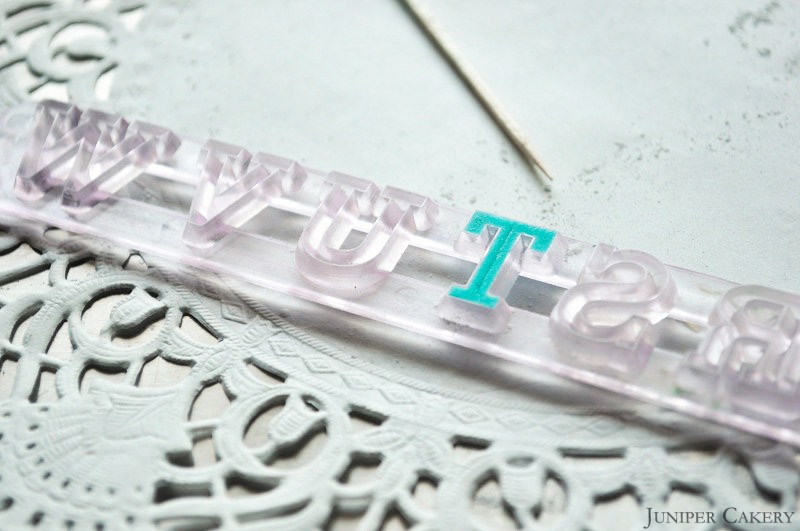
Step two: Dust down the current letter you require with a generous amount of icing sugar before you begin. Now press that letter into the modelling paste/sugarpaste and press it down as hard as you can. Using the end of your rolling pin tap/press the tappit again ensuring it has cut through properly.

How to use Tappits

Step three: Turn your tappit over to see if you can see the edges of your letter poking through. If you can your tappit is ready (if not keep tapping/pressing with the rolling pin). If there is any excess modelling paste/sugarpaste on the outside of your letter use your cocktail stick to remove it.

How to use Tappits

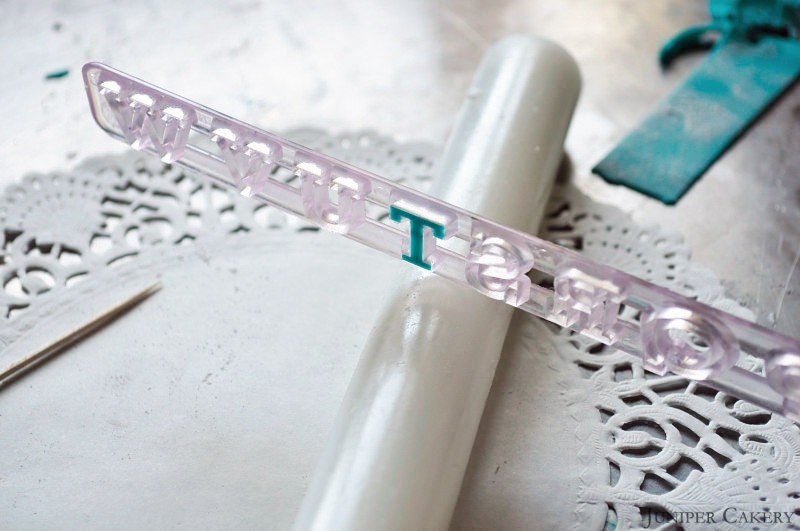
Step four: Place your rolling pin on a hard surface and rest your tappit set on it while you hold one end. Lean your tappit set forward and begin tapping, with force, until the letter falls out and on to your work surface.

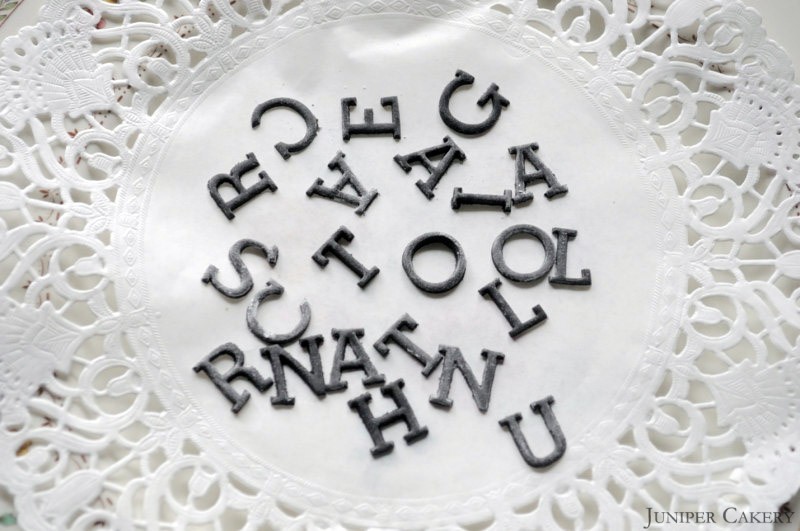
Continue the above process until you have the name, age, phrase you need to finish your baked creation!

How to use Tappits


Tutorial Tuesday: How to Make Perfect Chocolate Buttercream

As a follow up from our popular How to Make Simple Buttercream tutorial / recipe we thought we’d offer up our tips on whipping up an amazingly decadent chocolate buttercream! This frosting is perfect for mouth watering dark truffle cakes and milk chocolate fudge cakes. You can even use our tips to make an amazingly smooth white chocolate buttercream; perfect with delicious fruity fillings and preserves inside layer cakes.

How to make perfect chocolate buttercream

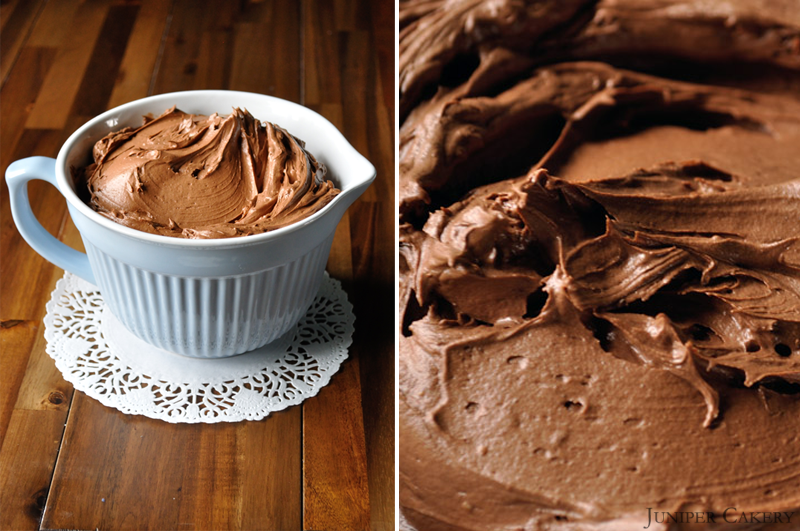
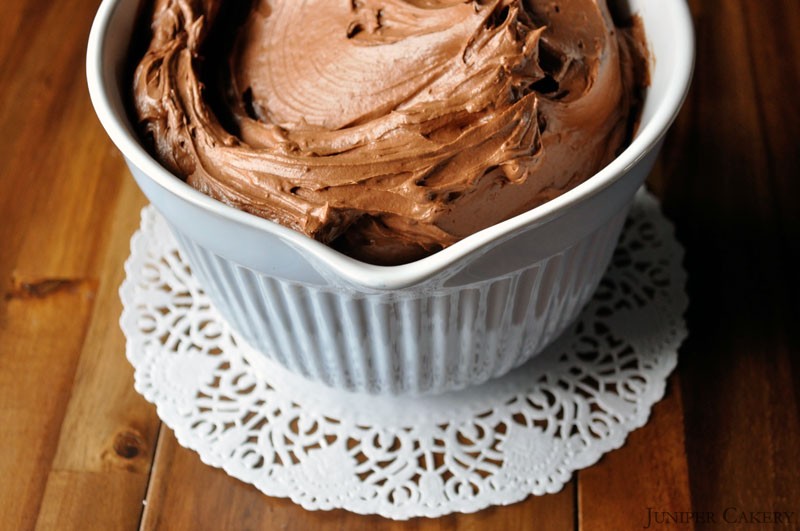
Our first tip for creating super smooth chocolate frosting is… add melted chocolate! The best thing about adding melted chocolate is that it really helps minimise air bubbles. The second is that by mixing a simple buttercream recipe / method with tempered chocolate is that it becomes a sort of hybrid buttercream-ganache; or ‘butternache’. This makes it perfect for crumb coating cakes.
Perfect Chocolate ButtercreamPerfect Chocolate Buttercream

Perfect chocolate buttercream recipe!
To make enough to fill and ganache/buttercream a 10″ cake of three layers and a 6″ cake of three layers you’d need around 900g of our super smooth chocolate buttercream. This equates to… (NOTE: To make enough to generously frost around 24 cupcakes you’d need around two thirds of the recipe below. Simply multiply the amount per ingredient below by 2 and then divide by 3 e.g. 750g butter x 2 = 1500 / 3 = 500g)

As we stated in our Simple Buttercream tutorial use this recipe as a jumping off point to help whip up frosting perfect for you and how you work. If you haven’t read our initial tutorial about whipping up buttercream you probably should!

750g butter
400g chocolate callets / buttons (the best are by Callebaut)
400g icing / confectioner’s sugar
12 tablespoons of cocoa powder

Perfect Chocolate Buttercream

Step one: Cut up your butter into small cubes. We use a serrated knife to do this as the serrated edge causes less suction than a straight edge one. This means you shouldn’t be fighting desperately with getting the butter off your knife; a hazardous thing to do at best!

Step two: In a stand up mixer (we recommend a KitchenAid Artisan 4.8 Litre / 5 Quart Mixer) cream your butter using the flat beater on medium speed.

Step three: As the butter is creaming add in the icing sugar a bit at a time.

Step four: In a glass bowl melt up your chocolate callets in either a bain marie (the bowl in a saucepan of hot water) or a microwave (check and stir every 30 seconds to avoid burning).

Step five: Remove from heat once melted and stir until the chocolate has half cooled. Pour your melted chocolate into your mixer bowl with the buttercream and mix.

Step six: Add in the tablespoons of cocoa powder four at a time. Mix. Test your frosting once every 4 tablespoons has been incorporated.

Step four: Mix your frosting at full speed at 30 second intervals; checking each time.

Perfect Chocolate Buttercream

Remember to test, taste and analyse your buttercream as you make it and change the recipe slightly if need be. You need to develop a sort of sixth sense or intuition when it comes to whipping up things like buttercreams and fillings. With our recipe and the advice we offered on our initial How to Make Simple Buttercream post you should be on your way to making perfect and delicious frosting! Buttercream can be a trial and error thing, but with experience you’ll end up with wonderful frosting every time!


×