Tutorial Tuesday: How to Make an Edible Teacup & Saucer!

We love anything involving tea and we had been hankering to put together a tutorial on how to make a teacup or teapot for a while. So in this week’s tutorial we show you how to create an edible teacup and saucer using flower / modelling paste! We loved putting together this teacup and think it is perfect for summer afternoon tea themed parties, weddings and birthdays!

Raspberry Chambord and Dark Chocolate Truffle Cake

You can definitely fancy it up and add some whimsical fun by adding unusual sprays of sugar flowers nestled into the saucer, or make sugarpaste macarons and cookies to sit next to the cup. Why not add a little teabag string and label into the cup, copy the pattern from a favourite tea set, add some fondant ‘tea’ or create a elegant silver spoon either on the saucer or poking out of the ‘tea’!

Raspberry Chambord and Dark Chocolate Truffle Cake

What you will need:

Teacup and saucer
Flower / modelling paste (normal sugarpaste won’t harden and hold as well)
Icing sugar
Fondant rolling pin
Melted white chocolate
Blade tool
Edible Glue
Raspberry Chambord and Dark Chocolate Truffle Cake

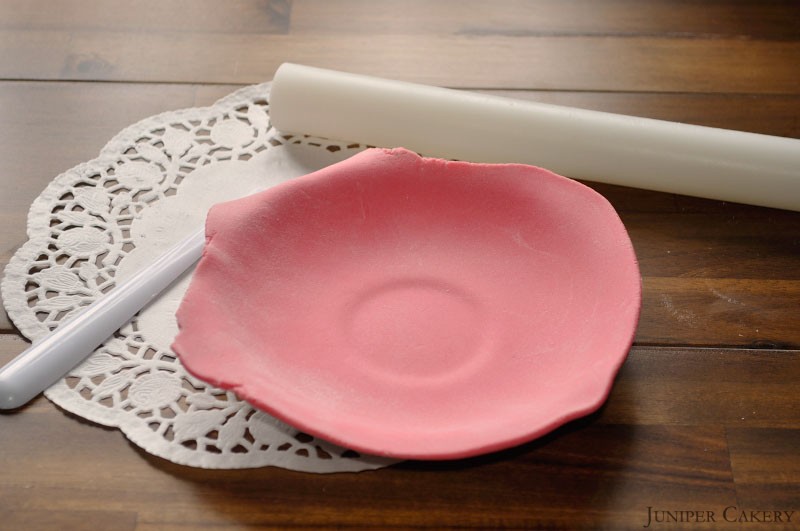
Step one: Roll out your modelling paste to around 4mm thick and wider than your tea saucer.

Step two: Dust your sauce with icing sugar (make sure there are no lumps of sugar or this will dent your modelling paste.

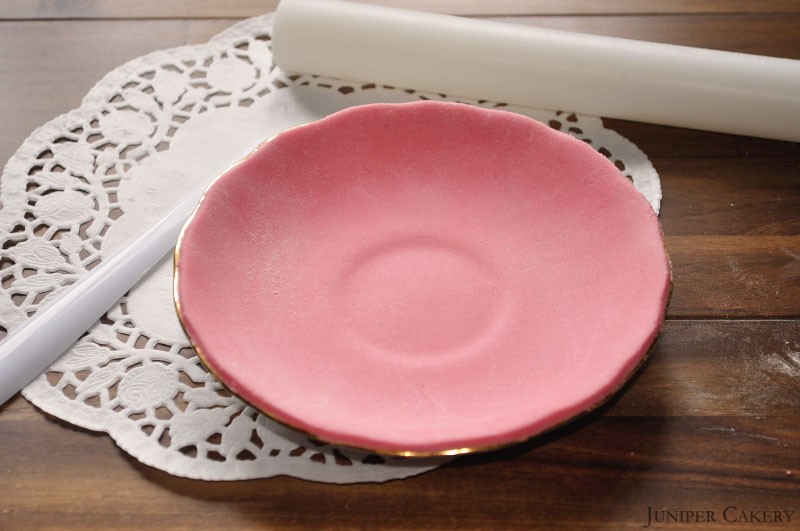
Step three: Place your rolled paste into the dish and gently smooth into the contours of the tea saucer. (After a few minutes gently slide out the paste saucer to make sure it comes out easily.)
Raspberry Chambord and Dark Chocolate Truffle Cake

Step four: Cut away the excess paste from around the saucer like you would when cutting crust away from an un-baked pie. Leave to set.
Raspberry Chambord and Dark Chocolate Truffle Cake

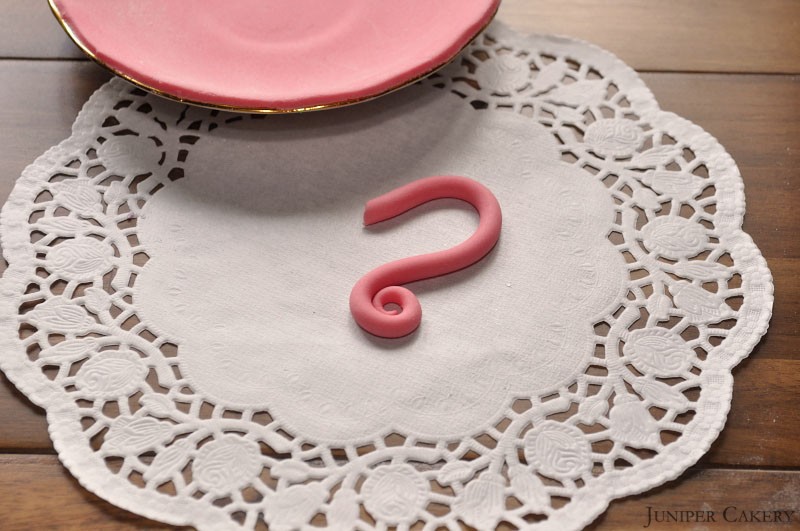
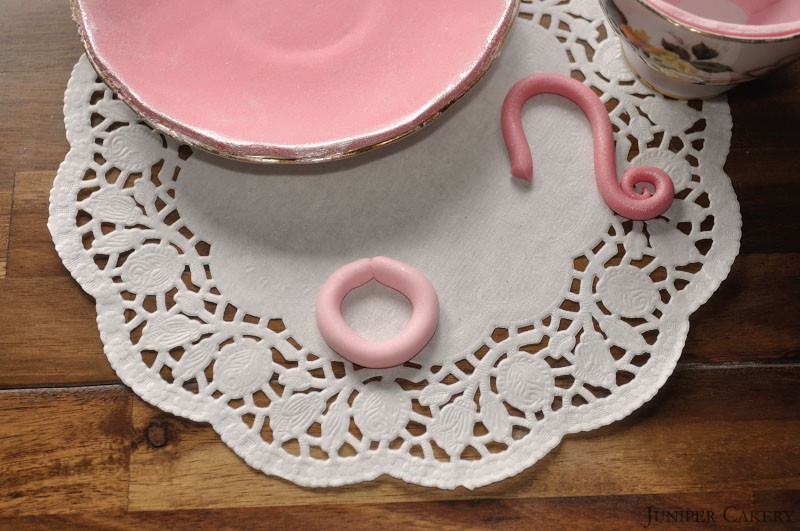
Step five: To make your teacup handle roll out some modelling paste to about 3 inches making sure one end is tapered. Whilst it is laid on your surface begin to shape it. Keep comparing it to your teacup to make sure it’s the right size. Leave this to set along with your saucer.
Raspberry Chambord and Dark Chocolate Truffle Cake

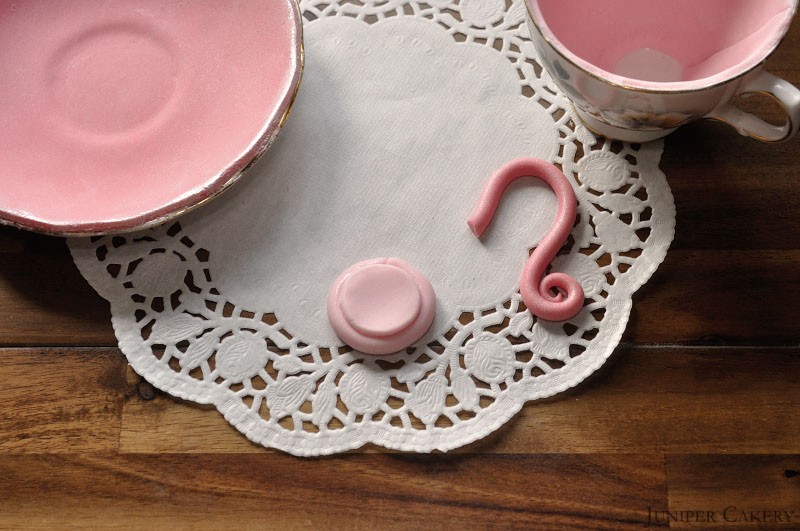
Step six: Make the base of your teacup by rolling out some paste into a ‘rope’. Form this into a ring that is a bit bigger than the base of your teacup. Glue the ends together with edible glue.
Raspberry Chambord and Dark Chocolate Truffle Cake

Step seven: Roll out some paste and cut a circle the same size of the base of your cup. Glue this to the ring / teacup base you made in step six and set aside.
Raspberry Chambord and Dark Chocolate Truffle Cake

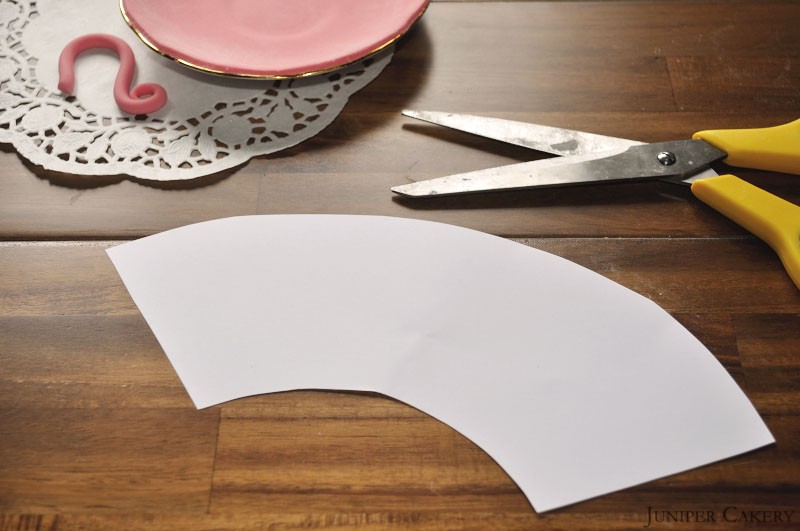
Step eight: The trickiest part is the cup itself so this needs to be checked and planned a little. Cut out a fan shape template from paper and nestle this into your cup to check how it will fit. Adjust the size.

Raspberry Chambord and Dark Chocolate Truffle Cake

Step nine: Using the template you created in step eight cut out the fan shape in rolled modelling paste. Place the cut modelling paste into your icing sugar dusted teacup and press slightly. Join the edges with edible glue. To reinforce the edges cut a strip of matching fondant and glue over where the edges meet. Leave to set.

Step ten: When all your pieces are set glue each together with some melted white chocolate. For the handle it helps to hold it up whilst the chocolate dries with some bubble wrap underneath.

Step eleven: If you want to create some ‘tea’ to put inside your cup then dust the inside of your cup, mould some tea coloured sugarpaste (you can use this instead of modelling paste as it doesn’t particularly need to hold) into the cup and flatten the top. Place inside your cup and gently mould further into the teacup. You can also paint the top of the ‘tea’ in a light brown colour instead of colouring fondant.

Raspberry Chambord and Dark Chocolate Truffle Cake

Voila! Now you have an edible teacup and saucer ready to paint, decorate and add to the top of a cake! Lovely floral sprays, polka dots and light stripes work well painted onto teacups along with pearlescent, gold or silver edges. We’re sure that whatever you do to decorate your teacup and saucer will look lovely and striking!


Tutorial Tuesday: How to make a superhero raccoon!
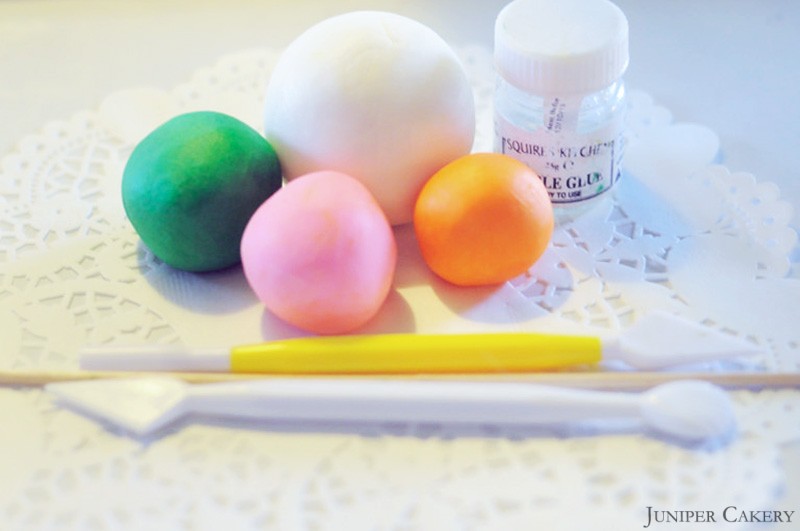
With warm summer air blowing in through the windows here at Juniper Cakery HQ it’s hard not to be inspired by what’s outdoors. The likely hood of a raccoon strolling through our gardens may be about as high as a raccoon donning a cape and mask but that’s what we love about cake decorating…you can be as insane as you like! Our crazy critter tutorials show you how to customise a cake in a fun, novelty way. This superhero raccoon would be a fantastic addition to any comic book fan’s cake and by following this tutorial you have all the superpowers you need to create one of your very own!

Tutorial Tuesday: How to make a sugarpaste raccoon

What you will need:
White sugarpaste/modelling paste
Black & green food colour paste by Wilton
Modelling tool set Fondant roller
Paint brush
Edible glue
Cocktail Sticks

Tutorial Tuesday: How to make a superhero raccoon!

Tutorial Tuesday: How to  make a sugarpaste racoon

Step one: Once you’ve custom coloured your sugarpaste (we chose a black, grey and green colour theme but don’t be afraid to choose your own, or the recipients, favourite colours) take a fair amount of your base colour (we’ll refer to this as grey) and begin rolling it in your hands. Make sure it’s crack free and begin moulding it into a ‘pear’ shape to form your raccoon’s head.

Tutorial Tuesday: How to  make a sugarpaste racoon

Step two: To make your raccoon’s eyes use a piping tip to cut out to circles in a contrasting colour (we chose a deeper grey) and shape them a little so they’re not perfectly round. Roll two very small balls out of white sugarpaste, flatten them with your fingers and place them on top of the deeper grey sugarpaste with edible glue. Paint in some pupils with black food colour paste and a paintbrush to finish your raccoon’s eyes!

Tutorial Tuesday: How to  make a sugarpaste racoon

Step three: Give your raccoon a little nose by rolling a small amount of deeper grey sugarpaste between your finger and thumb and stick in place using edible glue.

Step four: To give your little raccoon ears take to small pieces of your deeper grey sugarpaste and mould two triangle shapes between your fingers. Use the non-bulbous end of the bulbous cone tool to mark where your raccoon’s ears will be placed and glue them on with edible glue.

Step five: To give your raccoon a mouth push the non-bulbous end of the bulbous cone tool into the sugarpaste and paint black.

Step six: With your grey sugarpaste begin moulding a similar ‘pear’ shape roughly the same size as your raccoon’s head to form the body.

Tutorial Tuesday: How to  make a sugarpaste racoon

Step seven: Place a cocktail stick through your raccoon’s body, add a little edible glue and gently slide your raccoon’s head into place.

Tutorial Tuesday: How to  make a sugarpaste racoon

Step eight: For the raccoon’s legs and arms roll out four ‘sausages’, making two slightly smaller than the other, and taper them ever so slightly at one end. Make three marks on each tapered end using your blade tool to add detail to your raccoon’s paw. Fix in place with edible glue.

Tutorial Tuesday: How to  make a sugarpaste racoon

Step nine: Now it’s time to create your raccoon’s little bushy tail! Roll out the remainder of your grey sugarpaste in to a ‘sausage’ and taper at one end. Place a small piece of cocktail where your would like your raccoon’s tail to be placed and surround it with edible glue and fix into place. Add stripes using black food colour paste and a pint brush.

How to Make the Mask

Step one: Using the fondant roller roll out your green sugarpaste (or whichever colour you chose) and cut an eye mask shape out of it using your blade tool. Lay the mask over your raccoon’s eyes to see approximately how far they are apart and when you’re sure place the mask back onto a flat surface and begin to cut the eye holes out.

Tip: If you’re find that cutting the small eye sockets out freehand isn’t working try using the smaller end of a piping tip.

Step two: With your left over green sugarpaste after cutting out the mask cut a long strip of sugarpaste approximately 4 mm thick. Place it around your raccoon’s head to measure and once you have it at the right size stick it into place with edible glue. Cut two small ‘leaves’ out of the green sugarpaste and roll a small ball between your fingers and fix them at one side of your raccoon’s head to create a knot! Now your raccoon is masked!

How to Make the Cape

Step one: Work the left over green sugarpaste in your hands and roll it out once again. Using the blade tool cut out an oblong making one end wavy, two ‘leaves’, two ‘blades of grass’ and roll one small ball.

Step two: Glue your cape into place making sure the wavy end is near your raccoon’s tail and gently work it to make it look as though there is wind blowing through and allow to set. Glue the thicker end of your ‘blades of grass’ to where the cape ends and allow them to meet under your raccoon’s chin. Where they meet glue your two ‘leaves’ and ball into place to cover up the seam and create a knot!

Step three: To create a superhero logo cut a hexagon from white sugarpaste using your blade tool, fix into place with edible glue and paint your chosen logo on with food colour paste.

By following this tutorial you now have your very own superhero raccoon! Why not turn your little critter into your own or your loved one’s favourite superhero? Add a Catwoman or Batman mask over your raccoon’s face (it already has the ears!), work in red and gold to create an Iron-raccoon or add a red, white and blue cape for Wonder Woman!

Tutorial Tuesday: How to make a sugarpaste raccoon


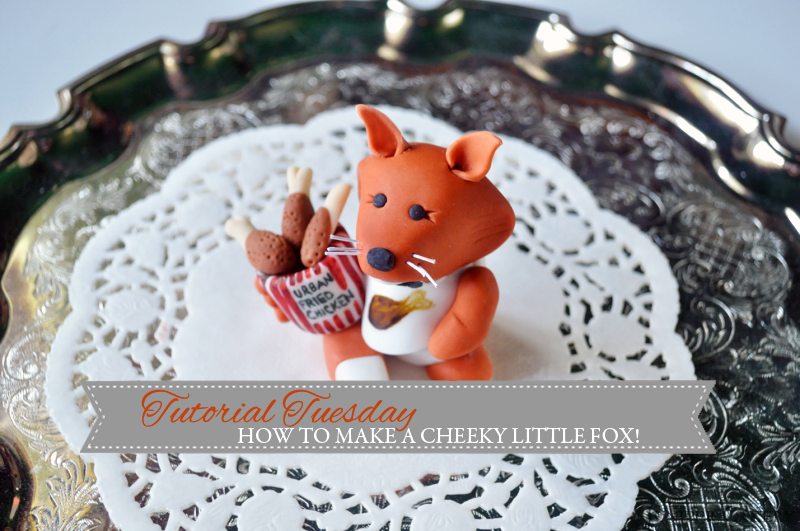
Tutorial Tuesday: How to make a cheeky little fox!

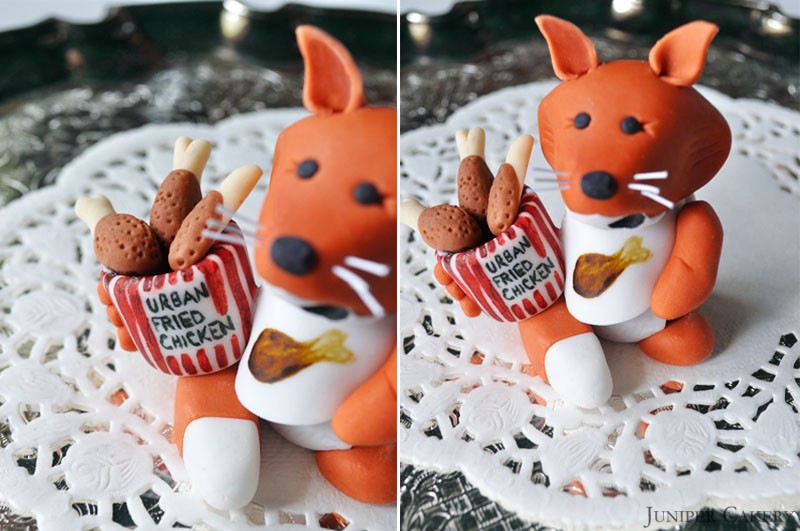
Hello everyone! After a short break our Tutorial Tuesdays are back! We asked what you would like to see featured in upcoming tutorials via our Facebook and we had lots of lovely responses. It would seem that sugarpaste characters and animals proved to be a popular choice and the Juniper Cakery office gardens have proven to be a popular destination for foxes so we though we would create this cheeky little fox for you to re-create! As we made this cute little critter we thought it’d be hilarious and fun to add a bucket of ‘Urban Fried Chicken’ in its arm and a food bib around its neck!

Tutorial Tuesday: How to make a fondant sugarpaste fox

What you will need:

White sugarpaste/modelling paste
Red, brown and orange gel paste (to make a burnt orange colour for the fox)
Set of modelling tools
Red and brown food colour paste (to create the bucket of ‘chicken’)
Black ready to roll icing (for the fox’s eyes, nose and mouth)
Sugarpaste/fondant roller
Edible glue
Cocktail sticks

Tutorial Tuesday: How to make a fondant sugarpaste fox

Tutorial Tuesday: How to make a cheeky little fox!

Step one: Using some of the sugarpaste you custom coloured for your fox roll out a ball ensuring there are no cracks. Begin to ‘flatten’ either side of your ball until you have fanned out ‘cheeks’. Repeat this in the middle of your cheeks but this time taper towards the end and work the sugarpaste upwards with your fingers to create a pointy snout for your little fox.

Tutorial Tuesday: How to make a fondant sugarpaste fox

Step two: Now you have the general shape of your fox’s head use the shell end of you blade and shell tool to add some fur detailing.

Tutorial Tuesday: How to make a fondant sugarpaste fox

Step three: Using the smaller end of your ball tool indent two ‘eye sockets’. Make two small slits with the blade end of your blade and shell tool to add further detail to your fox’s eyes. Now roll out two very small balls using the black sugarpaste and secure them in place with edible glue.

Tutorial Tuesday: How to make a fondant sugarpaste fox

Step four: Make an indentation in your fox’s snout with the non-tapered end of the bulbous cone tool, roll a small amount of black sugarpaste into an oval and fix into place with edible glue. If you would like to add ‘whiskers’ cut six pieces of florist wire approximately 1 1/2 cm long and push in to snout.

Step five: For ears, roll out a small amount of your burnt orange sugarpaste, cut two triangles out approximately 1cm x 1cm and fold in two corners until they’re touching. Make two indentations on top of your fox’s head using the ball tool and fix into place with edible glue.

Step six: Roll out a small amount of white sugarpaste using your fondant roller until it approximately 1mm thick. With your blade tool cut a triangle approximately 1cm x 1cm x 1cm and place it under you fox’s chin. Use the non-tapered end of your bulbous cone tool and gently work the white fondant into the burnt orange fondant until it appears seamless. Now you have your given your fox some traditional markings! For the mouth simply make an indentation using your ball tool and paint black with Wilton’s black food colour paste.

Tutorial Tuesday: How to make a fondant sugarpaste fox

6

Step seven: To create a body for your fox begin rolling out a thick ‘sausage’ shape and make sure you slightly taper one end as this will be the neck. Add further markings to your fox by rolling out a small amount of white fondant and cutting out a ‘raindrop’ shape which will fit on to your fox’s stomach. Attach with edible glue and add fur detailing with your blade tool.

Tutorial Tuesday: How to make a fondant sugarpaste fox

Step eight: To attach your fox’s head to the body push in a cocktail stick, paint the ‘neck’ with edible glue and gently push the head in to place.

Tutorial Tuesday: How to make a fondant sugarpaste fox

Step nine: To make a tail roll another ‘sausage’ shape between your fingers only this time make it much smaller. Taper one end and curve it so it will fit around your fox’s body. Add a white tip by moulding a triangle shape with your fingers attach with edible glue and work with in the non-tapered end of your bulbous cone tool.

Tutorial Tuesday: How to make a fondant sugarpaste fox

Step ten: Your fox’s tail will ‘hide’ the left foot so only one foot needs to be made. Mould a circle with your fingers, press one end down with the ball tool and apply edible glue to stick in to place.

Tutorial Tuesday: How to make a fondant sugarpaste fox

Step eleven: How you make arms for your fox with depend on if you include the bucket of chicken and bib. If you’re making your fox without the extra novelty details roll out two small ‘sausages’, make a small cut about halfway down each ‘sausage’ and bend both ends in at this point. Taper one end to form a ‘paw’ and attach both arms with a small piece of cocktail stick and edible glue. To make and put together the fox’s arms, bucket of chicken and bib see below.

How to Make the Bucket of Chicken

Step one: Mould a ‘marshmallow’ shape out of your white sugarpaste and push in the larger end of the ball tool to create the inside of your bucket. If this forces your bucket out of shape simply work it once again until it regains the appropriate shape.

Step two: For the chicken; using your custom coloured sugarpaste roll out a very small ‘sausage’ shape and round one end but cutting and shaping the fondant to look like a traditional cartoon-like bone.

Step three: Roll ovals of brown fondant and push them down on top of the bone until they cover one end. Fix in to place with edible glue and mottle using the end of the bulbous cone tool.

Step four: Paint your bucket of chicken with red stripes and add a logo of your choice (we chose ‘Urban Fried Chicken’). Glue your chicken pieces in place.

Step five: Roll three small balls of your burnt orange fondant and stick them next to one another on the left side of your bucket. These will be your fox’s ‘fingers’.

Note: Only one arm is needed if you’re adding the bucket of chicken. The ‘fingers’ will give the illusion of the bucket being held by your fox.

Tutorial Tuesday: How to make a fondant sugarpaste fox

How to Make the Sugarpaste Bib

Step one: Roll out the remainder of your white sugarpaste and cut out a large ‘U’ shape with a thick bottom.

Step two: Use up the cut offs of rolled icing and cut out two small petal shapes and roll one small ball. Once your fox’s bib is in place glue the two petal shapes where the bib meets and glue the ball in the middle. Now you have a knot where your fox tied the bib!

Step three: Customise the bib by painting a chicken leg or ‘drumstick’ in the centre. Simply use different tones of brown food colour paste and a small paint brush to pain the design.

Note: Once the bib is in place the arm can be fixed on top.

If you’ve followed this tutorial step-by-step you now have your very own cheeky little fox! Sugarpaste characters like this are perfect for creating silly, novelty cakes for loved ones. Why not be inventive and turn this little fox into any character you like! If a relative loves music add some headphones, if they love sports swap the bucket of chicken for a basketball or football or if they love movies turn the bucket of chicken into a bucket of popcorn; the options are endless!

Tutorial Tuesday: How to make a fondant sugarpaste fox


Tutorial Tuesday: How to Make a Cheeseburger Cupcake!

Tutorial Tuesday: How to make a fun burger cupcake!

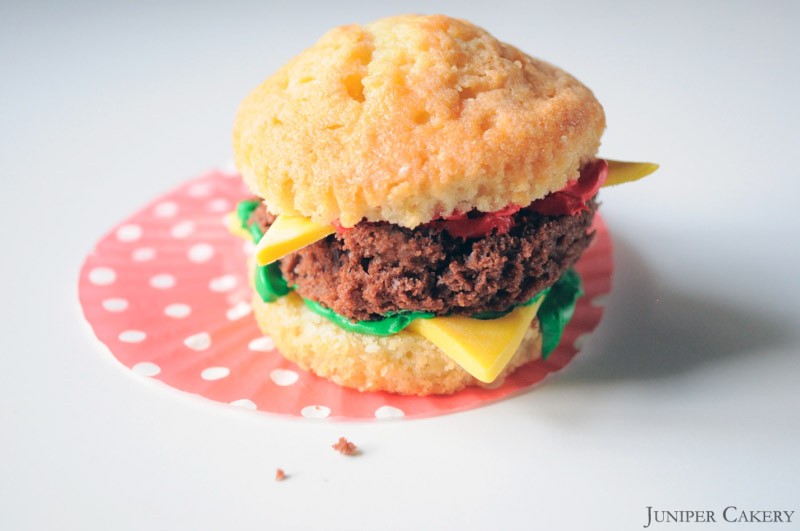
In this week’s tutorial we show you how to make a cheeseburger cupcake! These fun, quick and easy cupcakes add novelty to birthday parties, garden parties, picnics and barbecues. Present them in bright open cupcake cases and add to the novelty factor with a tiny can of soda! Why not turn this tutorial into a big cake by baking 9 inch layers and adding sugarpaste / fondant pickles, onion rings and sliced tomatoes! To begin this tutorial take a look at the list of things you will need below.

Tutorial Tuesday: How to Make a Cheeseburger Cupcake!

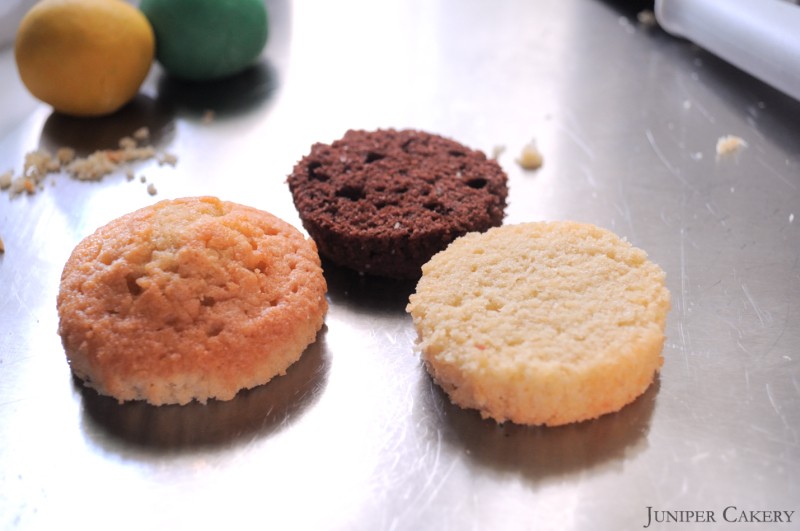
One vanilla cupcake
One chocolate cupcake
Fondant rolling pin
A sharp knife
Yellow sugarpaste
Red buttercream (we used Wilton’s Red gel paste to custom colour our buttercream)
Green buttercream (We used Wilton’s Leaf Green gel paste to custom colour our buttercream)
Piping tips (we used these to create the holes in the slices of cheese)
366 leaf piping tip

Tutorial Tuesday: How to make a fun burger cupcake!

Step one: Using a knife (do ensure your knife is sharp as a blunt blade could ‘pull’ apart your cupcake) cut your vanilla cupcake in to two halves. Repeat this with the chocolate cupcake and discard the top half.

Tutorial Tuesday: How to make a fun burger cupcake!

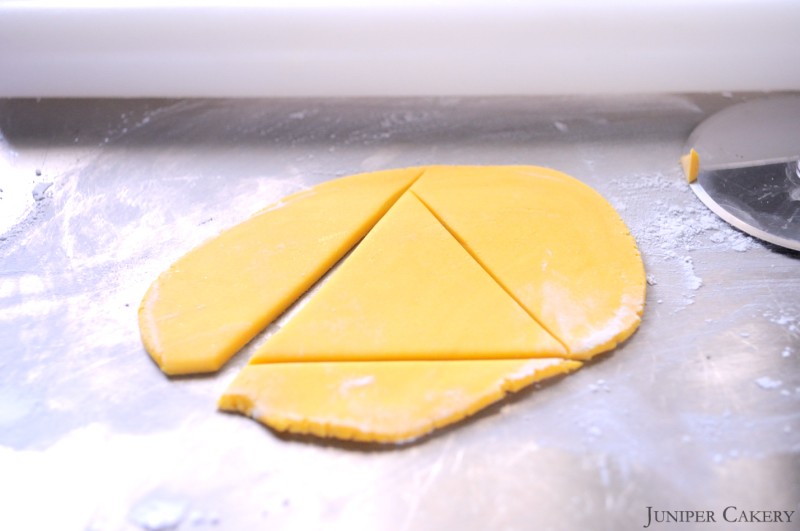
Step two: Put your sliced cupcakes to one side and roll out your yellow sugarpaste. Using a blade tool, sharp knife or pizza cutter cut a triangle out of the rolled fondant.

Tutorial Tuesday: How to make a fun burger cupcake!

Step three: Using a selection of different sized piping tips (or cutters if you have them small enough) begin to punch out holes in you cheese to create a fun cartoon effect.

Tutorial Tuesday: How to make a fun burger cupcake!

Step four: Take the bottom half of your vanilla cupcake and place on slice of cheese atop. Using your green buttercream begin to pipe to create a lettuce effect. It doesn’t matter if your piping is messy or uneven as it will be hidden inside your burger.

Tutorial Tuesday: How to make a fun burger cupcake!

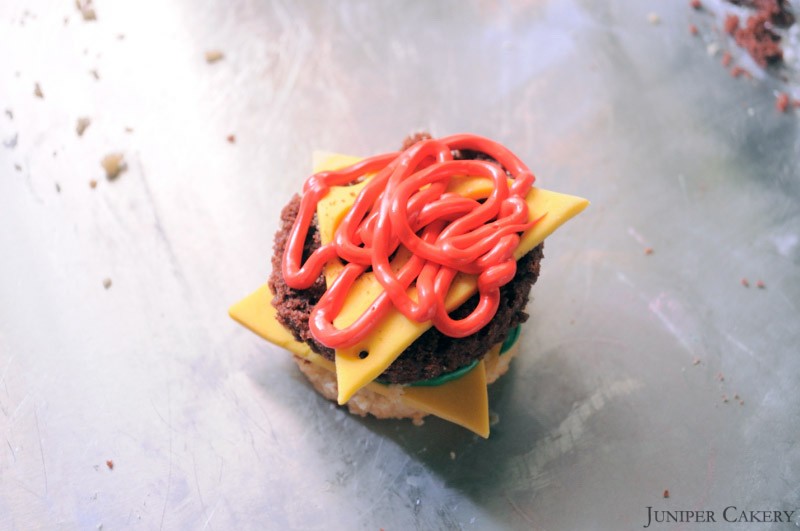
Step five: Now place the piece of chocolate cupcake atop of your lettuce and push down to hold in place. Place another slice of cheese on top of your burger and pipe your red buttercream (you don’t need a tip to do this, simply snip the end off of a piping bag) to add tomate ketchup!

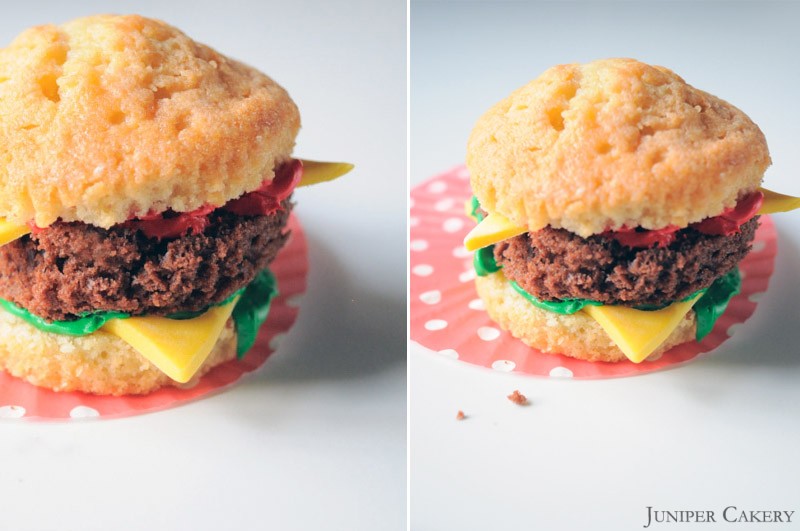
Step six: Now it is time to add the top layer of your burger bun using the top piece of your vanilla cupcake. Press down to secure in place and you’re done; you now have your very own cupcake cheeseburger!

Tutorial Tuesday: How to make a fun burger cupcake!

If you’ve followed this tutorial step-by-step you will now have a basic cupcake cheeseburger so why not take it further? Make tomatoes, gherkins / pickles, onions, eggs, bacon, fries out of sugarpaste and add as much detail as you like for extra fun!

Tutorial Tuesday: How to make a fun burger cupcake!


Easter Tutorial: How to make a simple sugarpaste chick!

Easter Tutorial: How to make a simple sugarpaste chick!

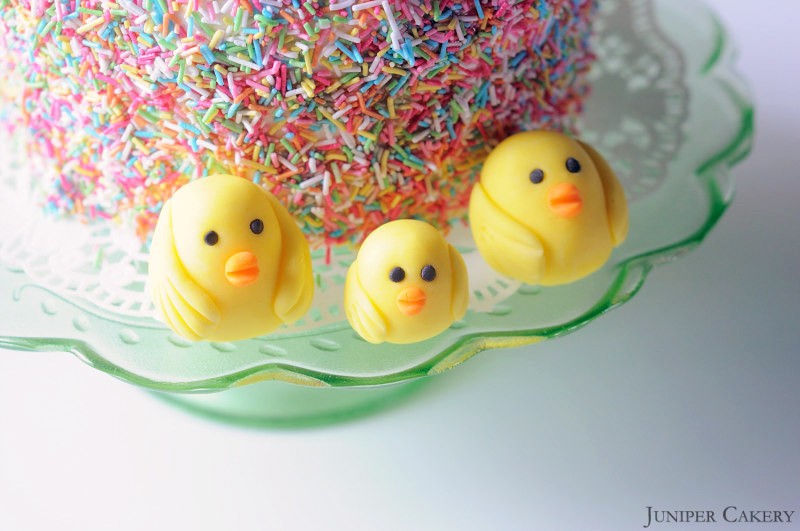
In this tutorial we show you how to create some simple sugarpaste chicks! Easter is a great time to get inventive with homemade treats and this easy-to-follow tutorial will give you all the knowledge you need to create some adorable Easter decorations. Why not adorn your cakes and cupcakes with these cute little chicks and offer them as an Easter gift, at parties or keep them all to yourself. Also, these chicks would not look out of place on nest cupcakes! To begin this tutorial take a look at the ‘what you will need’ list below.

What you will need:

Yellow fondant (we used Lemon Yellow by Wilton to colour white fondant)
Orange fondant (we used Orange by Wilton to colour white fondant)
Black fondant (we used Black by Wilton to colour white fondant)
Pint brush
Edible glue
Blade tool

Easter Tutorial: How to make a simple sugarpaste chick!

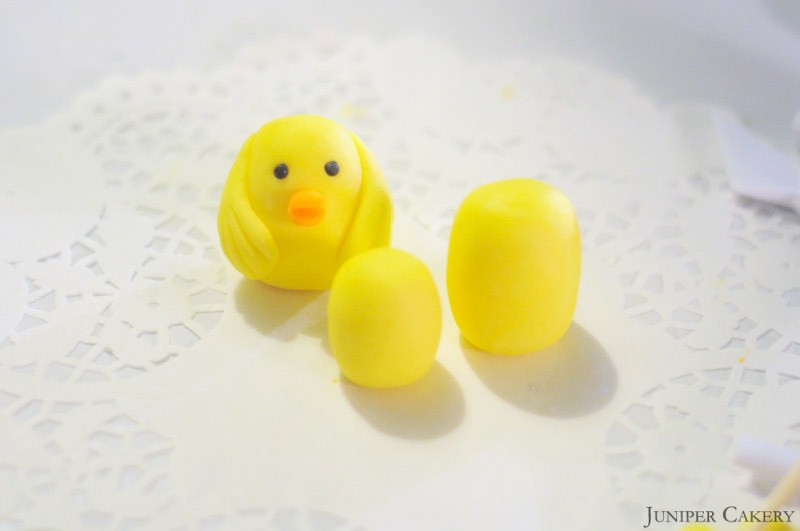
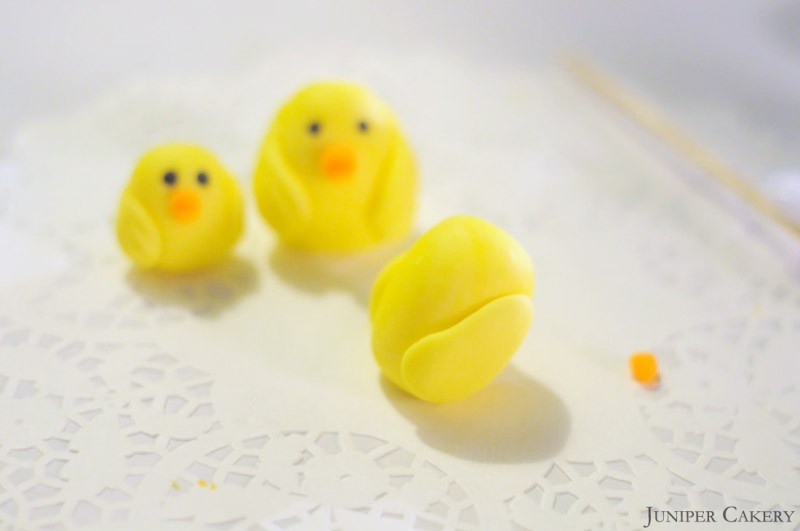
Step one: Using the yellow fondant form an ‘egg’ shape and place it to one side to set a little.

Easter Tutorial: How to make a simple sugarpaste chick!

Step two: Using the remainder of the yellow fondant now roll out a ‘sausage’ shape, flatten it and taper slightly at one end. Repeat this twice for each little chick you’re making and stick them on using the edible glue and paint brush. To give each wing feathered markings use the blade tool and gently indent lines as many or as few times as you desire.

Easter Tutorial: How to make a simple sugarpaste chick!

Step three: To make a beak for your chick take a very small amount of orange fondant and shape into a ‘cone’ using your fingers. At the larger end of the cone apply a little edible glue and stick it in place. Once stuck down take your blade tool and make a slit in the middle of the cone from side to side create an open beak for your chick! Repeat this on each chick you make.

Easter Tutorial: How to make a simple sugarpaste chick!

Step four: Mark where you would like your chick’s eyes to be and place a small amount of black fondant over the desired place!

Easter Tutorial: How to make a simple sugarpaste chick!

If you have followed this step-by-step tutorial you will now have made your very own Easter chick/chicks! Why not play around with this simple design and create robins, penguins, owls or bluebirds!


Easter Tutorial Week: How to make a sugarpaste bunny!

Easter Tutorial Week: How to make a sugarpaste bunny!

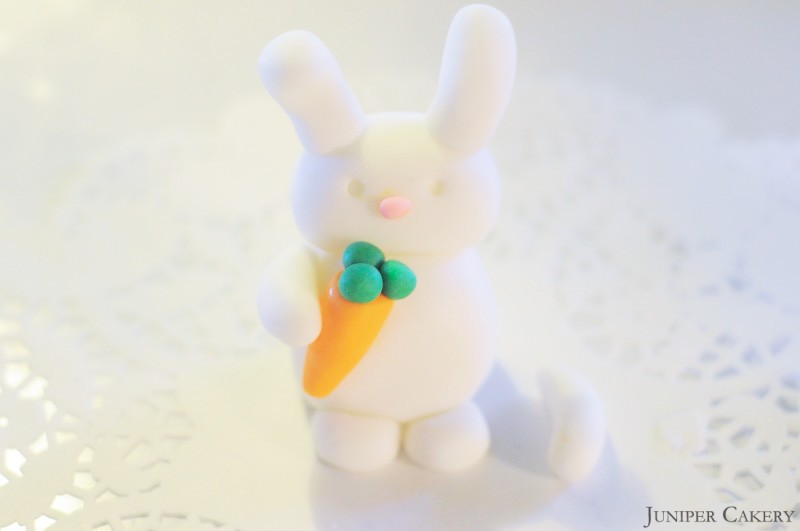
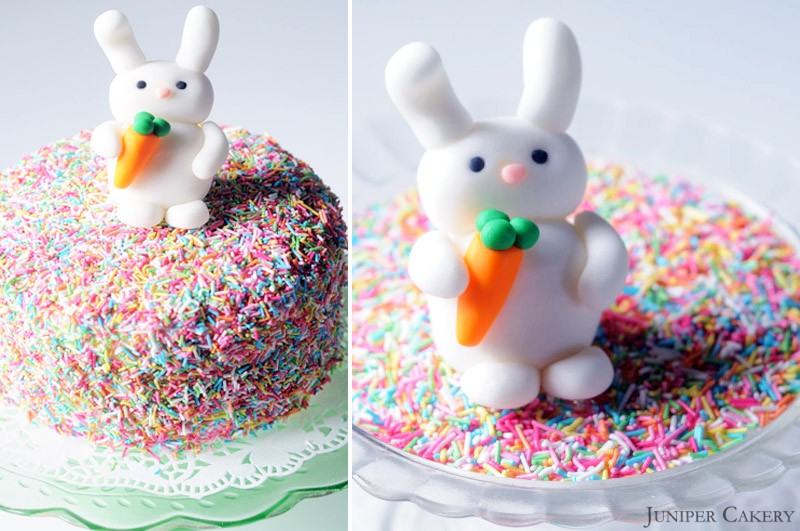
In today’s Easter tutorial we show you how to create your very own Easter bunny! By following this simple tutorial not only will you be able to create a cute bunny perfect for your springtime cakes and cupcakes; you will also be bale to customize your creation into a number of different animals. Why not experiment and once Easter is through use the basics learnt in this tutorial to create a panda bear, teddy bear, cat, dog or mouse! To begin this tutorial take a look at what you will need below.

Easter Tutorial Week: How to make a sugarpaste bunny!

Easter Tutorial Week: How to make a sugarpaste bunny!

What you will need:

White fondant
Green fondant (we used Wilton’s Leaf Green gel paste to colour white fondant)
Orange fondant (we used Wilton’s Orange gel paste to colour white fondant)
Pink fondant (we used Wilton’s Pink gel paste to colour white fondant)
Black fondant (we used Wilton’s Black gel paste to colour white fondant)
Edible glue
Paint brush
Blade tool
Kebab stick or cocktail stick

Easter Tutorial Week: How to make a sugarpaste bunny!

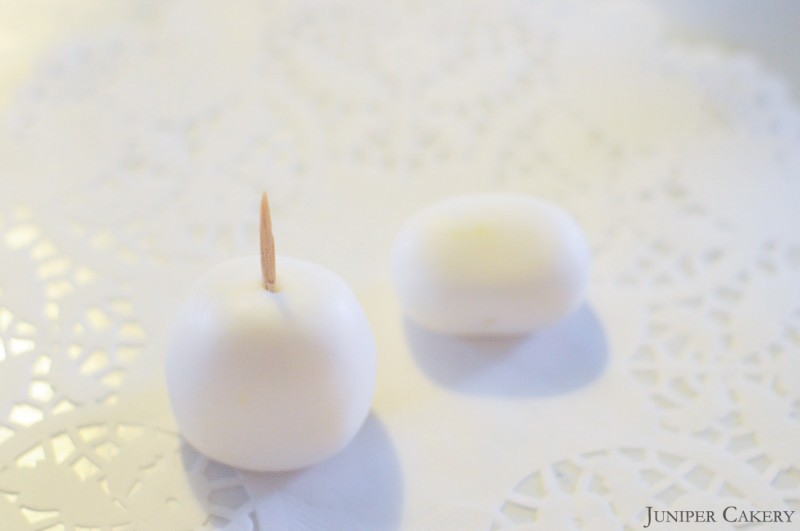
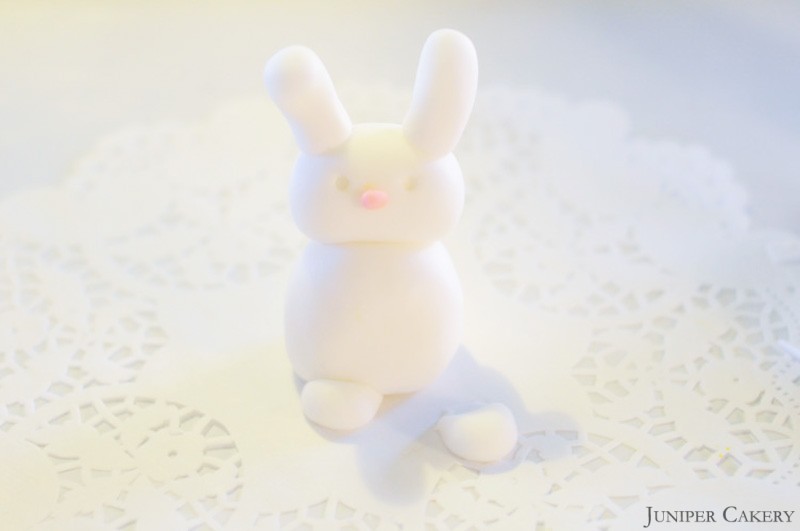
Step one: Take a piece of the white fondant and shape it in to a ‘rugby ball’ ensuring you don’t taper at either end, this will be your bunny’s head. Placing the head to one side take a generous piece of white fondant and create and, almost, ‘egg’ shaped oval. Now you have your bunny’s head and body.

Easter Tutorial Week: How to make a sugarpaste bunny!

Easter Tutorial Week: How to make a sugarpaste bunny!

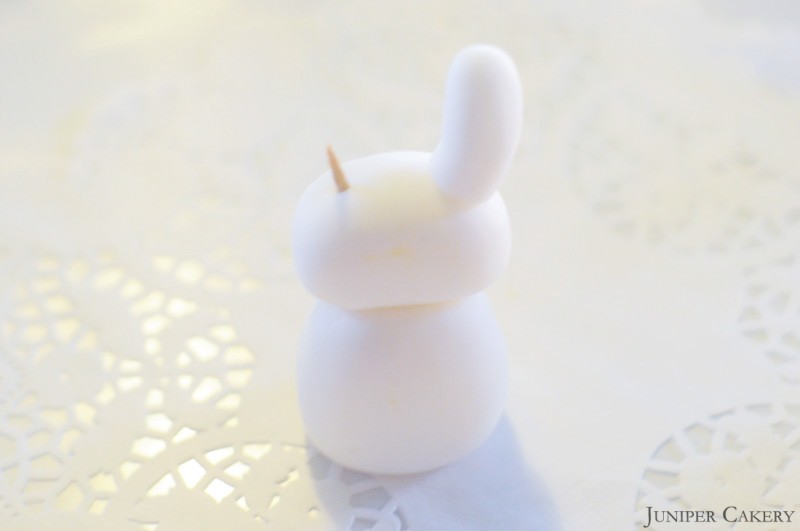
Step two: Take your bunny’s body and slide a piece of the kebab stick/cocktail stick down through the ‘neck’ with 1cm or so still showing. Paint a small amount of edible glue around the stick and slide your bunny’s head in place.

Easter Tutorial Week: How to make a sugarpaste bunny!

Step three: Using a small amount of the pink fondant shape and oval with your fingers and glue in the centre of your bunny’s face. Now your bunny has a nose!

Easter Tutorial Week: How to make a sugarpaste bunny!

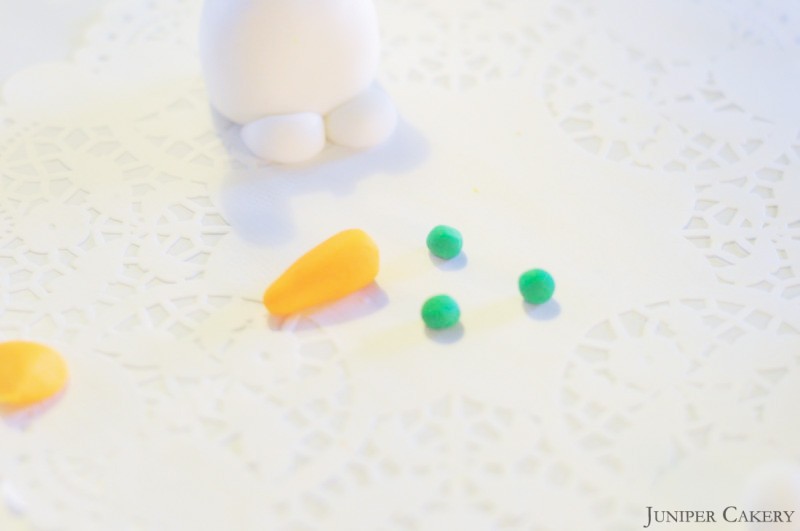
Step four: Put your bunny to one side at this point. Take a small amount of the orange fondant and begin to shape into a sausage tapering at one end to create a ‘carrot’ shape. With the green fondant roll out three small balls. Paint the non-tapered end of your bunny’s carrot and stick the balls in place.

Easter Tutorial Week: How to make a sugarpaste bunny!

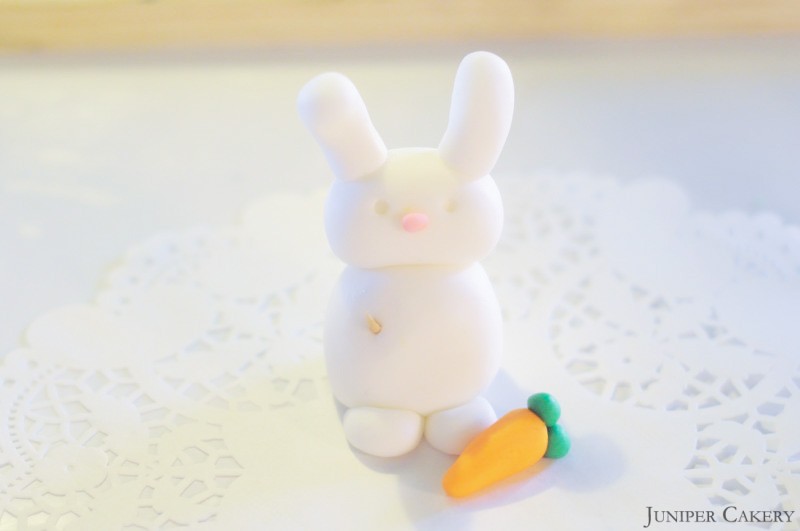
Step five: Paint the location you would like to place your bunny’s carrot and stick on ensuring you hold it in place for a few moments.

Easter Tutorial Week: How to make a sugarpaste bunny!

Step six: Now it is time to create your bunny’s feet! Using the left over white fondant create two balls flattening one end with your fingers until it is no more than about 1mm thick. Now sit your bunny onto those flat pieces after painting them with edible glue so they become secured.

Easter Tutorial Week: How to make a sugarpaste bunny!

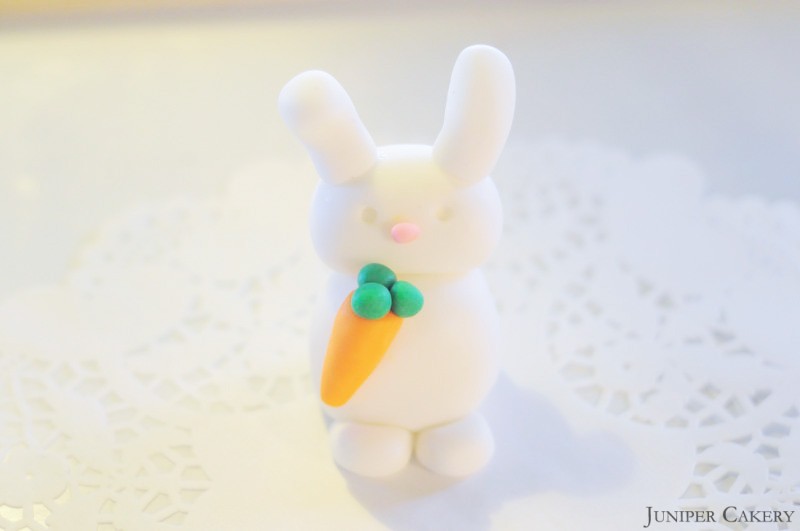
Step seven: Similarly to your bunny’s carrot roll two ‘sausage’ shapes out using a small amount of white fondant to form your bunny’s arms. Flatten them slightly and stick them in place using the edible glue. Place one over the carrot as though your bunny is holding it in place.

Step eight: Indent two dots where you would like your bunny’s eyes to be and roll two small balls out of the black fondant. Stick in place.

Easter Tutorial Week: How to make a sugarpaste bunny!

If you have followed this tutorial step-by-step now you will have your very own fondant Easter bunny! Why not experiment with colour and create a brown, black, grey or multi-coloured bunny!

Easter Tutorial Week: How to make a sugarpaste bunny!


‘Tutorial Tuesday': How to Colour Your Own Sprinkles!

Tutorial Tuesday: How to Custom Colour Your Own Sprinkles!

Tutorial Tuesday: How To Colour Your Own Sprinkles!

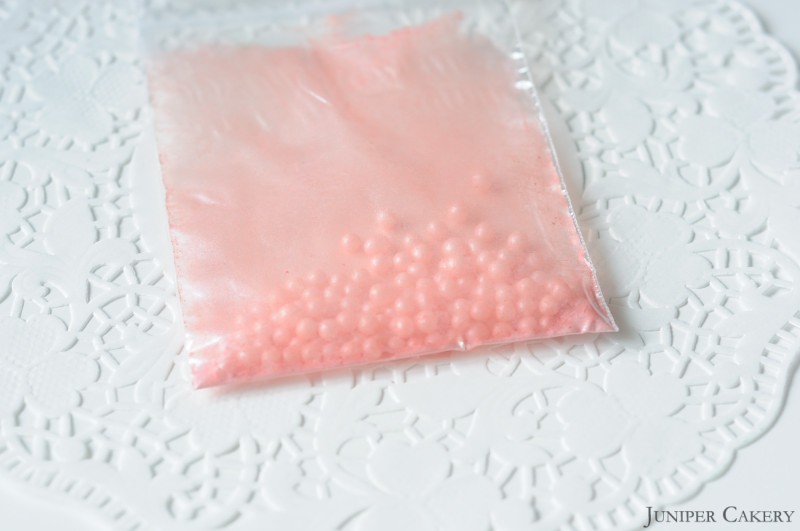
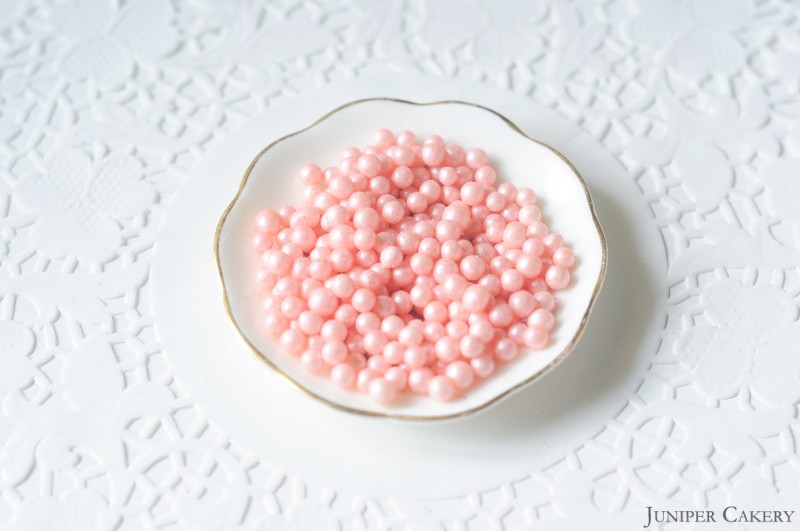
In this week’s cake and cupcake tutorial we show you a quick and simple way to custom colour your own sprinkles and pearls to match your cakes and cupcakes! By following these four easy steps you could begin the decoration early and have as many, or as little, custom sprinkles you need. Why not make the colours you require and store them for future use? Simply check the use by dates on the bottle of your lustre dust and sugar pearls/nonpareils and write which ever comes around first on the ziplock bag and store in a cool, dry place.

What you need:

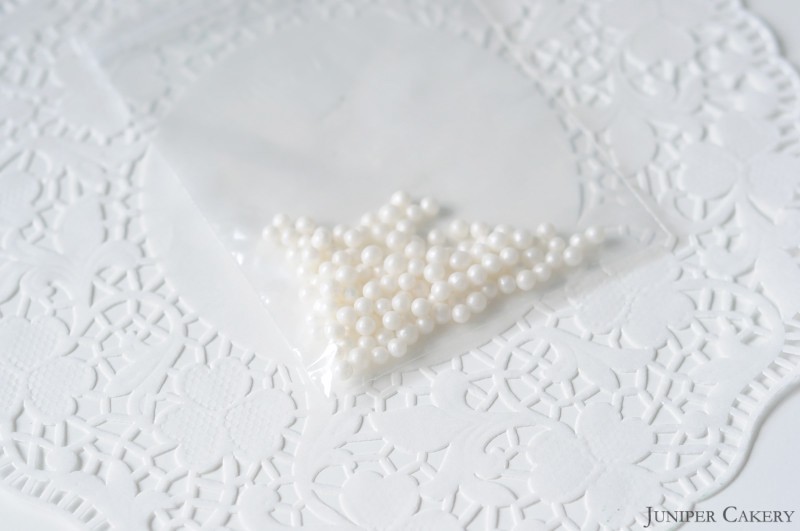
White sugar pearl beads or white nonpareils
Coloured lustre dust
Ziplock bag

Tutorial Tuesday: How to Custom Colour Your Own Sprinkles!

Step one: Place your white sugar pearls or nonpareils into the ziplock bag.

Tutorial Tuesday: How to Custom Colour Your Own Sprinkles!

Step two: Pour a small amount of your chosen lustre dust in and lock the zip securely. The amount of lustre dust you add is really up to you and can be adjusted for different tones.

Tutorial Tuesday: How to Custom Colour Your Own Sprinkles!

Step three: Shake the ziplock bag until you’re confident the lustre dust has covered all of the pearls/nonpareils. You can continue to shake again if required.

Tutorial Tuesday: How to Custom Colour Your Own Sprinkles!

Step four: Pour your pearls/nonpareils out into a dish or plate and put the ziplock bag to one side. If you have any excess lustre dust left in the bag be sure to pour it back into the container.

Tutorial Tuesday: How to Custom Colour Your Own Sprinkles!

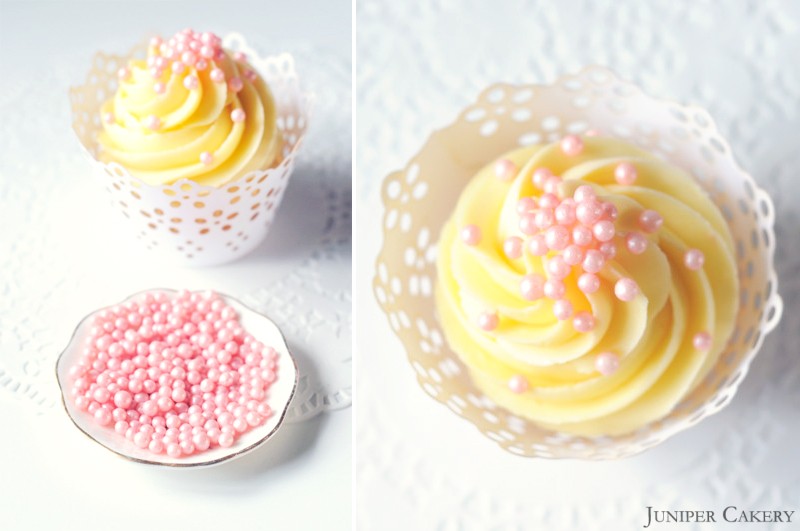
Below is an example of them on a cupcake but why not experiment. These would look fantastic on cookies, cakes and cakes pops also.

Tutorial Tuesday: How to Custom Colour Your Own Sprinkles!

If you have followed this tutorial you will have coloured your own sprinkles! Why not make them in lots of colours and mix them together for a rainbow themed cake.


‘Tutorial Tuesday': How to make an Easter chick cupcake!

Tutorial Tuesday: How to make an Easter chick cupcake

Tutorial Tuesday: How to make an Easter chick cupcake!

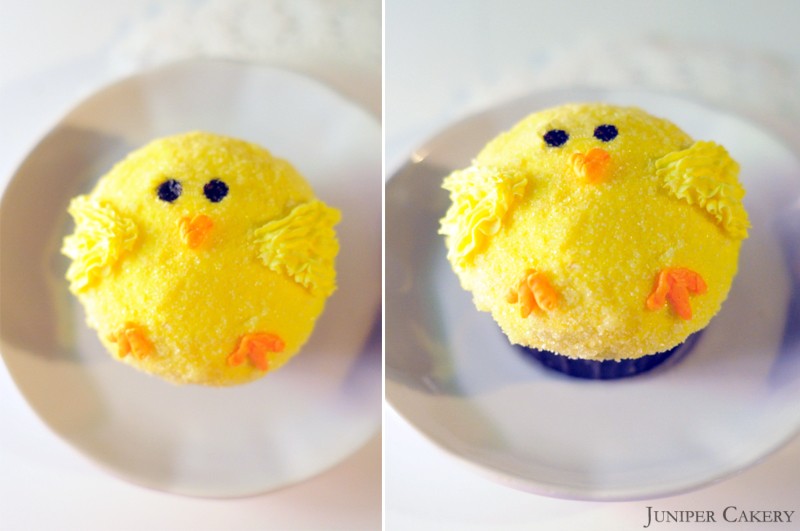
Easter is just around the corner so in this week’s tutorial we show you how to create a cute and simple Easter chick cupcake; fun for all ages to make! Why not play with colour combinations, flavours, sprinkles, piping tips etc to create fun characters or different types of birds for parties or new seasons.

Tutorial Tuesday: How to make an Easter chick cupcake

What you need…

A cupcake (or cupcakes depending on how many you would like to make. Don’t be afraid to experiment with flavour)
Yellow buttercream
Orange buttercream
Lemon crystals or yellow sugar sand crystals
Black gel colour by Wilton
2.5 round writer tip
510 closed star tip
Kebab stick
Spatula

Tutorial Tuesday: How to make an Easter chick cupcake

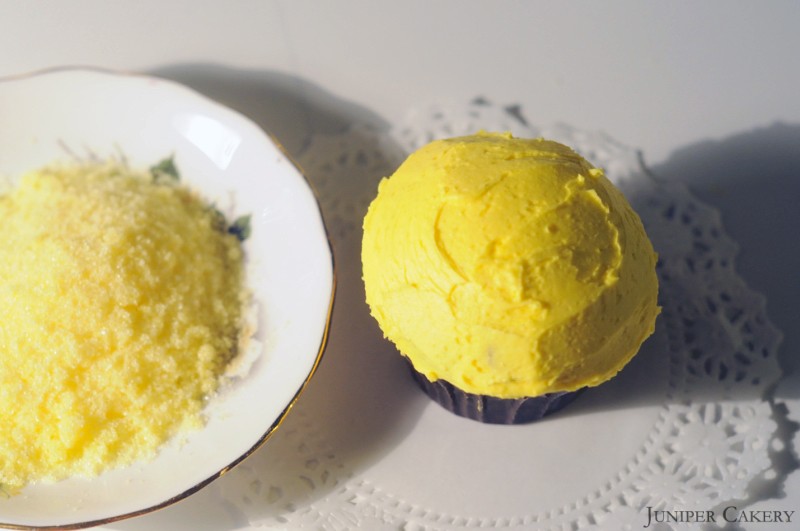
Step one: Using the spatula spread a generous amount of yellow buttercream onto your cupcake as evenly as possible. It doesn’t have to be perfect as it is only there to stick the lemon crystals on securely.

Tutorial Tuesday: How to make an Easter chick cupcake

Step two: Place the lemon crystals on a flat plate and dip and roll your cupcake around in the crystals until it is fully covered. Now your chick has a ‘fluffy’ look.

Tutorial Tuesday: How to make an Easter chick cupcake

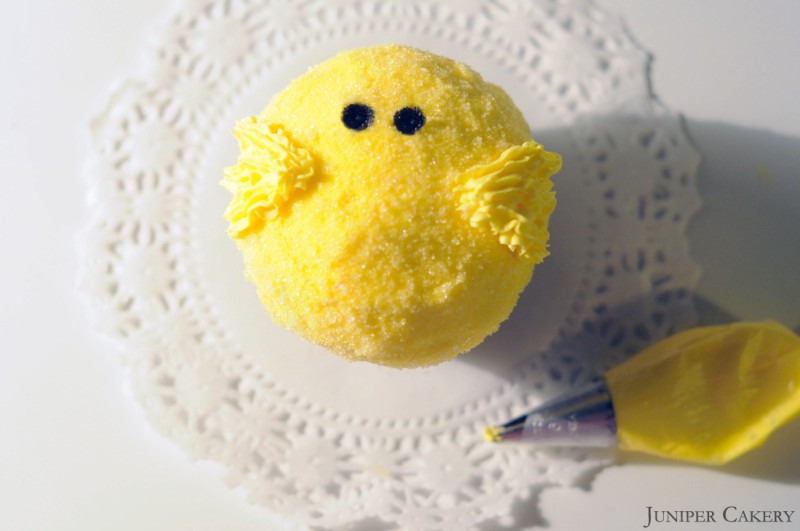
Step three: Dip the flat end of the kebab stick into the black food gel and place your eyes accordingly. This may take a few goes as the lemon crystals may stick to the gel.

Tutorial Tuesday: How to make an Easter chick cupcake

Step four: Using the 510 closed star tip pipe a ‘V’ shape on either side of your chick then pipe a line in the middle of each ‘V’ to create wings!

Tutorial Tuesday: How to make an Easter chick cupcake

Step five: With the 2.5 round writer tip create another ‘V’ between the two wings for a beak.

Tutorial Tuesday: How to make an Easter chick cupcake

Step six: Now it is time to give your chick some feet. Using the 2.5 round writer tip pipe three small lines pointing towards the base of the cupcake.

Tutorial Tuesday: How to make an Easter chick cupcake

If you’ve followed this step-by-step tutorial you will now have your very own Easter chick cupcake! Why not experiment with colour and create a collection.


‘Tutorial Tuesday': How to pipe a buttercream rose using a flower nail!

Tutorial Tuesday: How to pipe a buttercream rose using a flower nail

Tutorial Tuesday: How to pipe a buttercream rose using a flower nail!

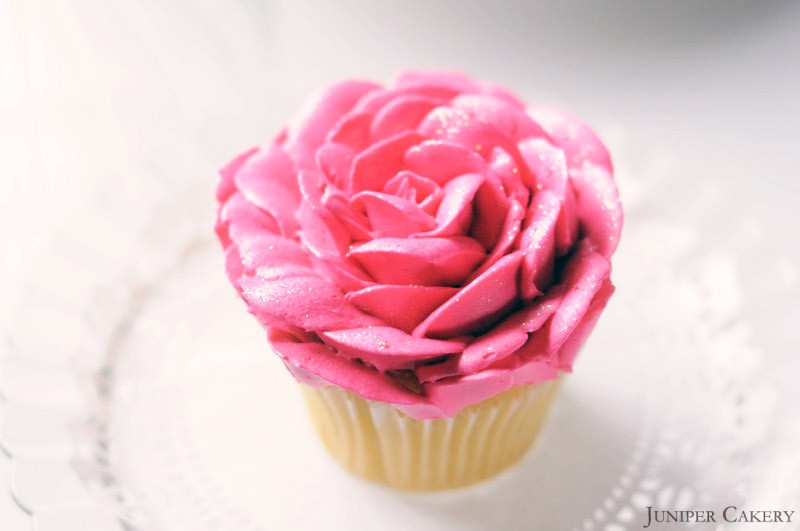
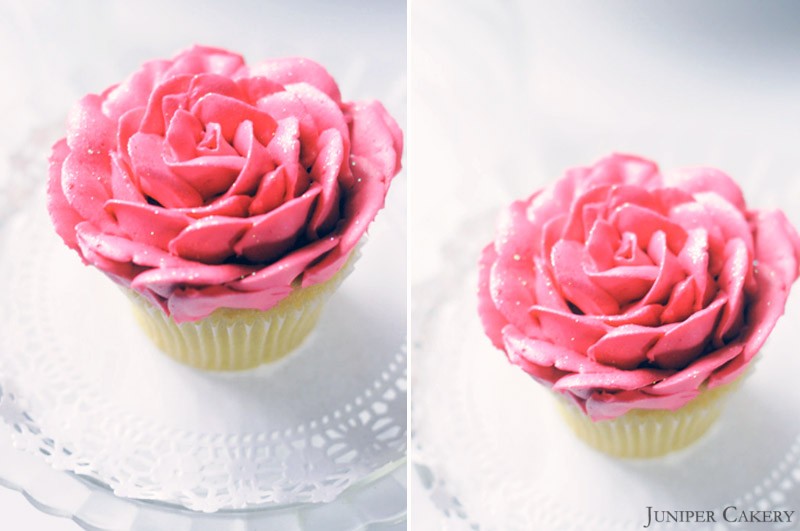
In this week’s tutorial we show you to pipe a buttercream rose using a flower nail! These buttercream roses are perfect on top of delicious cupcakes. They are also great decorations to place around the top of a home made cake.

Why not play with colour and add interesting looks to your roses. Fill your piping bag with two buttercream colours on each side for two tone roses. Paint a stripe of food colour along the inside of your bag in-line with the thin part of your petal tip to add colour to you flower’s edge. Use one piping bag per cupcake and layer tablespoons of different coloured buttercream inside the bag to make rainbow roses. Those are just a few ideas to add colour to your piped flowers.

This piping style can take a while to get right, but once you have the hang of this method it is really fun! We do, however, have a simpler buttercream rose tutorial for those who would like to create a quick, easy and lovely rose. Both types of piping will create eye catching roses that are perfect for both cupcakes and cakes!

Tutorial Tuesday: How to pipe a buttercream rose using a flower nail

What you need:

3 inch flower nail
Piping bag
Coloured buttercream
Petal tip no. 125 or 126
Small square of parchment paper

Tutorial Tuesday: How to pipe a buttercream rose using a flower nail

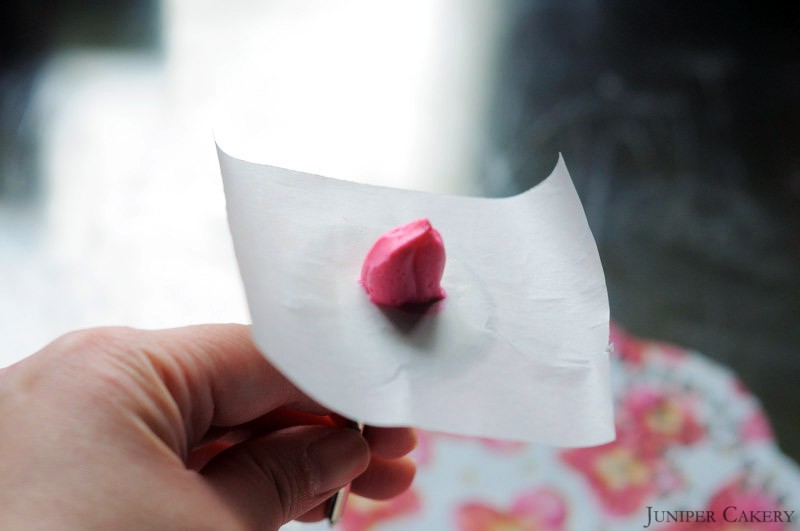
Step one: You need to stick the small square of parchment paper to your flower nail by piping a tiny bit of buttercream atop the nail and setting the paper on top. By adding the parchment paper to pipe your rose onto you are making transferring the rose to a flat surface to set easier.

Tutorial Tuesday: How to pipe a buttercream rose using a flower nail

Step two: Pipe a centre to your rose. This should be a small cone like shape of buttercream. With practice try to pipe your rose bud centre with a ‘fold’ shape to it. The ‘fold’ makes a more natural rose bud shape to the centre of your flower.

Tutorial Tuesday: How to pipe a buttercream rose using a flower nail

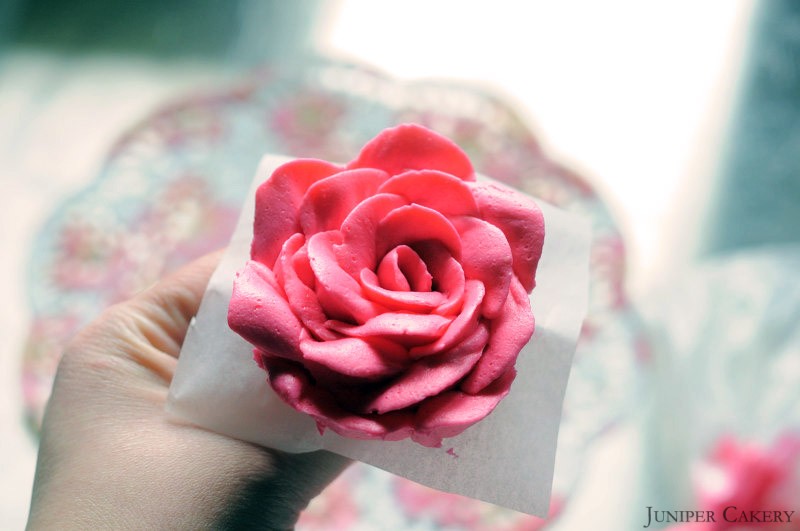
Step three: To pipe your rose petals angle your tip slightly towards you. Also, keep the thick end of the petal tip on the bottom so the thin part forms the top (visible edge) of your petals. Pipe your petals in scallops around the centre. With each new rose pipe your petal or scallop from the last petal’s centre.

Tutorial Tuesday: How to pipe a buttercream rose using a flower nail

Step four: Pipe your rose’s petals to your desired size. Piping this type of rose takes a fair bit of patience and practice so keep trying and don’t be disheartened!

Tutorial Tuesday: How to pipe a buttercream rose using a flower nail

Step five: When you reach the final layer of petals angle the top (thin end) of your petal piping tip a little more towards you so that your final petals curve outwards. This makes your rose finish much neater and with a more natural finish.

Tutorial Tuesday: How to pipe a buttercream rose using a flower nail

Once your rose has set you can carefully move it from the parchment paper onto a cupcake (pipe a small bit of buttercream on top of your cake for it to stick) using a pair of small scissors.

Also, you can pipe this type of buttercream flower straight onto the top of your cupcake. Be aware that this can be tricky. TIP: If you do want to pipe straight onto your cupcake try using a turntable to turn your cupcake and sit with your cupcake at eye level for more control.

If you have followed this tutorial you will be left with a beautiful buttercream rose! If you need to decorate a batch of cupcakes or a cake why not make your roses in advance, leave them to set (you can even keep them in the freezer then thaw them at room temperature), and they’re ready to decorate you baked treats with.

If you give this tutorial a try we’d love to see your finished cakes and cupcakes!


‘Tutorial Tuesday': How to create a sugarpaste lamb!

Tutorial Tuesday: How to create a sugarpaste lamb for St. David's Day!

Tutorial Tuesday: How to create a sugarpaste / fondant lamb!

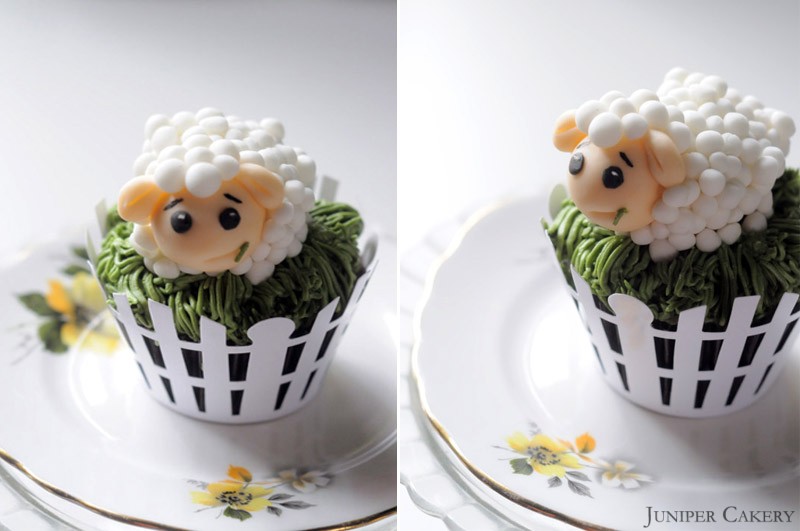
As the winter months transcend into spring why not follow this tutorial and create your very own sugarpaste lamb! With Easter and St. David’s Day just around the corner these little lamb cupcakes are perfect for your spring themed celebrations. As one half of Juniper Cakery is Welsh we’ll certainly be creating this lamb on the 1st of March!

Tutorial Tuesday: How to create a sugarpaste lamb for St. David's Day!

What you will need:

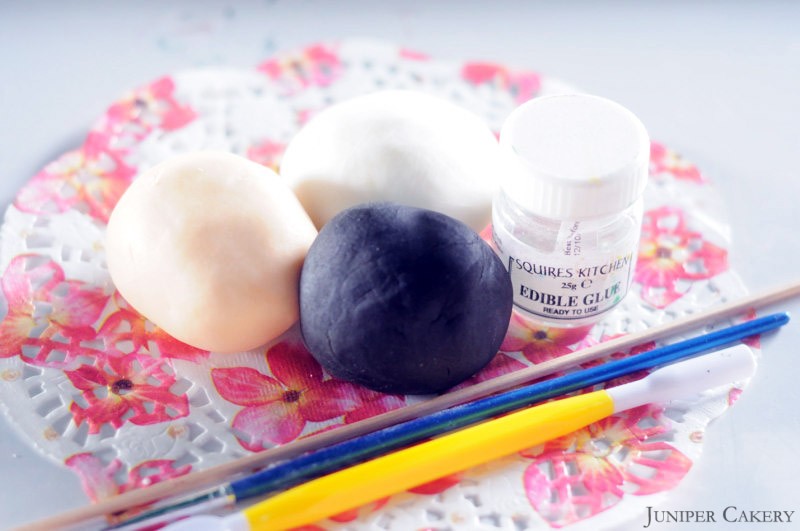
White sugarpaste or white flowerpaste for ‘wool’
Peach sugarpaste or flowerpaste for the sheep (We used white flowerpaste coloured with peach gel paste colour by Sugarflair)
Black sugarpaste for the eyes and eyebrows
Edible glue
Blade tool
Paint brush

Tutorial Tuesday: How to create a sugarpaste lamb for St. David's Day!

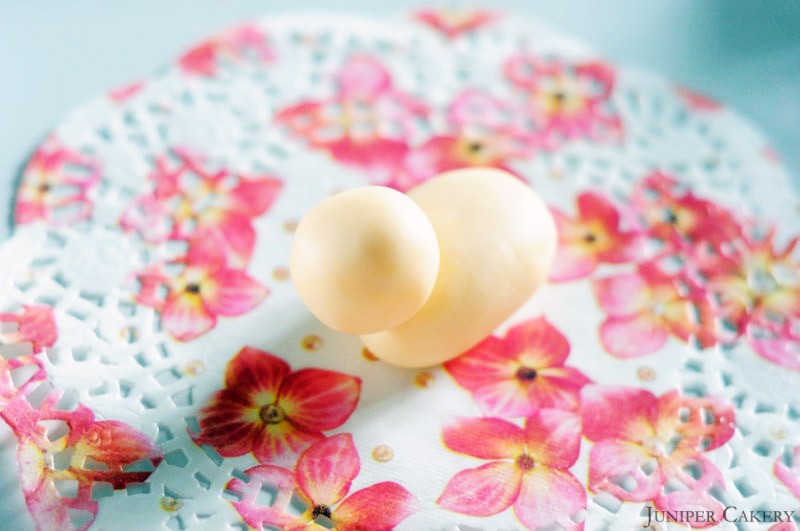
Step one: Split the peach sugarpaste in to three, sitting one piece aside for now, and roll out a ‘sausage’ and a ball with the other two pieces. Place the ball atop of one end of the ‘sausage’ using  edible glue to secure it in to place. If you feel extra support is needed place a cocktail stick between both pieces.

DSC_0019

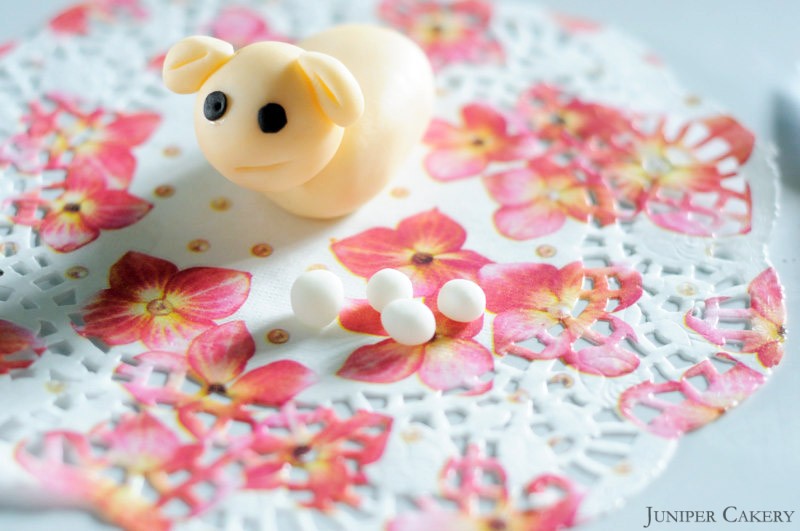
Step two: Now you have the body of your lamb it is time to add some facial features. As you can see below we’ve given ours has a sheep-ish look perfect for adding a blade of ‘grass’ at a later stage as though eating. You could play around at this stage but if you would like to create a similar characteristic for your lamb use the blade tool to make a small incision at either side of your lamb’s face to create the mouth. Using a small amount of the black sugarpaste create two circles and stick them into place using edible glue; now your lamb has eyes!

Step three: For the ears simply take the remainder of the peach sugarpaste, roll them into small ovals, ensuring they taper at one end, and slice down the middle using the blade tool until they resemble coffee beans. Glue them into place with edible glue and now your lamb has ears!

Tutorial Tuesday: How to create a sugarpaste lamb for St. David's Day!

Step four: As we have done above begin rolling balls of white sugarpaste in multiple sizes; their actual size depends on how big, or small, you’ve decided to make you lamb. Build up your lamb’s ‘wool’ with one or two lawyers to ensure that all of the body is covered as seen below.

Step five: If you would like to add a piece of ‘grass’ for your lamb to chew simply pipe your cupcake using a 133 grass tip. Using a cocktail or kebab stick select a blade and place it in the corner of your lamb’s mouth. Alternatively you could roll a thin piece of green sugarpaste out between your fingers and attach it in the same way.

Step six: To add eyebrows simply paint them on usuing a black gel paste.

Tutorial Tuesday: How to create a sugarpaste lamb for St. David's Day!

If you have followed this tutorial you will now have your very own little lamb! If you’re planning on celebrating spring, Easter or St David’s day this is a perfect way to do so. Why not change the white ‘wool’ to black ‘wool’ for variation or even place a flock of sheep atop a larger cake.


×