Valentine Tutorial: Pink Champagne Cupcakes!

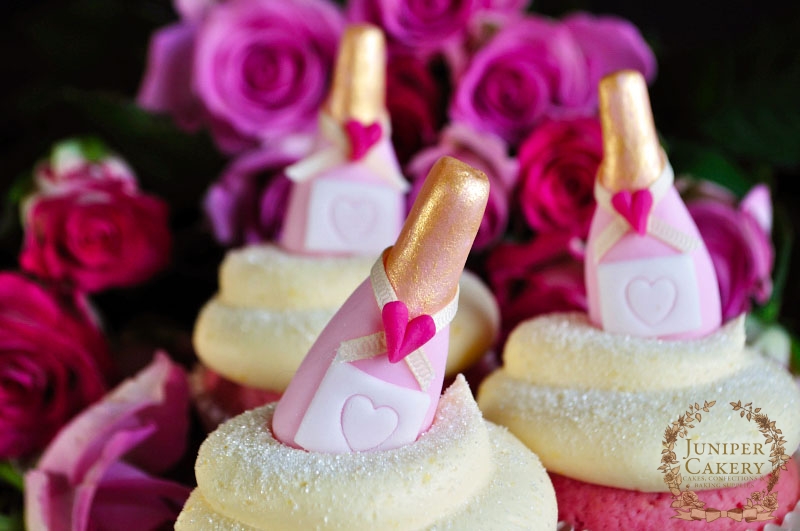
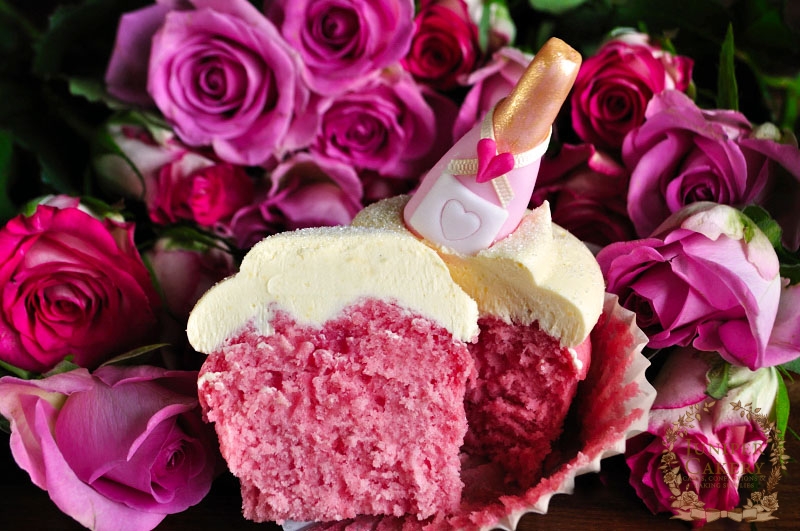
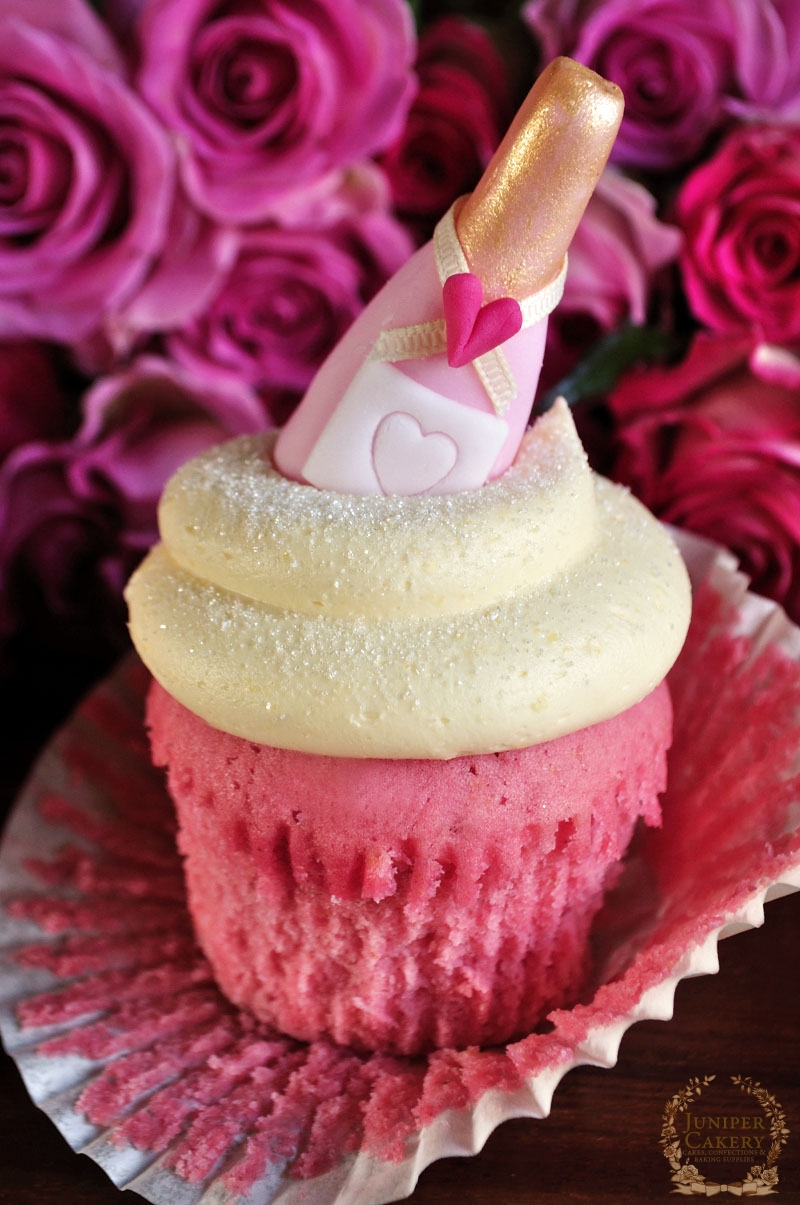
With Valentine’s Day literally just days away here’s a lovely cupcake recipe and tutorial for you to re-create at home for that special someone. We had such fun whipping these up in the Juniper Cakery kitchen and studio as you can imagine; cue lots of champagne, gold hand painting, miniature champagne bottles from fondant and decadent swirls of lovely vanilla buttercream! These adorable little pink champagne bottles nestled into silky vanilla buttercream atop soft rosy champagne infused cupcakes are bound to be a show-stopping hit with loved ones; they definitely were with ours! If you’re feeling extra adventurous why not paint, indent or pipe the recipient’s initials onto each bottle label for a sweet and impressive personal touch.

Pink Champagne Cupcakes by Juniper Cakery

Pink Champagne Cupcakes by Juniper Cakery

As an alternative to using real champagne, as this can get costly, in your cupcakes why not try utilising 6-12 drops of champagne essence.
Pink Champagne Cupcakes by Juniper Cakery

Pink Champagne Cupcakes by Juniper Cakery

 Pink Champagne Cupcakes by Juniper Cakery

Miniature Fondant Pink Champagne Bottles

You’ll need…

Pink or a dark green fondant / sugarpaste if creating normal champagne bottles
White or ivory fondant / sugarpaste
Raspberry pink fondant / sugarpaste
Edible glue
Paintbrush
Gold lustre dust or edible metallic paint
Vodka
Small plunger cutters (optional)
Blade tool
Candy melts
3mm thin ivory ribbon
Disposable piping bag
Fondant rolling pin
Icing / confectioner’s sugar
Pink Champagne Cupcakes by Juniper Cakery

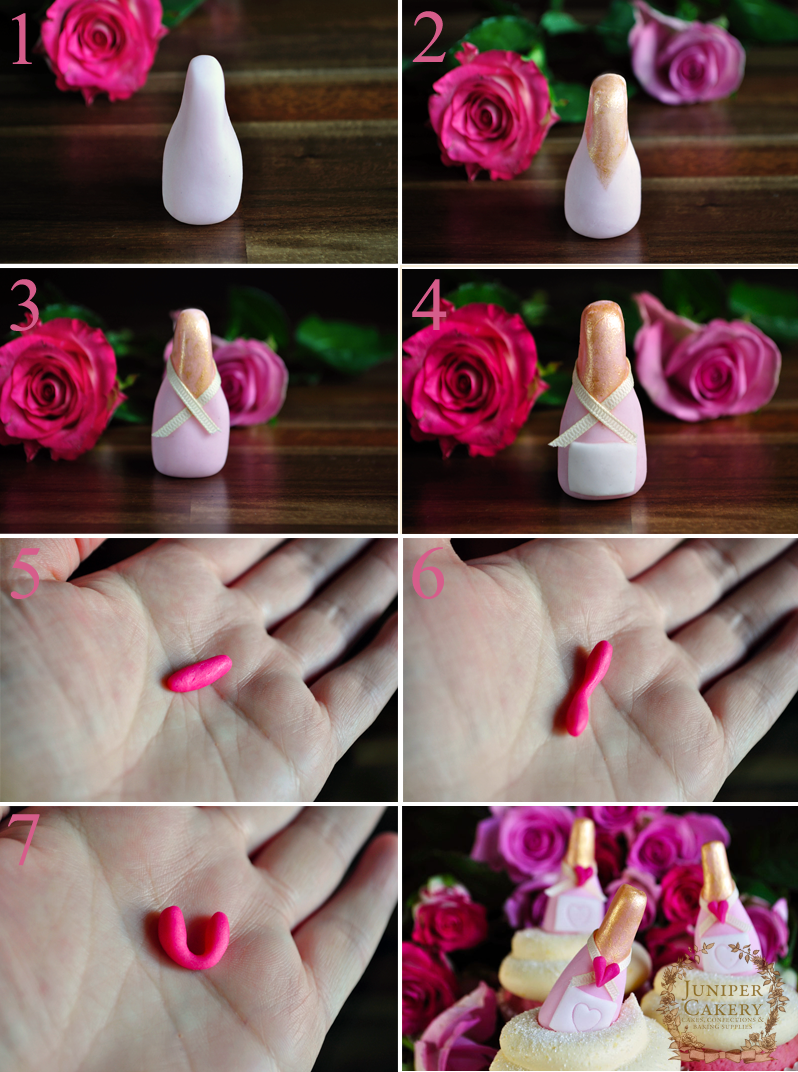
Step one: Take some fondant the colour you wish your bottle to be and roll into a ball then a tapered oblong and shape carefully into a bottle whilst it is stood up on a flat surface. 

Step two: With a approximately 2-3 drops of vodka added to some gold lustre dust  OR some gold metallic edible paint hand paint the neck of the bottle. This may need a few coats if your bottle if a dark coloured fondant.

Step three: Take some 3mm ivory ribbon and cut to a length that fits around the bottle’s neck and crosses at the front well. Attach with a few tiny dots of melted candy melt (melt these quickly by filling a disposable back with the melts and microwaving until ready before snipping off the end of the piping bag). Hold gently until set.Step four: Roll out some white or ivory fondant / sugarpaste to 2mm thick onto an icing sugar dusted surface

Step four: With the blade tool cut out a rectangular shape an appropriate size for the front of your champagne bottle. Attach using a little edible glue. Imprint or add any detail to the label now.

Step five: Take a small amount of red or pink fondant and roll into a ball then into an oblong shape.

Step six: Shape into a dumb bell or bone-like shape by rolling the middle of the red fondant oblong with a finger.

Step nine: Take the dumb bell / bone shaped red fondant and carefully pinch in half into a heart shape. Smooth the centre over a little.

Step seven: With a little melted candy melt attach the heart where the ribbon crosses and meets at the front of the champagne bottle.

Step eight: Repeat all above steps until you have the desired amount of champagne bottles.

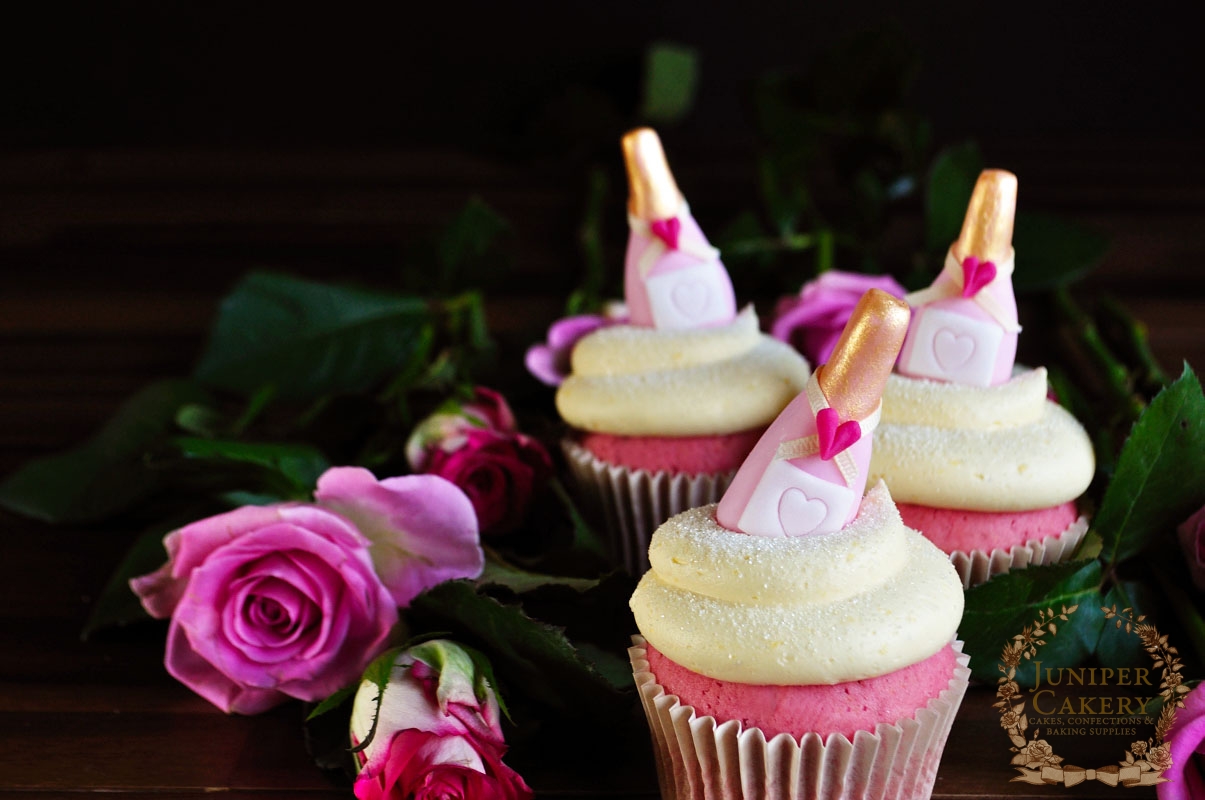
Now all that is left to do is to pipe your cupcakes generously with vanilla buttercream, add any decor you wish (edible glitter, sprinkles, sugar pearls etc) and nestle your tiny champagne bottles atop at a jaunty angle!
Pink Champagne Cupcakes by Juniper Cakery

After all your hard work you should now be left with an array of delicious and adorable cupcakes waiting to steal the heart of all who cast their eyes upon them. If you’re making these for yourself, however, we really wouldn’t blame you at all!


Ruffled Champagne Cake with The Happy Egg Co. Eggs!

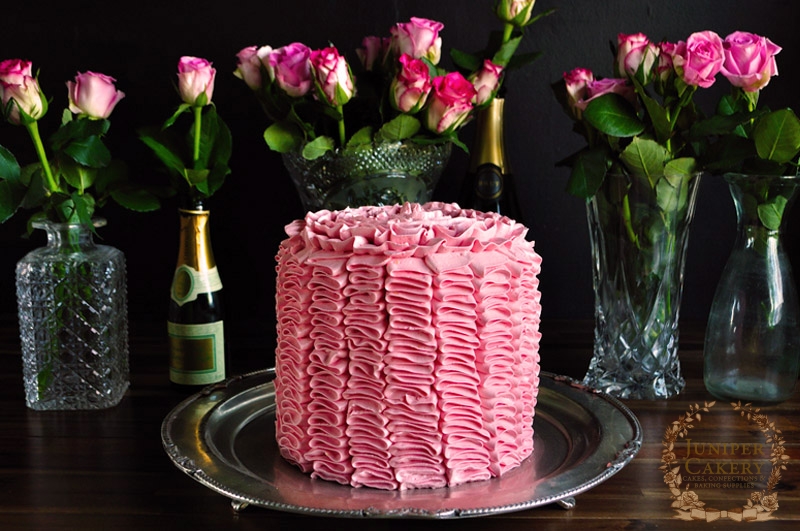
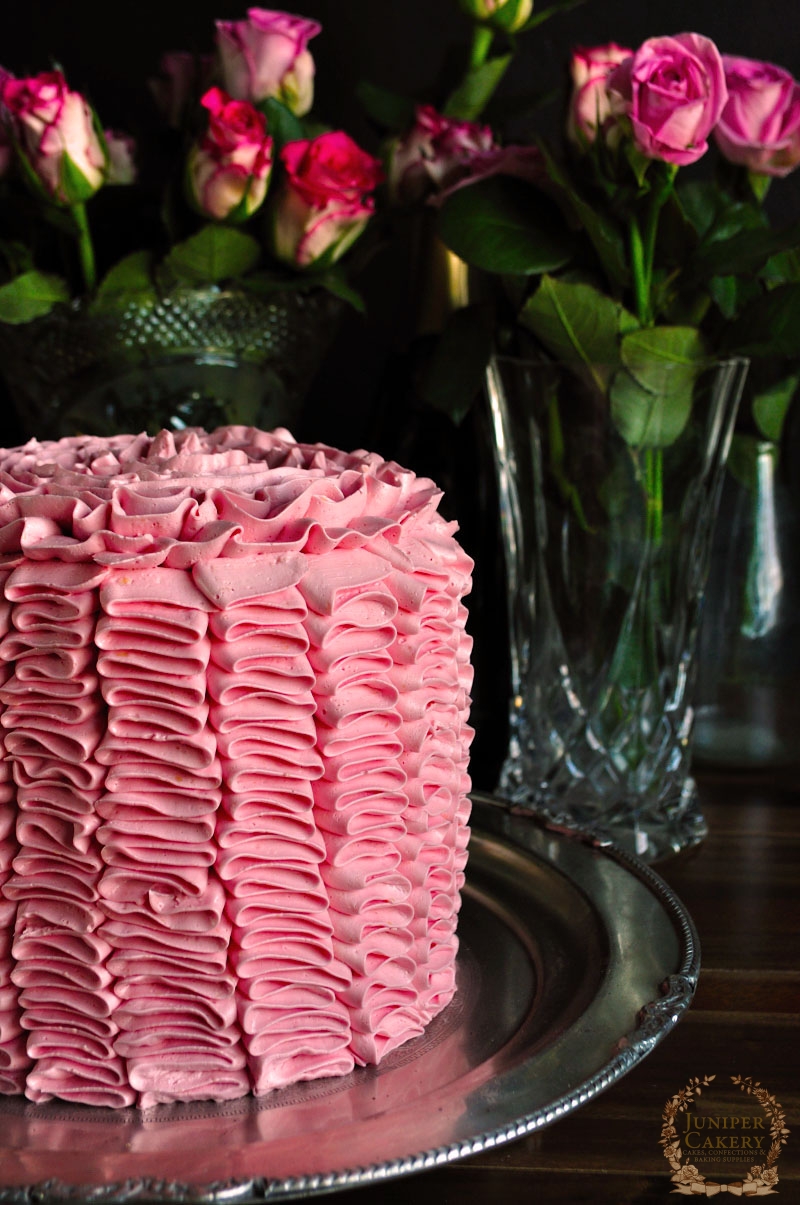
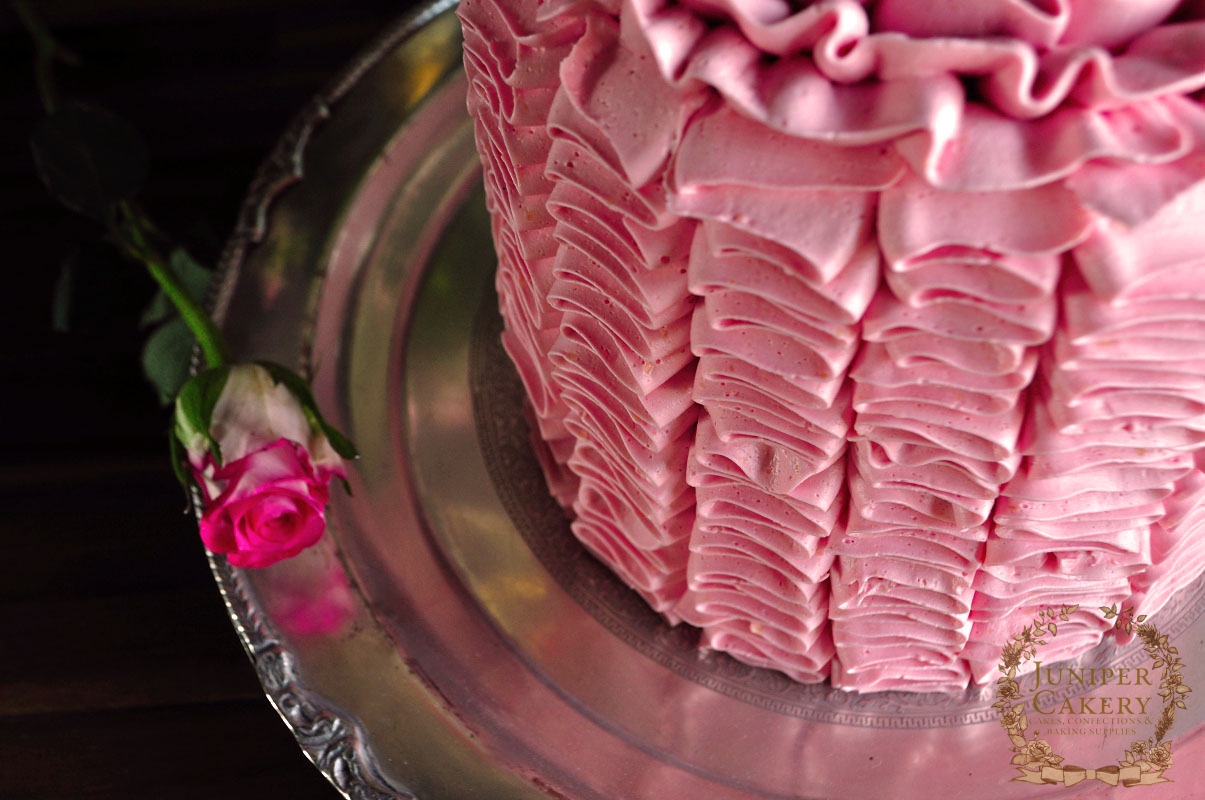
What better way to treat a loved one for Valentine’s Day than with a beautiful and indulgent home-made cake! Using three key Valentine ingredients, and some egg whites from The Happy Egg Co. eggs, we created this truly lovely and decadent cake. One of the best things about this recipe is that it incorporates some incredibly sumptuous flavours and ingredients without being too sweet or rich. Perhaps the only bad thing about this cake is that you’ll find you’ve eaten quite a few slices without realising! Imagine a gorgeously soft and fluffy champagne infused cake smothered with fruity yet creamy strawberry and white chocolate buttercream just waiting to be devoured… can’t wait to start baking? We thought so.

Ruffle Champagne Cake by Juniper Cakery

Ruffle Champagne Cake by Juniper Cakery

White Champagne Cake (makes three 9 inch diameter layers one inch deep)

453g Self-raising flour
453g Butter
453g Caster sugar
453g Egg whites from The Happy Egg Co. eggs
400ml Champagne or 12-18 drops of champagne essence

Pre-heat an oven to Gas Mark 3/325F/170C.

In a saucepan add the 400ml of champagne, set to boil then simmer until reduced to half the amount. Set aside to cool.

Cream your butter in a mixer then add the sugar. Add in the flour along with half of the happy eggs for around one minute. Once half of the happy eggs are combined add the remaining eggs along with the champagne or champagne essence. Mix for about 5 minutes.

Pour batter in the pan around 2cm in height and place on the top shelf. Bake for around 40-50 minutes. Repeat this step to create your second and third layer. When all layers are baked leave them to cool fully as you prepare your buttercream!

Ruffle Champagne Cake by Juniper Cakery

Ruffle Champagne Cake by Juniper Cakery

Strawberry and White Chocolate Buttercream

500g Diced/chopped butter at room temperature
300-400g Icing sugar (keep testing when adding to make sure it is the consistency and sweetness you like)
6-12 Drops of strawberry extract
150g Melted white chocolate
Pink gel paste food colour

Add half of the of butter into your mixer and cream. Then gradually add icing sugar and the remaining butter (cut into cubes) until you get a smooth, creamy texture. Add in the melted chocolate and then add the strawberry essence to taste with some pink gel paste food colour.

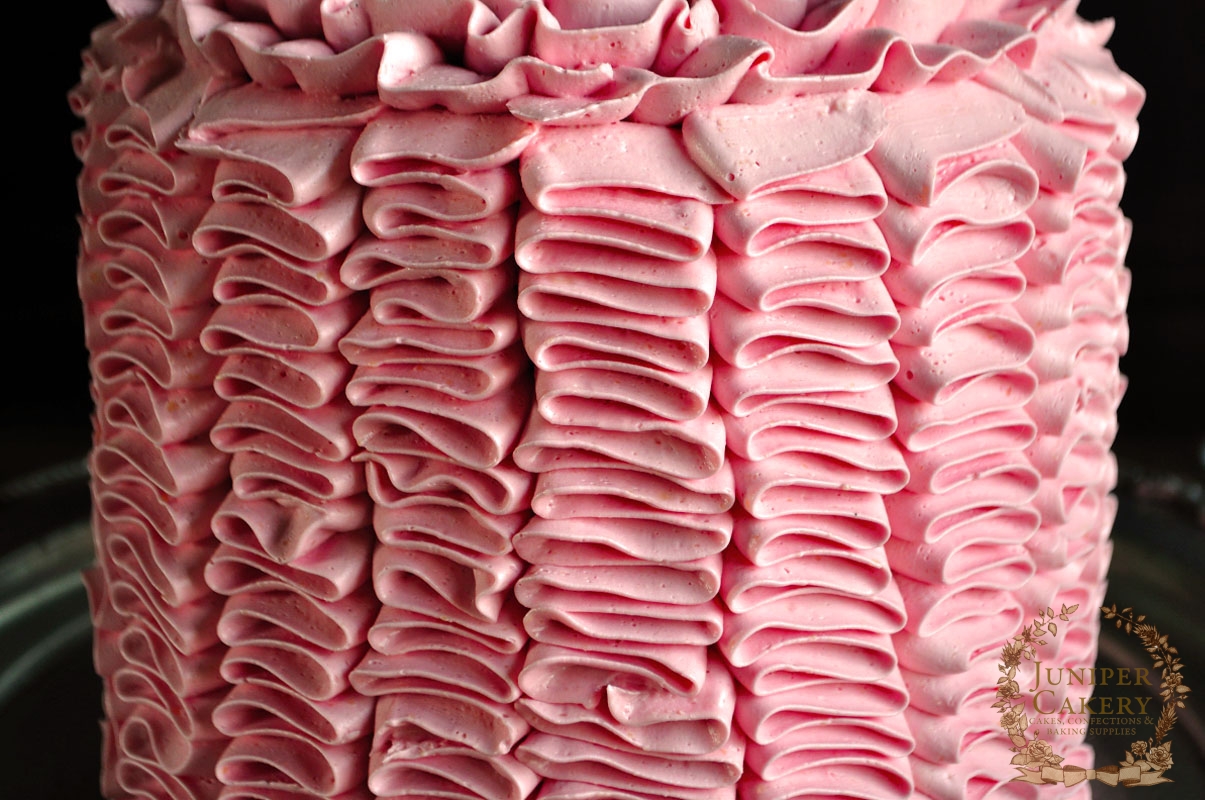
To assemble you need to stack your layers with your buttercream sandwiching them together; now you need to crumb coat your cake. A crumbcoat is a thin layer of buttercream or ganache that seals in the crumbs before being fully iced or covered. With a good angled spatula smoother some of the buttercream atop and around the sides of the stacked cake until covered. Chill in a refrigerator for 20-40 minutes. Once chilled remove and cover with the rest of your strawberries and white chocolate buttercream using a spatula. We covered ours with soft buttercream ruffles for a romantic look.

Ruffle Champagne Cake by Juniper Cakery

We hope you’ve enjoyed our year of various cake recipes utilising eggs from The Happy Egg Co. as we have and that we’ve inspired more people to try their hand a new skill… or several.


Valentine Tutorial: Love Letter Cupcakes!

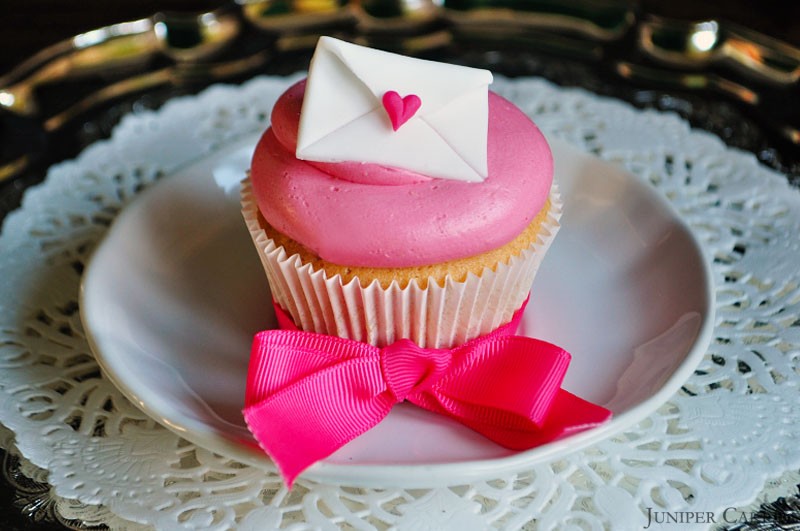
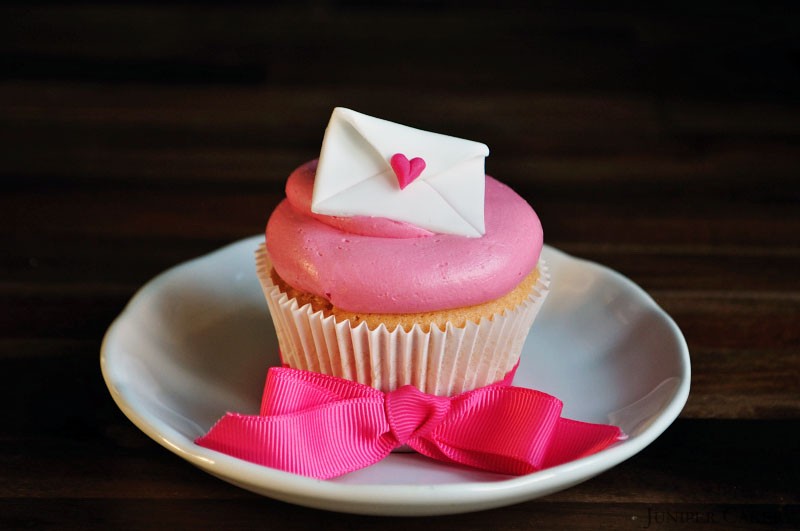
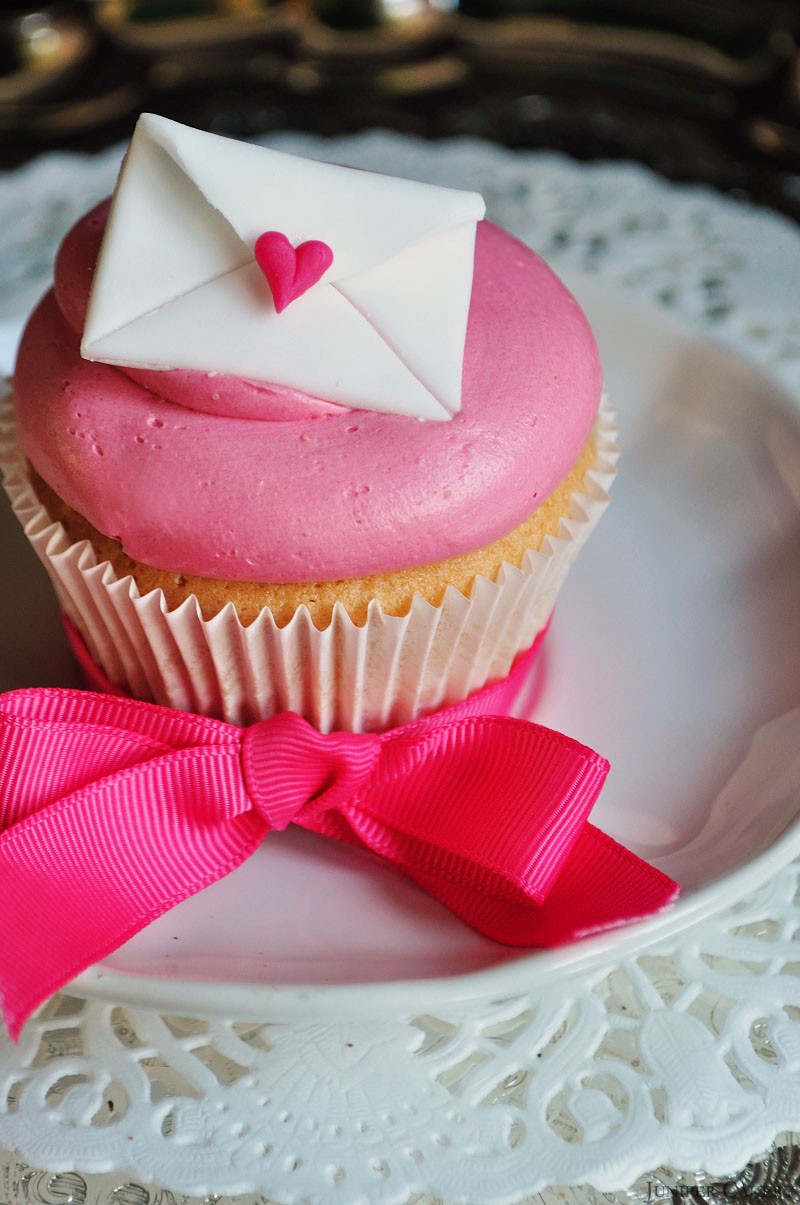
With February 14th right around the corner we’re sure you probably have lots of romantic projects in progress, however, there’s always some time to fit in another sweet treat. Why not whip up a batch of cupcakes to decorate with adorable love letter toppers for your loved ones.  Here’s a lovely and quick tutorial to help you make little fondant love letters for your sweetheart! One of the best things about this cupcake decorating tutorial is that you only need a few tools and materials and a few spare minutes!

Love Letter Cupcake by Juniper Cakery

Love Letter Cupcake by Juniper Cakery

Also, because we’re so generous we’ve included a lovely recipe for Strawberries & Cream cupcakes for you to whip up and nestle your love letters atop of!

For the Strawberries and Cream buttercream you’ll need a bottle of fruity natural strawberry essence which we stock via our e-store and some lovely pink gel paste food colour

Fondant Love Letter Cupcake Decor

You will need…

White fondant / sugarpaste
Red or pink fondant / sugarpaste
Blade tool
Edible glue
6 inch fondant rolling pin
Icing sugar to dust surface

steps

Step one: Dust your work surface with icing sugar and roll out some white fondant to a thickness of 2mm.

Step two: With the blade tool cut out a house shape approximately 3cm by 4cm out of the white fondant. This will be the envelope.

Step three: Indent a ‘V’ shape from the bottom of the white envelope that reaches about 2cm into the centre.

Step four: Take the top (shaped like a house’s rooftop) of the envelope and carefully fold over to match the indented ‘V’ shape. Affix with a dab of edible glue. 

Step five: Take a small amount of red or pink fondant and roll into a ball then into an oblong shape.

Step six: Shape into a dumb bell or bone-like shape by rolling the middle of the red fondant oblong with a finger.

Step seven: Take the dumb bell / bone shaped red fondant and carefully pinch in half into a heart shape. Smooth the centre over a little. This is the heart that sits at the seal of the envelope!

Step eight: With some edible glue attach the heart where the envelope flap and indented ‘V’ on the envelope bottom meet.

Step nine: Repeat all above steps until you have the desire amount of love letters.

Love Letter Cupcake by Juniper Cakery

You should now be left with a wonderful flurry of eye-catching yet simple love letters! If you’re feeling brave and adventurous and handing out cupcake adorned with these to family why not try hand painted their names onto each envelope! All you need is a fine paintbrush, some black gel paste food colour mixed with a tiny amount of vodka (the alcohol will evaporate before consumption so it will be safe for kids) and a steady hand. Also, to add a little sparkle why not dust edible glitter or lustre onto your little hearts.

 Love Letter Cupcake by Juniper Cakery


Tuesday Tutorial and Recipe: Shot Through The Heart Brownie Cupcakes!

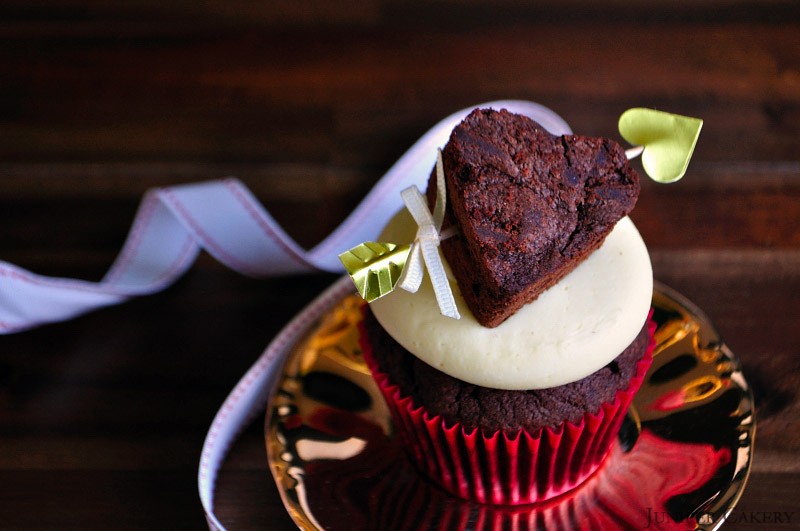
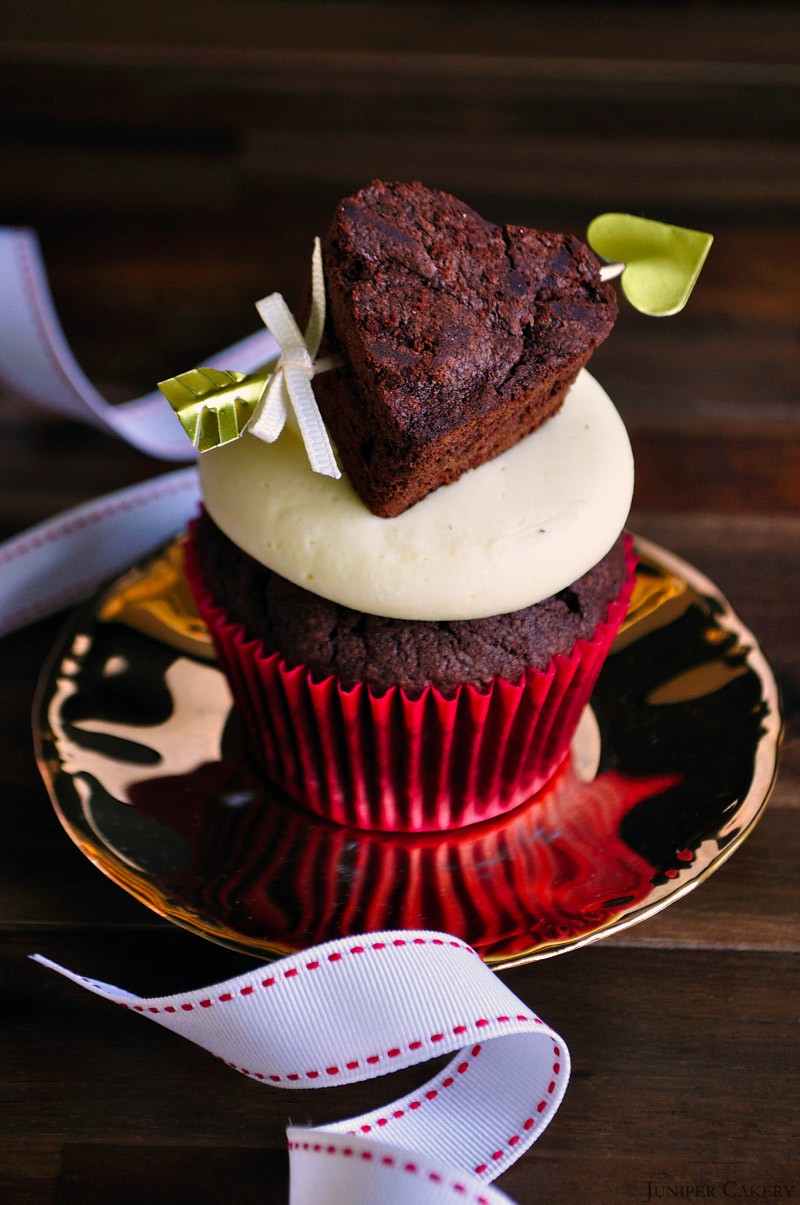
Valentine’s Day is right around the corner so what better way to treat your sweetheart than to some lovingly home made sweets! We’ll be offering up some recipes and tutorials that show you how you can create some delicious treats to impress your Valentine with. This week’s Shot Through The Heart Brownie Cupcakes are the perfect treats to present to your loved one. They are chocolate crammed brownie cupcakes swirled with silky smooth chocolate buttercream and finished with adorable and fun brownie hearts shot with mini arrows! Nestle these into a cupcake gift box with a little message and you will definitely sweeten someone’s day!

browniefull1

Brownie Cupcakes (Makes approx. 12 cupcakes)

226g self raising flour
226g caster sugar
226g butter
4 medium eggs
2/3 tablespoons cocoa powder
100g melted dark chocolate callets, baking chips
12 baking cases
1 cupcake or muffin pan
2 tablespoons hot water
1 teaspoon baking powder

Pre-heat your oven to Gas Mark 3 / 160C / 325F and line a cupcake pan with cupcake cases.

Cream your butter and sugar first. When creamy add your eggs and combine together with the flour and baking powder. Mix well until silky and pour in the melted chocolate and make a paste with the cocoa powder and water then add, mix again and fill your cases with the batter.

Bake for around 20 minutes to 30 minutes or until a cake tester comes out clean when tested.

Chocolate Buttercream

250g butter
250-300g icing sugar (keep testing when adding to make sure it is the consistency and sweetness you are comfortable with)
100g melted dark chocolate callets, buttons or chips
1-2 tablespoons of cocoa powder
808 or 809 plain round piping tip
Disposable piping bag

Dice the butter and add to your mixer to cream. Then gradually add icing sugar and the remaining butter (cut into cubes) until you get a smooth, creamy texture. Add the cocoa powder and melted chocolate.

For more hints and tips see our tutorial on how to make buttercream here.

Mini Chocolate Brownie Hearts

200g chopped milk chocolate
175g self raising flour
100g butter
100g caster sugar
3 eggs

Melt the chocolate and butter together by setting a bowl in a saucepan of hot water. Keep stirring until both the butter and the chocolate are mixed and then remove the pan from the heat.

In a separate bowl mix the eggs and the sugar together until they form a creamy yellow colour.

Combine the chocolate and butter mix with the eggs and sugar and stir until fully mix.

Add the flour to the mix and stir. Mix until smooth until you get a thick and sticky texture (if you would like any chocolate chips or chunks in your brownies now is the perfect time to add them)

Pour the batter into a greased pan and bake for around 30 minutes (depending on oven) on gas mark 4 (conversions are available on Google) Leave to cool.

Once cooled cut out some hearts using a good heart shaped cutter. Remember to use a small cutter if using these to top your cupcakes with!

Cupid’s Arrows

12 toothpicks
Thick paper or card (this can be coloured or plain) or heart stickers
Scissors
Double sided tape (omit this if you are using stickers)

Cut matching triangles from some paper (around 24 for the backs and fronts). Stick small patches of double sided tape to the backs of them. To attach peel the tape backing off and press onto one end of a toothpick. Repeat this process until done.

Shot Through The Heart Brownie Cupcake

Once the arrowheads have been created and fixed on push the toothpick carefully through your mini brownie hearts at an angle. Then you can finished them!

Shot Through The Heart Brownie Cupcake

For the ‘feather’ ends of the arrows cut 24 rectangles out of paper or card. Snip the sides of them so that they are angled. Attached them to the toothpicks with double sided tape. Finally, carefully snip the sides to create ‘feather-like’ edging! We also added a little ribbon bow to our arrow.

Now to assemble your cupcakes generously pipe them with buttercream and adorn the tops with your brownie hearts and cupid’s arrows! You should finally be left with a batch of delicious and heart warming cupcakes ready to be admired for Valentine’s Day!

Shot Through The Heart Brownie Cupcake


×