Browsing Tag

white chocolate

21st September 2017 // 0 Comments

Royal Albert x Juniper Cakery: Cherry & White Chocolate Cake!

Cherry and white chocolate cake recipe by Juniper Cakery for Royal Albert

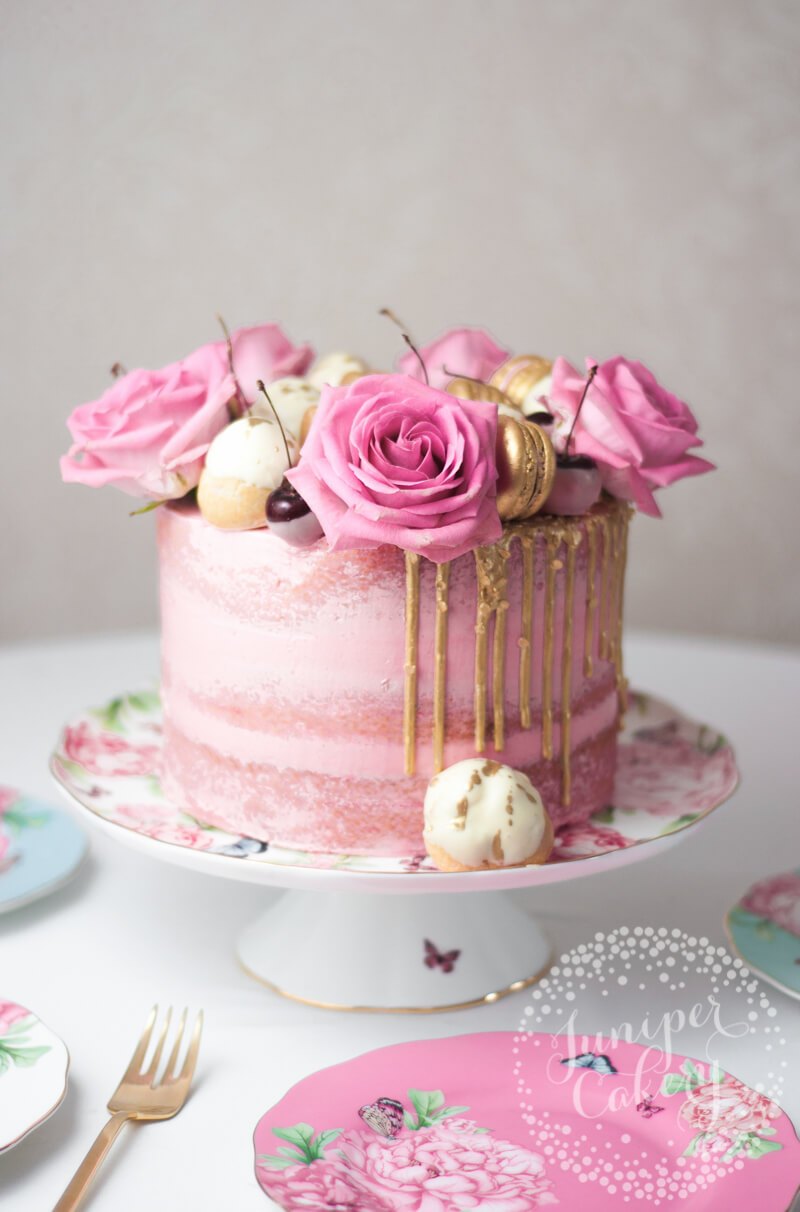
When Royal Albert contacted us to say our cakes and treats were a perfect fit for their gorgeous range of tableware designed by Miranda Kerr obviously we were beyond flattered! The range manages to be luxurious yet fun and definitely on-trend (those pink peonies are a fashion favourite). Definitely something we aim to be with every sweet we create! With this in mind and to really make the most of those last few days of summer we’ve put together one super pretty cake you can re-create too! Cherries are available in late summer, but they always remind us both of Autumn too (hello fruity cherry conserves and cinnamon cherry strudels!). Adding in a good Madagascan vanilla along with a creamy white Belgian chocolate helps give this cake a wonderfully comforting feeling! To whip up this cake at home keep reading!

Cherry and white chocolate cake recipe by Juniper Cakery for Royal Albert and Miranda Kerr

Cherry, vanilla and white chocolate cake recipe by Juniper Cakery for Royal Albert and Miranda Kerr

Love the stylish Royal Albert and Miranda Kerr ‘Gratitude’ cake stand and ‘Friendship’ tea plates we used to help show off our Royal Albert inspired cake? Follow the links to shop them! They’re so vibrant and beautiful. We’re huge fans of the large peonies, gold accents and pretty colour palette.
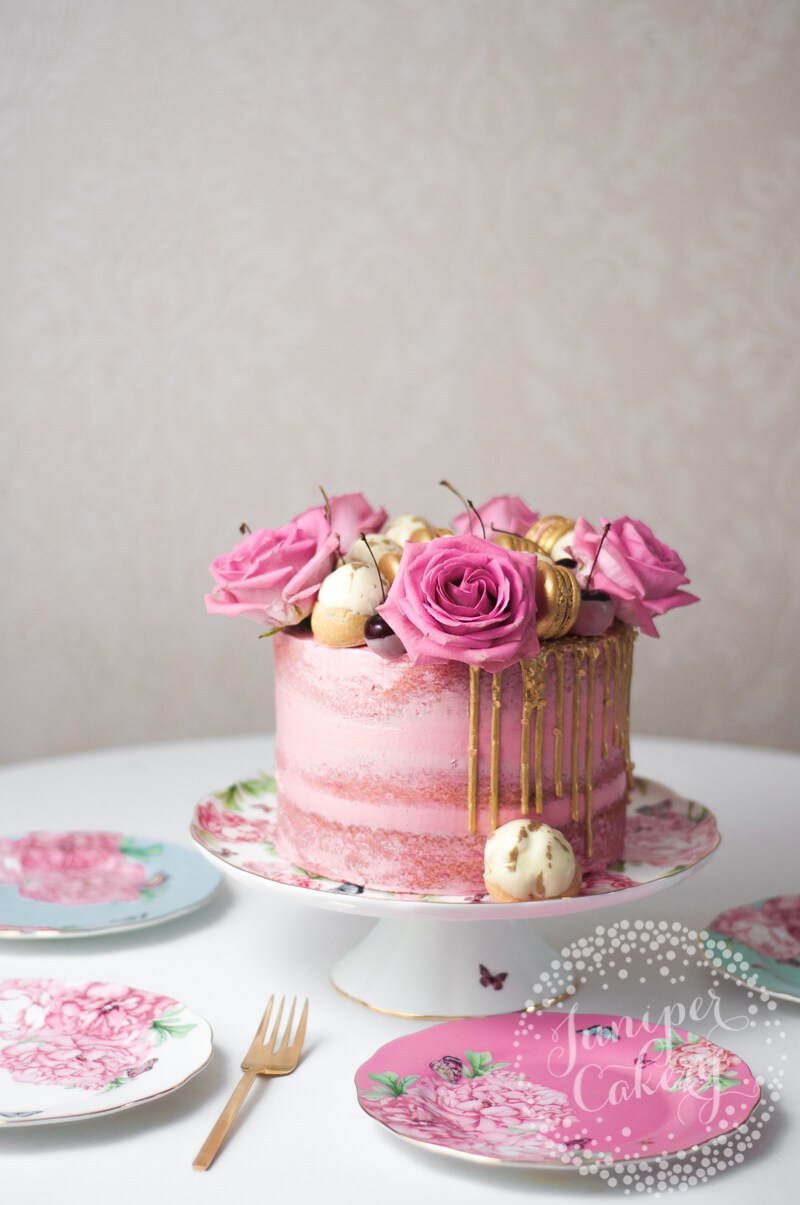
Cherry cake recipe by Juniper Cakery

Cherry and white chocolate cake recipe!

Ingredients needed for the cake:
(this recipe makes approx. 3 x 8″ circle cakes)

Step 01:

Pre-heat your oven to gas mark 3 / 140C (fan) / 160C (non-fan) / 325F. Butter and line your cake pans.

Step 02:

Cream together the butter and sugar in a good stand-up mixer. Don’t over mix as this adds air into your batter which can lead to a sunken mess.

Step 03:

Add in your flour and roughly mix this into the creamed butter and sugar. Again don’t over mix! Mixing too much once your flour has been added overstimulates the gluten which can make a rather dense and chewy textured cake. Not nice.

Step 04:

Now add in your eggs and Madagascan vanilla. Mix until incorporated. Then pour evenly between three 8″ cake pans! Bake each layer/pan for approximately 30 mins. Test your cake with a clean knife or cake tester. If it comes out clean your cake is ready! If not and batter sticks to the blade or tester bake for another 15 minutes checking again at the halfway mark!

If you want to bake all three layers at once place in your oven and bake for approximately 40-50 minutes. Remember to test your cakes. If they’re not ready bake for another 10-15 minutes and test each 5-7 minutes into your extra baking time!

Step 05:

When ready remove from the oven. Quickly and carefully turn out onto a clean surface to cool. We use chocolatier marble slabs to help our cakes cool down a little quicker.


Ingredients needed for the vanilla and white chocolate buttercream:

Step 01:

Cream the butter in a stand mixer. Scrape the butter back down to the bottom of the bowl using your spatula. Try not to mix the butter too much or this can lead to pesky air bubbles and an odd textured buttercream! It’s so tempting to just leave the mixer going while you prep other things, but don’t!

Step 02:

Add in your sifted icing sugar (also known as powdered sugar or confectioner’s sugar in the US) and mix until incorporated. Remember not to over mix though!

Step 03:

Now add in your Madagascan vanilla bean paste along with your 100g of melted white chocolate and a little pink food colour. Mix together.

Pink vanilla and white chocolate buttercream by Juniper Cakery

Tip! When it comes to adding in colour do this a little at a time. It’s so much easier to add more colour if needed then remove any once mixed in!

How to make a cherry, vanilla and white chocolate cake

Ingredients and materials needed to fill and decorate your cherry and white chocolate cake:

  • Cherry conserve
  • Fresh cherries
  • Pink candy melts by Wilton
  • Fresh and washed pink roses in posy picks
  • Trex or Crisco vegetable shortening
  • Macarons, candy, homemade marshmallows or meringue kisses to decorate
  • Cream puffs (if you’re feeling adventurous) - We have a Strawberry Milkshake cream puff recipe here. Just omit the strawberry essence from the whipped cream filling and add a tablespoon of blitzed cherry conserve into the double cream when whipping!
  • Your go-to ganache drip recipe - we added our signature gold sequin drip to our cherry and white chocolate cake. To simplify this cake you can leave the drip out!

Step 01:

When cool your layers are ready to work with! You never want to sandwich with warm cake as it will begin to melt your fillings. Sloppy, warm buttercream or ganache is not a good look. With a large serrated knife level each layer. You can definitely use a cake leveller for this tip if you like. We make so many cakes that we’ve developed a knack for levelling cakes by eye!

Cherry conserve filled cake recipe by Juniper Cakery

Step 02:

Now it’s time to fill and sandwich your layers! Add a ring of your pink vanilla and white chocolate buttercream leave a circle in the centre for your cherry conserve. When ready spoon in your fruity filling. Carefully add your layer on top and repeat this entire step for the next layer. Once all three cakes have been sandwiched you can add your pretty pink buttercream!
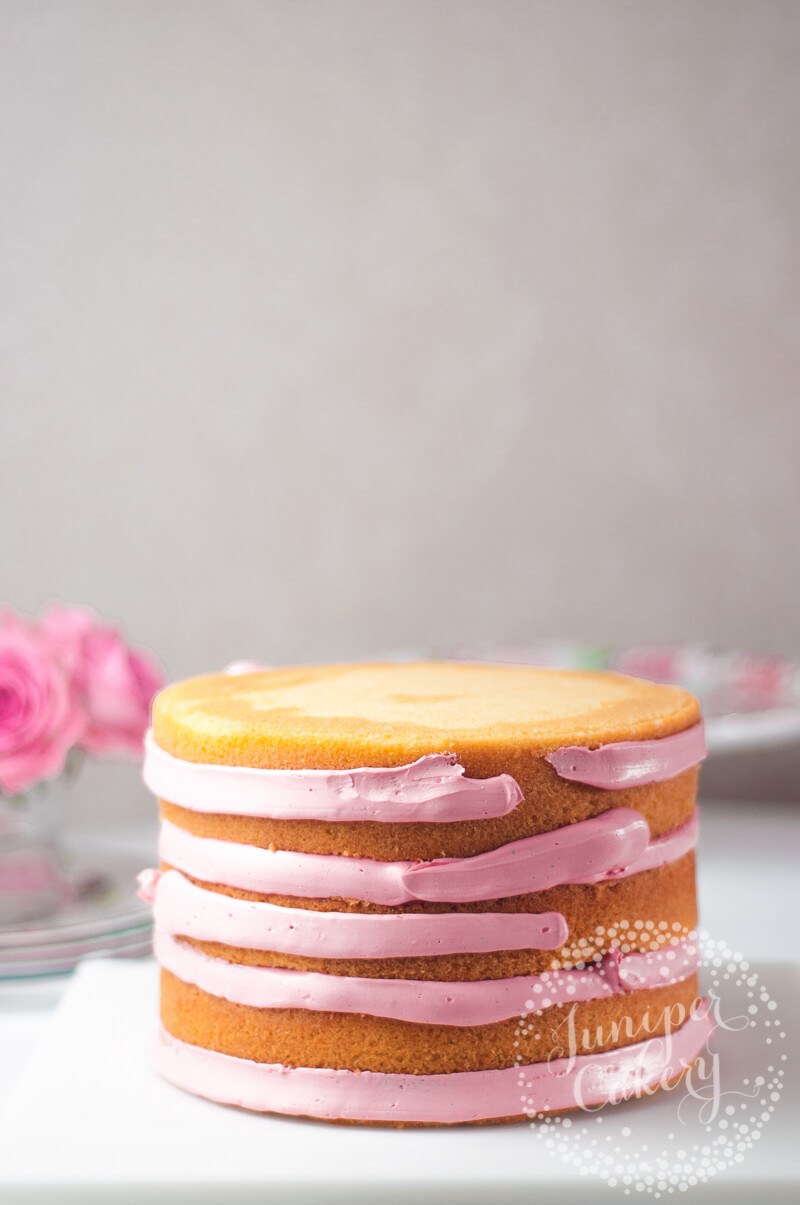
How to cover a semi-naked cake by Juniper Cakery

Step 03:

For an on-trend semi-naked look smooth or pipe your pink buttercream around the sides and top randomly. Scrape and remove any excess using a good icing scraper. Place in your fridge to chill.

Step 04:

Yay! Now for the fun part! If you’re braving a ganache drip then now it the time to add it! Drips work best on a nice chilled cake. The coldness of the cake helps the chocolate to set quicker giving you much more control over it. You don’t want every drip to pool at the bottom of your cake board or stand. We added a white chocolate drip to ours studded with edible sequins and painted gold. That’s an entire tutorial altogether though!

Pink dipped cherries by Juniper Cakery

Pretty pink candy melt dipped cherries by Juniper Cakery

Step 05:

For cute pink dipped cherries add approx. 100g pink candy melts to a microwave safe bowl and melt down. We heated ours set at 2 minutes and checked every 30 seconds until done. Add in around half a tablespoon of your vegetable shortening until a smooth molten texture. Now dip in your cherries and leave to set on some parchment paper!

Step 06:

To decorate add in your pretty pink roses first. These are your focal decorative items and your largest so it helps to map out your design with these. Our roses have been washed, cut down, then inserted into posy picks before added to our cake.

Cute gold splattered cream puffs by Juniper Cakery

Step 07:

Then you can add whatever other sweets and treats you have to your cake! We added pink candy melt dipped cherries, cherry cream puffs, and pretty macarons to ours!

Cherry filled cake with white chocolate buttercream by Juniper Cakery

Pretty in pink cherry cake for Royal Albert

White chocolate and pink cherry cake for Royal Albert

To really add the wow factor to this cherry and white chocolate cake why not treat yourself to something sweet from Royal Albert and Miranda Kerr’s collection!

22nd January 2015 // 0 Comments

Raspberry, White Chocolate and Pink Peppercorn Cake!

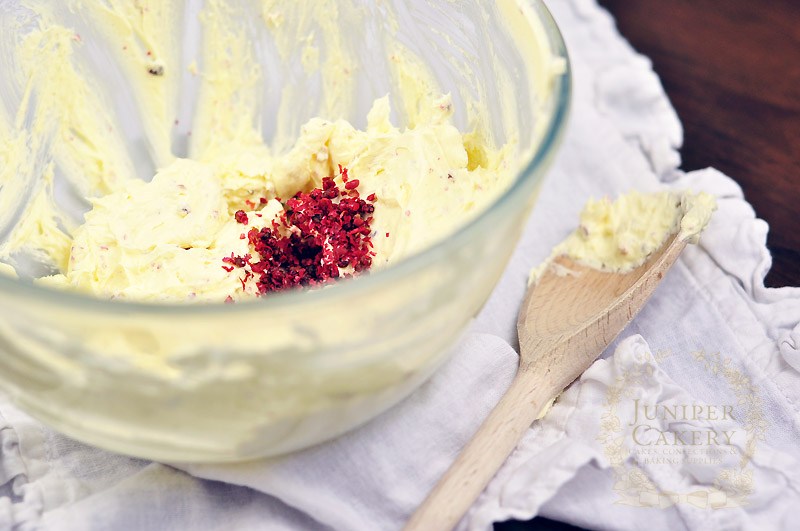
Add a little subtle heat to your Valentine’s Day treats with our fabulous Raspberry, White Chocolate & Pink Peppercorn Cake recipe! This cake is a delight to whip up, but it’s even better to eat! We love the luxurious silky taste of the white chocolate buttercream featuring fruity warm hits of pink peppercorns dotted throughout. Follow our super tasty recipe below for a fantastic treat…

Raspberry, White Chocolate and Pink Peppercorn Cake


(makes approx. 3 x 1″ layers 6″ in diameter)

Ingredients for the vanilla cake

453g self-raising flour
453g caster sugar
453g butter or baking margarine (diced and left at room temperature to soften)
7 medium sized eggs
Vanilla extract

Ingredients for the white chocolate and pink peppercorn buttercream

500g butter
400g icing sugar (approx.)
300g white chocolate good quality callets, buttons or chips
2 tablespoons pink peppercorns

Ingredients for the raspberry preserve

300g fresh raspberries
300g pectin sugar
1 tablespoons lemon juice

To decorate

Fresh raspberries (not frozen)

To bake, fill, cover and decorate your cake

Step 1: Preheat your oven to 170 degrees C / 325 degrees F / Gas mark 3 and grease or line your cake pans.

Step 2: Prep your pink peppercorns by adding them to a pestle and mortar to grind down. It’s OK if you have pink husks in your mix as these don’t hinder the taste and texture of your buttercream too much! At this stage you’re simply preparing your peppercorns for your buttercream as this can be a lengthy process. Set aside once crushed and ground.

Step 3: Add diced room temperature butter to a stand up mixer and mix until creamy.

Step 4: Add in the sugar and vanilla extract. Mix well before adding in the eggs.

Step 5: Gradually add in the flour whilst mixing. We add half and mix well before we include the last half of the flour once the first half has been incorporated.

Step 6: Separate your batter evenly between 3 x 6″ circle baking pans (you can use 8″, however, be aware that your layers may be a little thinner once baked)

Step 7: Place in the oven and bake for around 30-40 minutes or until a cake tester is inserted and comes out clean! Once baked remove and leave to cool on a wire rack.

Step 8: To make the buttercream add softened diced butter to a stand up mixer and cream.

Step 9: Sift icing / confectioner’s sugar into the bowl of creamed butter until a consistency and taste you like. When you can taste equal amounts of butter and sugar it’s ready!

Pink peppercorn buttercream by Juniper Cakery

Step 10: Add melted white chocolate and mix on medium speed before adding in ground pink peppercorns you prepared in step 2! Don’t over mix or you’ll be left with lots of annoying air bubbles. Set aside.

Step 11: To create your raspberry jam add your fresh raspberries, lemon juice and water to a saucepan.

Step 12: Cook the preserve ingredients on medium to high heat and stir until the raspberries break down and the mix is a good thick consistency.

Step 13: Remove and transfer to a clean bowl or jar to leave to cool.

Step 14: To assemble cut your cake layers so that each is level and flat. Then fill with your raspberry preserve placing the next layer on top until complete. Once fully stacked remember not to add your jam to the very top/outside layer of cake.

Step 15: With a large angled palette knife smother your white chocolate and pink peppercorn buttercream onto the top and sides of the cake. Use cake scrapers to smooth out your buttercream.

Step 16: Topple fresh raspberries on top to finish!

Pink peppercorns make a truly unique and surprising twist to this recipe. They’re sweet and fruity yet exude a subtle hit of pepper heat. To turn it up a notch why not add ground pink peppercorns to your cake batter before baking? Or grind some into your home made raspberry preserve? They pair well with other fruity tastes so if you’re not a fan of raspberries why not try morello cherries, strawberries, tangy lemon curd or even healthy blueberries?


9th December 2013 // 0 Comments

Bellini Cupcake Recipe for The Devilled Egg

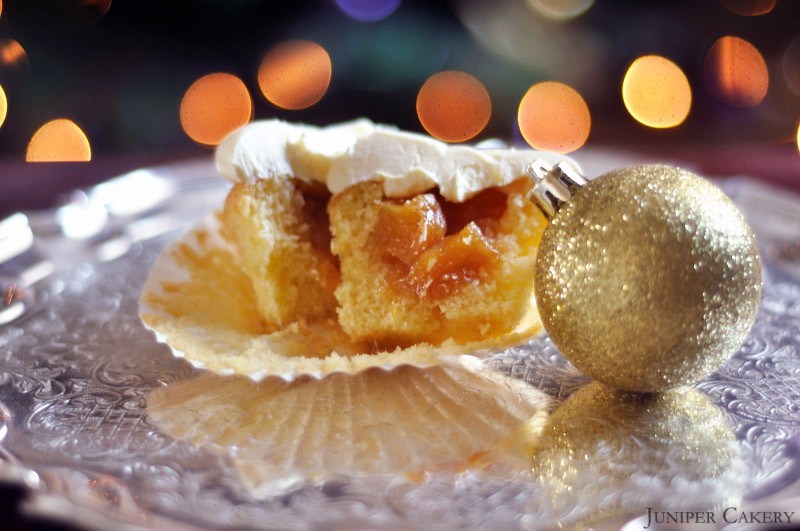
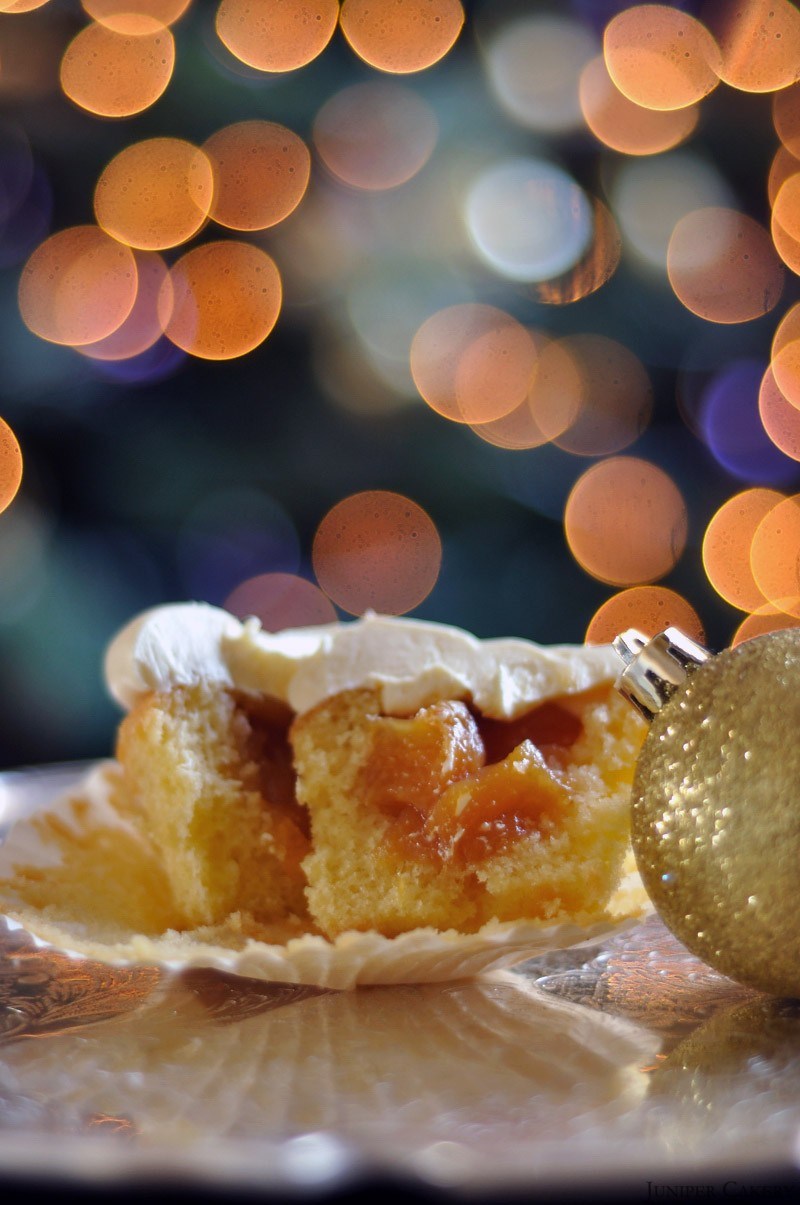
Every year the fun filled winter season tempts us all with decadent desserts and luxurious liqueurs. This year is obviously no different as we present this grown up gourmet Bellini cupcake; perfect for celebrations and soirées! This light and fluffy Prosecco cupcake is filled with home made peach and brown sugar confiture, generously swirled with vanilla pod infused buttercream and finished with a sweet (no pun intended) white chocolate and Prosecco ‘snowball’ truffle. We created this cupcake recipe especially for Bristol based culinary school, The Devilled Egg. This festively frivolous cocktail inspired cupcake is sure to make you a hit on the dinner party circuit! Why not make your way to The Devilled Egg Kitchen Academy’s blog for our full recipe!

bellinislicedpeach belliniportraitpeachbelliniportrait

27th November 2013 // 0 Comments

Winter Tales Recipe and Tutorial: Vanilla Snow Queen Cupcakes

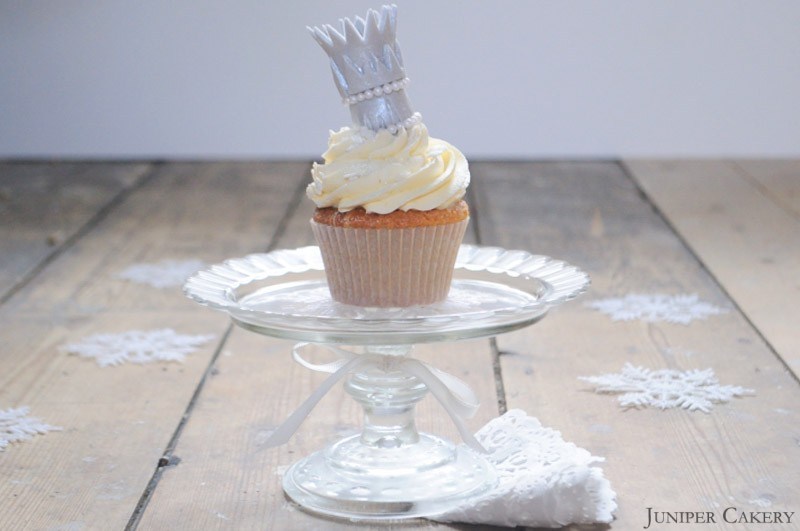
As cold, frosty mornings set in across the land here in the UK it’s time for the Snow Queen to begin her reign. What better way to see in the chilly season with these Vanilla Snow Queen cupcakes; soft and light vanilla cakes filled with luxurious white chocolate ganache, swirled with white vanilla buttercream and finally finished with a beautiful, sparkling crown! Display them atop a lovely silver platter or a pristine white tiered cake stand sprinkled with edible glitter for an extra frosty look. The wonderful thing about these particular cupcakes is they manage to be both fun for the kids yet full of glitz and glamour for more grown up sophisticated parties!

Vanilla Snow Queen Cupcake by Juniper Cakery

Vanilla Cupcake Recipe (makes approx. 12 cupcakes)

226g self raising flour
226 butter
226g caster sugar
4 eggs
1 bourbon vanilla pod

Pre-heat your oven to Gas Mark 3 / 160C / 325F and line a cupcake pan with cupcake cases. Cream your butter and sugar first and when ready add your eggs and vanilla. Once combined add the flour, mix well and pour your batter into your cases. Bake for around 20-30 minutes or until a cake tester comes out clean when tested.

White Chocolate Ganache Filling

200g white chocolate callets, chips or buttons
100ml double cream
Glass bowl
Whisk
Saucepan of hot water

In a glass bowl pour in the chocolate with the double cream and set into a saucepan of hot water. Stir gently with the whisk until melted and incorporating together. Remove from the hob and leave the bowl of chocolate and cream to set either in a refrigerator or on a windowsill in cold weather (cover with cling film if doing so). The ganache will be ready to fill your cupcakes with when it has the consistency of peanut butter.

Vanilla Buttercream Recipe

250g butter
250-300g icing sugar (keep testing when adding to make sure it is the consistency and sweetness YOU’D like)
6-12 drops of natural vanilla essence
Icing and buttercream whitener

Add half of the of butter diced into pieces. Cream the butter in a mixer. Then gradually add icing sugar and the remaining butter (cut into cubes) until you get a smooth, creamy texture. Add the flavour to taste and add a few drops of icing whitener at a time until you’re happy with the colour.

For more hints and tips see our tutorial on how to make buttercream here.

How to Make the Snow Queen’s Crown

You will need…

Gray sugarpaste / fondant (we used coloured plain paste with liquorice gel paste food colour)
Tylo powder
Lustre dust
Fondant rolling pin
Straight edge blade tool
Ball tool
Edible glue
Paintbrushes

Step one: Add some tylo powder to your white or gray sugarpaste / fondant. You should only add a small amount; around 1/4 of a teaspoon per 250g.

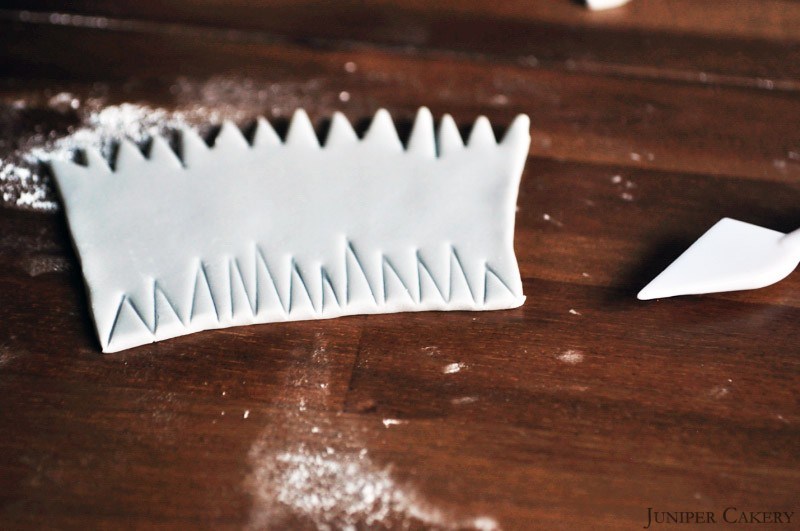
Step two: Using a fondant rolling pin roll out your paste until around 3mm-4mm thick. With the straight edge blade tool cut out an elongated crown shape around 5-6cm in width at the bottom (but growing larger towards the top) and height.

DSC_0078_578

Step three: Using the blade tool cut out a series of un-regimented ‘spikes’ along the top of the crown. Still using the blade tool indent ‘spikes’ along the crown’s bottom.

3

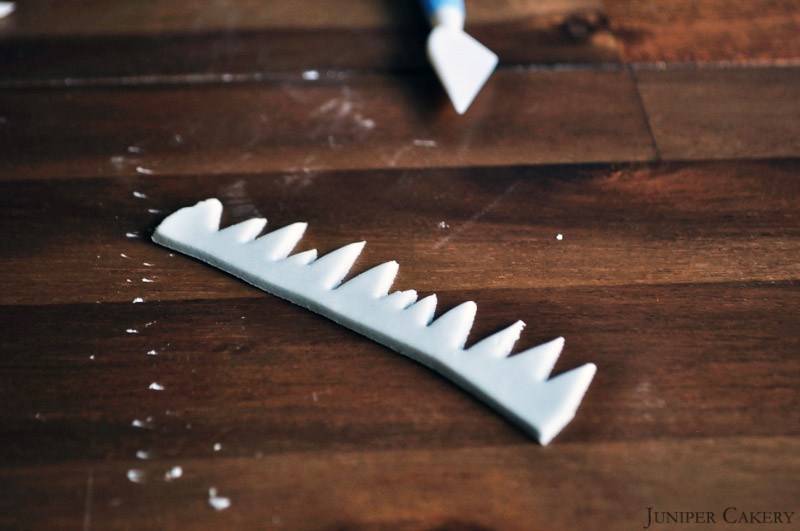
Step four: Roll out some gray fondant and cut a small strip. Cut ‘spikes’ along the top.

Step five: Using some dabs of edible glue attach the jagged strip from step four along the middle of the crown.

Step six: To create the pearls on the Snow Queen’s crown indent sections of the crown with the ball tool. Roll up some small white fondant balls and attach by adding a dab of edible glue into the indentation and lightly pressing the small ball into it. Alternatively you could use pearl beads.

Step seven: To shape your crown carefully stand it upright and paint the edges with edible glue before gently pressing together. Leave to set.

Step eight: Once your crown is set brush generously with silver lustre dust (avoiding the white fondant balls you’ve just attached). Leave for a few minutes and then dust once more.

Step nine: To make the pearls shimmer lightly brush them with a new paintbrush and some pearl lustre dust.

Once your crown is ready you can assemble your Vanilla Snow Queen cupcakes! Pipe each cake with your vanilla buttercream, gently nestle your crowns into the frosting and sprinkle generously with snowflake sprinkles! You can also add some edible glitter for some extra sparkle if you wish.

Voila! Congratulations on your collection of gorgeously glimmering Vanilla Snow Queen cupcakes; perfect for the frosty festive season.

29th August 2013 // 13 Comments

Recipe: White Chocolate Cupcakes!

Here is a cupcake recipe for all the white chocolate lovers out there! This cupcake is a lovely creamy, soft and smooth white chocolate crammed delight. It’s perfect for the chilliness of the coming months, but if you want something with a bit of bite why not throw in some lemon extract into the batter with a handful of blueberries, raspberries or blackberries. Either way this is a wonderful cupcake for a well deserved treat!

Recipe: Triple White Chocolate Cupcakes

Vanilla and White Chocolate cupcakes (makes approximately 12)

226g self raising flour
226g butter
226g caster sugar
4 eggs
1 Bourbon Vanilla Pod
2 handfuls of white chocolate chips or buttons

Step one: Preheat your oven to Gas Mark 3/325F/170C

Step two: Cream the butter with sugar and once well mixed add in the seeds from the inside of your vanilla pod, flour and then the eggs.

Step three: Set out twelve cupcake cases in your pan and fill each case 2/3 full. Tumble some white chocolate chips/buttons into your batter.

Step four: Bake from around 12-18 minutes or until a golden brown on top and leave to cool on a counter.

White Chocolate Buttercream

We make our buttercream using our own intuition. We’ve tried countless recipes; all of which failed to pass our test (and stability) tests. It’s best that you begin to develop and ‘eye’, ‘feel’ and ‘taste’ so that you know when your frosting is perfect for you. For starters though, the recipe below is a rough guide…

250g butter
250-350g icing sugar
100g of white chocolate chips/buttons
1 Bourbon Vanilla Pod
Extra white chocolate chips/buttons to decorate
855 piping tip/nozzle
Piping bags

Step one: Cut your butter into small cubes and cream your butter until soft. Gradually add icing sugar until a good consistency and add the seeds from a vanilla pod..

Step two: Melt 100g of white chocolate buttons and once partially cooled add to your buttercream. Mix well. Add a little extra icing sugar if needed.

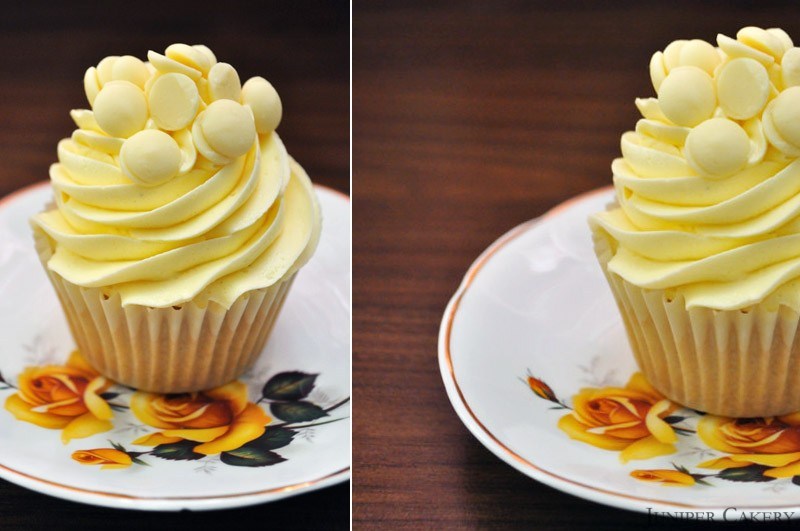
Step three: Fill a piping bag fitted with an 855 piping tip/nozzle (this tip/nozzle creates lovely ruffled buttercream) with your white chocolate buttercream.

Step four: Now you can pipe lots of generous and tasty swirls of buttercream on top of your cupcakes once they have cooled down and topple some tasty white chocolate chips/buttons on top!


SaveSave

SaveSave