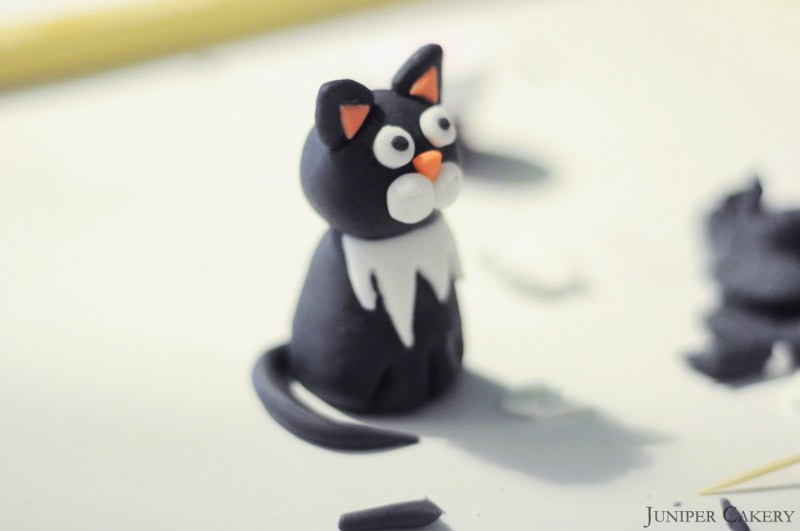
Tutorial Tuesday - How to make a sugarpaste cat!
In this week’s tutorial we’re showing you how to create your own adorable little cat from sugarpaste. This fully edible decoration is perfect for adorning your beautiful cakes and cupcakes with; use them to add fun to kids’ cupcakes or add character to a wedding cake and use to make cake toppers! This tutorial is also quick and easy enough for you to adapt and customise to suit themed parties and events!
What you need:
Sugarpaste (in whatever colours you wish your cat to be plus black and white for the eyes and pink for the nose and ears)
PME blade tool
PME shell tool
PME scallop tool
Toothpicks
Paintbrush
Edible glue
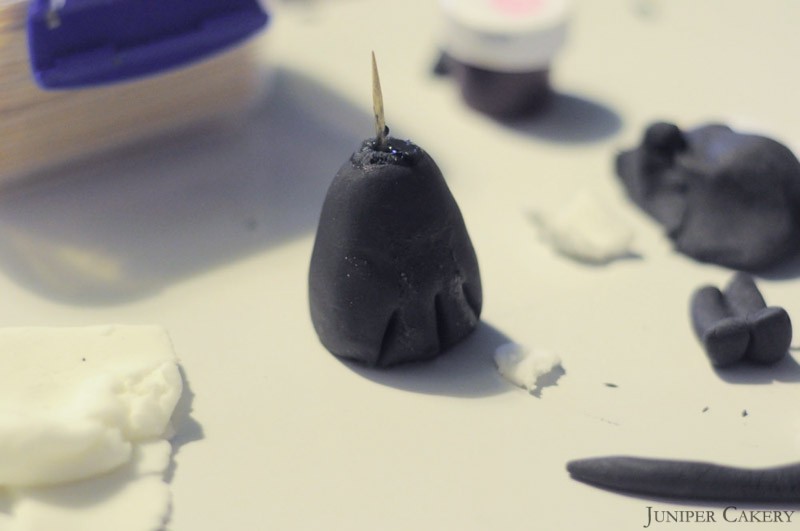 Step one: To form the body shape mold a pear shape from some sugarpaste. Using your blade tool scour and shape two legs out of the front of your cat’s body. Use the shell tool and press cat ‘toes’ into your cat’s paws.
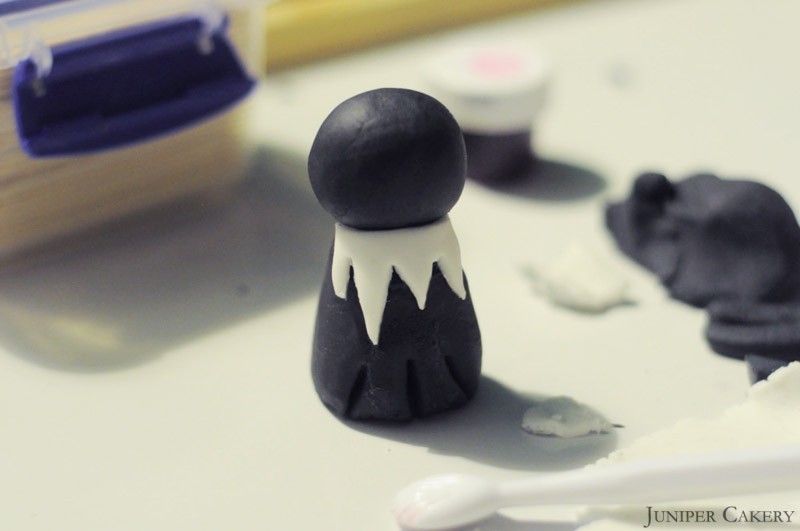
Step two: To make your cat’s head roll out and shape a ball of sugarpaste and set aside.
Step three: We added some contrasting fur detail by cutting out a zig-zag edged shape from white sugarpaste.
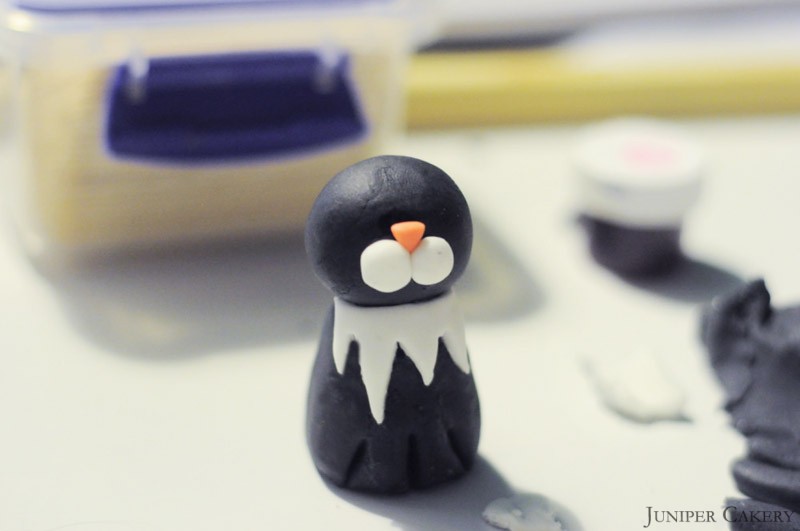 Step four: Now to form your cat’s muzzle. Using a small amount of pink coloured sugarpaste create a small triangle; this will become the nose. Also, using some sugarpaste (we used a contrasting white) and a round piping tip cut out two small circles and attach to the ‘cheek’ area of your cat’s face. Glue the pink nose nestled atop both circles. This is your cat’s muzzle.
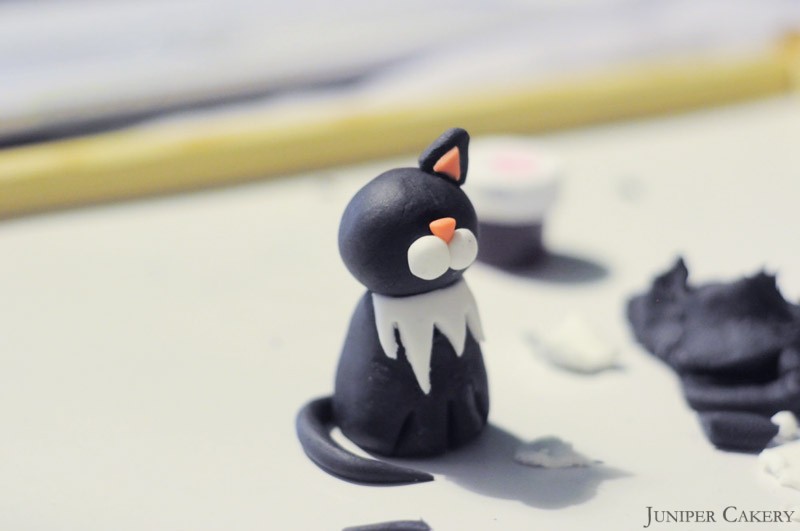 Step five: Make two small triangles out of matching sugarpaste and two smaller triangles out of pink sugarpaste then attach together using edible glue. Finally, glue the ears to your little cat’s head.
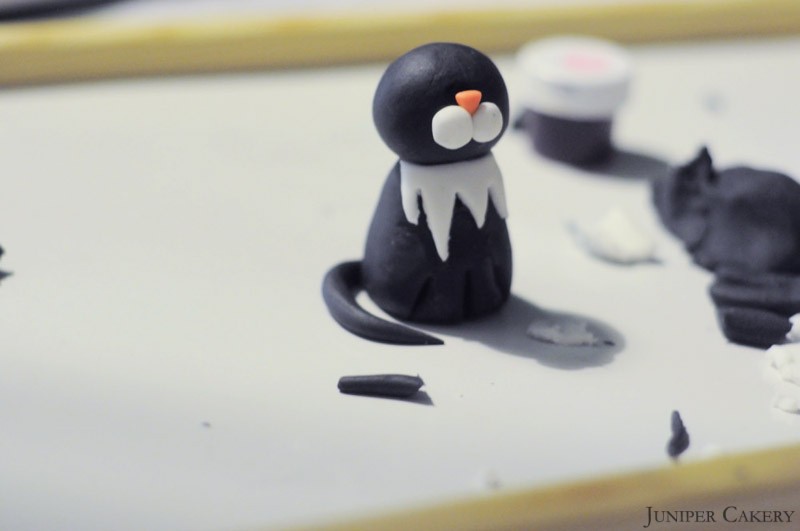 Step six: To create you cat’s tail simply roll out a long piece of sugarpaste that tapers to one end. Curl the tail around your cat’s feet and glue the back-end in place.
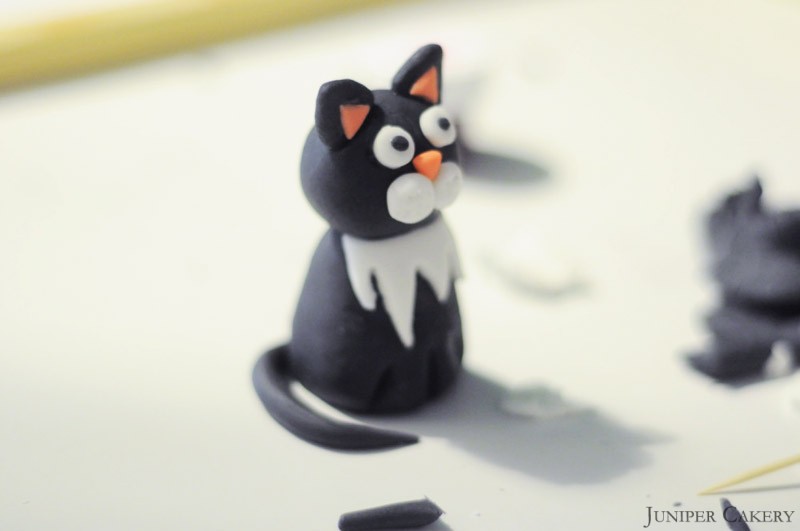 Step seven: For the eyes use a small round piping tip (Wilton 1A) to cut out two white circles and two black circles (custom cut these to make them slightly smaller than the whites). Glue the black atop the whites and glue to the top of the head.
If you’ve followed this tutorial then you will now have a beautiful sugarpaste cat that you can personalise for any occassion! Why not adjust this tutorial and make the body smaller and the head and eyes larger to turn your cat into a wide eyed kitten perfect for nestling into rich buttercream piped cupcakes? To make this tutorial extra wild you can also choose different colours, patterns and styles of ‘fur’ to make an array of felines from cheetahs and leopards to sugarpaste mane-d lions.


Thanks so much for your sugarpaste cat tutorial, I tried my hand at it for the first time today and it wasn’t quite as good as yours but it did a pretty passable imitation! Really helpful and informative, thank you