Tutorial Tuesday: Easy Meringue Christmas Trees!

Hurrah! Christmas is coming! Whilst this is ever so exciting we understand that whipping up (pun fully intended due to the nature of this blog post) festive treats for the holiday season need to be both striking yet stress-free. That’s why for our collection of Christmas cake, cupcake and cookie decorating tutorials and recipes we’ve tried our best to keep them simple. This week we begin our festive series with some delightfully easy Meringue Christmas Trees!

How to whip up easy Meringue Christmas Trees…
Easy meringue Christmas trees recipe and tutorial

Meringue Christmas Trees

Ingredients needed

  • 60g egg whites (room temperature works best)
  • 120g caster sugar (this needs to be caster sugar as it dissolves perfectly in a meringue)
  • Green gel or paste food colour

Note: As a general rule you need double the amount of caster sugar to egg whites so if you need to make a large bowl of meringue keep this in mind!

Materials needed

  • Piping bag
  • 828 Ateco piping tip
  • Cookie sheet/tray or any flat baking tray
  • Parchment paper or silicone baking mat
  • Clean kitchen paper towels
  • Lemon juice

Meringue recipe

Step 1:

Pre-heat your oven to gas mark 2/300F/170C and line a flat baking try with either parchment paper or a silicone mat.

Step 2:

In the lemon juice wiped (this rids any fat residue with can make a meringue seriously fail) bowl on a stand-up mixer add your room temperature egg whites and whisk on high speed for a few minutes or until lovely stiff peaks are formed! 

Step 3:

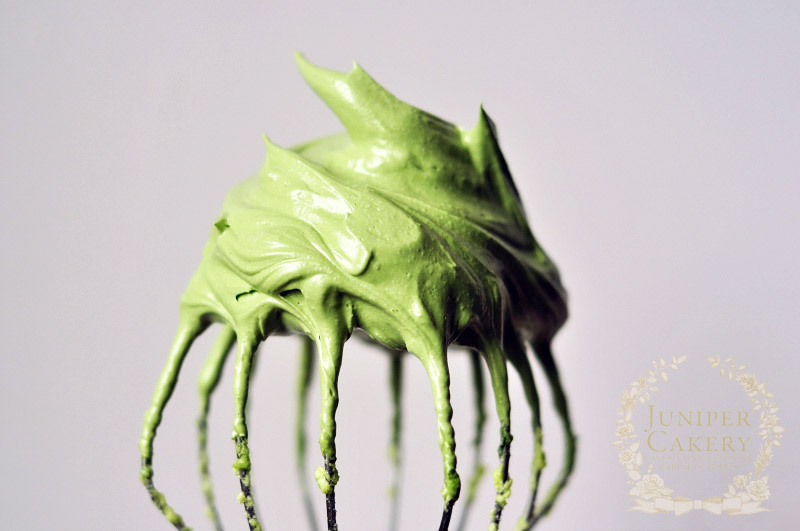
Add in your food coloring and mix for around 20 seconds or until fully incorporated. Don’t worry if your egg whites begin to look a little ‘clumpy’ or if they all seem to congregate inside your whisk. Adding the sugar next ‘loosens’ them.

Step 4:

Gradually add in your caster sugar a tablespoon at a time as you whisk on high until glossy, stiff peaks form.
Pipes meringue Christmas trees

Step 5:

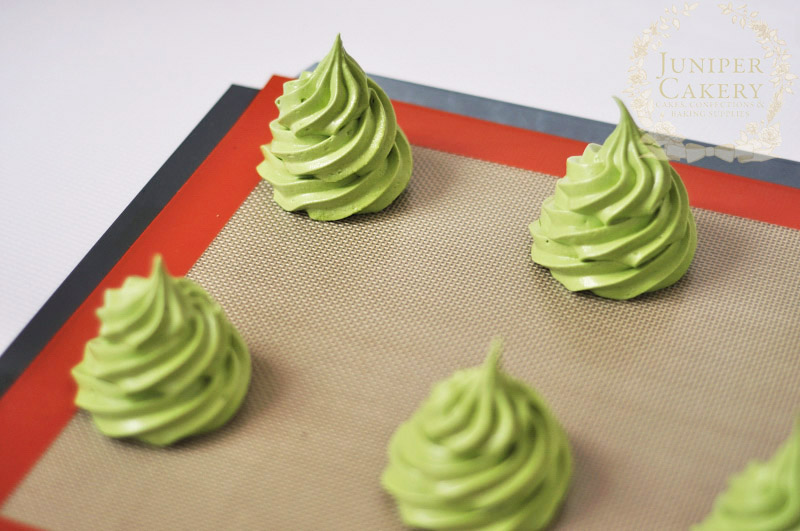
Fill a piping bag fitted with a 828 piping tip with your green meringue mix and shake the bag down to rid yourself of any unwanted air bubbles.

Step 6:

Pipe a row of Christmas trees at least 2 inches apart on your tray. To do this simply pip as your would with  cupcake buttercream/frosting yet a little taller.

Step 7: 

Place in the oven on the lowest rack for around 1 hour. To prevent the tops from browning add a thin sheet of foil to the top tray of your oven and increase your baking time to 1 hour and 30 minutes.

Step 8:

When baked remove and set aside to cool. You can then work on some decorations like fondant/sugar paste stars using rolled out fondant or sugar paste icing, some star shaped cutters and a little pearlescent, gold or silver lustre dust! Attach any extra decorations on with a tiny dab of melted white chocolate and you should be left with a miniature forest of festive trees.
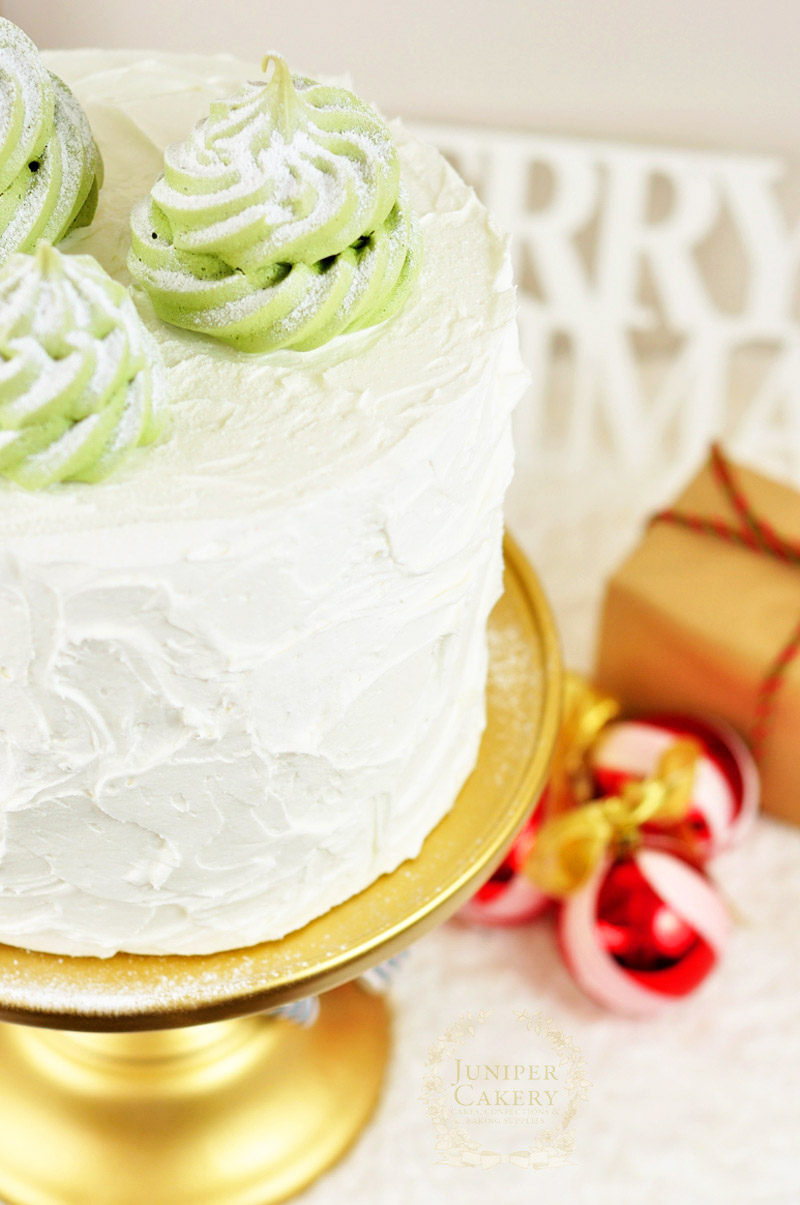
Recipe for meringue Christmas tree cake toppers

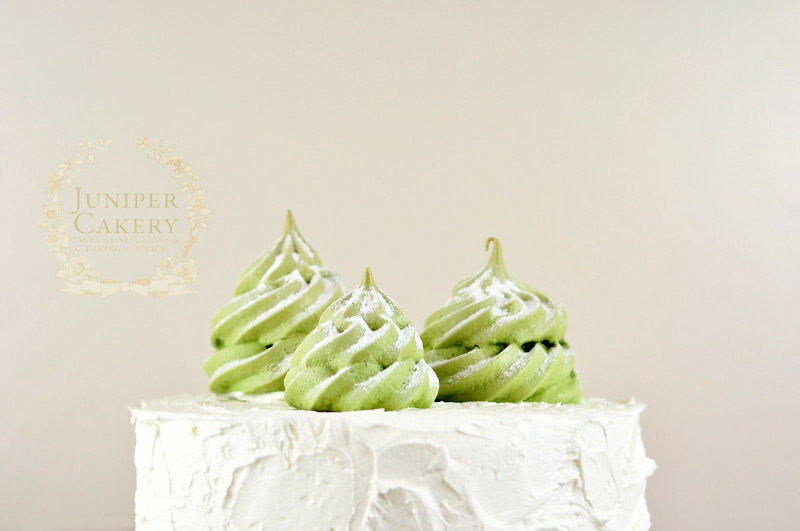
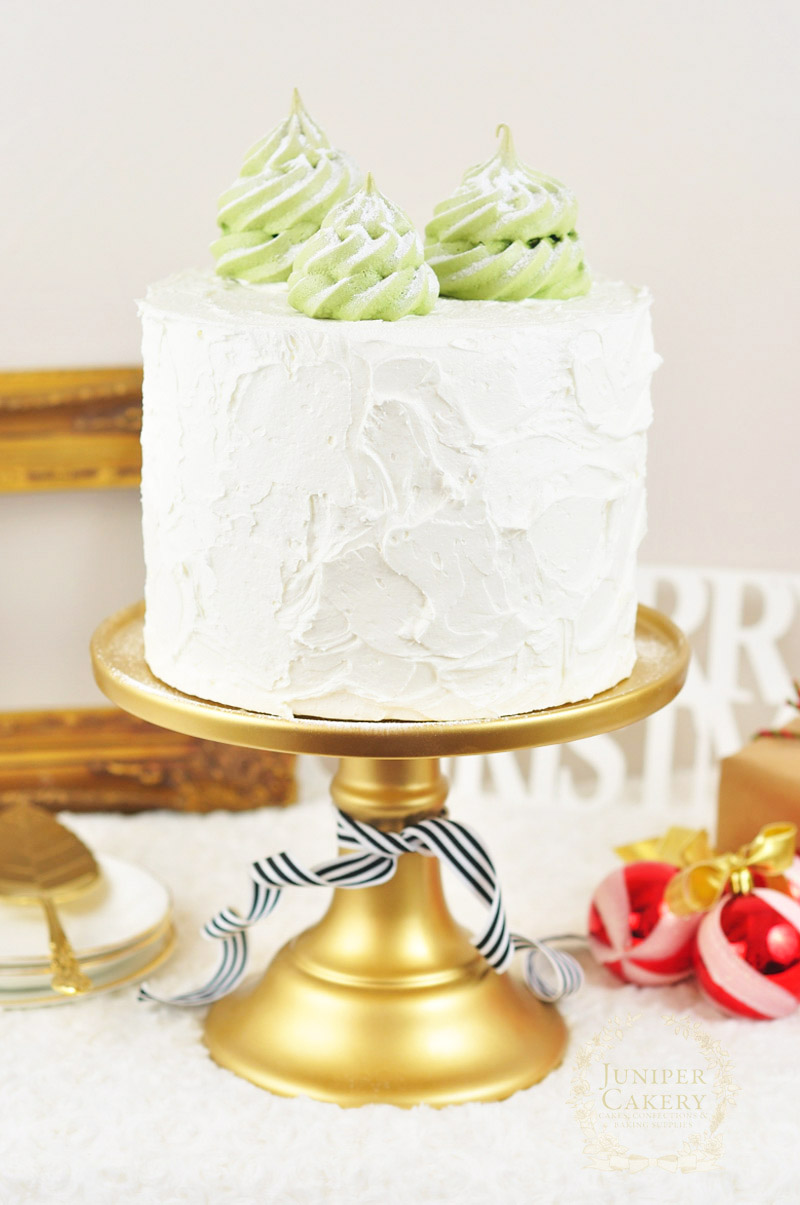
There are lots of fabulous ways you can use these adorable edible Christmas trees for holiday treats. We added ours on top of a red velvet cake smothered with rustic and white cream cheese buttercream before dusting them lightly with a little icing sugar to create a quaint snowy scene. 
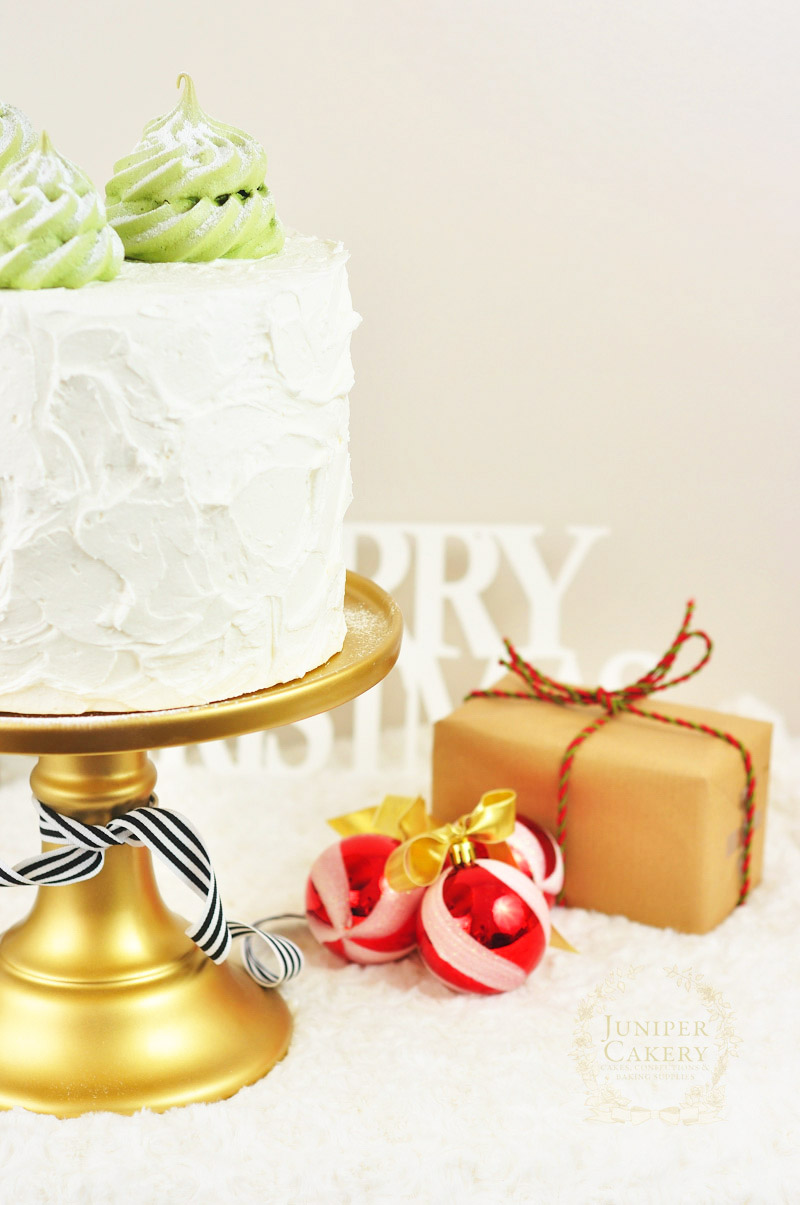
Simple meringue Christmas tree desserts

Some great ideas on how you could decorate cakes and cupcakes with your easy Meringue Christmas Trees are to nestle them on top of tasty cupcakes, add them around the edges of a freshly baked and iced cake, or your could even serve them up on a silver platter just as they are!


Tutorial: Intro to Royal Icing…Stencil Designs!

We’re now onto week three of our ‘Intro to Royal Icing’ tutorial series which we hope you find easy to follow and pretty darn useful. Working with royal icing seems daunting, but with a straightforward recipe and some patience and practice it needn’t be! For our first tutorial of the collection we showed you how to pipe delicate pearl borders and we shared our go-to recipe for royal icing, then last week we featured a how to on making a parchment paper cornet/cone and how to pipe polka dots, this week we’re going to show you how to use stencils and royal icing to apply some fabulous designs onto your cakes and cupcakes!
How to stencil with royal icing by Juniper Cakery

Stenciling cakes tutorial by Juniper Cakery

How to use stencils with royal icing

You’ll need…

  • A flat and clean stencil
  • Cake, cookie or flat fondant disc to top a cupcake (fondant/sugarpaste covered is best)
  • Royal icing (find our recipe here) the consistency of toothpaste
  • Spatula
  • Trex or Crisco (optional)

Step 1: One of the first steps (if obvious) is to make sure that your stencil is the appropriate size for the surface you wish to decorate! Also, it’s best if your stencil is flat so look after them to avoid kinks, bends or folds. If you’re a fresh faced beginner it’s best to steer clear of over-complicated stencil designs until you’re more proficient!

Royal icing stencil tutorial by Juniper Cakery

Step 2: Apply the stencil to the surface (some people paint Trex or Crisco onto the side of the stencil that will touch the cake to help stick it on, some utilise pins instead, and some have someone generous enough to lend their steady hands for a few moments), hold down steadily yet lightly before you apply your royal icing. 

Tutorial on how to stencil with royal icing by Juniper Cakery

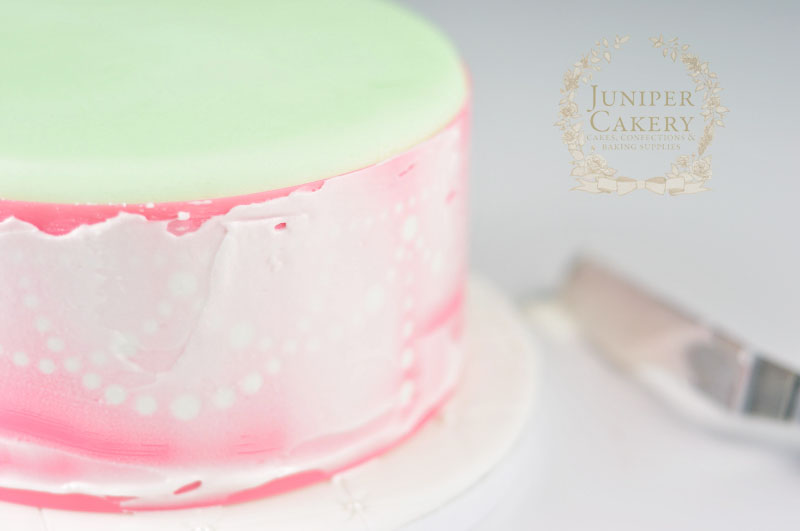
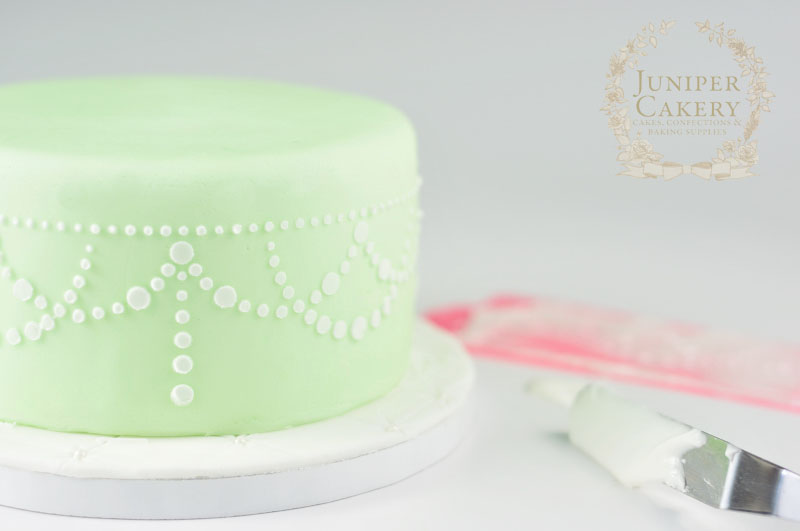
Step 3: With a good spatula (we recommend a cranked or angled spatula for good control). Whilst holding the stencil steady apply some royal icing and use the spatula to smooth over the stencil. Scrape excess royal icing away with the spatula and when ready slowly peel the stencil away. Remember to always work pragmatically… clean and wipe your stencil between each cookie or side of a cake to avoid blurred or indecipherable designs. Impatience will lead to mess! 

How to stencil onto cakes with Juniper Cakery

Tutorial on how to stencil cakes by Juniper Cakery

Once you become more confident with this technique adding stencil designs to your cakes and cookies with royal icing will be a fantastic and fast way to add detail! Now that our ‘Into to Royal Icing’ series is over why not keep test your new-found skills on a batch of cookies or cupcakes? Stop by next week to find out what our next collection of tutorials will be!


Tutorial: Intro to Royal Icing… Piping Polka Dots!

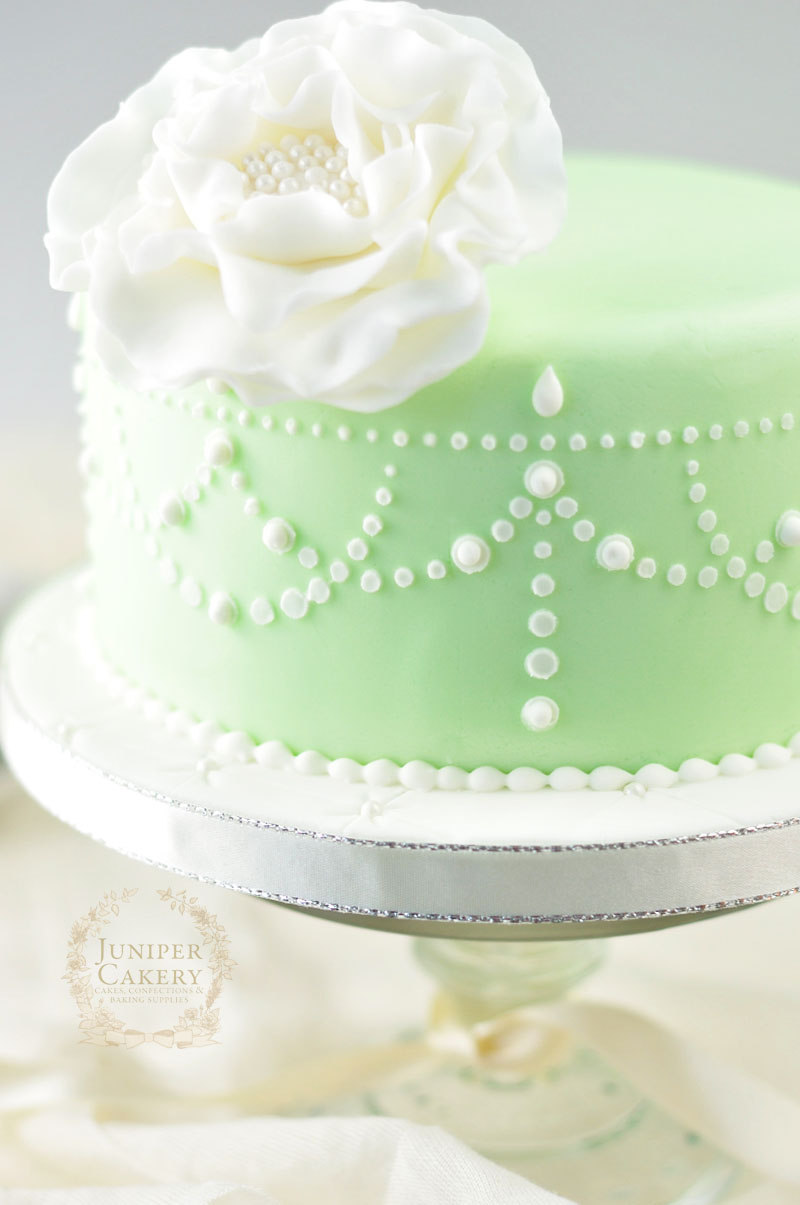
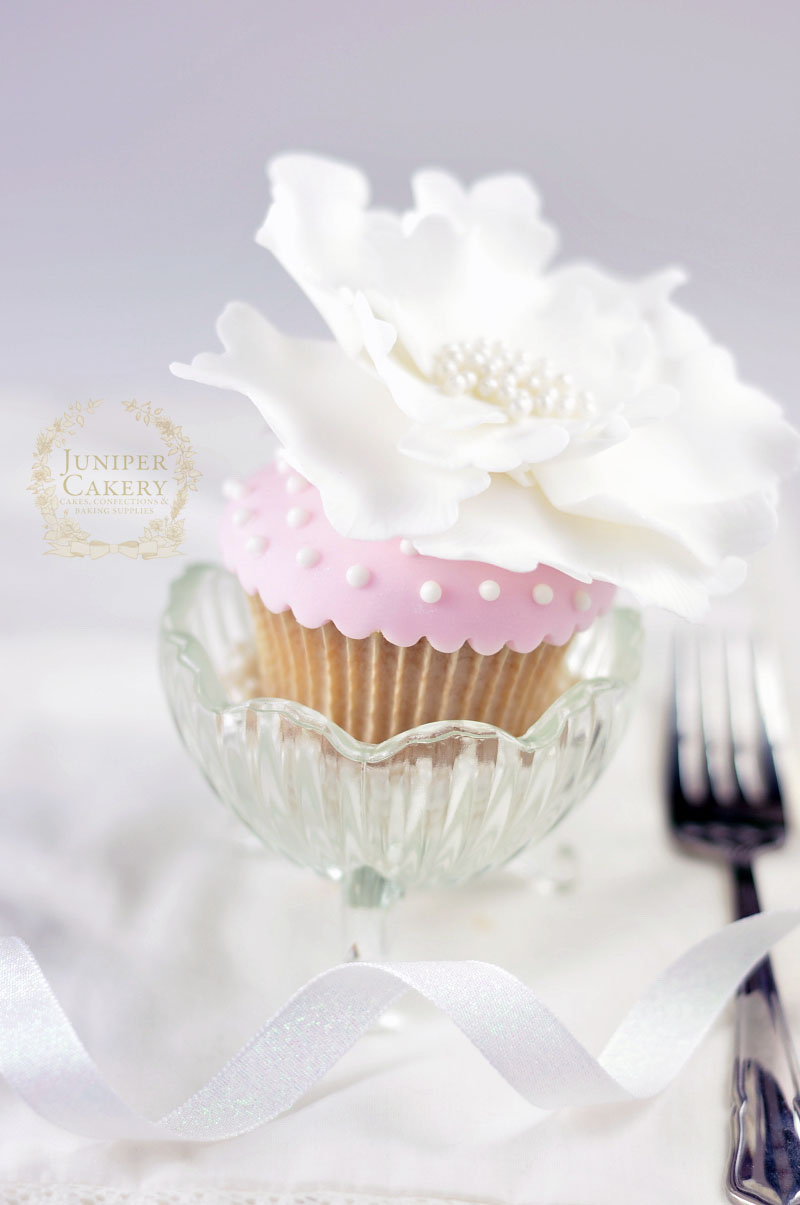
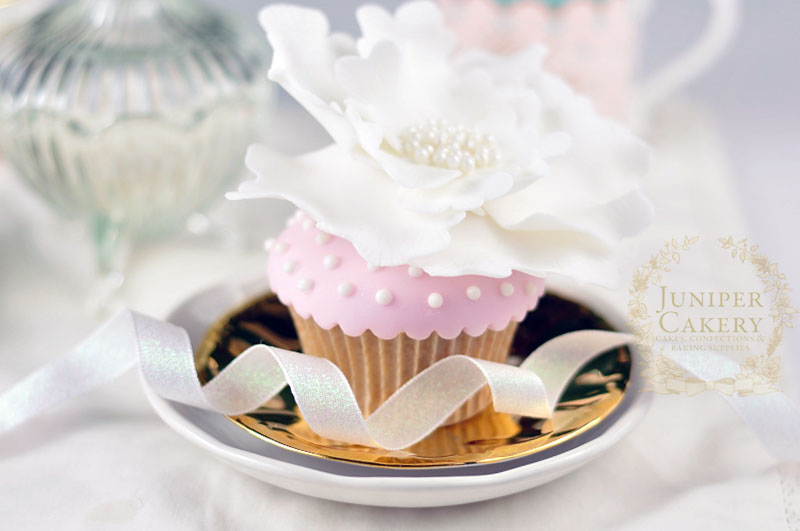
Last week we kick started our ‘Intro to Royal Icing’ tutorials with our go-to royal icing recipe and a tutorial on how to pipe a lovely and delicate pearl border! Now it’s time for us to show you how to pipe polka dots (or random dots if you like) onto cakes, cookies and cupcakes. This technique is wonderful and perfect for adding texture to decorated treats; piping royal icing dots into a polka dot formation also adds a very subtle vintage feel to a finished cake!

Polka dot icing tutorial by Juniper Cakery

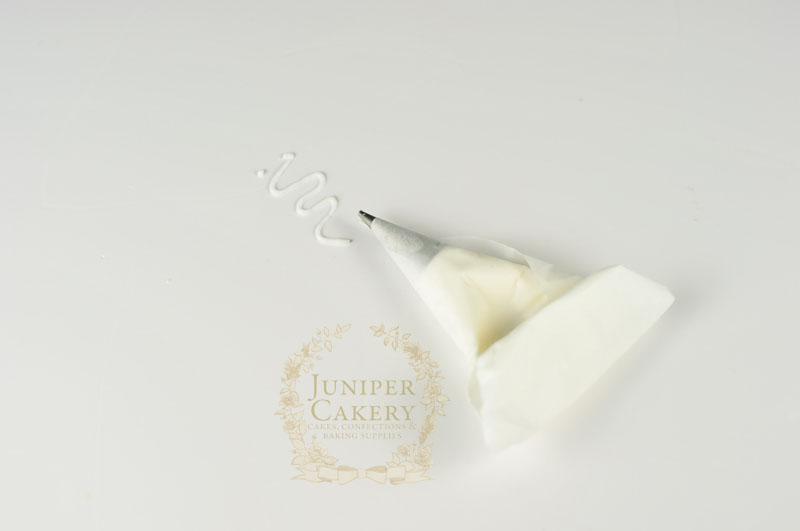
This week we’re also going to show you how to create a parchment cornet /cone used for piping royal icing designs. We use a combination of both parchment cornets and disposable piping bags and personally haven’t noticed too much of a different between the two. One notable thing is that the smaller parchment cornet is better if piping smaller or more ‘fiddly’ detail due to the way you end up holding it and also due to the size. Using a parchment cornet is generally great for writing, string-work or lace.

How to make a parchment cornet / cone

You’ll need…

  • Parchment paper
  • Scissors
  • Piping tip
  • Small round piping tip (we used a 2.5 writer tip by PME
  • Royal icing (find our recipe here) the consistency of toothpaste


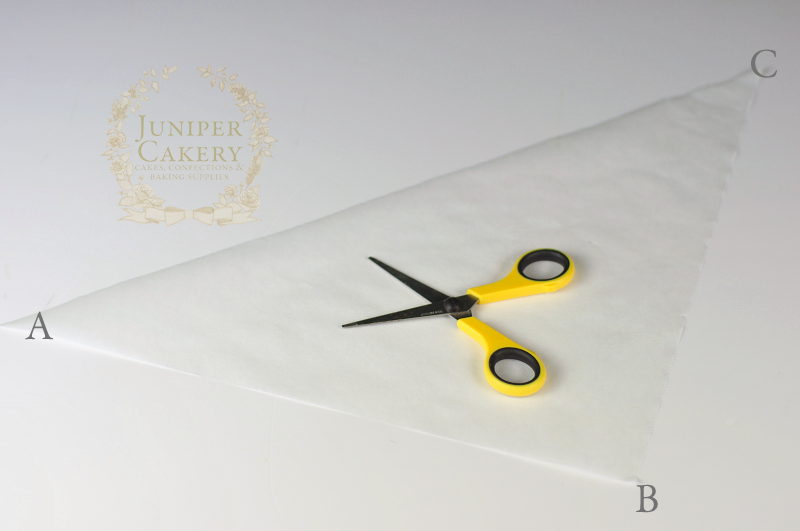
Step 1: Take a roll of parchment paper and cut a square portion from this.

Step 2: Fold corner to corner to form a triangle and cut down the fold.

how to make a parchment cone for royal icing by Juniper Cakery

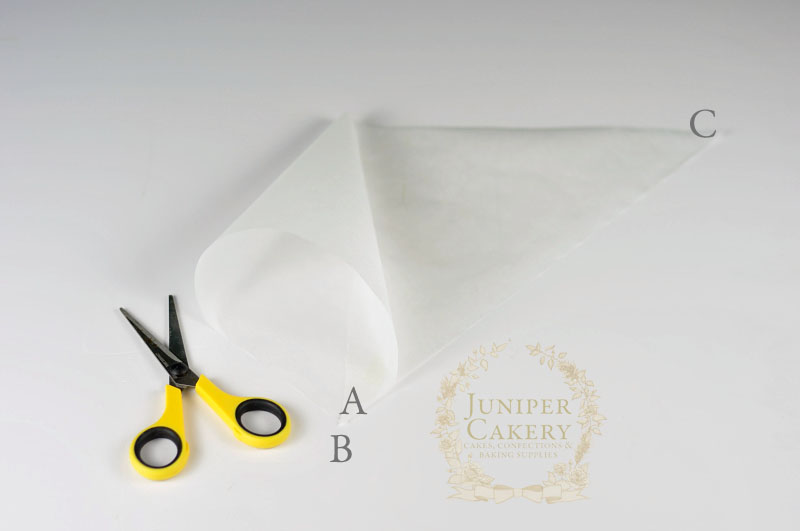
Step 3: Think of each corner as being marked with a letter. The middle point should face you and be corner B. The outer points should be A and C. A being the left and C being the right.

Step 4: To form the cornet bring point A to point B to form a conical shape.

how to make a parchment cornet by Juniper Cakery

Step 5: Take point C and bring this to point B. This should, in a sense, double up the cornet shape.

Step 6: Take your piping tip and fit into the bottom of the cornet as with a disposable piping bag. You can adjust the points to fit the tip.

Step 7: When all points meet rip two notches parallel to each other and fold this to hold the bag.

Step 8: Fold the piping bag at the points a few times to secure.

Step 9: Fill with a little royal icing.

how to make a parchment  piping bag by Juniper Cakery

Step 10: Fold the parchment cornet in on itself from the sides and then from the top a few times and you’re ready to pipe!

Royal icing dots tutorial by Juniper Cakery

How to pipe royal icing polka dots

 You’ll need…

  • Parchment cornet/cone filled with royal icing and fitted with a small plain round tip
  • Cake, cookie or fondant/sugarpaste covered cupcake
  • Food safe paintbrush
  • Icing sugar
  • Dressmaker’s pin (optional)

How to pipe dots with royal icing by Juniper Cakery

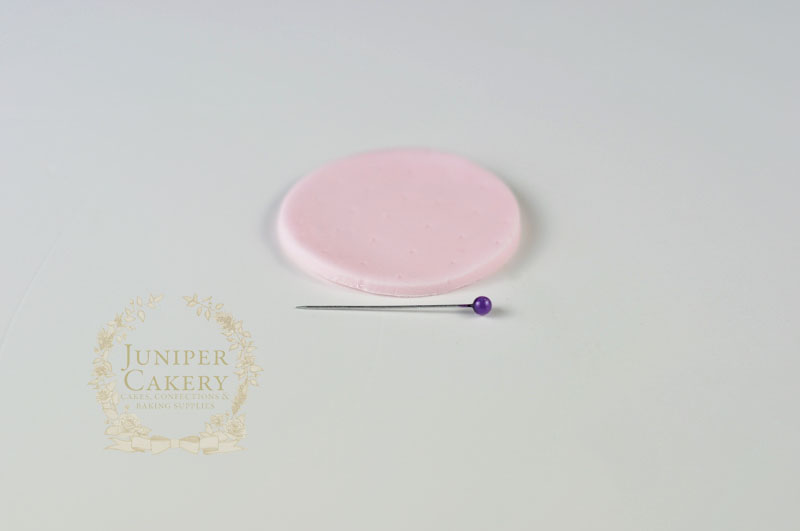
Step 1: When you’re relatively new to piping out polka dots or a design made up of small royal icing dots it’s a good idea to mark out your design or pattern with pin pricks. Use a clean dressmakers pin to do so.

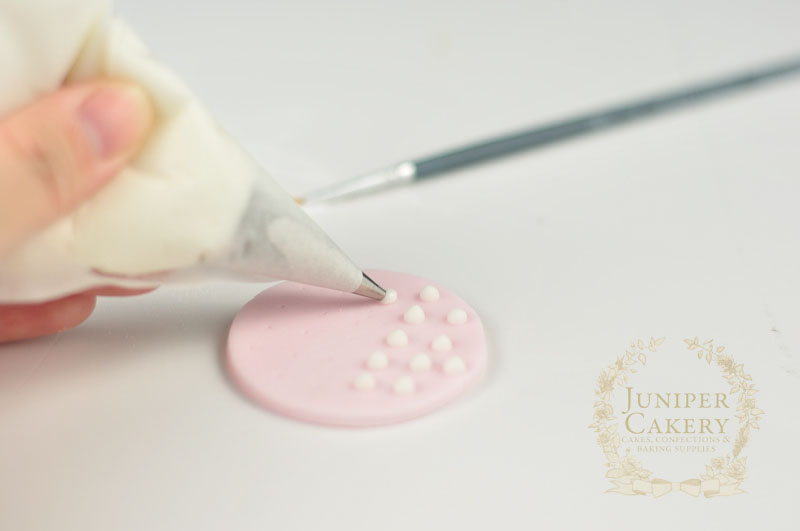
Step 2: With your parchment cornet/cone filled with royal icing and fitted with a seamless (this is important as a seam can send your royal icing out crooked and hard to control) small round piping tip and position yourself at a good height to your cake or cookie. For cakes work from the direct front and for cookies or cupcakes work from directly above.

Piping dots with royal icing by Juniper Cakery

Step 3: Apply a little pressure to add a small dot of royal icing. Don’t pipe for too long if you need a larger dot as this will create ridged spots that won’t look too elegant, instead swap to a large round tip if needed. Another tip is to not place the piping tip too close to the surface or else you’ll be left with flat spots instead of nicely rounded dots.

Step 4: Don’t worry if you’re left with a bit of a tip to each dot. This is fairly normal; if you’ve the perfect consistency dots do ‘settle’ after a few seconds and without spreading out. If you do have tips that don’t settle you can flatten these slightly with a food safe (only ever used on edible items) paintbrush dipped in a  little icing sugar. You’ll need to work fast  as royal icing sets quickly. It may be frustrating but don’t be tempted to pipe out all your dots before tapping the tips down because they’ll have dried before you have the chance!

Royal icing dots tutorial by Juniper Cakery

Keep practising! It takes a little time to get any technique perfected especially when it involves royal icing. If you’re feeling adventurous why not edge a cake with the pearl border we showed you how to create last week and decorate with this week’s dainty polka dot tutorial! Next we’ll be showing you how to use royal icing to stencil designs on your cakes and cookies!


Circus Cake & Cupcake Topper Tutorial: Lion

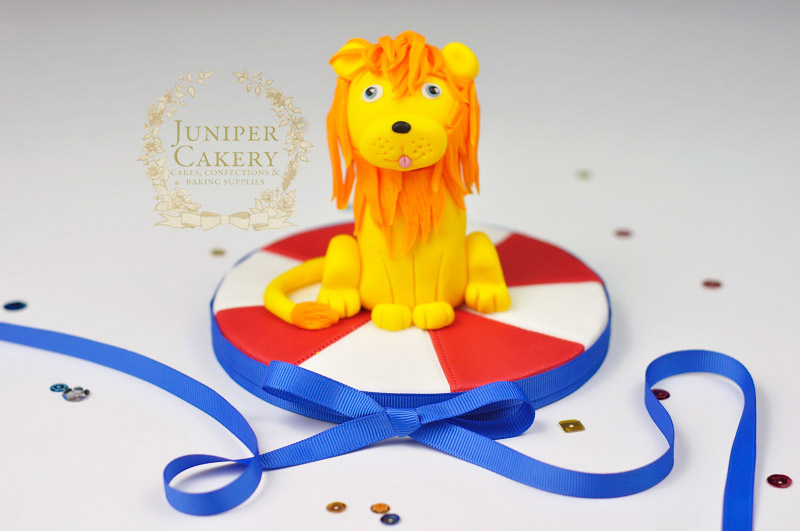
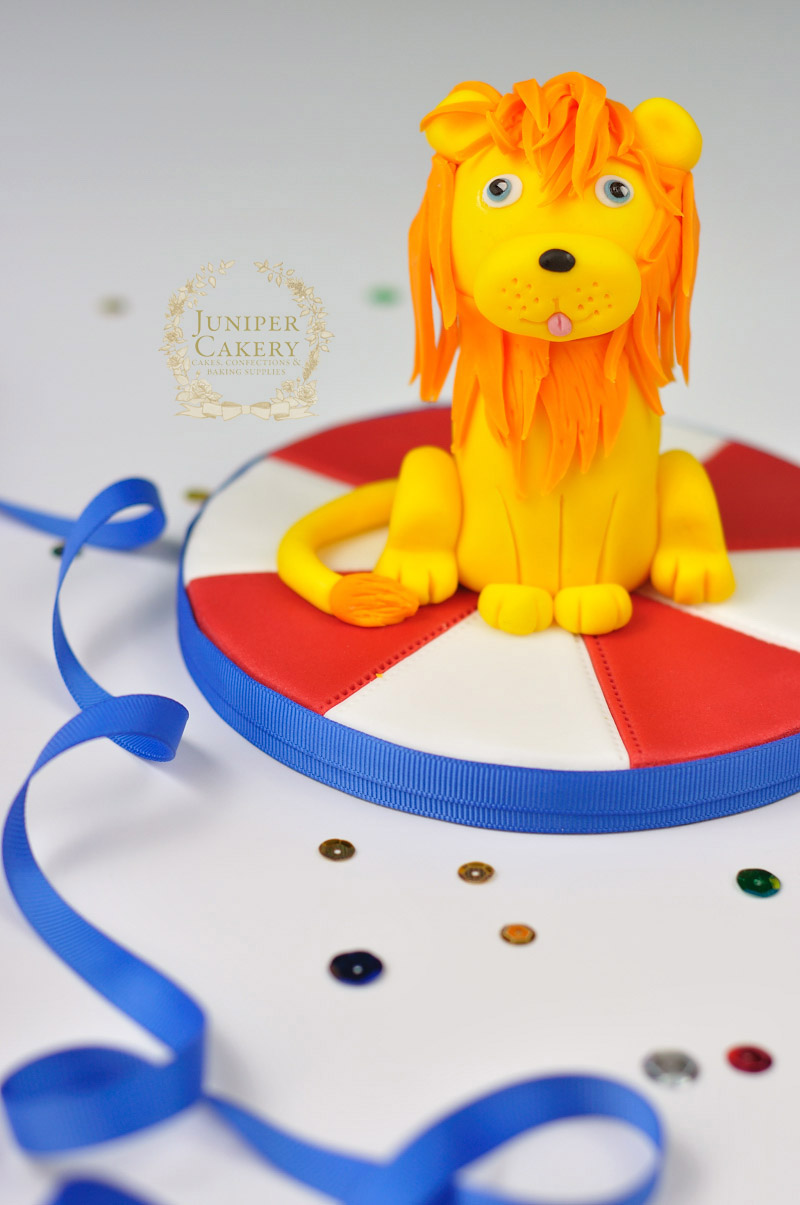
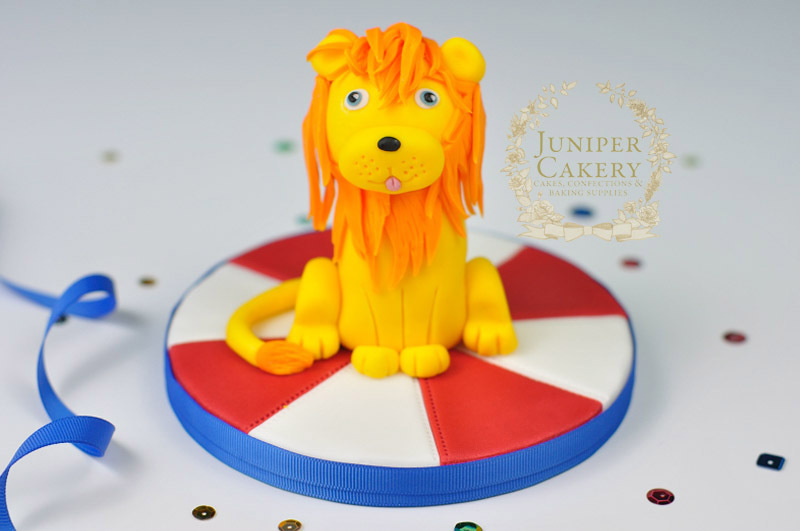
As the days and months get brighter so do our colour palettes! That was our main thought when we began discussing tutorial themes… vibrance. With that in mind, of course, our newest collection of cake and cupcake decorating tutorials look at the bright colours and animal characters from cartoon circuses! This week we show you how to create your own friendly lion; perfect for kids’ party cakes. This character is so easily adaptable to suit other themed cakes and cupcakes too; add a golden crown for a playful royal design or change the colours and create other characters for an amazing selection of Narnia cupcakes!

Fondant lion cake topper tutorial

How to make a circus lion cake topper by Juniper Cakery

You’ll need…

Learn how to make a sugar paste lion

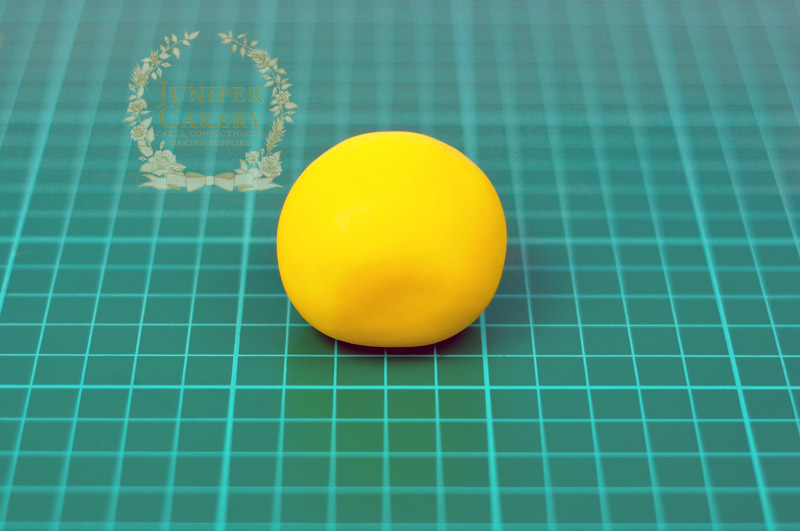
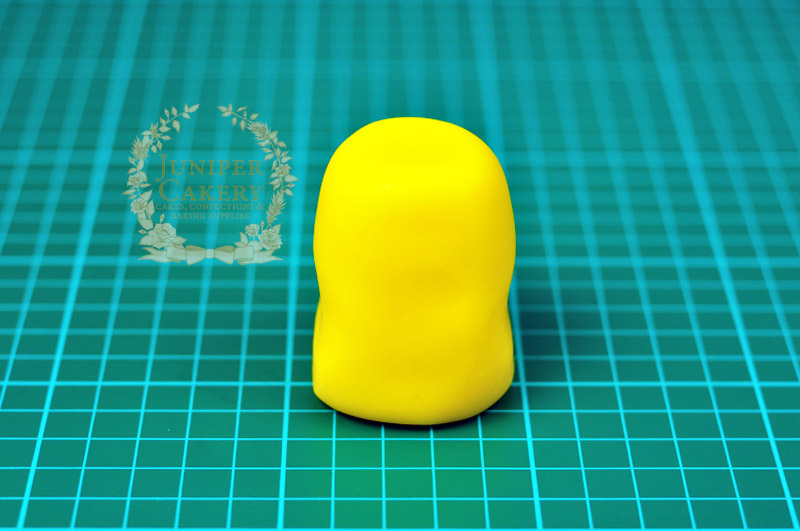
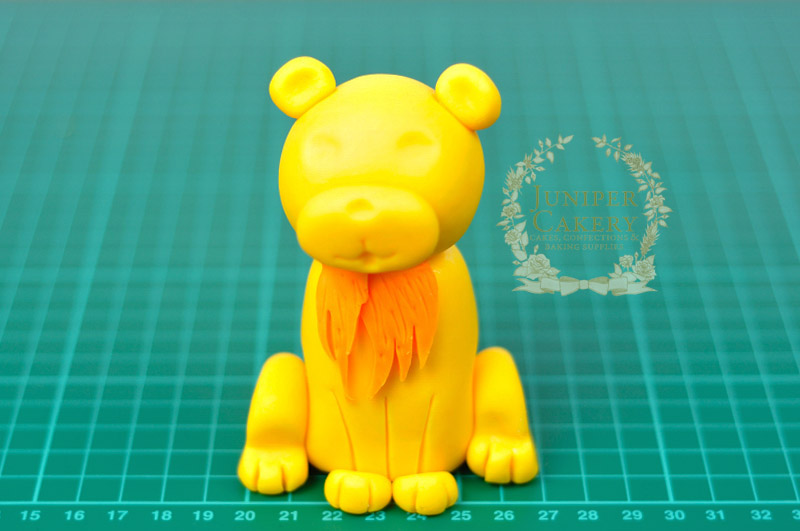
Step 1: Form a ball of yellow fondant / sugarpaste (mixed with a pinch of tylo powder to help make the fondant / sugarpaste harder) approximately the size of a ping pong ball. Slightly flatten the lower part of the front where the muzzle will be attached later.

Circus lion cupcake topper tutorial

Step 2: With some tylo mixed yellow fondant / sugarpaste form a larger ball (around double the size as the piece in step 1) and mould oblong smoothing the sides inwards to create a slight hourglass shape.

Lion cupcake topper how to

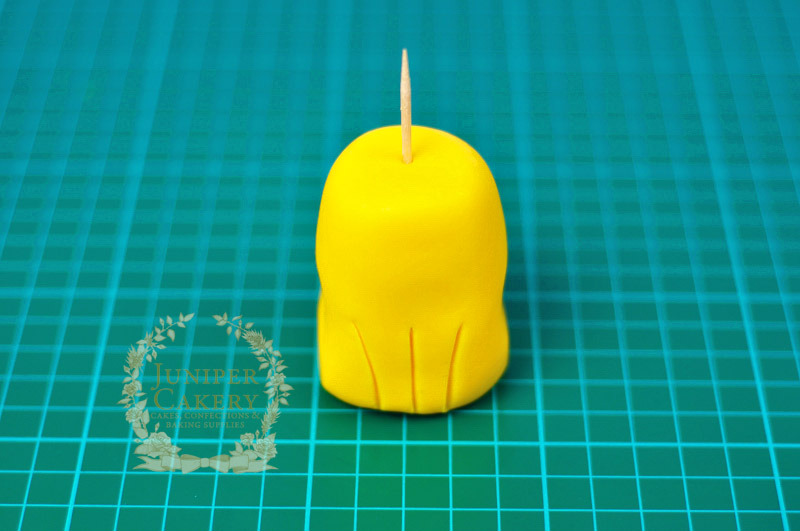
Step 3: With a blade tool etch two front legs and then push a cocktail stick down the centre. The head will attach to this so make sure the stick won’t protrude out of the yellow ball made in step 1.

Tutorial for a sugar paste lion figure

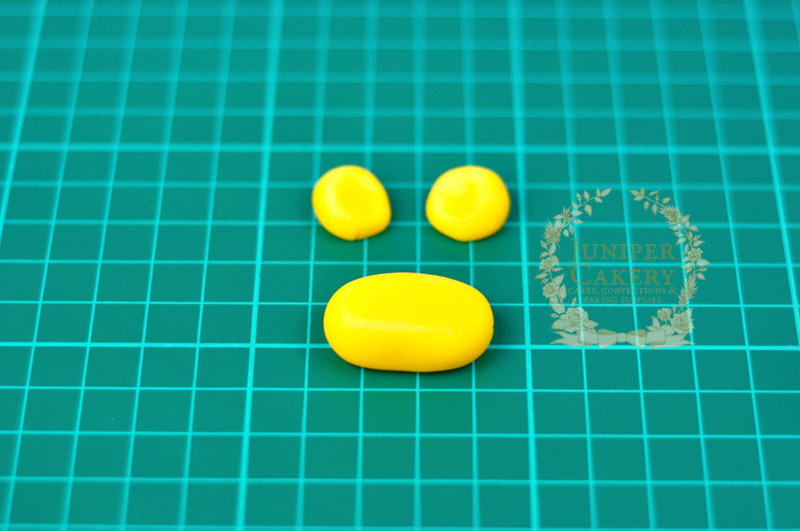
Step 4: For the muzzle make an oblong shape of yellow fondant / sugarpaste. For the ears make two small balls, flatten them slightly and with the ball tool indent where they’ll be place.

Circus lion cupcake topper

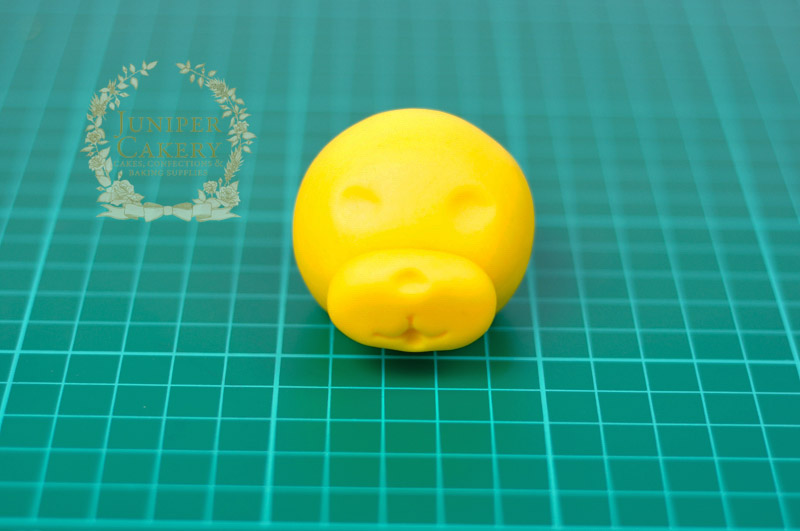
Step 5: To begin creating the face attach the muzzle to the flattened lower front area of the head with some edible glue. Use the scallop tool to create the mouth. With the ball tool indent the eye sockets, nose and a groove for the tongue to fit into.

How to make a cute lion topper

Step 6: Take the head and attach onto the body with a little edible glue on the cocktail stick.

Step 7: Use smaller pieces of a cocktail stick pushed into both sides of the lion’s head and attach the ears with some edible glue.

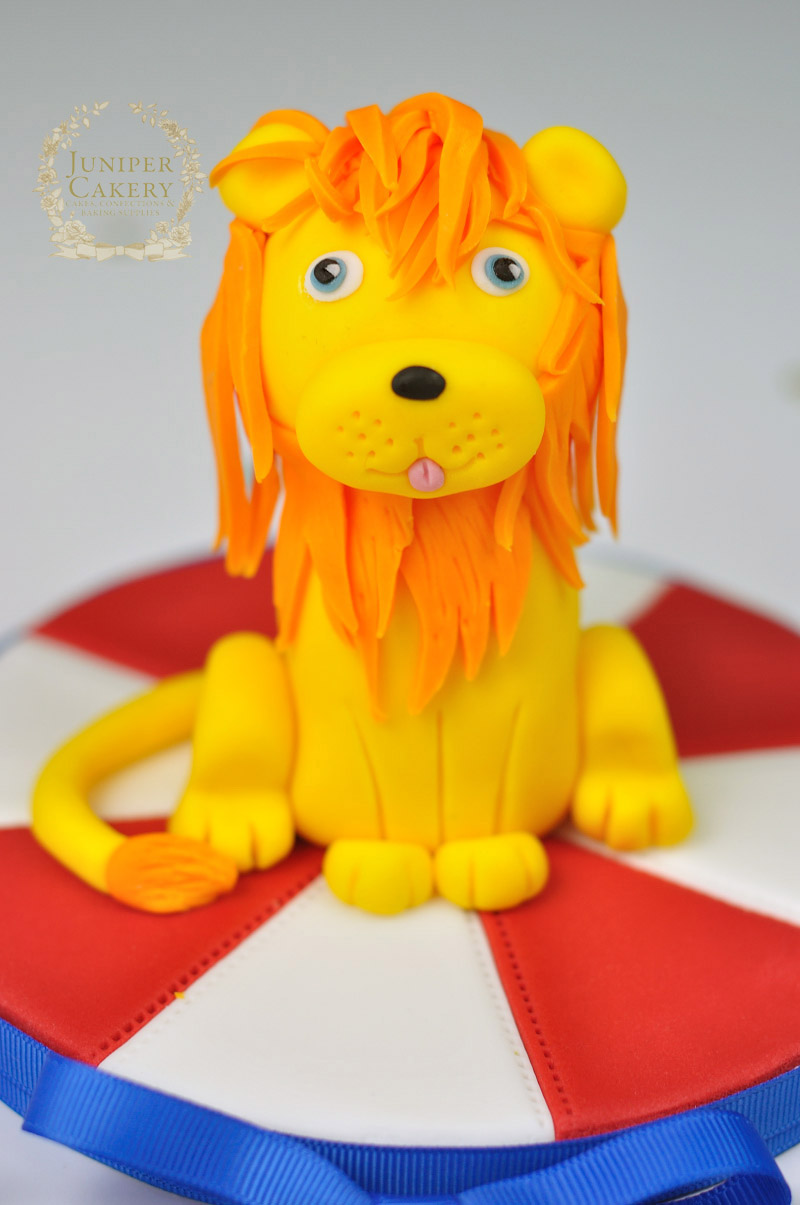
Step 8: To create the mane roll out some orange fondant / sugarpaste. With the blade tool cut out a series of jagged shapes and draw lines into them lightly with the scriber tool. Attach these around the lion’s head with edible glue.

Circus lion cake and cupcake topper tutorial by Juniper Cakery

Step 9: For the tail roll out a rope of yellow fondant and finish the end with a tapered piece of orange fondant detailed with lines. Attach to the back with edible glue once the lion is finished and sat on your cake or cupcake!

Step 10: Add the final details such as the tongue, whiskers (you can add white floral wire or just create dots with a scriber tool), the nose and the eyes. For the eyes simply layer colours of fondant / sugarpaste. Begin with the whites, indent with the small end of the ball tool, add the eye colour, indent again, then add a little black and then a tiny amount of white.

Fun sugar paste lion tutorial


Our Tips For Filling Layer Cakes!

Sometimes the most simple of tasks can be a little bamboozling and may not be so simple after all. Knowing how to fill your cakes and what to avoid can make or break that 6 tier masterpiece you’ve spent weeks designing. Head on over to the Craftsy Blog to read our top tips on how to fill your cakes to perfection!

Strawberry Jam and Whipped Cream Cake by Juniper Cakery


Fairy Tale Recipe & Tutorial: Shooting Star Cupcakes!

This week we’ve put together a wonderfully adorable fondant / sugarpaste tutorial on how to create some bright shooting stars. These are perfect for baby showers, kids’ parties, birthdays or themed events. We’ve also included a recipe for deliciously sweet and tangy lemonade cupcakes which are sure to be a hit with all ages!

Shooting Star Cupcake tutorial by Juniper Cakery

Shooting Star Cupcake tutorial by Juniper Cakery

Shooting Star Cupcake tutorial by Juniper Cakery

Fondant Shooting Star Decor

You will need…

Yellow fondant
Black fondant (optional)
Sprinkles (optional)
Ball tool
Scallop tool
Icing sugar to dust
Fondant rolling pin
Star cutter
Cling film
Water
Paintbrush
Edible or non-toxic cake decorating glitter (optional)
Melted white chocolate

step02

Step one: Roll out some yellow fondant to a thickness of approx. 7mm and sandwich this between two pieces of cling film before cutting out your star shape. The cling film on top helps create clean, rounded edges whilst the cling film under the fondant prevents the shape sticking to the surface.

step3

Step two: Carefully shape the star into a chunkier shape by rounded the tips with your fingers.

step4

Step three: Add cute facial details with a ball tool and scallop tool. At this stage you can add eyes with springs, sugar pearls, balls of fondant etc.

step5

Step four: Create the shooting star’s tail by rolling out ‘ropes’ of fondant that taper off.

step6

Step five: Create three ‘ropes’ to form the tail and arrange. Glue these together with either water or melted white chocolate. Once dry attach the tail to the back of the star with melted white chocolate. Then you can add edible glitter, lustre dust, sprinkles etc!

To assemble your Shooting Star Cupcakes pipe your lemon cupcakes with the freshly made lemonade buttercream (we used a disposable piping bag fitted with an 828 piping tip) then carefully nestle a shooting star atop each once set. Place on a tiered cupcake stand amidst star shaped confetti for a playful and tempting display!

Shooting Star Cupcake tutorial by Juniper Cakery


Review: Step by Step Cake Decorating by Karen Sullivan

When we were asked to review Step by Step Cake Decorating by Karen Sullivan we jumped at the chance. As professional bakers and cake decorators we have amassed an impressive collection of cooking and baking books.

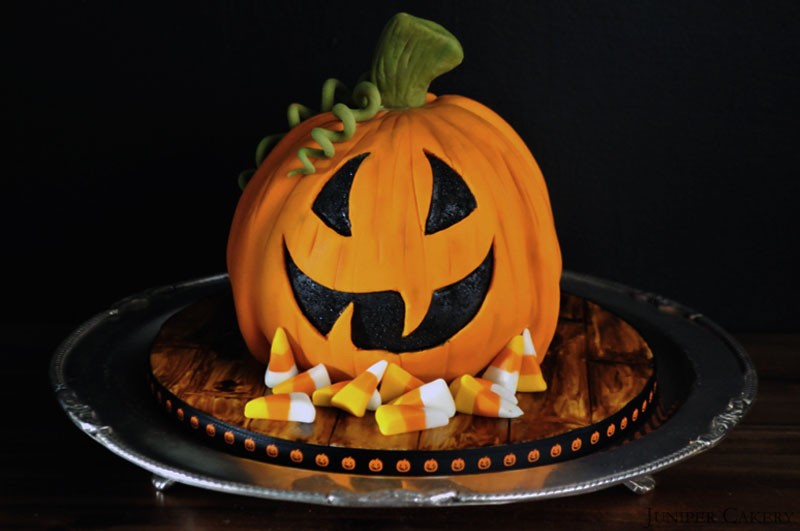
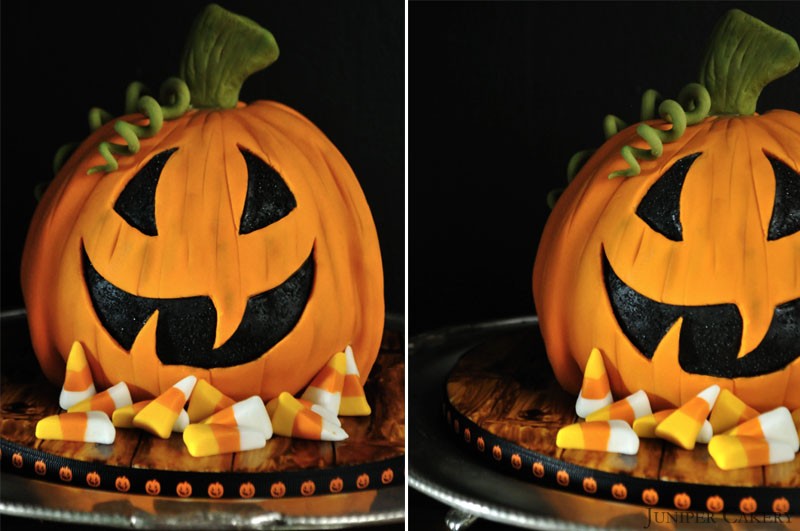
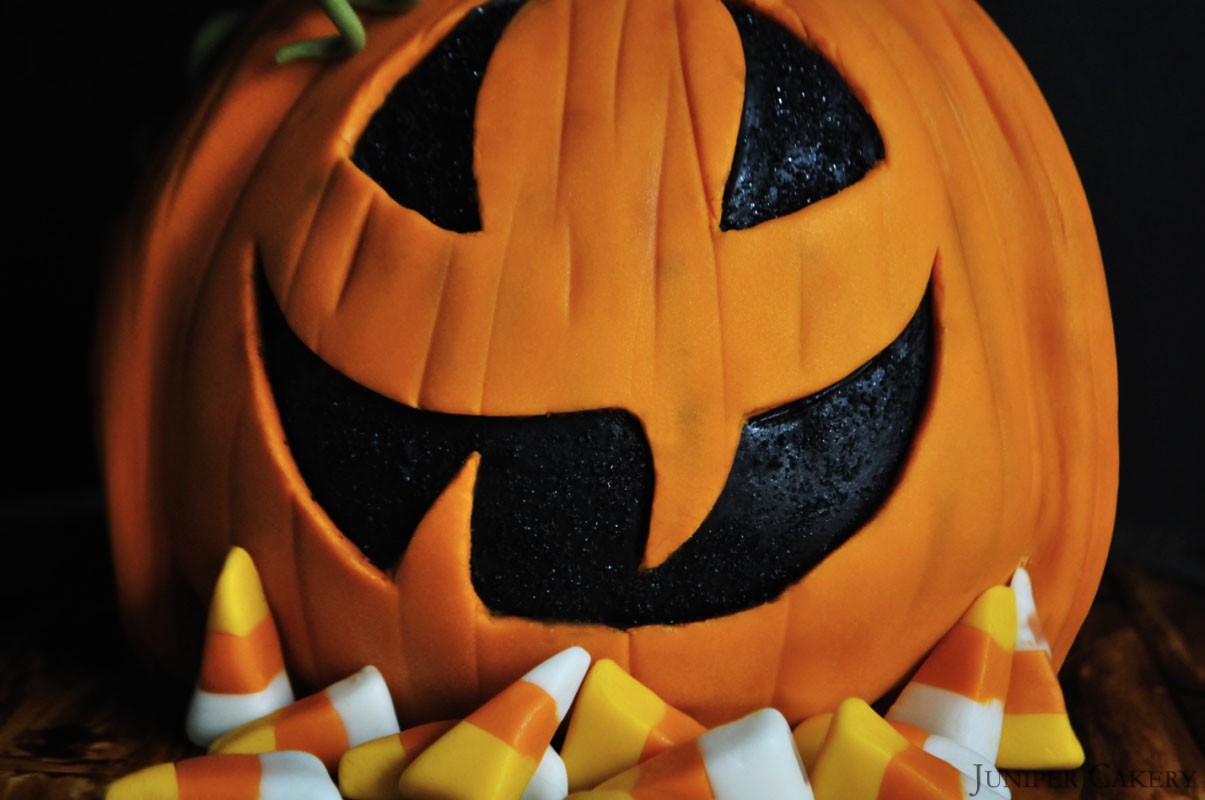
In order to review Step-by-Step Cake Decorating we decided to be hands on and re-create a playful and seasonal cake from within the book… the fun jack o’ lantern! We put our own spin on this cake and added candy corn (a bit of an addiction in the Juniper Cakery office) which we made using strips of coloured sugarpaste / fondant. We also decorated our cake board with wood effect painted fondant. The pumpkin cake itself was created by following the book’s instructions step by step.

Pumpkin Cake by Juniper Cakery

Step by Step Cake Decorating by Karen Sullivan is a great beginners guide where novices will find an array of cakes to re-create. The instructions for this fun, ‘fangtastic’ cake were clear and concise and prove to be a prime example of how accessible other tutorials are in the book. Whilst the tutorial is simple and straightforward you’ll still be eased into learning some handy terminology throughout. There are a good few pages dedicated to introducing the decorator to a selection of tools and equipment with explanations of use where needed. These tools range from basics such as scrapers and turntables to specialist items such as airbrushing machines and florist tape. The difference between a cake drum and cake board is also discussed as are other basics such as how to fill and cover a layer cake.Step by Step Cake Decorating BookStep-by-Step Cake Decorating by Karen Sullivan, published by DK, £16.99 at dk.com

For advanced cake decorators this will still become a reference book where quick ideas, tips and tricks of the trade are at the ready as we all have our ‘designer’s block’ days. Though the jack o’ lantern cake is one of our personal favourites, and a fitting choice for this time of year, there are still plenty of projects to take you though winter, spring and summer too! There are also great ideas for children’s birthdays including, but certainly not limited to, a pirate ship, dinosaur and a train.

Pumpkin Cake by Juniper Cakery

Step-by-Step Cake Decorating by Karen Sullivan is a book filled with fun and vibrant projects. This book a great introduction to those eager to begin learning the craft and the book even includes and a collection of basic cake, icing and buttercream recipes ready for you to get creating!

Pumpkin Cake by Juniper Cakery

If you’d love to get your hands on a copy of Step-by-Step Cake Decorating by Karen Sullivan why not try your luck at entering our giveaway! We have two copies ready to send out to two lucky winners. All you need to do is comment on this post! Entrants must reside in the UK and have their comment submitted by November 1st. The two lucky winners will be chosen at random and will be announced via our blog and social channels (Twitter, Facebook, Pinterest & Instagram) on November 4th. Good luck!

blogbookgive


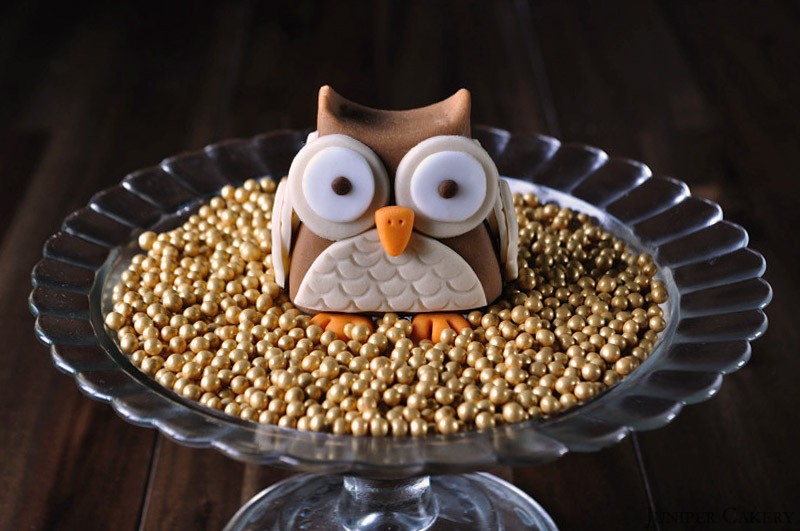
Tutorial Tuesday: How to Make a Sugarpaste Owl!

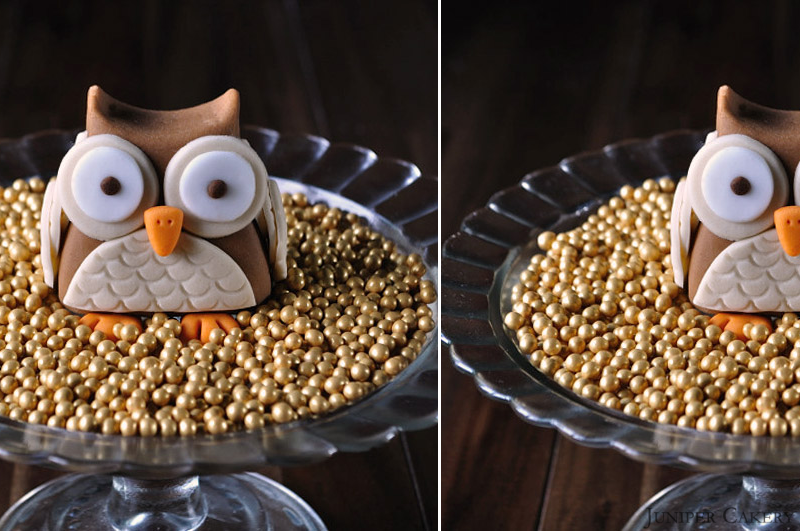
Yay! It’s now September which means that the lovely cosiness of Autumn (or Fall depending on where you are) is just around the corner! Autumn and winter are our favourite seasons here at Juniper Cakery and we get excited when they arrive every year. What’s not to love… lovely vibrant crisp golden leaves, cooler weather, bundling up in mis-matched knitwear, hot cocoa, spiced cakes, Halloween festivities and of course Christmas. With all this in mind this week’s tutorial is an adorable autumnal owl in fetching seasonal shades of browns and rust orange. This little creature will sit perfect on top of cupcakes and forest themed cakes!

How to make a sugarpaste / gumpaste owl

How to make a sugarpaste / gumpaste owl

What you need for this tutorial…

Sugarpaste / fondant in three complimentary colours
Water
Paintbrush
Round piping tip (use the large bottom for cutting)
Blade modelling tool
Ball modelling tool
Scallop and comb modelling tool
Circle cutters

How to make a sugarpaste / gumpaste owl

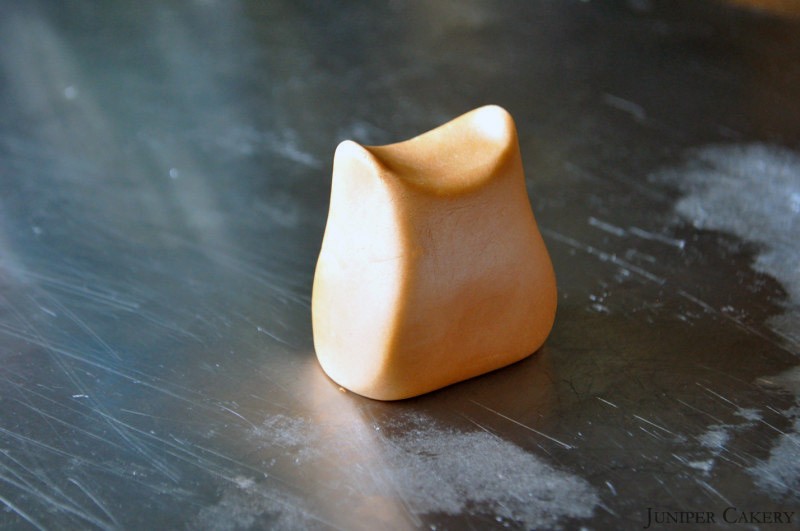
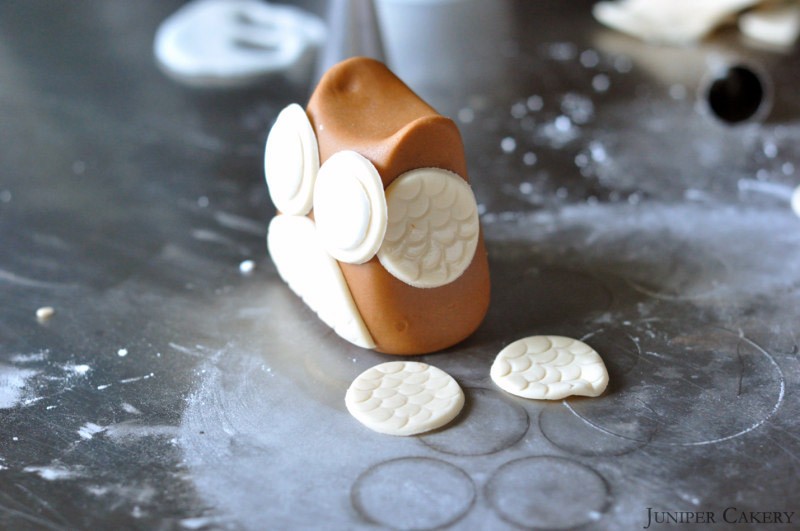
Step one: Use your chosen base colour to mould what we would describe as an upside down tooth shape as pictured above. Use your finger and thumb to pinch two ‘ears’ for your owl and smooth any stretches/cracks with your fingers.

How to make a sugarpaste / gumpaste owl

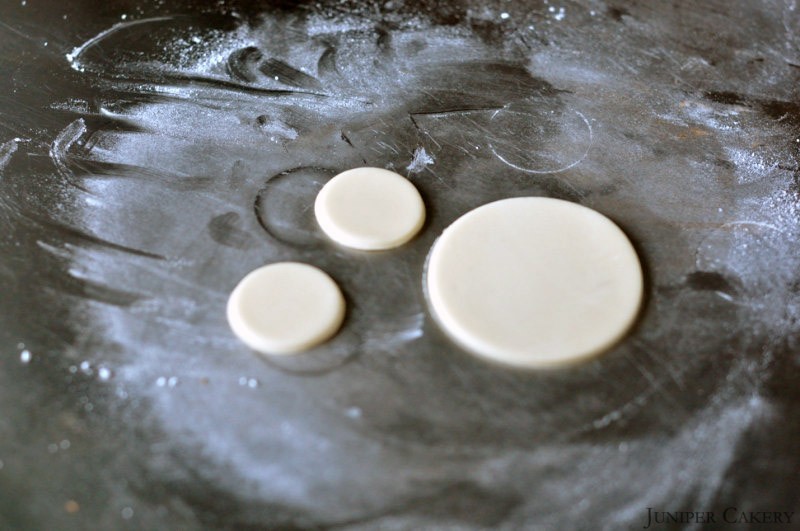
Step two: Using a small circle cutter and the end of a piping tip cut one small and two extra small circles out.

How to make a sugarpaste / gumpaste owl

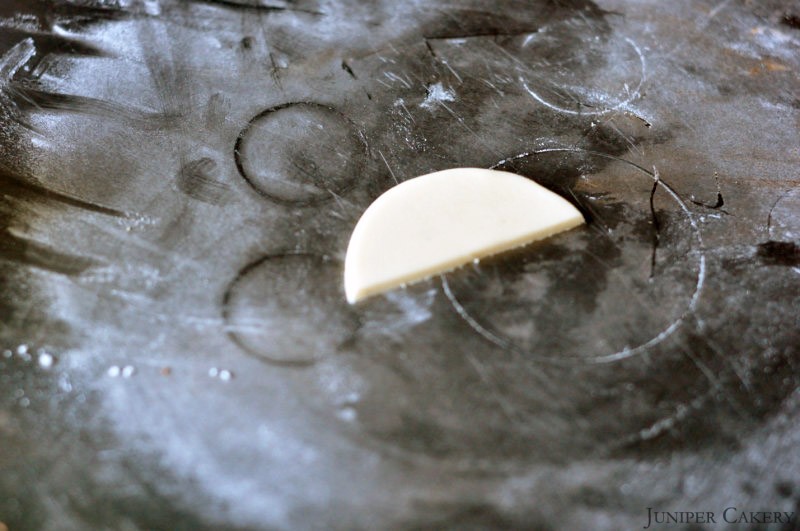
Step three: Slice the small circle into two halves. Into one of the halves create a ‘feathered’ pattern using the scallop and comb tool.

How to make a sugarpaste / gumpaste owl

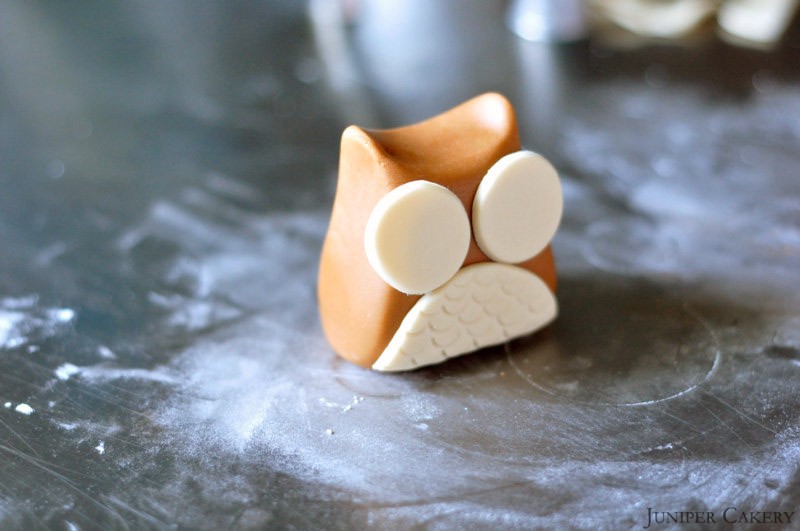
Step four: Now stick the two extra small circles in place as eyes and the half circle in place as a chest. For extra detail why not cut out smaller circles in an opposite colour and place them on top of the extra small circles, this will add extra dimension to your owl’s eyes.

How to make a sugarpaste / gumpaste owl

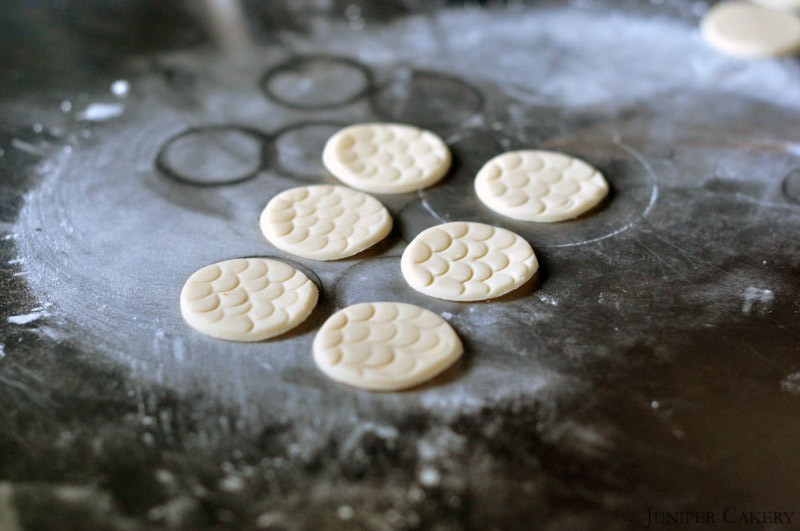
Step five: Using the piping tip again cut out three circles and add feathered detail using the scallop end of the scallop and comb tool.

How to make a sugarpaste / gumpaste owl

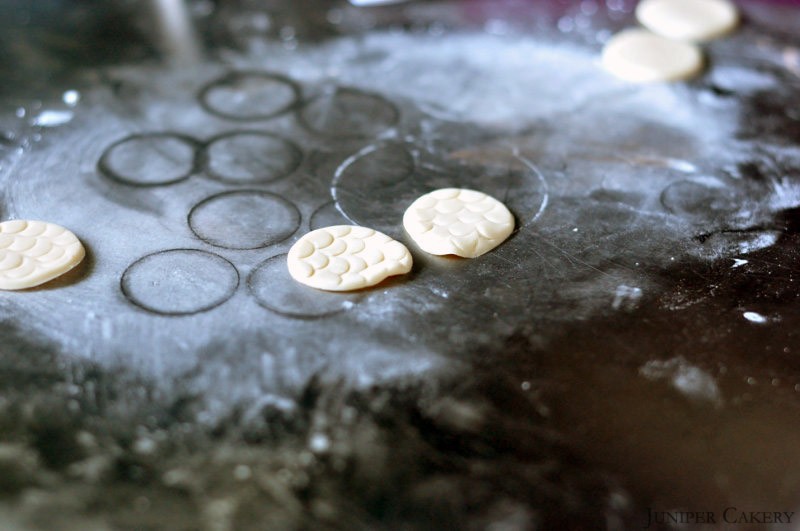
Step six: Pinch two of the circles with your finger and thumb to create a tapered ‘wing’.

How to make a sugarpaste / gumpaste owl

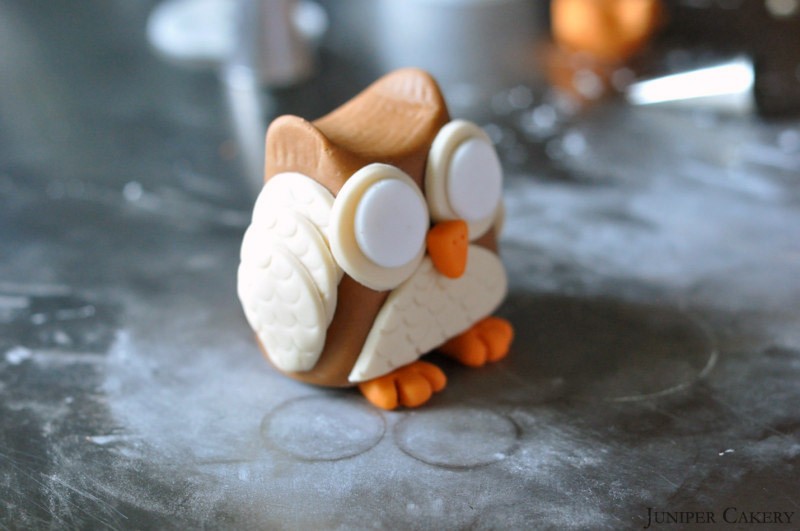
Step seven: Begin sticking the circles in place overlapping them as you go. Stick the tapered circle on last as this will finish your owl’s wing off nicely.

How to make a sugarpaste / gumpaste owl

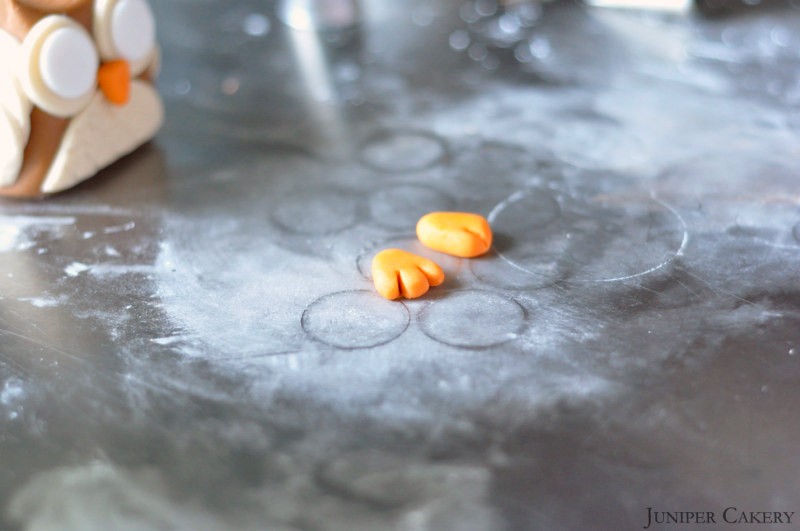
Step eight: Using a contrasting colour to your owl’s body make a chunky teardrop shape. Use the blade tool to make two slits at the non-tapered end, mould with your fingers to get rid of any sharp/rough edges. Repeat this once more and you now have your owl’s feet!

Step nine: Make a similar, but smaller, shape pinching the edges to get a triangle. Stick between the eyes, poke in two small holes and your owl now has a beak!

How to make a sugarpaste / gumpaste owl

Step ten: Stick in place using edible glue by simply sitting your owl on top of them. The weight will secure them and help the glue set.

How to make a sugarpaste / gumpaste owl

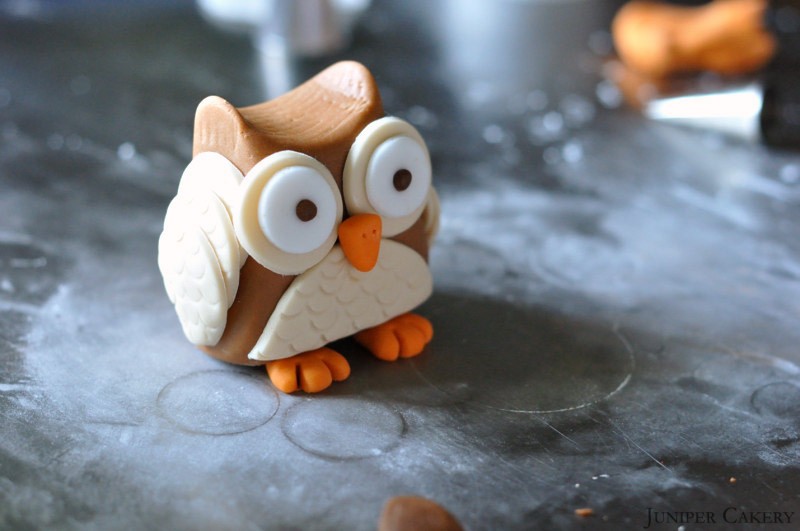
Step eleven: Roll two small balls of fondant, make an indentation in your owl’s eyes, and press in the two small balls for pupils!

How to make a sugarpaste / gumpaste owl

Now you’ve made your very own sugarpaste owl! This can be made in any colour for any occasion and your little owl can be nestled atop a cake and cupcakes!


CAKE101: Chill Your Cakes Beforehand if Blow Torching

Blow torching the sugared toppings of some cupcake flavours creates a delicious crunchy caramelised texture, but the buttercream underneath can be easily melted away by the heat. Our tip is to utilise your fridge or freezer to chill down the frosting.

CAKE101 Chill your cakes before blow torching

“Before caramelising and blow torching the tops or toppings of cupcakes leave your cakes to sit in the fridge until chilled and firm. You don’t want your buttercream to melt so begin with cold frosting.”


CAKE101: Make Your Own Cupcake Wrappers

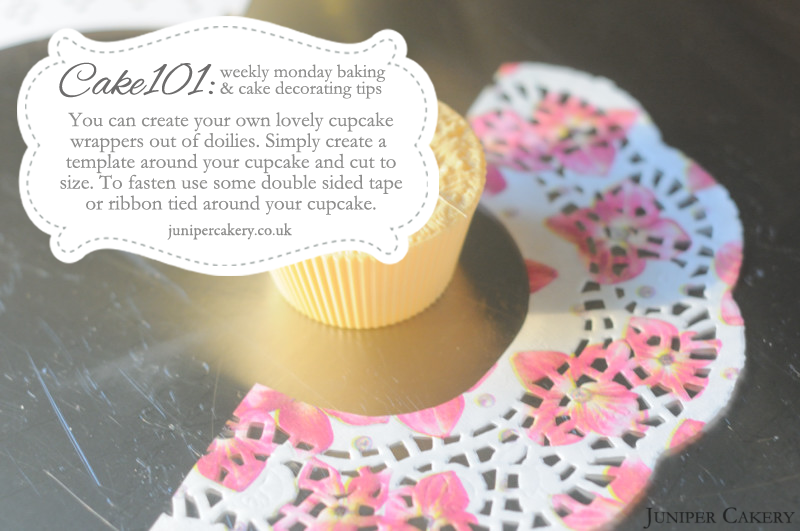
Sometimes you may need to custom decorate your cupcakes with something extra. Creating cupcake wrappers for themed celebrations is quick and fun! All you need are some cupcakes, doilies, scissors and double sided tape!

CAKE101 Make Your Own Cupcake Wrapper

“You can create your own lovely cupcake wrappers out of doilies. Simply create a template around your cupcake and cut to size. To fasten use some double sided tape or ribbon tied around your cupcake.”


×