Circus Cake & Cupcake Topper Tutorial: Lion

As the days and months get brighter so do our colour palettes! That was our main thought when we began discussing tutorial themes… vibrance. With that in mind, of course, our newest collection of cake and cupcake decorating tutorials look at the bright colours and animal characters from cartoon circuses! This week we show you how to create your own friendly lion; perfect for kids’ party cakes. This character is so easily adaptable to suit other themed cakes and cupcakes too; add a golden crown for a playful royal design or change the colours and create other characters for an amazing selection of Narnia cupcakes!
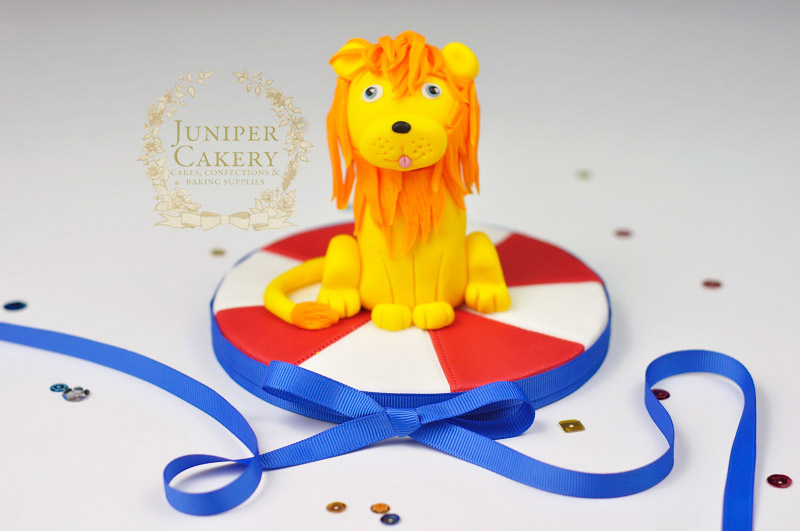
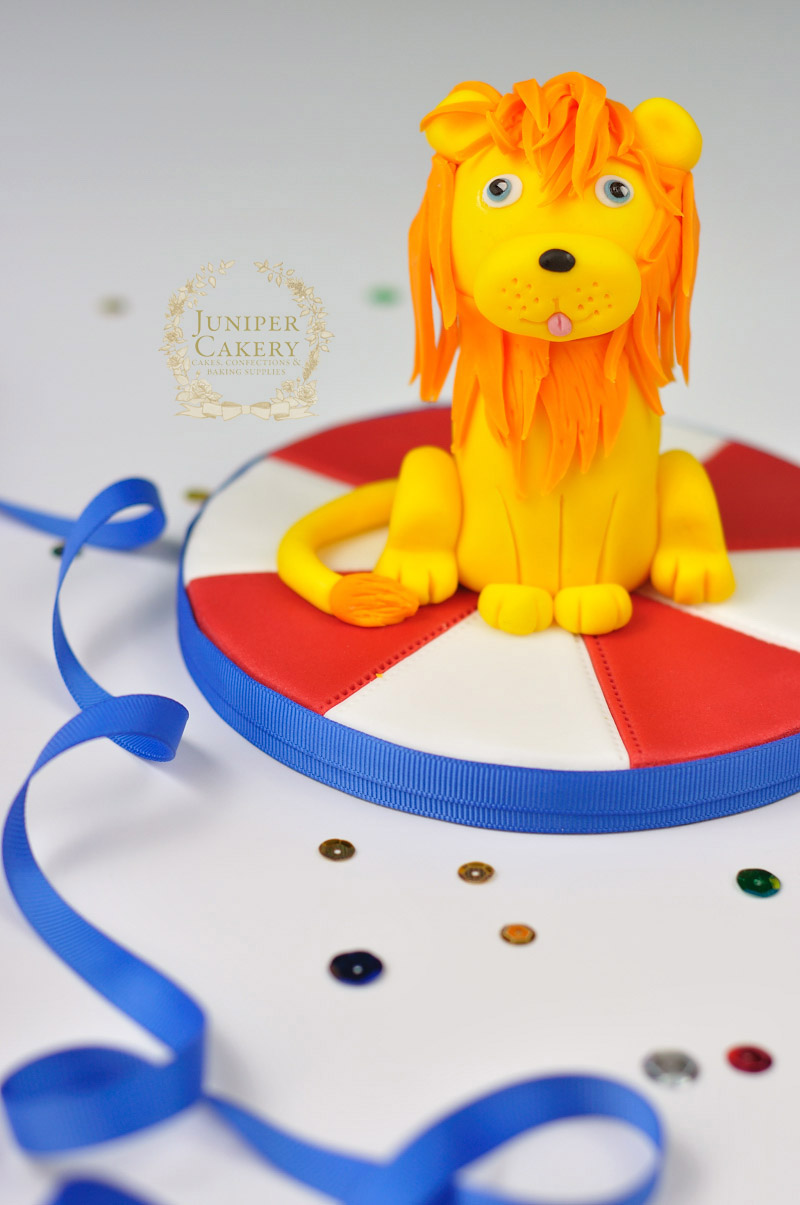
Fondant lion cake topper tutorial

How to make a circus lion cake topper by Juniper Cakery

You’ll need…

Learn how to make a sugar paste lion

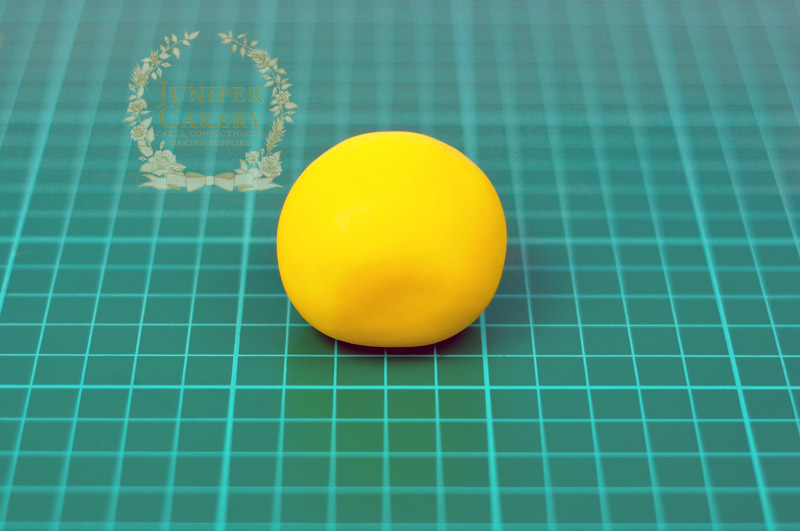
Step 1: Form a ball of yellow fondant / sugarpaste (mixed with a pinch of tylo powder to help make the fondant / sugarpaste harder) approximately the size of a ping pong ball. Slightly flatten the lower part of the front where the muzzle will be attached later.
Circus lion cupcake topper tutorial

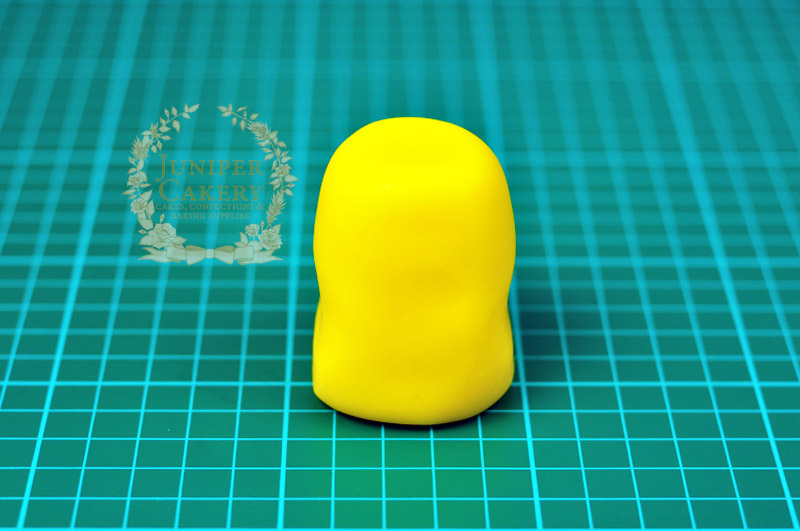
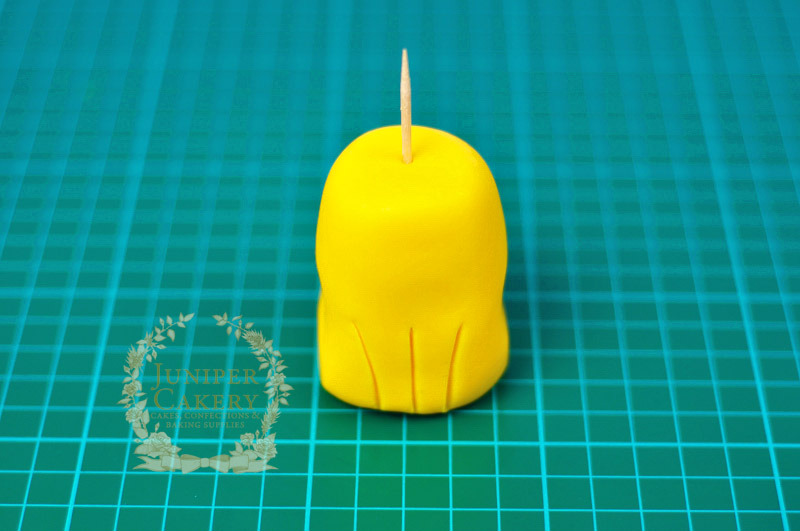
Step 2: With some tylo mixed yellow fondant / sugarpaste form a larger ball (around double the size as the piece in step 1) and mould oblong smoothing the sides inwards to create a slight hourglass shape.
Lion cupcake topper how to

Step 3: With a blade tool etch two front legs and then push a cocktail stick down the centre. The head will attach to this so make sure the stick won’t protrude out of the yellow ball made in step 1.
Tutorial for a sugar paste lion figure

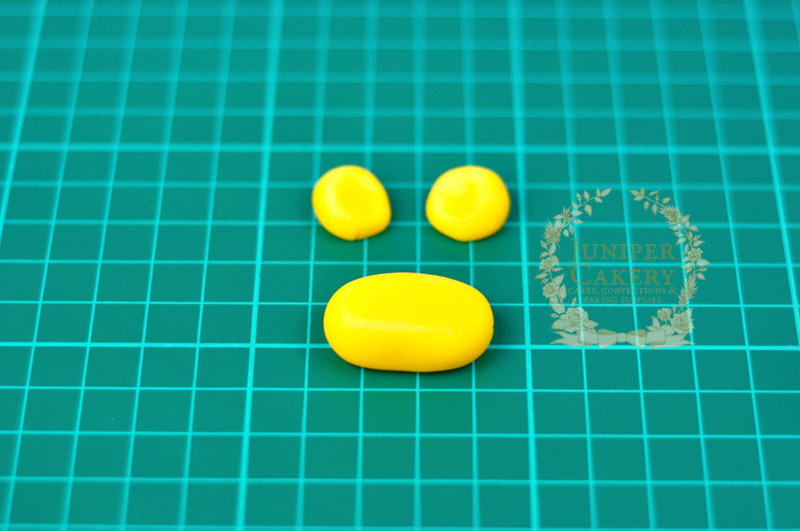
Step 4: For the muzzle make an oblong shape of yellow fondant / sugarpaste. For the ears make two small balls, flatten them slightly and with the ball tool indent where they’ll be place.
Circus lion cupcake topper

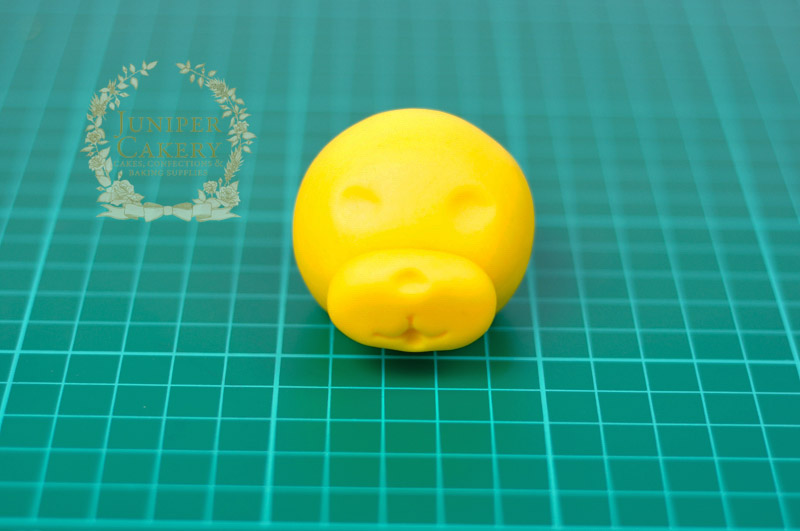
Step 5: To begin creating the face attach the muzzle to the flattened lower front area of the head with some edible glue. Use the scallop tool to create the mouth. With the ball tool indent the eye sockets, nose and a groove for the tongue to fit into.
How to make a cute lion topper

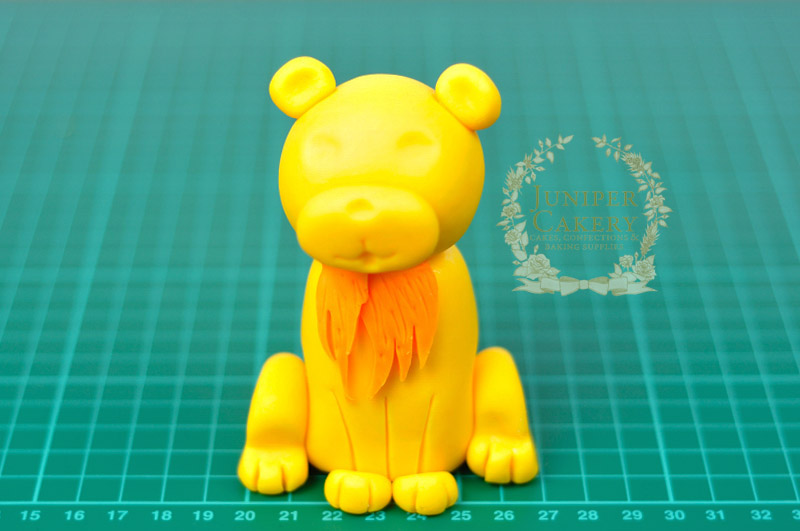
Step 6: Take the head and attach onto the body with a little edible glue on the cocktail stick.

Step 7: Use smaller pieces of a cocktail stick pushed into both sides of the lion’s head and attach the ears with some edible glue.

Step 8: To create the mane roll out some orange fondant / sugarpaste. With the blade tool cut out a series of jagged shapes and draw lines into them lightly with the scriber tool. Attach these around the lion’s head with edible glue.
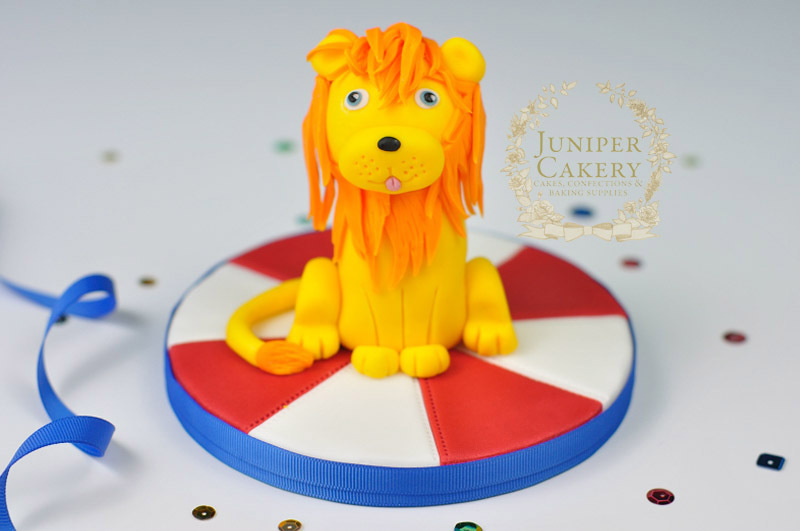
Circus lion cake and cupcake topper tutorial by Juniper Cakery

Step 9: For the tail roll out a rope of yellow fondant and finish the end with a tapered piece of orange fondant detailed with lines. Attach to the back with edible glue once the lion is finished and sat on your cake or cupcake!

Step 10: Add the final details such as the tongue, whiskers (you can add white floral wire or just create dots with a scriber tool), the nose and the eyes. For the eyes simply layer colours of fondant / sugarpaste. Begin with the whites, indent with the small end of the ball tool, add the eye colour, indent again, then add a little black and then a tiny amount of white.
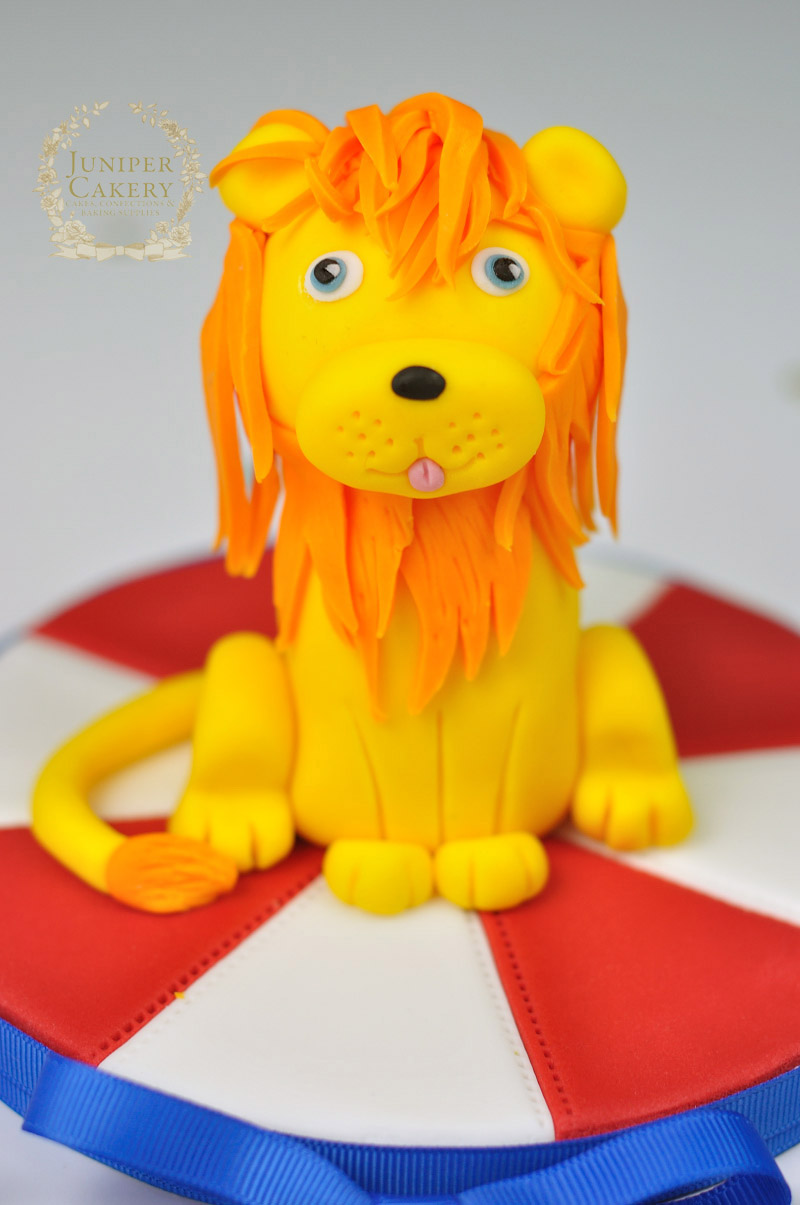
Fun sugar paste lion tutorial


Our Tips For Filling Layer Cakes!

Sometimes the most simple of tasks can be a little bamboozling and may not be so simple after all. Knowing how to fill your cakes and what to avoid can make or break that 6 tier masterpiece you’ve spent weeks designing. Head on over to the Craftsy Blog to read our top tips on how to fill your cakes to perfection!

Strawberry Jam and Whipped Cream Cake by Juniper Cakery


Fairy Tale Recipe & Tutorial: Shooting Star Cupcakes!

This week we’ve put together a wonderfully adorable fondant / sugarpaste tutorial on how to create some bright shooting stars. These are perfect for baby showers, kids’ parties, birthdays or themed events. We’ve also included a recipe for deliciously sweet and tangy lemonade cupcakes which are sure to be a hit with all ages!

Shooting Star Cupcake tutorial by Juniper Cakery

Shooting Star Cupcake tutorial by Juniper Cakery

Lemon Cupcakes with Lemon Buttercream
Serves 12
Lovely lemon cupcakes swirled with lemon buttercream
Write a review
Print
Prep Time
15 min
Cook Time
30 min
Total Time
45 min
Prep Time
15 min
Cook Time
30 min
Total Time
45 min
Ingredients
  1. CUPCAKES
  2. 226g Self-raising flour
  3. 226g Caster sugar
  4. 226g Butter or low fat margarine
  5. 4 medium eggs
  6. 6-12 Drops lemon extract
  7. .
  8. BUTTERCREAM
  9. 250g Butter
  10. 200-300g Icing / confectioner's sugar
  11. 6-12 Drops lemon extract
  12. 1 Tablespoon room temperature water
Instructions
  1. FOR THE CUPCAKES - Pre-heat the oven to Gas Mark 3 / 325 F / 170 C. Line a cupcake tray with 12 cupcakes cases.
  2. In a bowl cream together the butter/low fat margarine with the caster sugar until pale in colour and creamy.
  3. Add in the eggs.
  4. Once the eggs are mixed in add the flour and lemon extract. Mix until incorporated.
  5. Separately the mix equally between the 12 cupcake cases and bake on the middle shelf of your oven for 15-25 minutes.
  6. FOR THE BUTTERCREAM - Dice the butter into smaller pieces.
  7. In a bowl with a stand up mixer cream the butter.
  8. Gradually add in the icing / confectioner's sugar until it is the sweetness you like. For good buttercream you should be able to taste equal amounts of butter AND sugar.
  9. Add in the lemon extract and mix.
Notes
  1. If using low fat margarine please check the packet to see if it is suitable for baking with!
http://junipercakery.co.uk/blog/

Shooting Star Cupcake tutorial by Juniper Cakery

Fondant Shooting Star Decor

You will need…

Yellow fondant
Black fondant (optional)
Sprinkles (optional)
Ball tool
Scallop tool
Icing sugar to dust
Fondant rolling pin
Star cutter
Cling film
Water
Paintbrush
Edible or non-toxic cake decorating glitter (optional)
Melted white chocolate

step02

Step one: Roll out some yellow fondant to a thickness of approx. 7mm and sandwich this between two pieces of cling film before cutting out your star shape. The cling film on top helps create clean, rounded edges whilst the cling film under the fondant prevents the shape sticking to the surface.

step3

Step two: Carefully shape the star into a chunkier shape by rounded the tips with your fingers.

step4

Step three: Add cute facial details with a ball tool and scallop tool. At this stage you can add eyes with springs, sugar pearls, balls of fondant etc.

step5

Step four: Create the shooting star’s tail by rolling out ‘ropes’ of fondant that taper off.

step6

Step five: Create three ‘ropes’ to form the tail and arrange. Glue these together with either water or melted white chocolate. Once dry attach the tail to the back of the star with melted white chocolate. Then you can add edible glitter, lustre dust, sprinkles etc!

To assemble your Shooting Star Cupcakes pipe your lemon cupcakes with the freshly made lemonade buttercream (we used a disposable piping bag fitted with an 828 piping tip) then carefully nestle a shooting star atop each once set. Place on a tiered cupcake stand amidst star shaped confetti for a playful and tempting display!

Shooting Star Cupcake tutorial by Juniper Cakery