Our Bakery Cakes!

Bakery style cakes are fabulous. They’re fun, bright, and come in a variety of mouth-watering flavours. That’s why we’ve whipped up a small collection of bakery-style cakes perfect for the Easter festivities available for order and pick-up in the Kingston-upon-Hull area!

Our prices begin at just £10 for a small bakery style cake and can be customised further with different colour palettes and added messages too! If you’d love to order one, but had your heart set on a different flavour just get in contact with us and we’ll do our best to help. Email us or inbox us via Facebook to enquire.

Our bakery cakes in Kington-upon-Hull area…
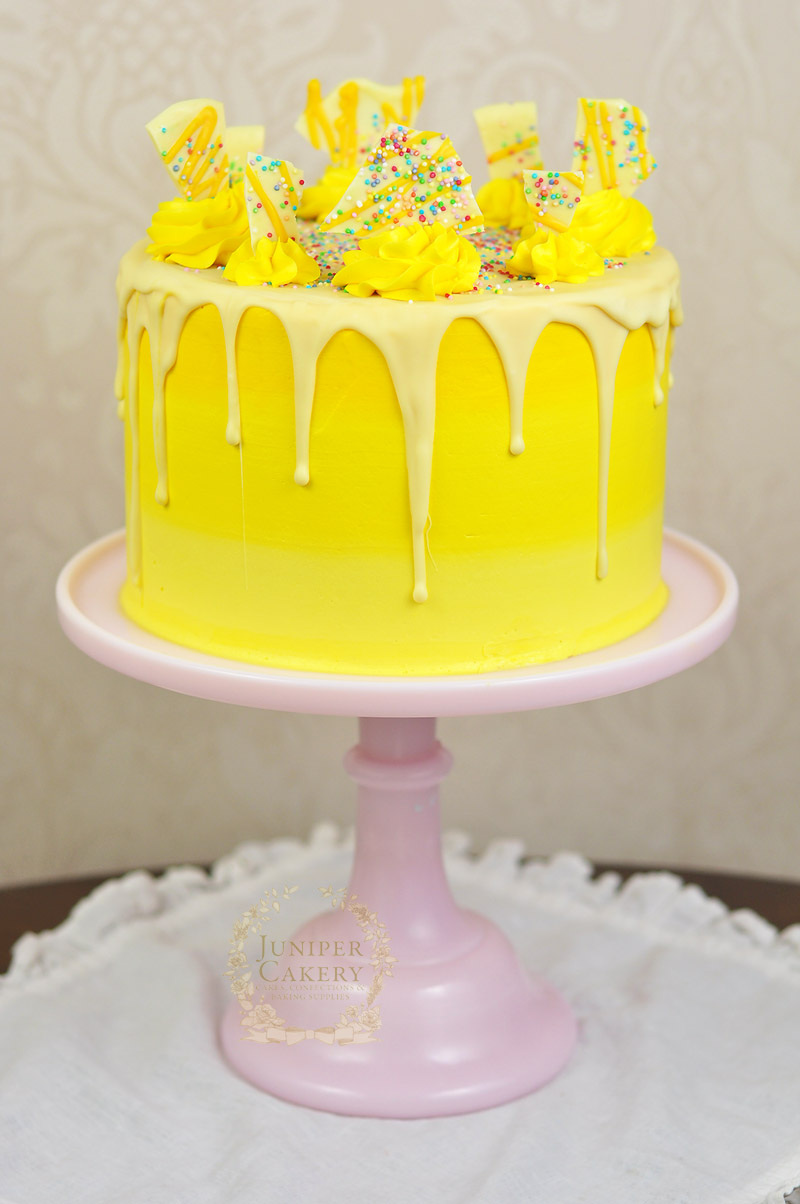
Lemon ombré bakery style cake by Juniper Cakery

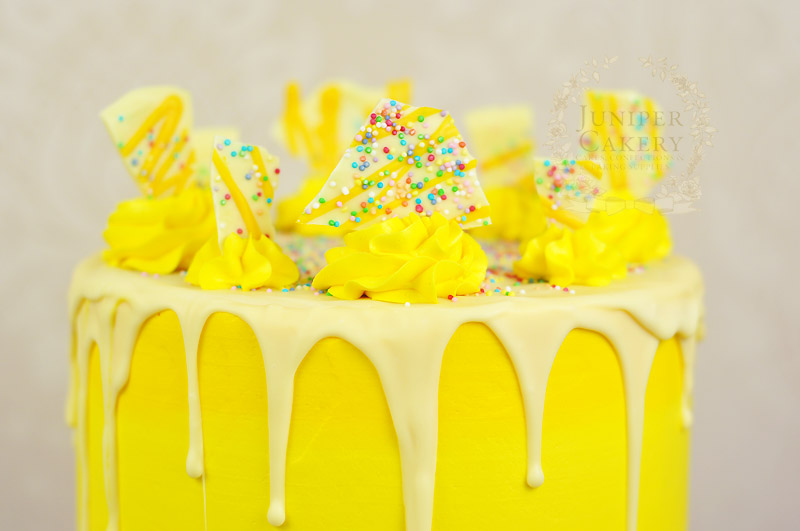
White chocolate and lemon cake by Juniper Cakery

Lemon ombré with white chocolate and Easter egg inspired ‘bark’

Wonderfully fresh tasting lemon cakes are always a crowd pleaser at a party or around a dinner table. Our lemon and white chocolate bakery cake is created using the finest Sicilian lemon oil along with Belgian white chocolate. We decorated ours with rainbow nonpareil sprinkles, but you can customise your cake with stars, hearts, edible pearls or even a personalised message! Why not email us or inbox us via Facebook for more info!

Soft vanilla cake filled with fresh lemon curd and Sicilian lemon oil infused buttercream, smoothed with chic ombré lemon buttercream, drizzled with white chocolate, sprinkled with rainbow nonpareils, piped with lemon buttercream and finished with white chocolate, lemon drizzle and sprinkle ‘bark’

Decorate cakes and cupcakes with this easy tutorial for Easter chocolate bark by Juniper Cakery

How to make simple Easter chocolate bark to decorate cakes and cupcakes with

Strawberry milkshake ombré with white chocolate and mini egg ‘bark’

Our Strawberry milkshake flavour was inspired by both a fabulous 1950s style diner we visited in Dublin and Felicity’s childhood spent in the Californian sun (where weekends involved drives around San Francisco with carousels, Arby’s Roast Beef sandwiches and malted strawberry shakes and rainbow sherbet ice cream). It’s an incredibly fragrant cake too and is the perfect mix of fun and fancy! For Easter we’ve adorned the Strawberry Milkshake cake with crumbled mini egg chocolate shards, but of course you could add fresh strawberries on top of each buttercream swirl or even a sweet hand-painted message! Email us or inbox us via Facebook for to enquire!

Soft vanilla cake filled with strawberry preserve and strawberry milkshake (strawberry with Madagascan vanilla and Belgian white chocolate) buttercream, smoothed with an ombré effect, drizzled with white chocolate, sprinkled with bright sugar pearls, piped with strawberry milkshake buttercream and finished with white chocolate and mini egg ‘bark’

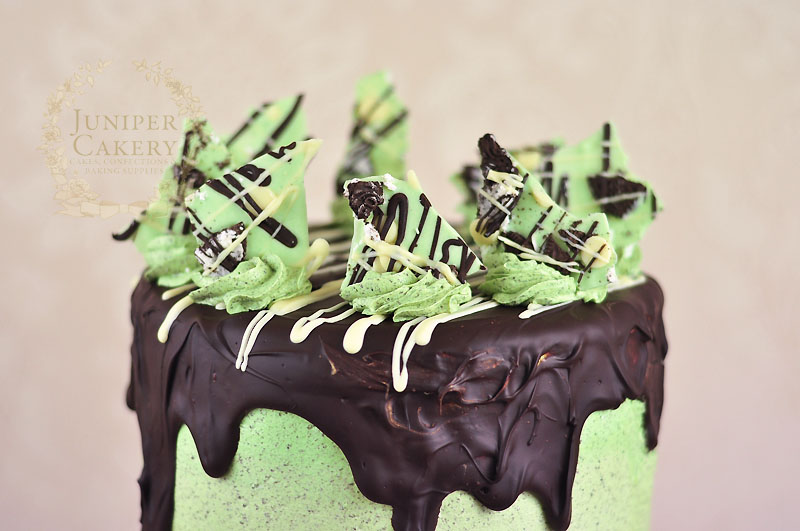
Peppermint Oreo Cake by Juniper Cakery

Peppermint and Cookies n Cream Cake by Juniper Cakery 

Peppermint cookies ‘n’ cream ombré with a dark chocolate drizzle and crushed Oreo ‘bark’

Inspired by both our love for anything Cookies ‘n’ Cream flavoured and fresh Mint Choc Chip ice cream this lovely cake is perfect for any chocoholic who also loves a little twist. We automatically adorn our bakery cakes with our made to order chocolate ‘bark’ or shards, however, you can opt for Oreo cookie on each swirl of buttercream and perhaps include a short message or name on a hand-painted custom plaque too!

Soft chocolate cake filled with peppermint and Oreo cookie buttercream, decorated with an ombré stripe effect, drizzled with dark and white chocolate, piped with more fragrant peppermint Oreo buttercream and finished with  a cookie crumb ‘bark’

Our bakery style cakes are perfect for anyone who needs a cake in a few days, who doesn’t like fondant or sugar paste icing or who simply just wants something fun and delicious!


Naked Cake with Rosemary & Candied Lemon Slices!

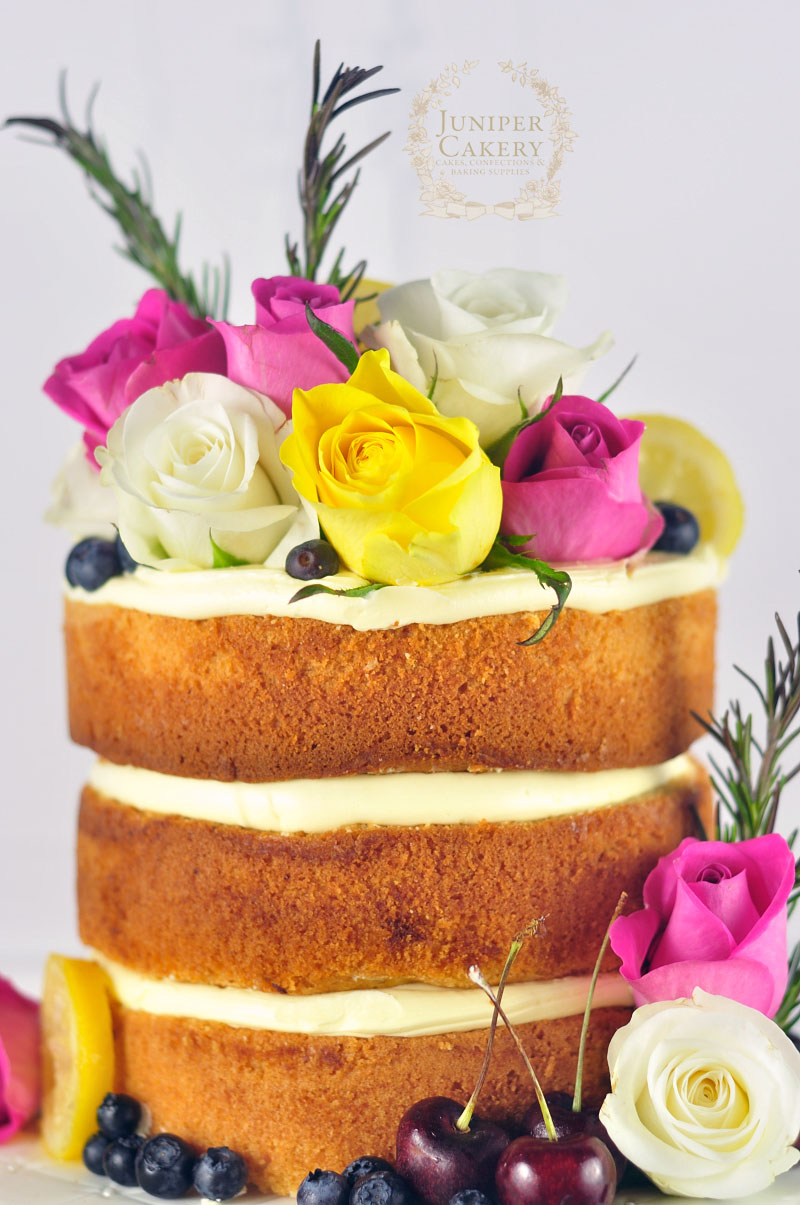
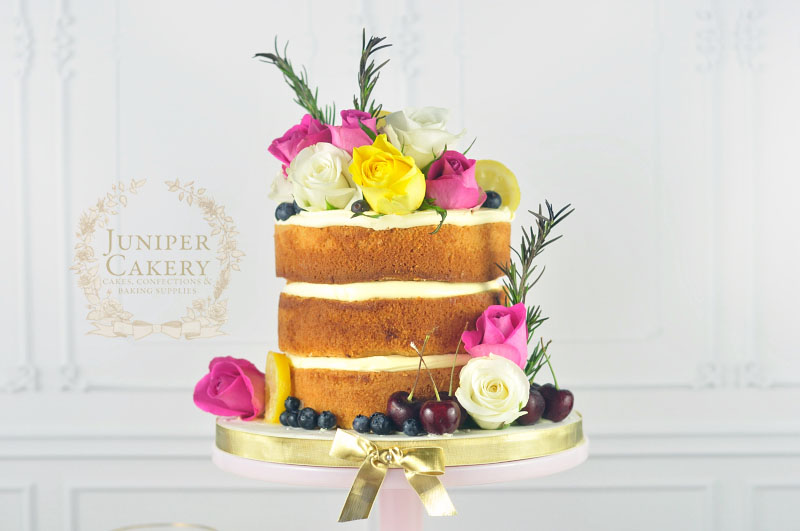
Every year we’re asked to create a birthday cake that utilises less fondant and sugar for the same diabetic client. This year, eager to try out the latest of cake trends, we whipped up this gloriously colourful naked birthday cake with them in mind! It’s a vanilla, lemon and white chocolate naked cake adorned with a flurry of roses, fruits and herbs!

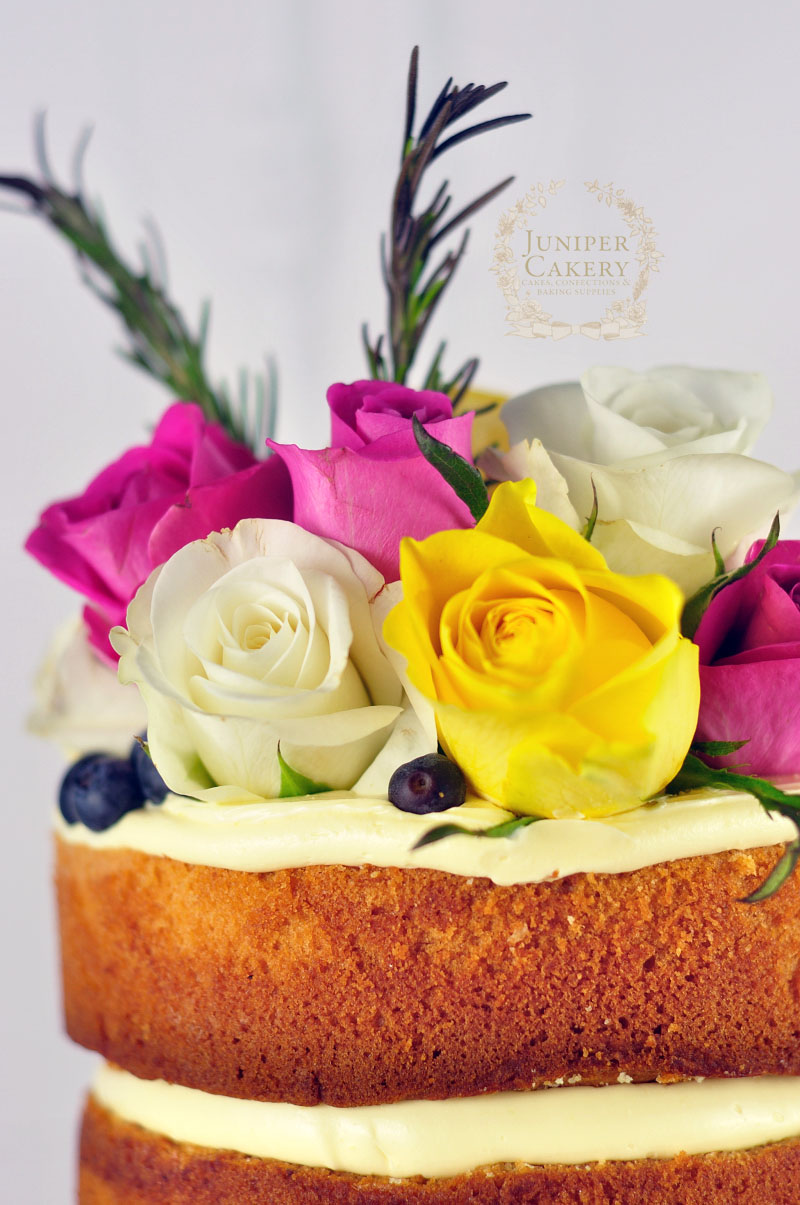
Naked birthday cake by Juniper Cakery

Pretty naked cake by Juniper Cakery

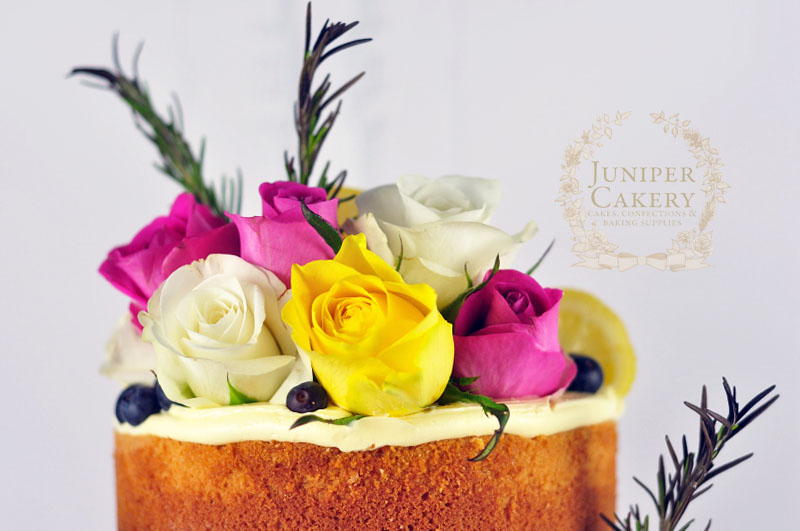
Decorating a freshly baked cake with bright roses, berries and sprigs of rosemary instantly added a touch of rustic glamour to the vanilla layers sandwiched with our whipped lemon oil and white chocolate buttercream! For a late summer birthday we opted for the most vibrant roses we could source so that this cake would feature some lovely pops of colour throughout.

Buttercream naked cake by Juniper Cakery

We used sprigs of freshly cut rosemary, blueberries, cherries, candied lemon slices, and bright roses to adorn this vanilla pod infused cake. The rosemary makes a rather fabulous (and edible) way of adding a feather-like aspect to the design. For future naked cakes we simply love the idea of covering the odd blueberry with decadent gold leaf, adding aromatic cinnamon sticks, using exotic star fruit slices and large sage leaves to add a quirky slant on the usual decoration of fruits and flowers!

The cake was placed on a quilted and sugar pearl studded board that was then trimmed with a luxurious liquid gold ribbon finished with a bow! We loved the idea of pairing the bright coloured roses with a little bit of gold and some Chanel influenced quilting for glamorous touch.

Gorgeous rose decorated naked cake by Juniper Cakery

Some other fabulous ideas for more unusual naked cakes include red velvet layers, vanilla cakes filled with sprinkle infused buttercream, or a dark chocolate cake paired with a salted caramel and Nutella buttercream; perfect for the discerning and adventurous epicurean!

Rosemary and lemon naked cake by Juniper Cakery


Zesty Lemon Cupcake Recipe!

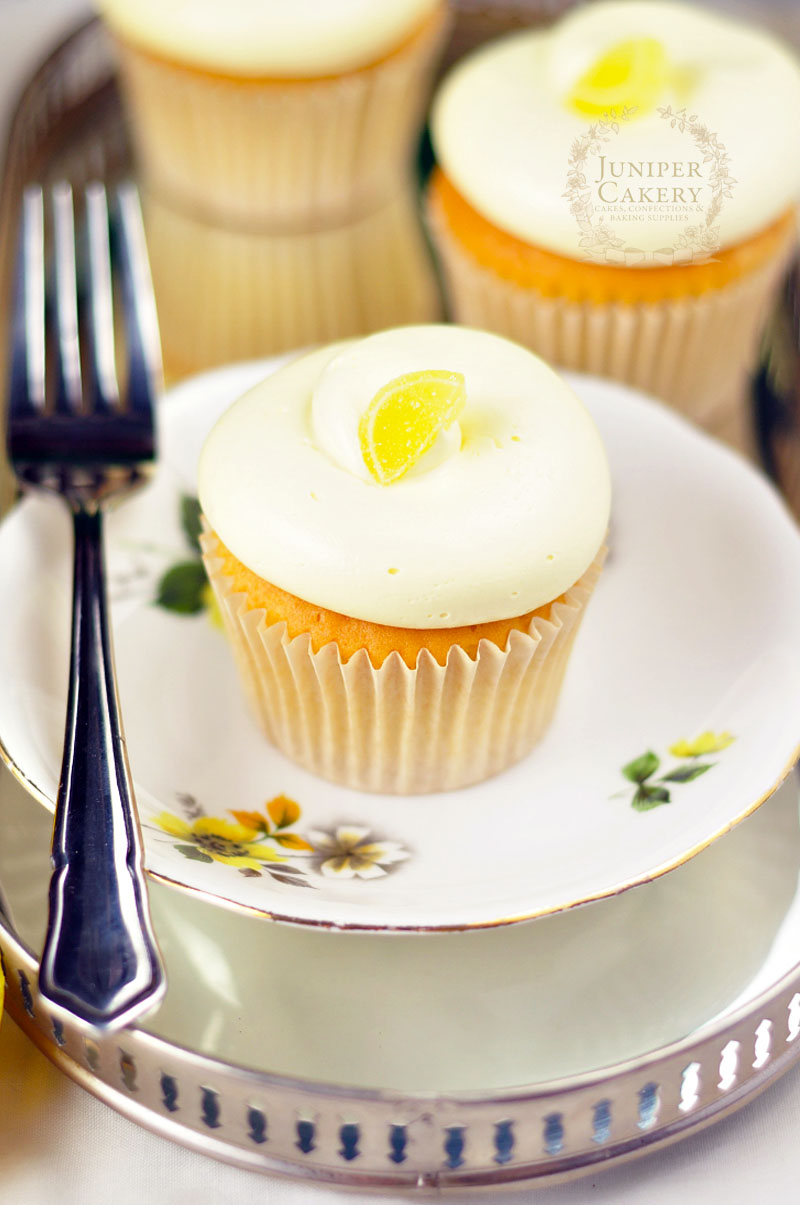
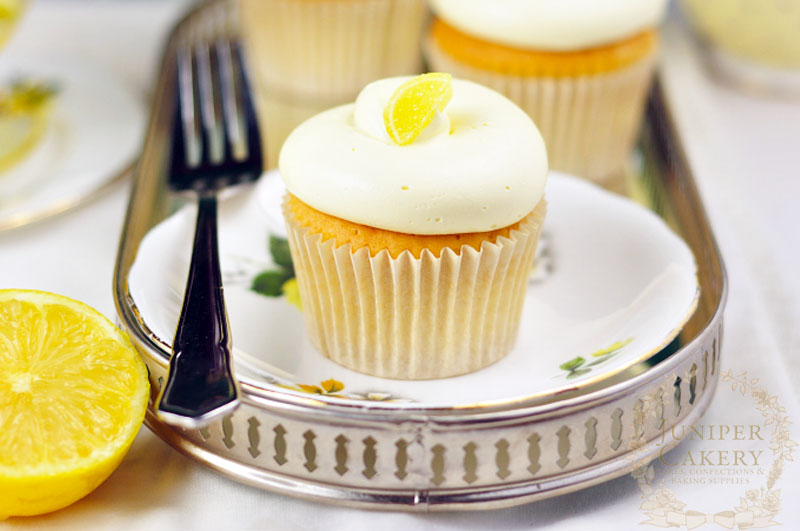
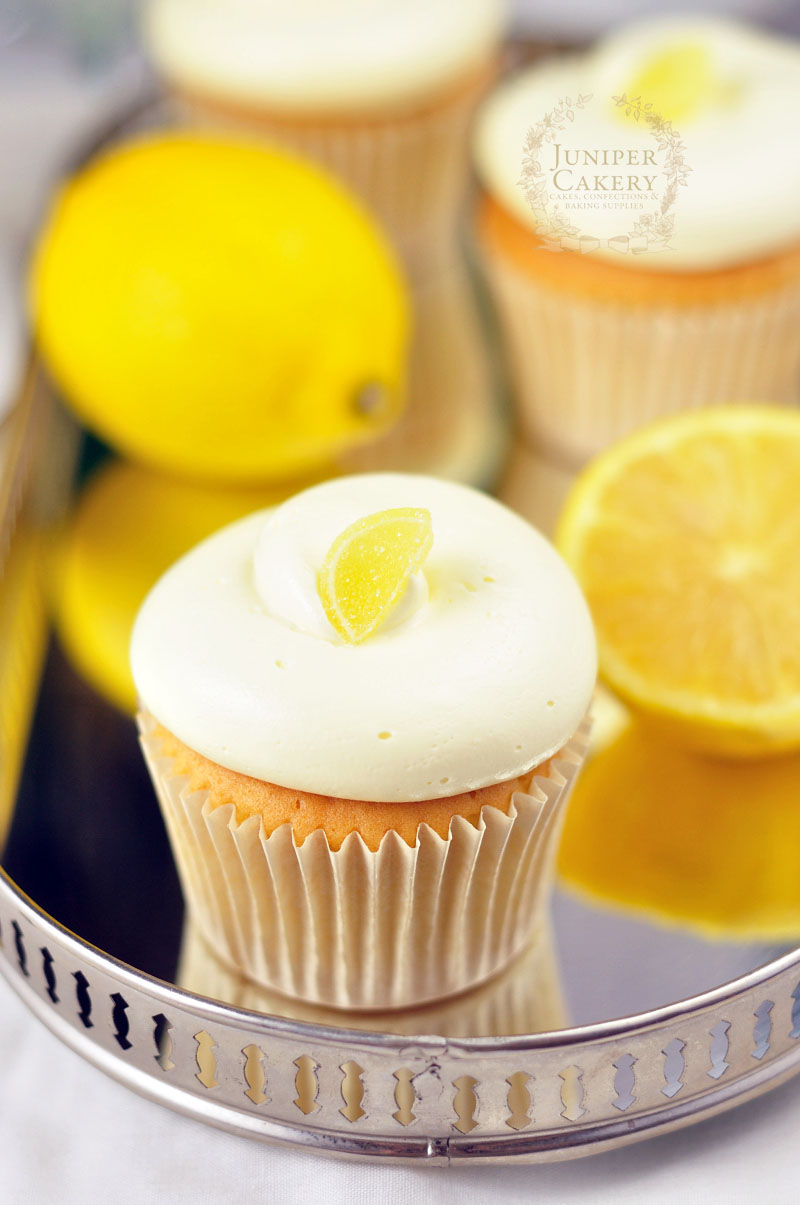
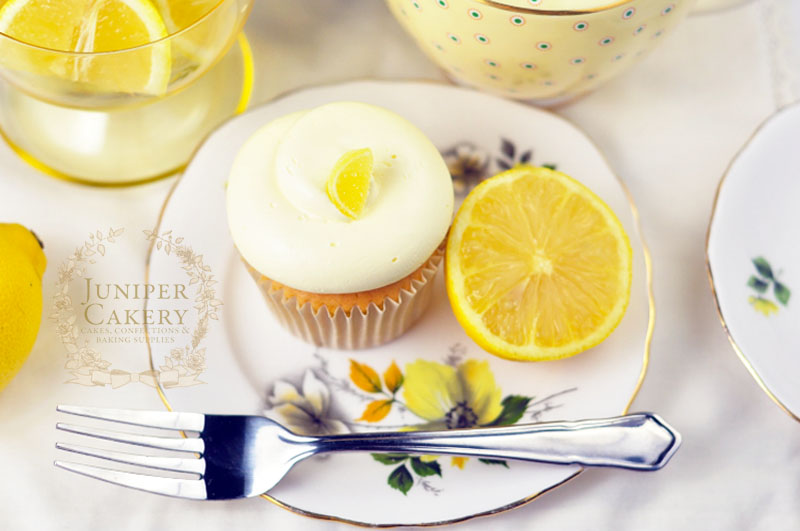
This fabulous lemon cupcake recipe is always a definite hit for us when in need of a little afternoon pick-me-up. We love the sweet yet tangy dimensions of taste found in these little gems and adore how they work so well against the soft and creamy textures of the cake and buttercream. They’re wonderful additions to get-togethers, parties or a quick treat during the warm summer months so why not follow our lemon cupcake recipe below for a crowd-pleasing batch treats!

Lemon cupcake recipe by Juniper Cakery

Zesty Lemon Cupcakes Recipe (Makes approx. 12 cupcakes)

  • 226g self raising flour
  • 226 butter
  • 226g caster sugar
  • 4 eggs
  • Lemon extract
  • Finely grated peel/zest of 1/2 a lemon

Step 1: Pre-heat your oven to Gas Mark 3 / 160C / 325F and line a cupcake pan with cupcake cases.

Step 2: Cream your butter and sugar first and when ready add your eggs, lemon zest and lemon extract (test your batter to make sure it’s as lemon-y as you’ve like it).

Step 3: Once combined add the flour, mix well and pour your batter into your cases.

Step 4: Bake for around 20-30 minutes or until a cake tester comes out clean when tested.

If you’re throwing a grown-up party why not fancy this recipe up with a splash of King’s Ginger (one of our favourite liqueurs) in the buttercream, fill with a vodka and lemon curd preserve, or add a touch of class with reduced champagne in the buttercream and topple with curled lemon zest and fresh raspberries!

Lemon buttercream

  • 500g softened butter
  • 400g-500g icing sugar
  • Lemon oil or extract

Step 1: Cream your softened butter in a stand up mixer.

Step 2: Sift your icing sugar and this add to your butter. Cream together.

Step 3: Add in your lemon oil or extract to flavour your frosting. We add in around 2 teaspoons, but you should add in whatever amount tastes best for you!

Lovely recipe for lemon cupcakes by Juniper Cakery

Lemon cupcake recipe by Juniper Cakery

Our top tip when it comes to baking gorgeous cupcakes is to fill your cases carefully. It doesn’t matter how busy we are and how insane our workload gets we make sure to never spill or drip batter onto the cases. Not only does this look rather unsightly and adds burnt cake to the outer edges of your cupcake cases, but it can even hinder your cakes baking evenly! A really handy method for filling your cases is to use a disposable piping bag and pipe batter into each cases.

Recipe for some tangy lemon cupcakes by Juniper Cakery

We fully advocate baking and making buttercream completely from scratch so we’re perfectionists when it comes to getting super silky buttercream. Our advice is to experiment, modify and test like a mad scientist! Our baked creations, buttercreams and fillings are the result of stressful late nights in the kitchen timing how long butter was whipped for, which butter performs/looks/tastes/holds better, etc. When we found a recipe that didn’t work we took it apart and adjusted it, tried again and repeated until it was perfect for us!

Gorgeous lemon cupcake by Juniper Cakery

Make sure to pipe each cupcake with a generous swirl of buttercream and decorate however you wish. Some fantastic decor ideas include sprinkling fun popping candy on top or a dash of lemon sherbet crystals, using sugar pearls for a more subtle look, jellied fruit inspired candies or some grated lemon peel.

If you’ve followed our lemon cupcake recipe you should be left with a deliciously sweet and zesty batch of lemon treats; perfect for relaxing with in the garden. We’d highly recommend pairing these tasty cakes with tangy lemonade or a soothing cup of fruit tea for a well-deserved rest!

Lemon cupcake recipe perfect for summer by Juniper Cakery


Mother’s Day Tutorial: Daffodil & Rose Adorned Cupcakes!

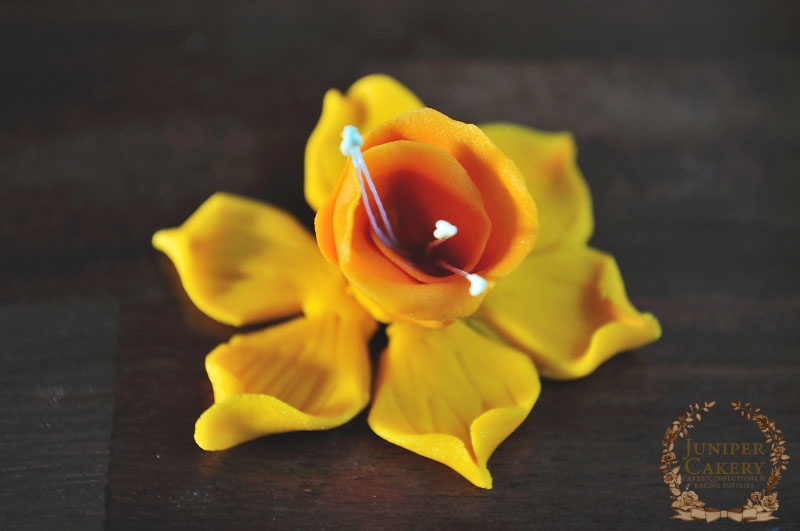
Instead of a bouquet of flowers for Mother’s Day (March 30th in the UK) why not give our recipe and tutorial a try and create a gorgeous floral collection of delectable cupcakes? We’ve created some ever so sweet daffodil and rose cupcakes for you to re-create at home! Perhaps the only thing better than a lovely bundle of flowers is a batch of floral decorated cupcakes?

How to create sugar daffodil flowers and roses…

Daffodil and rose adorned cupcakes by Juniper Cakery

Cupcakes adorned with daffodils and roses by Juniper Cakery

To create an abundant bouquet feel we clustered a few daffodils together atop of each delicious cupcake! Instead you can mix roses and daffodils together or keep it simple with a single flower nestled into the buttercream of each cake.

Floral decorated mother's day cupcakes by Juniper Cakery

Cupcakes with roses and daffodil sugar flowers by Juniper Cakery

Why not add adorable fondant ladybugs, caterpillars or butterflies nestled in between your sugar blossoms for a fun collection of garden themed cupcakes?

How to make sugar daffodil cupcake toppers…

You will need…

Fondant rolling pin
Mexican flower foam pad
Icing sugar to dust
Flower foam pad
Ball tool
Veining tool
Plain stamens
Tylo powder
Yellow fondant /sugarpaste
Darker yellow/orange fondant / sugarpaste
Edible glue
Tapered 6 point star tool
Blade tool
Cocktail stick

Learn how to create a sugar daffodil by Juniper Cakery

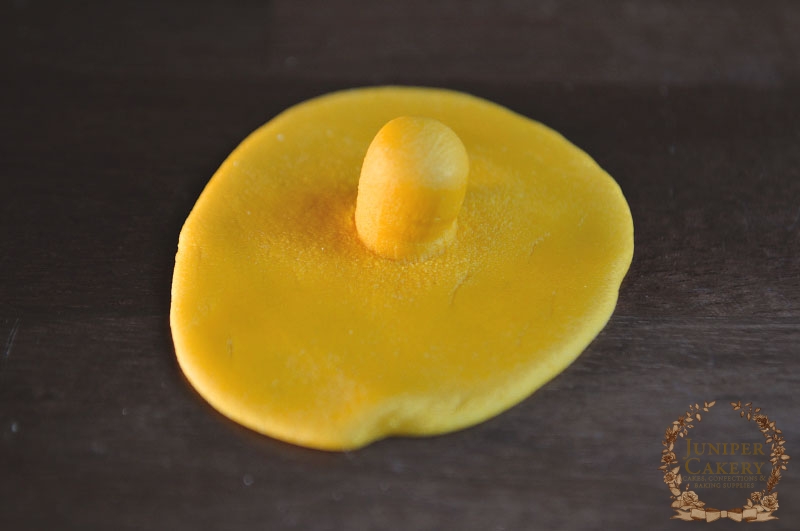
Step one: Using a Mexican flower foampad create a hat-like shape from yellow fondant / sugarpaste. To do this roll out a ball of fondant over the largest hole in your mexican flower foam pad. When you carefully tease this out you should be left with a flat rolled out fondant… but with a tapered or tube-like shape on one end.

Create a gum paste daffodil by Juniper Cakery

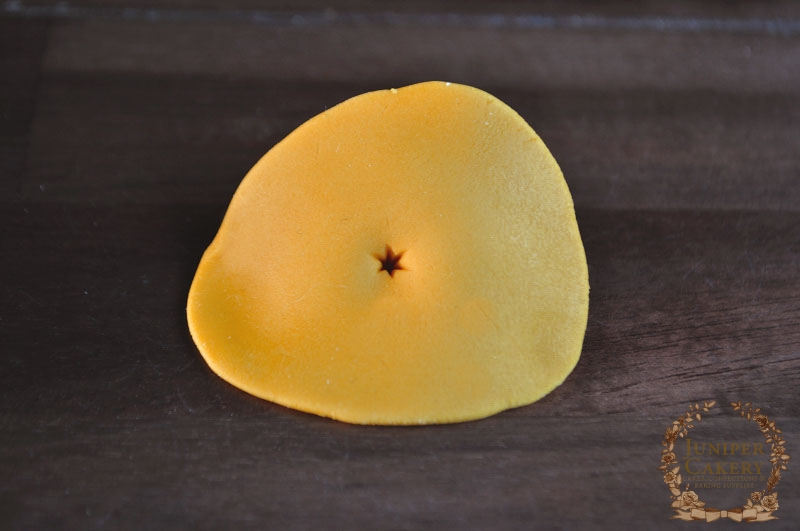
Step two: On the completely flat side use the 6 point side of your tapered star tool to indent a 6 point star in the centre of the fondant. This will mark where each of your six petals will separate.

Tutorial on how to make a sugar gum paste daffodil by Juniper Cakery

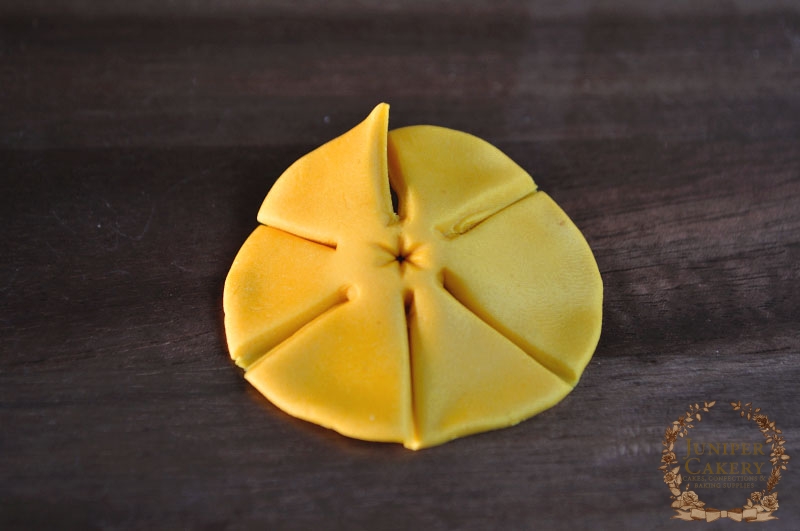
Step three: With the blade tool carefully cut the fondant with the cuts matching up to the points of the indentation made with your 6 point tapered star tool. These will become your petals.

Tutorial for a sugar daffodil flower by Juniper Cakery

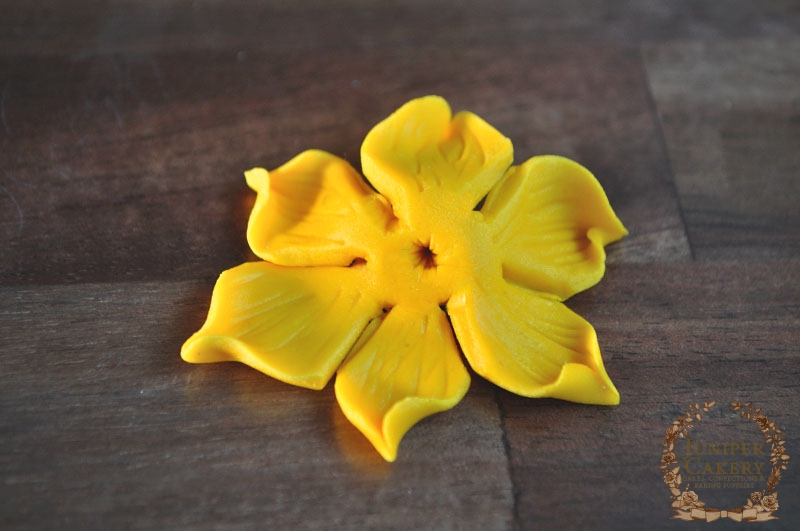
Step four: Add detail by using the veining tool to draw lines on the petals. Shape, thin and ruffle each petal tip using your ball tool and flower foam pad. Then pinch the tip of each petal to create shape. Use a little edible glue to secure each pinched tip if needed. Set aside.

Gum paste daffodil tutorial by Juniper Cakery

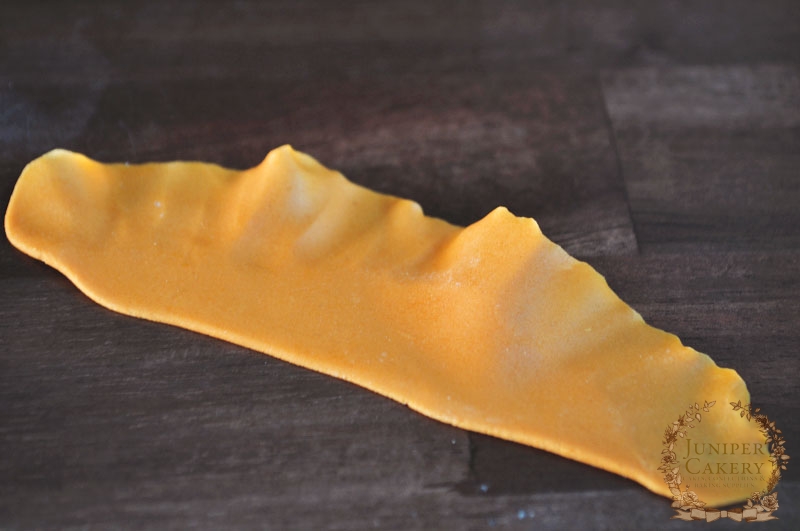
Step five: To create the ruffled centre roll out some darker yellow / orange fondant into a oblong shape. Thin and ruffle the edges using your ball tool and flower foam pad. 

Sugar daffodil tutorial by Juniper Cakery

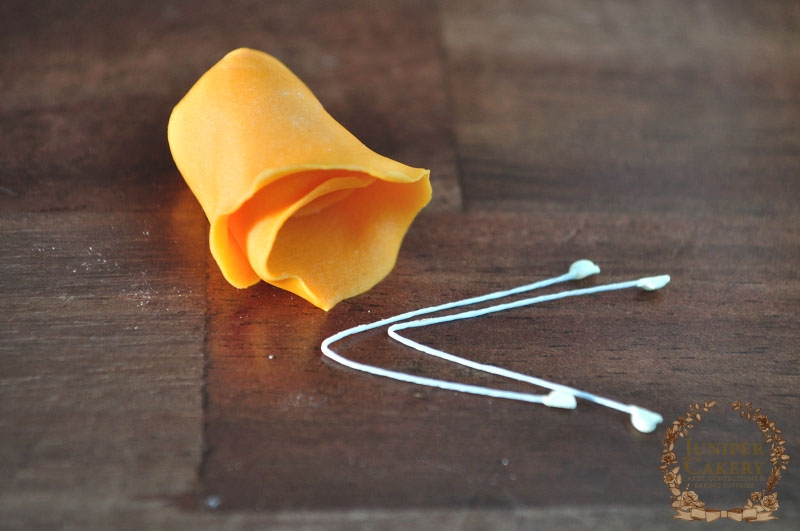
Step six: Loosely roll up the oblong shaped fondant and pinch one end. Cut some of the pinched of section if necessary. Take your taper star tool and indent the middle of the base of the ruffled section just made. Dab a little edible glue on the indentation inside the ruffled piece.

How to make a sugar daffodil flower by Juniper Cakery

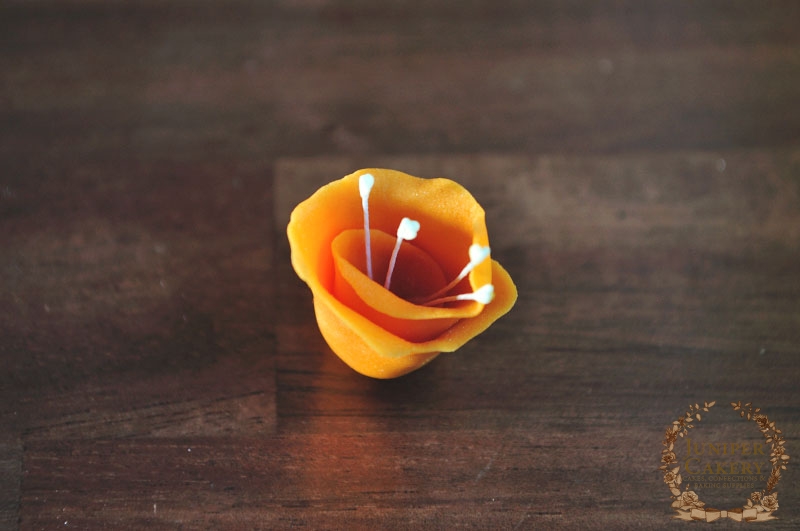
Step seven: Take some stamens, fold them and using a cocktail stick push them into the indentation inside the ruffled section.

How to make a sugar daffodil by Juniper Cakery

Step eight: Add a little edible glue onto the middle of the petal section that had been set aside and attach the ruffled middle. Hold until set.

How to make sugar rose cupcake toppers…

You will need…

Fondant rolling pin
Flower foam pad
Ball tool
Lavender coloured fondant / sugarpaste
Olive green coloured fondant / sugarpaste
Icing sugar to dust
Rose petal cutters
Cocktail stick
Tylo powder
Edible glue
Rose leaf plunger cutter

How to make a sugar rose by Juniper Cakery

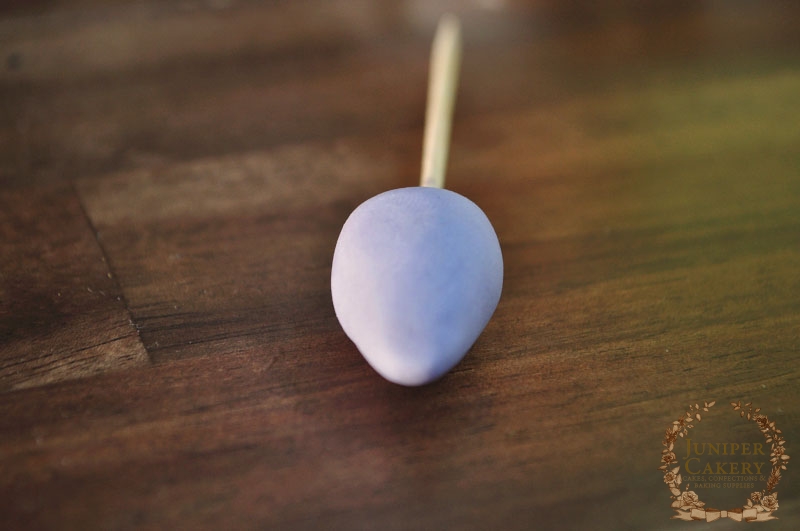
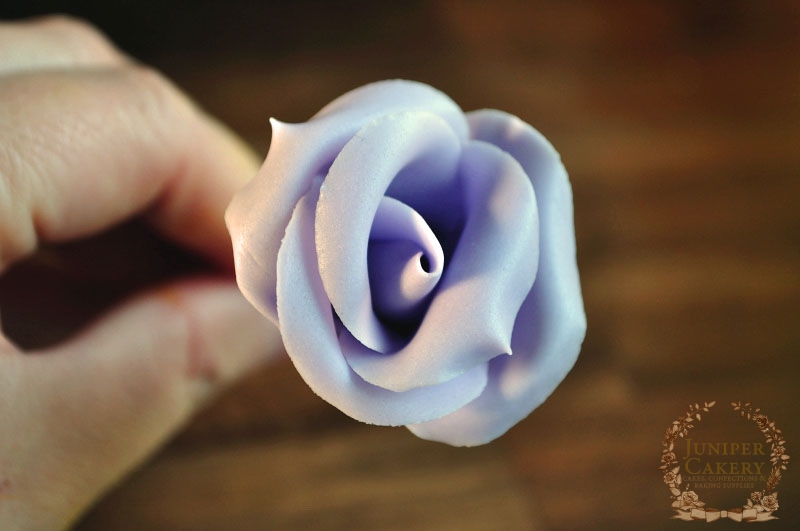
 Step one: The night before you begin your roses you need to prepare your buds! Take a small amount of fondant / sugarpaste mixed with tylo powder and form into a ball then taper into a bud shape. Take a cocktail stick and add edible glue to one end. Push the edible glue covered end into the base of the cocktail stick (just past half way) and leave to harden overnight.

Step two: Roll out your fondant / sugarpaste thinly on a surface dusted with icing sugar. Using the largest rose petal cutter cut out a petal from the fondant. Using your ball tool and flower foam pad thin and ruffle out the edges of the petal.

How to make a gum paste rose by Juniper Cakery

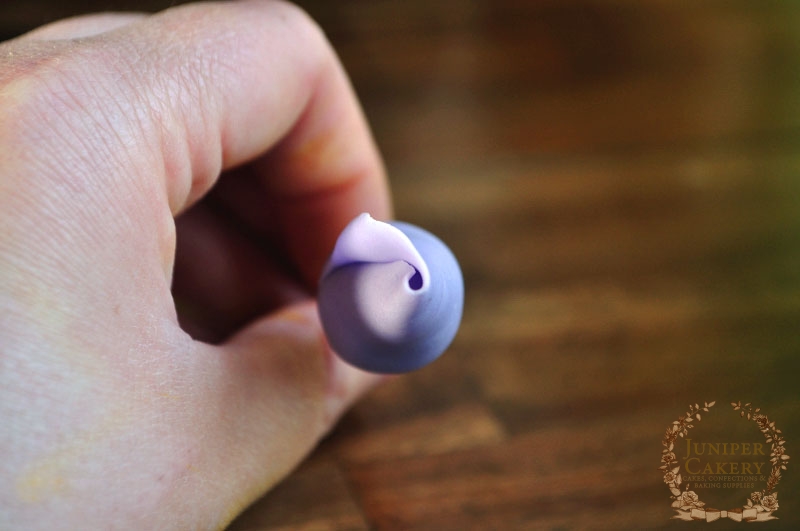
Step three: Dab some edible glue onto the bud. Attach the petal with the tip of the petal over the top of the bud. Carefully wrap the petal around the bud forming a peak at the top and ensure your bud overlaps down one side.

Tutorial on how to create a sugar rose by Juniper Cakery

Step four: Next cut two petals using a petal cutter a little longer than the bud. Thin and ruffle out the edges of the petal. Attach around the bud of your rose whilst carefully curving and shaping the edges of the two petals.

Learn how to create a gum paste rose by Juniper Cakery

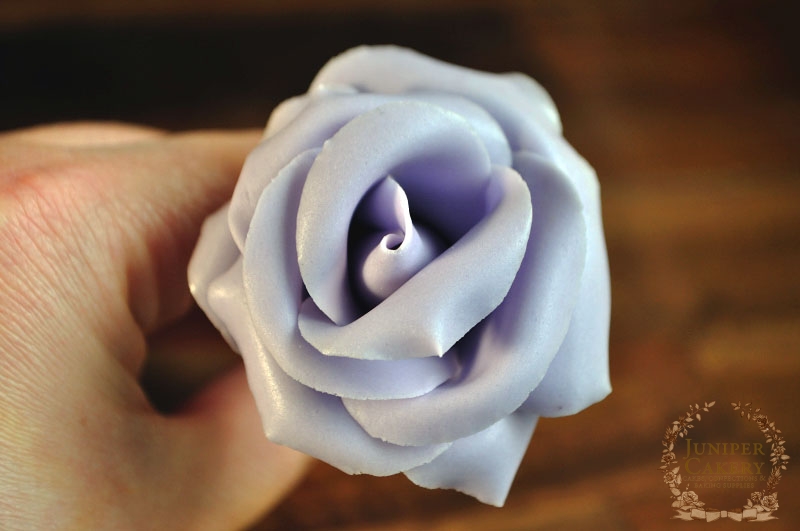
Step five: Now cut three petals using the same petal cutter used in step four. Using edible glue arrange these around your growing rose. Remember to overlap each petal slightly and place alternatively to the layer before. Carefully curve and shape the edges of the three petals.

Sugar rose tutorial by Juniper Cakery

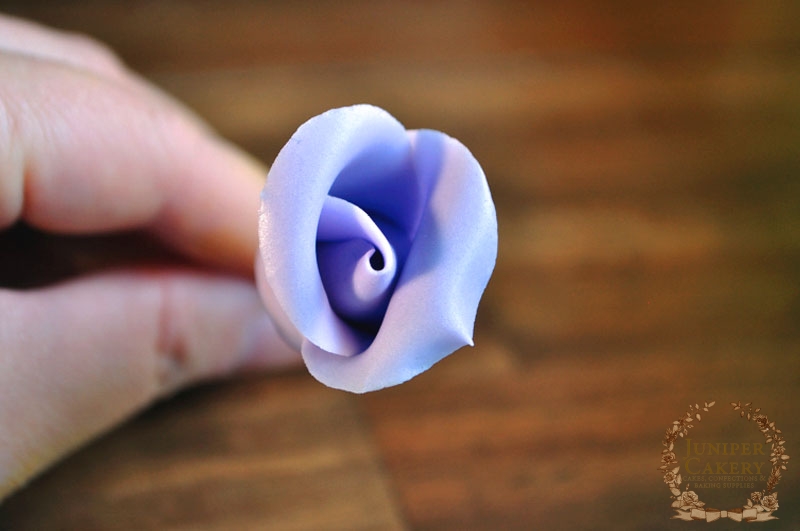
Step six: Now cut five petals using a larger petal cutter than the one used in step four. Using edible glue arrange these around your growing rose. Remember to overlap each petal slightly and place alternatively to the layer before. Carefully curve and shape the edges of the five petals.

Step seven: For the rose leaf roll out some olive green fondant thinly and use a medium rose leaf plunger cutter to cut out a leaf.

Cupcakes topped with gum paste daffodils and roses by Juniper Cakery

After piping your cupcakes with buttercream nestle your blossoms atop each one and enjoy!


Fairy Tale Recipe & Tutorial: Shooting Star Cupcakes!

This week we’ve put together a wonderfully adorable fondant / sugarpaste tutorial on how to create some bright shooting stars. These are perfect for baby showers, kids’ parties, birthdays or themed events. We’ve also included a recipe for deliciously sweet and tangy lemonade cupcakes which are sure to be a hit with all ages!

Shooting Star Cupcake tutorial by Juniper Cakery

Shooting Star Cupcake tutorial by Juniper Cakery

Shooting Star Cupcake tutorial by Juniper Cakery

Fondant Shooting Star Decor

You will need…

Yellow fondant
Black fondant (optional)
Sprinkles (optional)
Ball tool
Scallop tool
Icing sugar to dust
Fondant rolling pin
Star cutter
Cling film
Water
Paintbrush
Edible or non-toxic cake decorating glitter (optional)
Melted white chocolate

step02

Step one: Roll out some yellow fondant to a thickness of approx. 7mm and sandwich this between two pieces of cling film before cutting out your star shape. The cling film on top helps create clean, rounded edges whilst the cling film under the fondant prevents the shape sticking to the surface.

step3

Step two: Carefully shape the star into a chunkier shape by rounded the tips with your fingers.

step4

Step three: Add cute facial details with a ball tool and scallop tool. At this stage you can add eyes with springs, sugar pearls, balls of fondant etc.

step5

Step four: Create the shooting star’s tail by rolling out ‘ropes’ of fondant that taper off.

step6

Step five: Create three ‘ropes’ to form the tail and arrange. Glue these together with either water or melted white chocolate. Once dry attach the tail to the back of the star with melted white chocolate. Then you can add edible glitter, lustre dust, sprinkles etc!

To assemble your Shooting Star Cupcakes pipe your lemon cupcakes with the freshly made lemonade buttercream (we used a disposable piping bag fitted with an 828 piping tip) then carefully nestle a shooting star atop each once set. Place on a tiered cupcake stand amidst star shaped confetti for a playful and tempting display!

Shooting Star Cupcake tutorial by Juniper Cakery


Recipe: Fizzy Pink Lemonade Cupcake!

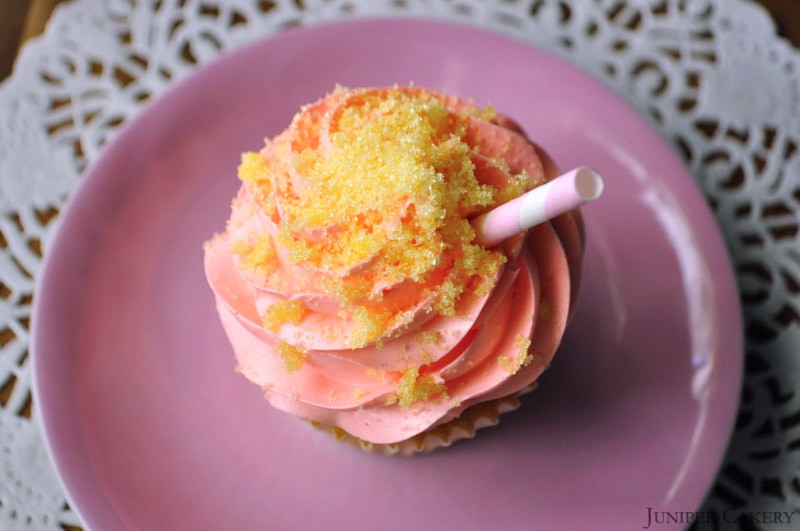
Summer is nearly over, so why not enjoy what is left of the sunny months with our recipe for Fizzy Pink Lemonade cupcakes! These will be a definite hit with both kids and grown ups at parties and barbecues. The soft lemon cake paired with the tangy lemon and pink grapefruit buttercream is fruity, sweet, refreshing and a wonderful summer inspired treat!

Pink Lemonade Cupcakes

Pink Lemonade Cupcakes

Basic Lemon Cupcake Recipe (makes approximately 12 cupcakes)

226g self-raising flour
226g butter
226g caster sugar
6-12 drops Lemon Extract
4 eggs
Cupcake cases

Step one: Preheat your oven to Gas Mark 3/325F/170C

Step two: Cream the butter with sugar and once well mixed add in lemon extract, flour and then the eggs.

Step three: Set out your cupcake cases in your pan and fill each case 2/3 full.

Step four: Bake from around 12-18 minutes or until a golden brown on top and leave to cool on a counter. TIP: To stop the tops of cakes and cupcakes from hardening when cooling place slices of bread on top of them as they cool.

Pink Lemonade Buttercream

250g butter
250g – 350g icing sugar
6-12 drops of Lemon Extract
6-12 Pink Grapefuit Essence
Pink Food Gel Paste by Squires Kitchen
Piping bags
858 piping tip
Lemon Sherbet Crystals
Retro Paper Straw

Step one: Cut your butter into small cubes and cream your butter until soft. Gradually add icing sugar until a good consistency.

Step two: Add lemon extract and your pink grapefuit essence to taste. Colour with pink food gel. Mix in some tangy lemon sherbet crystals for a hit of fizz.

Step three: Fit a piping bag with a 858 piping tip (to get a lovely traditional buttercream ruffle like our cupcake). Fill your piping bag with your buttercream.

Step four: Pipe some generous swirls atop your cupcakes, gently top with lemon sherbet crystals and add press half a retro paper straw into your buttercream!

Pink Lemonade Cupcakes


Our Lemon and Passion Fruit Cupcakes in Craftseller Magazine

Yay! Our super fruity and bright Lemon and Passion Fruit Ombré cupcakes were featured in this month’s issue of Craftseller magazine! Head to page 12 of the magazine to see our zesty cupcakes in all their glory. If you’d love to re-create these particular cupcakes yourself why not give our recipe a try?

craftseller-august

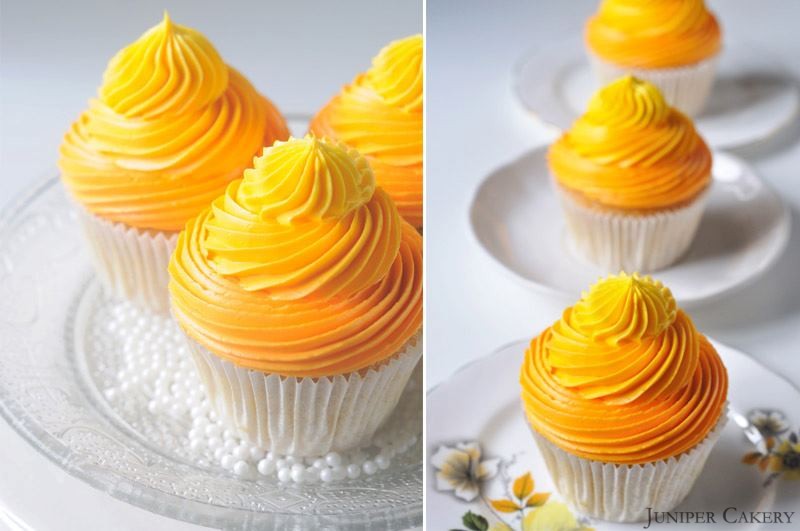
Lemon and Passion Fruit cupcakes by Juniper Cakery


Recipe: Lemon and Passion Fruit Cupcakes

Now that we are in the middle of summer we thought we’d share a popular recipe of ours that is perfect barbecues and parties! These Lemon and Passion Fruit cupcakes are fruity, bright and fun. Add some Lemon Sherbet Crystals and you’ll be left with lovely tangy and fizzy buttercream!

Lemon and Passion Fruit cupcakes by Juniper Cakery

Makes approximately 12 cupcakes

For the cupcakes…

226g self raising flour
226g butter
226g caster sugar
4 eggs

Step one: Preheat your oven to Gas Mark 3/325F/170C

Step two: Cream the butter with sugar, flour and then the eggs.

Step three: Set out twelve cupcake cases in your pan and fill each case 2/3 full.

Step four: Bake from around 12-18 minutes or until a golden brown on top and leave to cool on a counter.

For the buttercream…

We make our buttercream using our own intuition. We’ve tried countless recipes; all of which failed to pass our test (and stability) tests. It’s best that you begin to develop and ‘eye’, ‘feel’ and ‘taste’ so that you know when your frosting is perfect for you. For starters though, the recipe below is a rough guide…

250g butter
250-350g icing sugar
1-2 teaspoons of Lemon Extract
1-2 teaspoons of Passion Fruit Essence
Orange Food Gel Colour Paste
Golden Yellow Food Gel Colour Paste
868 piping tip/nozzle
Piping bags
Lemon Sherbet Crystals

Step one: Cut your butter into small cubes and cream your butter until soft. Gradually add icing sugar until a good consistency.

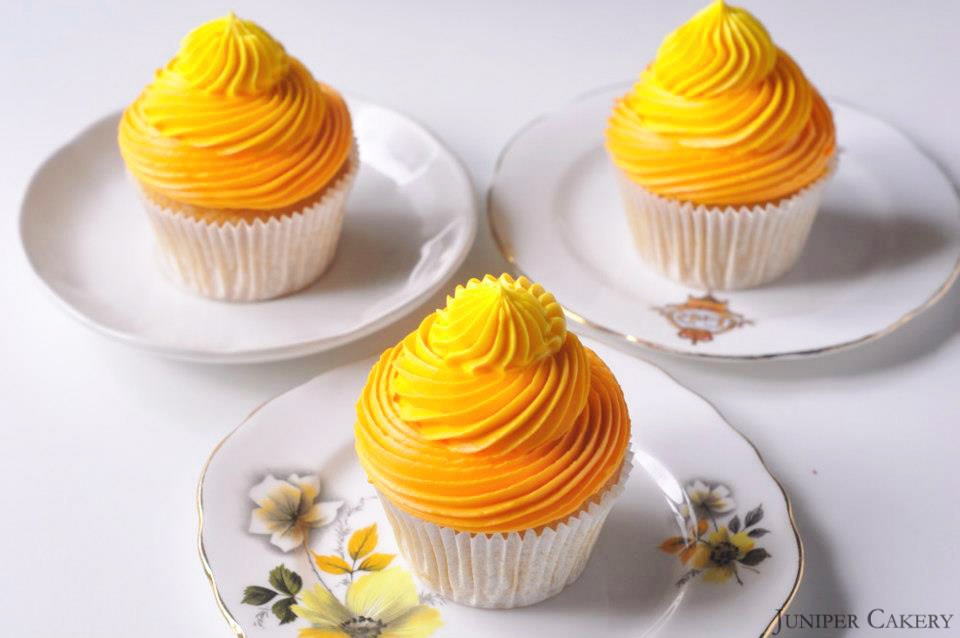
Step two: Separate your buttercream into two halves. Add some Passion Fruit Essence with Orange Food Gel Colour Paste to one half. To the other add Lemon Extract with some Golden Yellow Food Gel Colour Paste.

Step three: Scoop each flavour buttercream into separate piping bags fitted with an 868 piping tip/nozzle (this tip/nozzle creates lovely linear patterned buttercream).

Step: To pipe begin with your darker colour (Passion Fruit) and pipe one layer of buttercream onto your cupcakes. Now pipe your light colour (Lemon) buttercream atop.

For a little extra pop of flavour sprinkle your cupcakes with Lemon Sherbet Crystals!

Lemon and Passion Fruit cupcakes by Juniper Cakery

Now you can sit back and enjoy these fruity cupcakes! We suggest keeping them all to yourself.


Lemon, Lime & Passion Fruit Cake in Partnership with The Happy Egg Co.

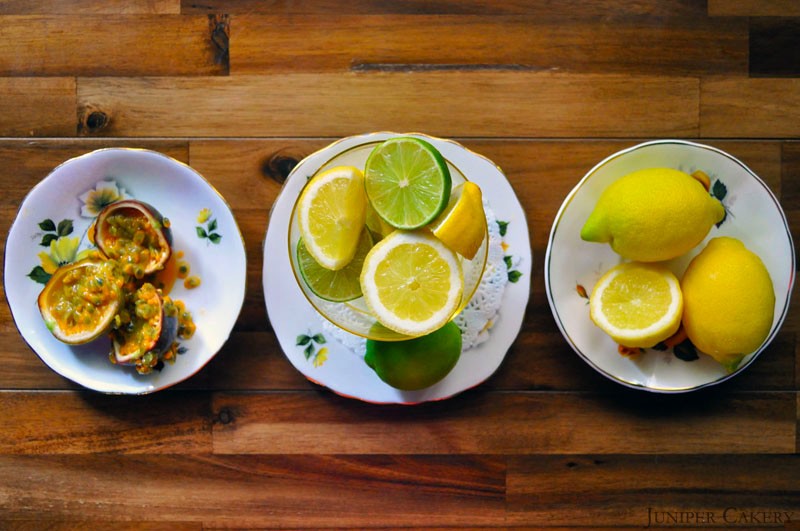
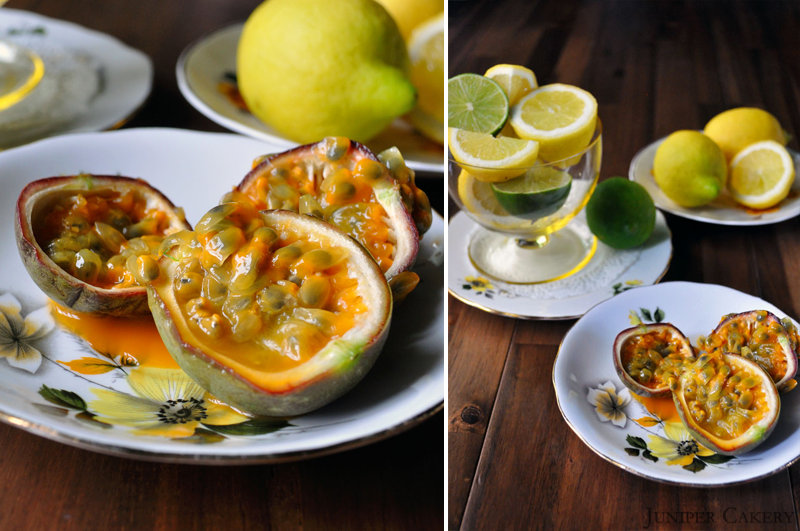
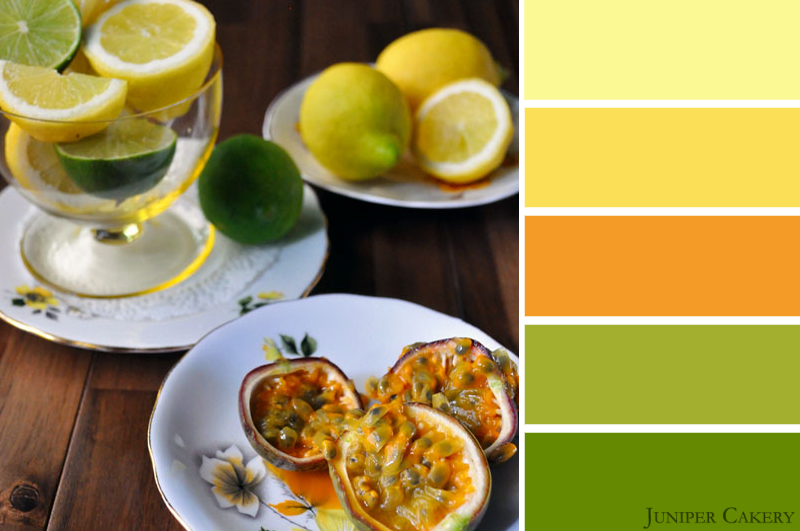
As discussed in June’s development post our inspiration for this month’s cake was tart, fruity flavours. Our lemon, lime and passion fruit combination naturally lead us to create a fresh, vibrant colour palette full of tonal yellows, oranges and green! The ombré buttercream technique we used combined the summer hues of lemon and yellow perfectly and baked inside the cake are flecks of lemon and lime zest to add extra flavour and bursts of bright green.

Lemon, Lime & Passion Fruit Cake

Makes approx. 2-3 x 8″ circle layers depending on thickness of each layer

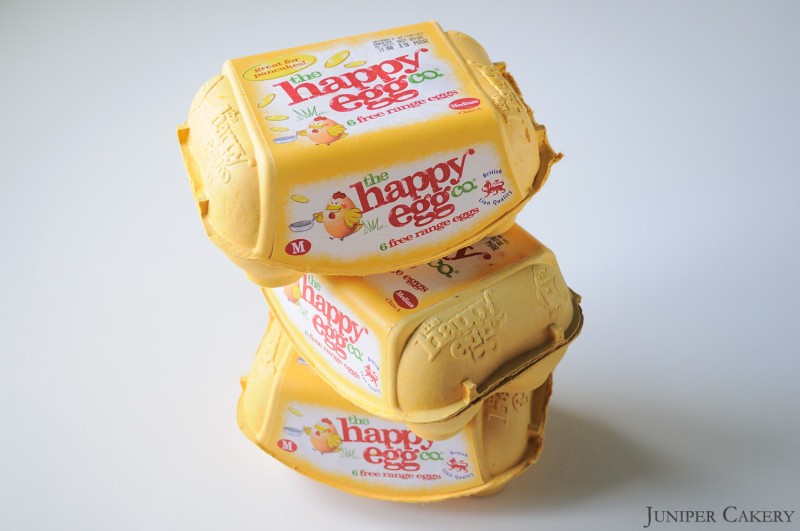
7-8 free range eggs by The Happy Egg Co. depending on egg size
453g self raising flour
453g caster sugar
453g butter
Zest from 2 lemons (optional)
Zest from 2 limes (optional)
Natural Lemon Extract 
Natural Lime Extract

Pre-heat an oven to Gas Mark 3/325F/170C.

Cream your butter in a mixer then add the sugar. Add in the flour along with half of the happy eggs for around one minute. Once half of the happy eggs are combined add the remaining eggs. Mix for about 5 minutes.

Separate your batter into two or three clean bowls (depending on how many layers you’d like) and flavour each with either lemon or lime extract (and zest if you’ve opted for this… do bear in mind that having the zest inside your cake is a little like choosing orange juice with ‘bits’).

Pour batter into an 8″ cake tin/pan around (we aim for the batter to reach 1 1/2 to 2cm in height in the tin) place on the top shelf. Bake for around 40-50 minutes or until ready. Repeat this step to create your second and third layer. When all layers are baked leave them to cool fully as you prepare your buttercream!

For the buttercream you will need…

453g butter (don’t use margarine as the water content is higher and not suitable for buttercream)
453g – 553g icing sugar (choose your own consistency and taste)
Natural Passion Fruit Essence (flavour to taste)

Add half of the of butter into your mixer and cream. Then gradually add icing sugar and the remaining butter (cut into cubes) until you get a smooth, creamy texture.

Add in the passion fruit essence to taste. Separate the buttercream evenly into three clean bowls and colour each a darker shade than the last.

Lemon, Lime & Passion Fruit Cake

The ombré buttercream technique

Achieving an ombré technique with buttercream is much simpler than with fondant as any mistakes can be improved.

Step one: Before you apply your deeper toned colours use some of your lighter coloured buttercream to apply a crumb coat; this will secure any crumbs so they won’t spill out into your design.

Step two:  Now your cake is covered in a thin crumb coat begin to work in bands of colour from the top down. Use a large cranked spatula to apply the remainder of your lighter coloured buttercream to the top of your cake. We were intentionally messy when decorating the top of our cake as this is a fun and simple way to add texture!

Step three: Add your two remaining colours in the same way and use a straight edge scraper to blend the buttercream on the sides of your cake for the perfect ombré finish.

This cake could be created using any three colours so don’t be afraid to experiment with your design.


The Happy Egg Co. Cake - Summer Citrus

As dark clouds turn to blue skies over the UK we couldn’t think of a better way to enjoy the month of June than with fresh, tart, fruity flavours! Everywhere you go you’ll see slices of lemon and lime bobbing in iced fizzy drinks, in ice creams, sorbets and ice pops and even squeezed on fish and chips on a trip to the sea side.

Lemon, Lime and Passion Fruit Cake

The citrus taste of lemon and lime also happens to make a delicious cake, which is great news for us! We’re yet to meet someone who doesn’t love a classic lemon drizzle cake but we wanted to add a third flavour to the mix. We considered mango, coconut and raspberry before we decided upon passion fruit!

Lemon, Lime and Passion Fruit Cake

The passion fruit adds a luxurious tropical kick to an old British favourite so our minds are made up; this month’s Happy Egg Co. cake will be lemon, lime and passion fruit flavoured! The vibrant tones included in this month’s colour palette were naturally inspired by the fruits themselves and the golden hues and zesty greens are perfect for June and July.

Lemon, Lime and Passion Fruit Cake


×